1968 F-100 Ranger

Post progress reports on your project truck(s)

Moderator: FORDification

dcbullet
Blue Oval Fan
Blue Oval Fan
Posts: 698
Joined: Fri Apr 01, 2005 6:28 pm
Location: Oceanside, CA

Post by dcbullet »

Wow, it's been a while since I posted anything. I kind of go into hibernation during our cold winters here in Northern California :wink: .

A couple months ago I got my passenger side exhaust manifold replaced. It had a huge leak in it ever since I got the truck. I can not believe how quiet the truck is now with the stock manifolds! It sounds like a regular vehicle instead of TAT TAT TAT TAT.....

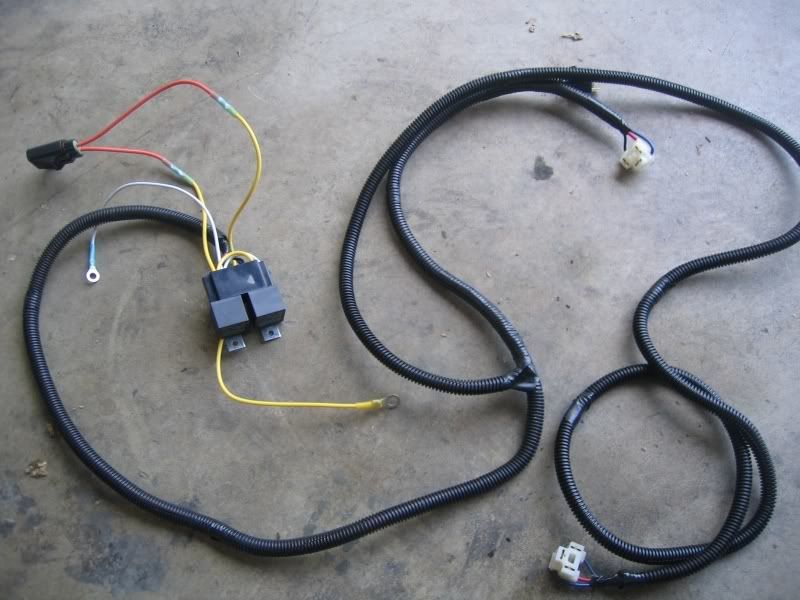
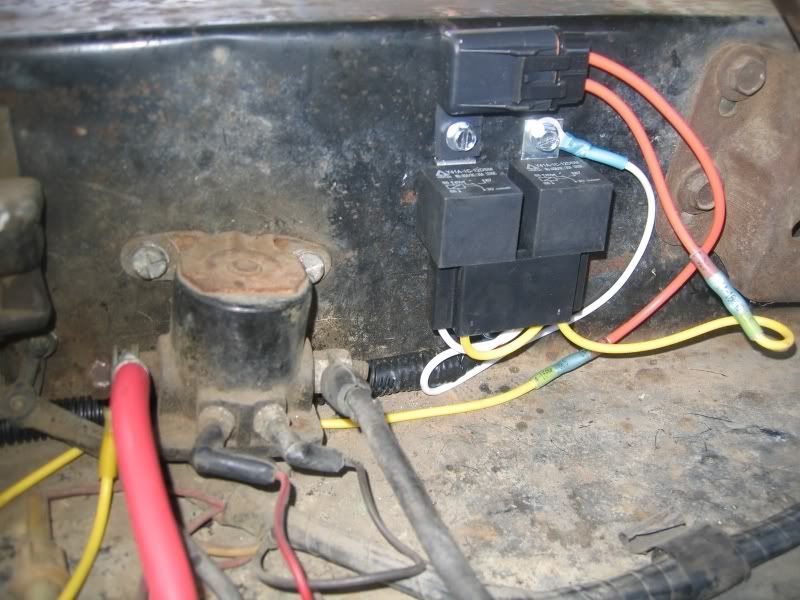
A couple of weeks ago I installed the headlight harness that 390Nut made. This was a very well made product as the rest of you probably experienced.

Image

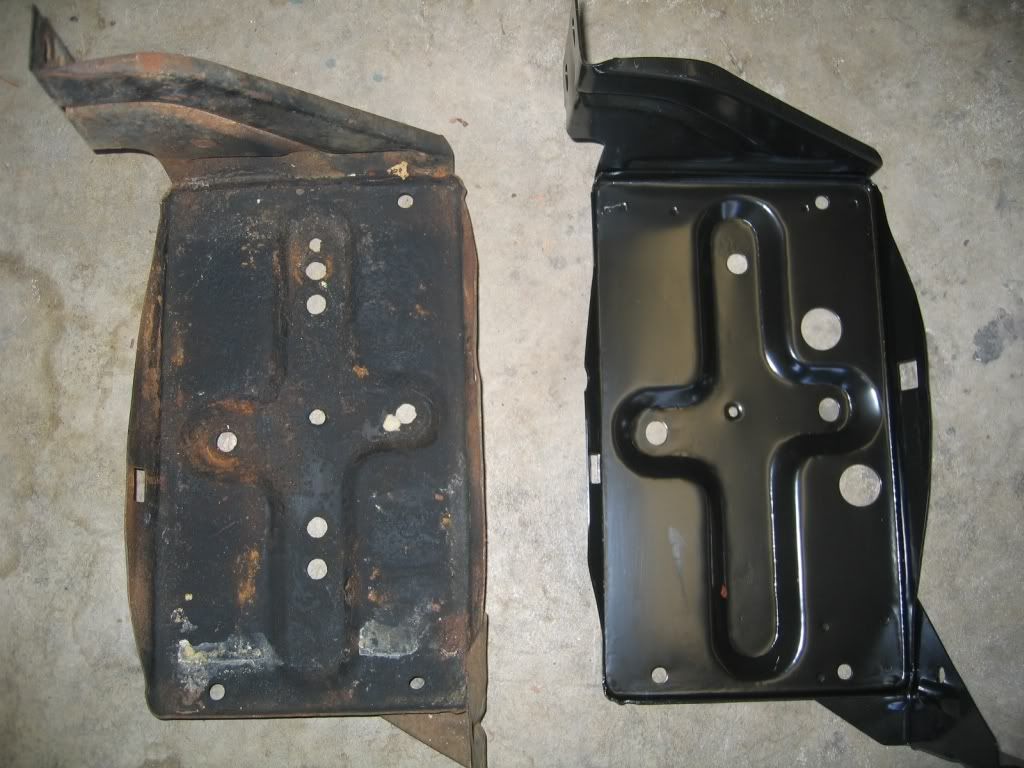
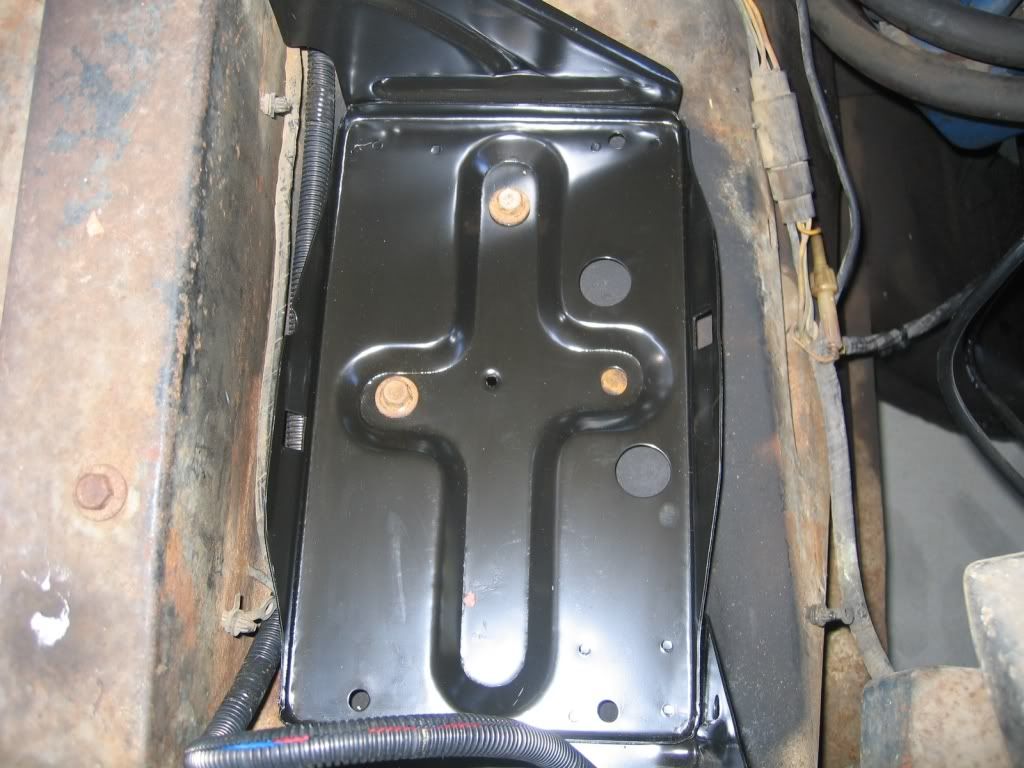
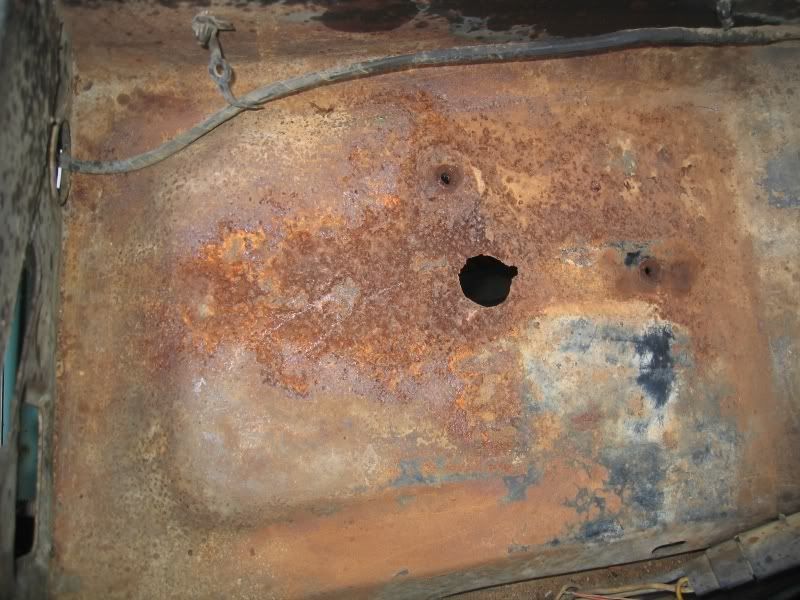
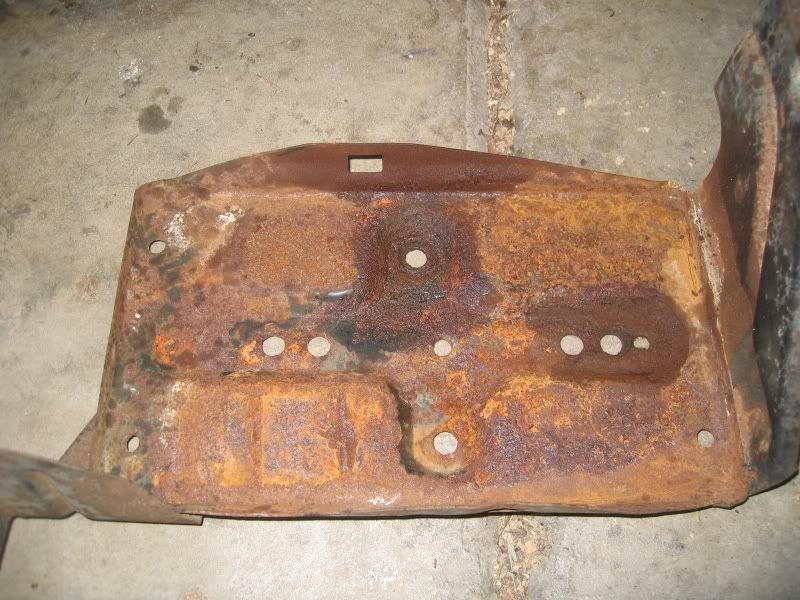
The battery tray and innner fender aren't in too bad a shape. I'll probably want to replace the battery tray but the inner fender just needs some wire wheel and new paint. Thank god for California weather. I cleaned them up a little and gave them a coat of Krylon Rust Tough in the mean time.

Image

Image

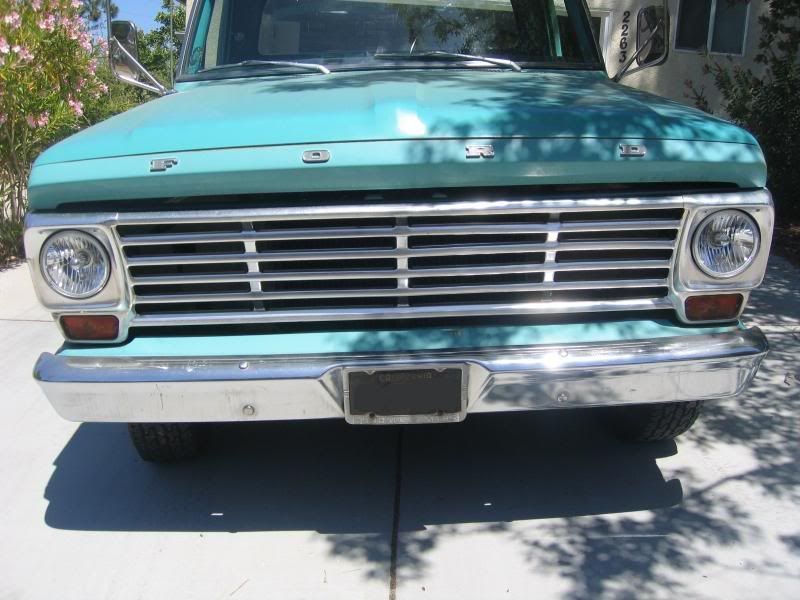
I also purchased these "Euro Style" halogen headlights from LMC.

Image

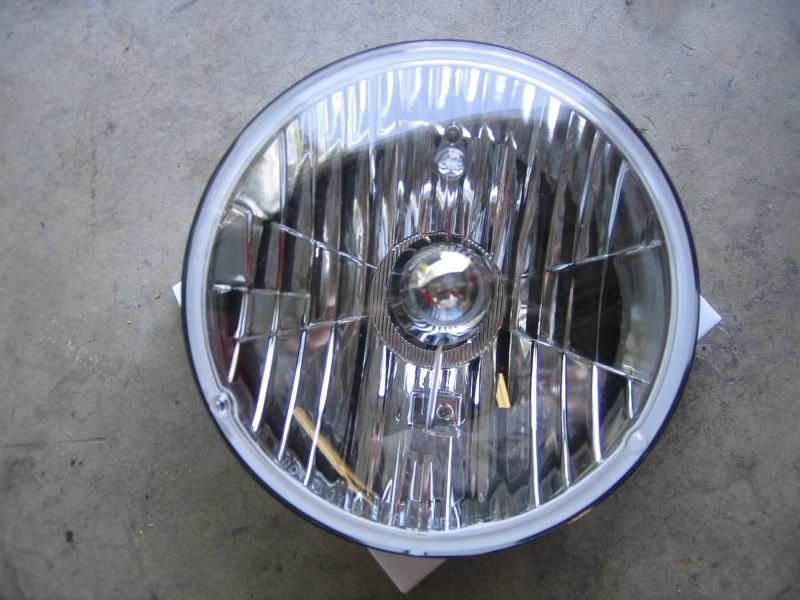
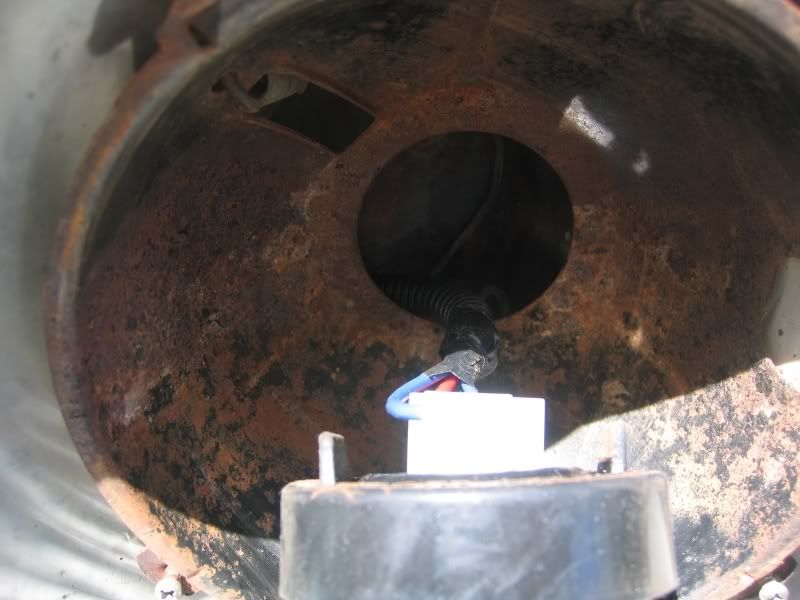
The problem I had with these headlights is that the back of the assembly has this large rubber cap that holds the bulb and keeps the elements out. Unfortunately, that rubber cap doesn't fit through the hole in the headlight bucket so the assembly won't fit all the way in by about 3/16". My solution was to use longer sheet metal screws to hold the headlight ring on. This works, but it would be better to make the hole larger I think. I just don't have a good tool to do this with yet.

Image

I attached the relays to the inner fender here and ran the harness under the starter solenoid. It's a nice fit.

Image

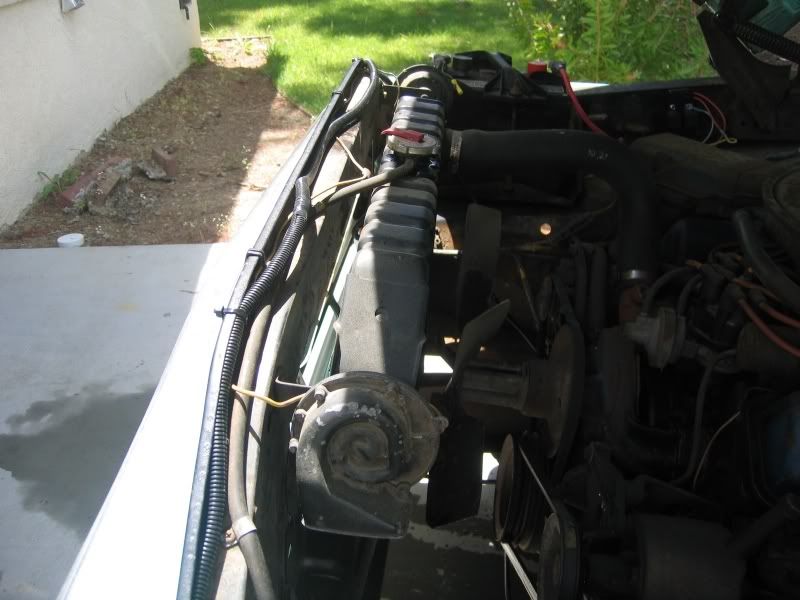
Then I ran the harness to the passenger side over the core support, as 390Nut designed it.

Image

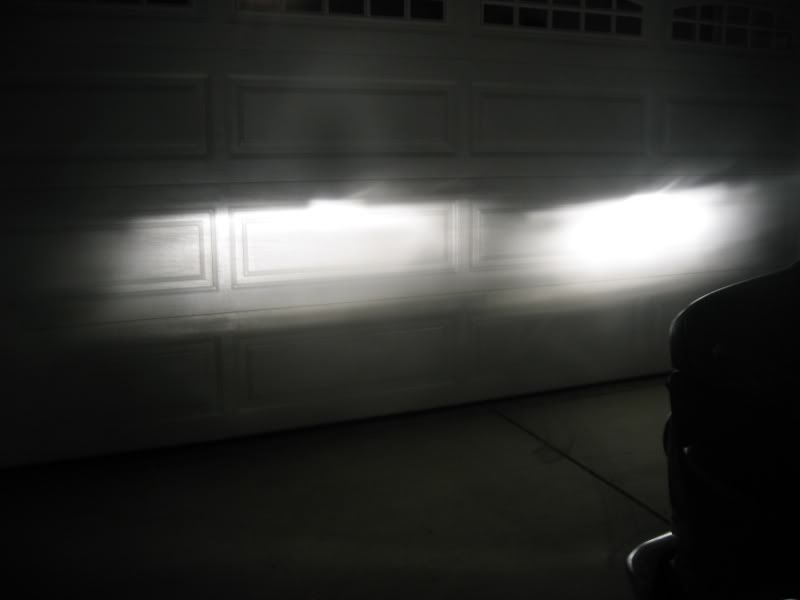
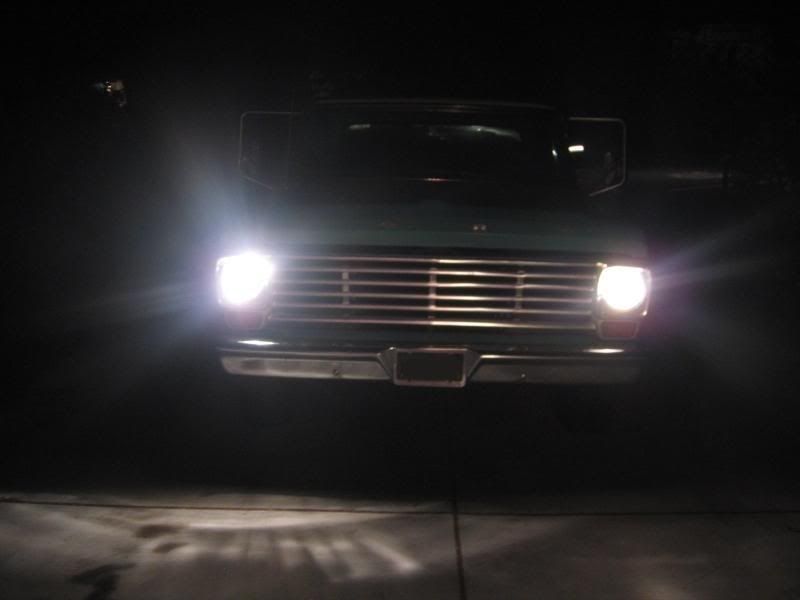
Here are some before and after shots. As you can see, I had some aiming problems before I switched out the headlights.

BEFORE

Image

After

It looks like I can still work on the passenger side aiming a little.

Image

BEFORE

Image

After

Image

Image

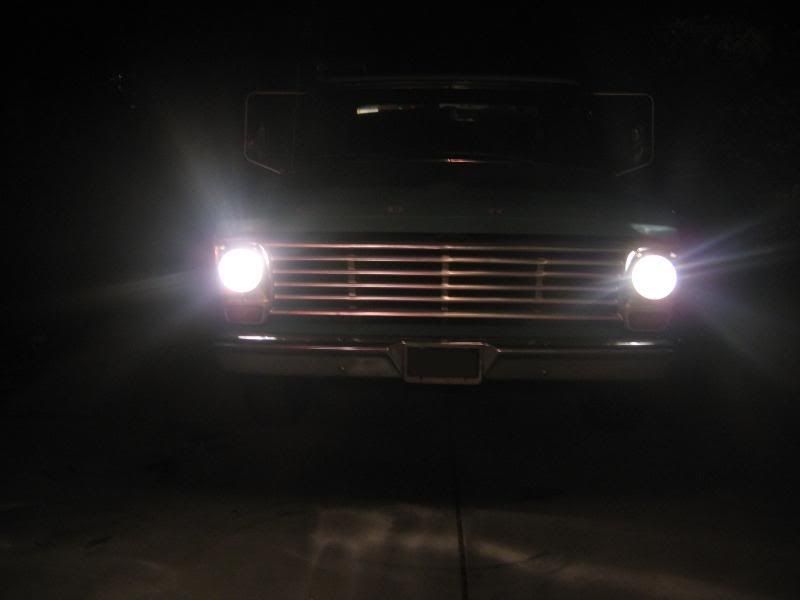
The pictures show the difference, but the actual real life results are even better than you can tell here. It is way, way better lighting now.
dcbullet
Blue Oval Fan
Blue Oval Fan
Posts: 698
Joined: Fri Apr 01, 2005 6:28 pm
Location: Oceanside, CA

Post by dcbullet »

I also replaced the rear step bumper, which was bent down, with the sport bumper. It took me a while to make this decision. I like the way the step bumper looks too, but I decided to go with the sport bumper to see how I liked it. I figure the brackets will hold their value so I can always switch it out if I change my mind.

The pictures are clickable to larger size.

Here are the brackets if you need to see how they install, for reference.

Image


Here are the shots of it installed. I think it does give the truck a more muscular look, which is something a Lunar Green truck needs all the help it can get with.

Image
Image
User avatar
69bumptruck
Preferred User
Preferred User
Posts: 269
Joined: Tue Jan 30, 2007 10:02 pm
Location: Moore, Oklahoma
Contact:

re: 1968 F-100 Ranger - Picture Heavy (06-16-2007 update)

Post by 69bumptruck »

Very nice thread here dcbullet! I just read it all from start to finsih and I'm impressed. You make it look easy. Looks like a brand new truck from where it started from, good job. Great pictures too, saved alot of them for future reference! :thup:
David, owner of:
1969 F100 SWB (restoration in progress)
http://www.cardomain.com/ride/2317125
dcbullet
Blue Oval Fan
Blue Oval Fan
Posts: 698
Joined: Fri Apr 01, 2005 6:28 pm
Location: Oceanside, CA

Post by dcbullet »

Thanks 69bumptruck!
69CSF250
New Member
New Member
Posts: 84
Joined: Wed Aug 09, 2006 11:40 am
Location: Virginia

re: 1968 F-100 Ranger - Picture Heavy (06-16-2007 update)

Post by 69CSF250 »

Just like others have said you are making this look easy and what has made this a funner read was viewing all the before and after photos. you are having some great results with all your effort. First thing I thought after reading all the pages was I need to let my wife read this so she understands what I mean when I say its a diamond inthe rough about old trucks we see around town. Cant wait to see whats next great work!
dcbullet
Blue Oval Fan
Blue Oval Fan
Posts: 698
Joined: Fri Apr 01, 2005 6:28 pm
Location: Oceanside, CA

Post by dcbullet »

Well just a grab bag of things I've done on my truck lately.

1. The front driver side wheel well trim was damaged when I bought the truck. I got a replacement from the pick-n-pull for $3.

BEFORE

Image

AFTER

Image

I noticed there was a ton of dirt under the trim so you guys might want to pull them off every now and again to clean under there and prevent rust.

2. My battery tray was trashed and I got this nice replacement. Looks like I need to get a set of new bolt when I get around to redoing the font end sheet metal.

Image

Image

3. I replaced the tail gate handle. The mechanism operates by two rods which are attached to the "latches" on each end of the tailgate. The handle twists a bracket and pulls the rods, thereby retracting the latches. To replace the handle, you need to preload the rods by twisting the bracket counterclockwise (looking from above) to line up the male end of the bolt with the female hole in the handle. Therefore, you need to attach the handle while the backing plate is not attached to the tailgate so you can twist the bracket while lining up the handle. It was pretty tricky, actually.

Here's a before shot

Image

Here is the mechanism you need to line up with the handle while twisting.

Image

Image

Looks much better now.

Image

Image

4. Finally, I installed a tachometer. I used a Sunpro Super Tach II. When I ordered it I didn't realize it was 100% plastic, which I would rather not have in a 1968 vehicle. I guess I shouldn't have expected much for $35. All in all, I think it looks pretty good, though. I don't really like how the steering column bracket works, however. There are a couple of tabs that bend up just slightly. Because of that, the hose clamp can't sit flush. Looks a little hokey.

To install the tach, there are four wires.

One goes to the coil's negative post.

Image

One goes to this handy blade in the fuse box.

Image

Another is the ground which I attached to the dash. Finally, I wired the light for the gauge to the cigar lighter light since it was right nearby and also is subject to the dimmer control.

Here's the install.

Image

This is what you see from the driver's position. I like how it doesn't block the rest of the gauges. That's why I got a really small tach.

Image

The gauge lighting for this tach is a dead on match for our dash lighting.
mljjones67
Blue Oval Guru
Blue Oval Guru
Posts: 1341
Joined: Sun Aug 06, 2006 5:41 pm
Location: Utah, Springville
Contact:

re: 1968 F-100 Ranger - Picture Heavy (10-14-2007 update)

Post by mljjones67 »

lookin good dc :thup:
tuff4rd
New Member
New Member
Posts: 110
Joined: Sat Jul 28, 2007 12:49 am
Location: Texas, McAllen

re: 1968 F-100 Ranger - Picture Heavy (10-14-2007 update)

Post by tuff4rd »

Good job :thup: Im looking to get the same tach for my truck, do you think it would be possible to drill a pilot hole in the column and a use a small screw to mount the tach to the steering column ? I just dont like the look of the hose clamp.
ImageImage
71 F100 XLT Ranger
04 F150 FX4
06 F150 XL
User avatar
rjewkes
100% FORDified!
100% FORDified!
Posts: 3711
Joined: Sun Apr 17, 2005 1:09 am
Location: Missouri, Webb City
Contact:

Post by rjewkes »

hey dc looks like you need a new dome,cigar fuse.
"It is better to keep your mouth shut and appear stupid than to open it and remove all doubt." - Mark Twain
'70 f250 4x4 Crew cab 460/C6 '72 F100 390/C6 9.8 MPG AVG. '89 Mercury Cougar LS Dual Exh. V6 . 18.9 MPG AVG. In Town.
Image
I don't want to give em a heart-attack. That is what would happen if I answered the door in the buff. Heck it almost scares me to death when I step out of the shower and look in the mirror.~Mancar1~
fuelly.com
dcbullet
Blue Oval Fan
Blue Oval Fan
Posts: 698
Joined: Fri Apr 01, 2005 6:28 pm
Location: Oceanside, CA

Re: re: 1968 F-100 Ranger - Picture Heavy (10-14-2007 update

Post by dcbullet »

tuff4rd wrote:Good job :thup: Im looking to get the same tach for my truck, do you think it would be possible to drill a pilot hole in the column and a use a small screw to mount the tach to the steering column ? I just dont like the look of the hose clamp.
Absolutely. There is a hole already in the mounting base for that. Iguess you'd need to use a pretty shallow sheet metal screw though.
rjewkes wrote:hey dc looks like you need a new dome,cigar fuse.
Haha, yeah. I've got a problem with my gargo light wiring.
User avatar
Clarko
Preferred User
Preferred User
Posts: 261
Joined: Fri Jul 28, 2006 3:40 pm
Location: California, Woodland Hills
Contact:

Post by Clarko »

Lookin great! That's the same tach I have. I just have it mounted to the left while you have it to the right.
Image
Brian
Image
1969 F-250 Ranger Camper Special 465FE/C6 (waiting on AOD)
1988 Bronco 351W/AOD
1994 Bronco 351W/E4OD
dcbullet
Blue Oval Fan
Blue Oval Fan
Posts: 698
Joined: Fri Apr 01, 2005 6:28 pm
Location: Oceanside, CA

Post by dcbullet »

Clarko wrote:Lookin great! That's the same tach I have. I just have it mounted to the left while you have it to the right.
I see you have the same issue with the bent up ends of the mounting bracket. I know they must have done that for some reason? :?
User avatar
1971ford
100% FORDified!
100% FORDified!
Posts: 5565
Joined: Wed Jul 04, 2007 1:05 pm
Location: Placerville CA

Post by 1971ford »

nice rear bumper and tailgate latch!
dont you just hate how there is that ugly gap between the bumper and the tailgate on our trucks?

i just got a new handle and backing plate but dont know how to install it. i might be able to do it from what you said. right now they are taped in so rain wont get in the tailgate.

how do you adjust the headlights? mine could use some adjusting. and i should get those lights you got, with mine you might as well point a flashlight out the window lol just kidding, there not that bad.

your truck is coming along so nicely!!
-Ryan
User avatar
ezernut9mm
100% FORDified!
100% FORDified!
Posts: 2803
Joined: Sun Nov 26, 2006 5:25 pm
Location: Missouri, Kansas City

Post by ezernut9mm »

lookin real good dc! do you have the original battery hold down to go with that new battery tray? i found them over at mustangs unlimited for 5 bux. should work as they are for 24f batteries

http://www.mustangsunlimited.com/itemdy ... &dep_key1=
wanting to buy a mercury tailgate!
"the man who is swimming against the stream knows the strength of it".- woodrow wilson

ImageImageImage
User avatar
seattle67
Blue Oval Fan
Blue Oval Fan
Posts: 739
Joined: Sun Aug 12, 2007 12:48 am
Location: Washington, Seattle

re: 1968 F-100 Ranger - Picture Heavy (3-15-2008 update)

Post by seattle67 »

Excellent post DC, good pics and good information. Your truck is really coming together!
Dan

"I plan to start procastinating immediately"

Image
Post Reply