1971 short wide (shortstack)

Post progress reports on your project truck(s)

Moderator: FORDification

User avatar
shortstack
New Member
New Member
Posts: 129
Joined: Wed Sep 22, 2010 9:45 am
Location: Austin TX

Shortstack Update...finally...

Post by shortstack »

It has been around four years since I really had any progress on the truck. With moving, a career change, and general laziness, I finally found time and motivation to continue. Here are some pictures if anyone is still interested in my project.

The truck as it sat after removing everything that had piled up.
Image

I removed the bed to take measurements for a custom fuel tank, installed some lowering shackles, and loaded it up to take to the car wash. The tire/wheel combo is from a jeep I had sitting around and were used only to move the truck.
Image
Image

Finally began installing the Painless wiring kit I bought some years ago. It was a bit overwhelming at first, but breaking it down into small steps section by section really helped.
Image
Those are my dad's legs. I cannot thank him or my brother enough for helping out.
Image
Image

I was not happy with any battery cables I found locally so I made some. The red cable is what I found locally.
Image
Image

The crimped terminals were what came with the Painless kit. I got everything laid out, tucked away, tested, terminated, and then went back with soldered, heat shrink connections.
Image

This was a milestone for me personally. It has been almost 10 years since electricity was last passed through the truck.
Image

I realized the last time I visited the transmission cover, I left the underside partially open. I had cut a hole for the T5's top cover, as well as the shifter, then just put the removable cover back on. Not wanting to have a cavity open to the elements with places for moisture to sit, I decided to cut the hole out. On a side note, it is a serious pain trying to cut metal that has dynamat residue on it. You can see the two holes in the second electrical image.
Image
Not the best angle, but you can see why I had to cut the tunnel.
Image

I have more updates and pictures coming.
1971 f100 Custom, SWB, 302, T5
"It can't be that hard."
User avatar
shortstack
New Member
New Member
Posts: 129
Joined: Wed Sep 22, 2010 9:45 am
Location: Austin TX

Re: 1971 short wide (shortstack)

Post by shortstack »

Made a lot of progress, but every step seemed like one forward and two back. We got the majority of the wiring sorted out, with only a few loose wires to run. I decided to prime the engine and try for a start. This was the first time since we built the engine (7 years ago?) that it has run. I pulled the plugs, put a little oil in the cylinders, filled/primed the oil system, turned it over by hand, and then turned it over with the battery. It sounded nice and strong.

I continued getting everything ready for the first try at starting. I got a new mechanical fuel pump, and bent a fuel line. (It was my first try at bending anything on purpose, and took a lot of time to get it bent correctly.)
Image
Image

The valve cover retainers that I am using came with studs that mount in the head. They were pretty short to begin with. The studs where my plug wire holders mount were so short that the retainer would not hold and tried to strip. I used some 1/4-20 all thread to make new studs. I cut a slot in the top so I can secure them to the head with a screwdriver.
Image
Image

I used a socket that fit the pump drive, and primed the engine.
Image
That red ground cable has since been removed.
Image
Marking the distributor to make sure I get everything back correctly.
Image
Got the plug wires installed along with the new coil. I had to build a bracket to mount the coil, but I am still not digging the placement 100%.
Image

My plan was to use the old radiator since it was still ok, but when I tried to remove an old lower hose, the whole fitting came loose. I got a replacement locally, and made the mistake of not opening the box at the store... I plan to have my original radiator repaired/cleaned because it seems to be better quality than the replacement I am currently using.
Image

I thought I had a good shot of the gauges I'll be using, but it looks like I was mid sneeze or about to fall over when I took it. All I have right now is a photo of them lit up. They are Auto meter Phantom II gauges. The two open holes should be filled with oil pressure and fuel level by the weekend.
Image

Everything was looking good, so we decided to crank it up. I primed the fuel system with a 5 gallon fuel can and a hose running to the pump and filled the bowls with fuel. It turned over a few times and then cranked up. Once it cranked up, there was a clattering sound. It sounded like valve noise, but didn't clear up within a minute. We shut it off and checked everything out. Oil pressure was around 60 PSI, timing was 10 BTDC, and I must have checked my firing order 6 different times. I checked my valve lash, I even pulled the distributor again to make sure it was timed correctly.

Tried to start it again to diagnose the noise, but it would only turn over. I had spark, but no fuel when I pulled the hose at the carb. The hose was in the fuel can, not stuck to the bottom, so I pulled the fuel pump.

The arm for the fuel pump stayed in the block when I pulled the pump, and the aluminum that holds the pin in place was missing. I found small pieces of it in the pump housing as well as the opening where the pump sits. This is where I began to realize that I am an idiot.

Image
There should be a fuel pump eccentric visible through this hole in the timing cover. I thought at first that we never installed it when we built the engine, but there was a small gap between the washer and the gear that was troubling. You may not be able to see it in the picture.

I used a small scope to look inside and see if there was any aluminum that made its way into the engine and saw a piece of metal that was interfering with the timing chain.

Pulled all the drive accessories off the engine, drained the water, oil, and then pulled the timing cover.
Image
Image

This is not my picture, but one I found online. This is the eccentric that should have been installed.
Image

Again, not my picture, but it shows what the oil slinger looked like before the fuel pump arm snapped it off.
Image

I found the piece of the slinger in the oil pan, and flushed the pan to make sure there was no more foreign material. I cleaned all the silicon, removed the broken slinger, and re-torqued the cam bolt. I installed new timing cover gaskets, water pump gaskets, and sealed it all up. Once the silicon dries, I can hopefully hear it run.

I made a block off plate for the fuel pump, and will run an electric pump. So much for the fuel line I spent so much time bending...
1971 f100 Custom, SWB, 302, T5
"It can't be that hard."
User avatar
Ranchero50
Moderator
Moderator
Posts: 5799
Joined: Wed Nov 08, 2006 7:02 pm
Location: Maryland, Hagerstown
Contact:

Re: 1971 short wide (shortstack)

Post by Ranchero50 »

Looks good. Blue trucks seem to always take longer to build vs. other colors.

I know I'm still finding resto parts for mine in the rafters and tucked away for safe keeping.
'70 F-350 CS Cummins 6BT 10klb truck 64k mile Bahama Blue

Contact me for CNC Dome Lamp Bezels and Ash Tray pulls.
User avatar
shortstack
New Member
New Member
Posts: 129
Joined: Wed Sep 22, 2010 9:45 am
Location: Austin TX

Re: 1971 short wide (shortstack)

Post by shortstack »

Thank you. Seeing the progress definitely gives me motivation to get it back on the road. I am down to the small tedious things now that seem to take up all the time.
1971 f100 Custom, SWB, 302, T5
"It can't be that hard."
User avatar
Ranchero50
Moderator
Moderator
Posts: 5799
Joined: Wed Nov 08, 2006 7:02 pm
Location: Maryland, Hagerstown
Contact:

Re: 1971 short wide (shortstack)

Post by Ranchero50 »

It will, just take your time and enjoy the experience.

I have a couple nit picking little things that I need to go back and redo, some from getting in a hurry and some from changing direction mid stream. Of course some stuff I just forgot to do and some I forgot to finish. Who needs windshield washers anyways?
'70 F-350 CS Cummins 6BT 10klb truck 64k mile Bahama Blue

Contact me for CNC Dome Lamp Bezels and Ash Tray pulls.
User avatar
shortstack
New Member
New Member
Posts: 129
Joined: Wed Sep 22, 2010 9:45 am
Location: Austin TX

Re: 1971 short wide (shortstack)

Post by shortstack »

Got my two remaining gauges in the mail today. I should have them installed and wired this weekend. Amazon was the among cheapest place I found these and they were delivered in two days.

Image

I already had the mechanical version of this gauge, but wanted a cleaner look when installed. I also didn't like the idea of oil being pumped into my cab if something should happen to the line.
Image

I am going to finish my install of the Mustang Steve clutch cable install this weekend. Just have to drill a hole in the firewall and mount the cable.
Image

I had Steve install the bearing retrofit kit and weld the quadrant onto the pedal assembly, but it is contacting the brace for my dash. Not sure if there was a way around it aside from cutting a relief into the dash, but I didn't want to do that. I cut the quadrant off and mounted it on the side of the pedal. I will have to get a picture this weekend.
Image
Image

I looked around and could not seem to find pictures of anyone that has installed the clutch cable into a bump. Before I cut the hole, does anyone have any suggestions or could point me to some reference material?

I found a few older pictures of badges I modified. I don't like chrome very much and plan on painting more accent pieces (mirrors, door handles, hood emblem, etc.) in the future.

Image
Image

Taped off and painted the inside of the hood lettering
Image
Image

Before painting:
Image

I should have just about everything on the way to get it running (correctly) by the weekend.
1971 f100 Custom, SWB, 302, T5
"It can't be that hard."
User avatar
popeyes71
Blue Oval Guru
Blue Oval Guru
Posts: 1176
Joined: Tue Jan 31, 2012 3:46 pm
Location: Bay Area, Ca.

Re: 1971 short wide (shortstack)

Post by popeyes71 »

Great looking truck and love the color. I'm partial to the color since mine is the same color. Sorry to hear about the fuel eccentric issue. It reminded me of the issues I had to get my old Highboy running but I eventually got through the issues and now its a great reliable old truck. And YES, dads help is priceless and the best! I enjoy the same father and son time with my father with my truck. Keep up the great work!
-Popeye-
1971 F-250 4x4 Highboy
1966 Chevy Nova, 8 second 10.5 car
User avatar
shortstack
New Member
New Member
Posts: 129
Joined: Wed Sep 22, 2010 9:45 am
Location: Austin TX

Re: 1971 short wide (shortstack)

Post by shortstack »

Thank you for the kind comments. It really helps give me the motivation I need to stay the course. I will definitely never mistake an oil slinger for an eccentric again... We built the engine and did the majority of the restoration before I even knew about this site, which could have saved so much confusion and wasted time.
It was my dad that kicked me into gear on the wiring. I had looked around and asked here if someone knew of a place that would install the wiring, but in the end, I am glad that we did it ourselves. I now know everything about the wiring, how it is run, where I can make changes in the future, etc.
1971 f100 Custom, SWB, 302, T5
"It can't be that hard."
IN2FORD
Preferred User
Preferred User
Posts: 345
Joined: Sun Apr 27, 2014 3:54 pm
Location: Cookeville TN

Re: 1971 short wide (shortstack)

Post by IN2FORD »

Outstanding!!!!

Barry
User avatar
SSW
New Member
New Member
Posts: 55
Joined: Sun Jul 06, 2014 9:55 pm
Location: Mesa, AZ

Re: 1971 short wide (shortstack)

Post by SSW »

Looking Great!!
what did you use for the PS hose? I have the same pump and ended up having one made with adapters to AN. Yours looks factory, which makes more sense for replacement down the road.
IN2FORD
Preferred User
Preferred User
Posts: 345
Joined: Sun Apr 27, 2014 3:54 pm
Location: Cookeville TN

Re: 1971 short wide (shortstack)

Post by IN2FORD »

Is that the stock location for the trans crossmember?

Barry
User avatar
shortstack
New Member
New Member
Posts: 129
Joined: Wed Sep 22, 2010 9:45 am
Location: Austin TX

Re: 1971 short wide (shortstack)

Post by shortstack »

SSW, I remember ordering a couple different hoses and just making them work. I think I ordered both lines for a 76 f100, and an 88 mustang. I had to re-bend the end on the return line, and cut/re-flare the end of the pressure line. It is not ideal, and does not look nice up close. After using some AN line for my fuel, I really like working with it, and will more than likely replace them.

Barry, I can get an actual measurement if you would like, but I basically bolted the crossmember to the trans. mount, set it into place, and drilled some new holes in the frame. I believe it is a couple inches rear of where the old three speed sat. The trans mount bolted right to the transmission.
1971 f100 Custom, SWB, 302, T5
"It can't be that hard."
User avatar
shortstack
New Member
New Member
Posts: 129
Joined: Wed Sep 22, 2010 9:45 am
Location: Austin TX

Re: 1971 short wide (shortstack)

Post by shortstack »

I got quite a bit accomplished this weekend. Won't bore you with all the details, since every picture is worth a thousand...

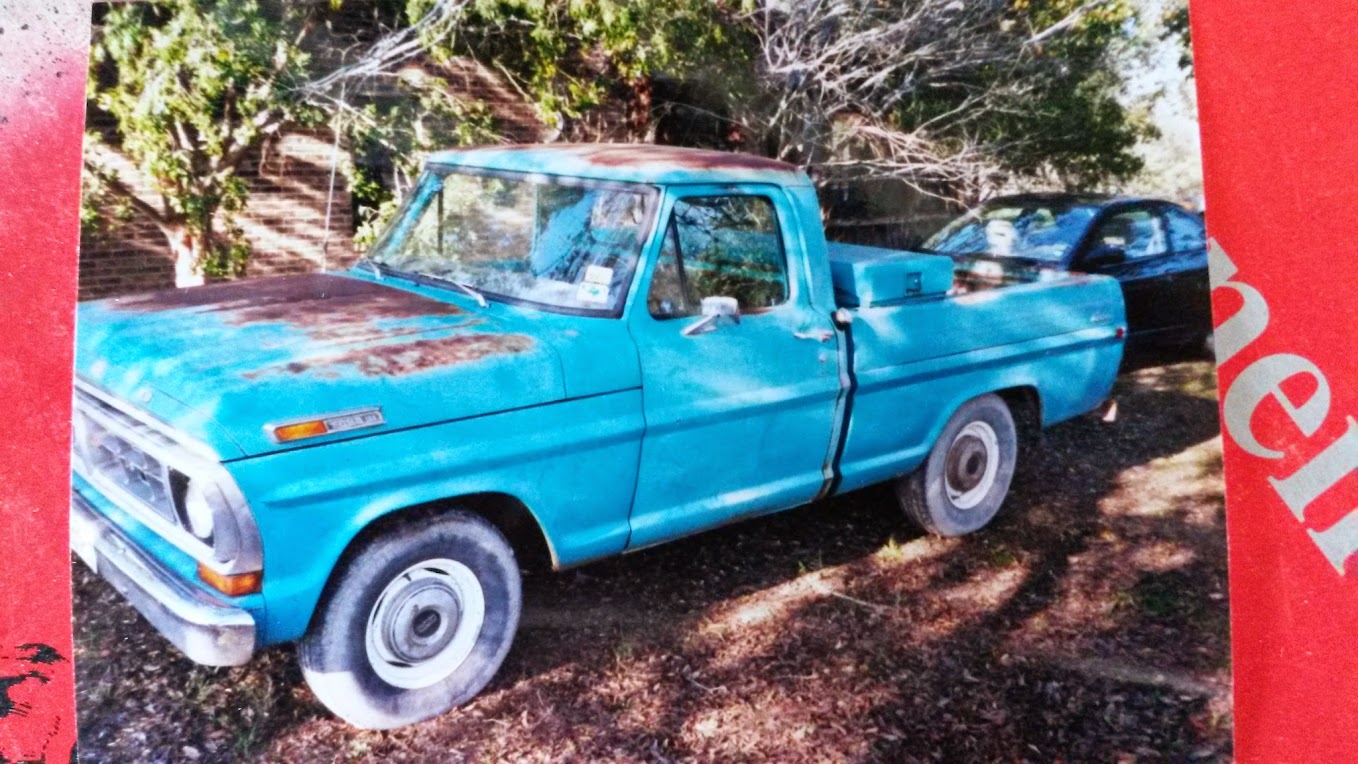
Dad was looking through a book we had compiled with all the receipts and info about the truck. This was around the time we received the truck back in 98. The nut that held the shifter linkage onto the trans was loose and it wouldn't come out of 2nd gear. Other than that, it was ready to drive.
Image

Onto the updates...
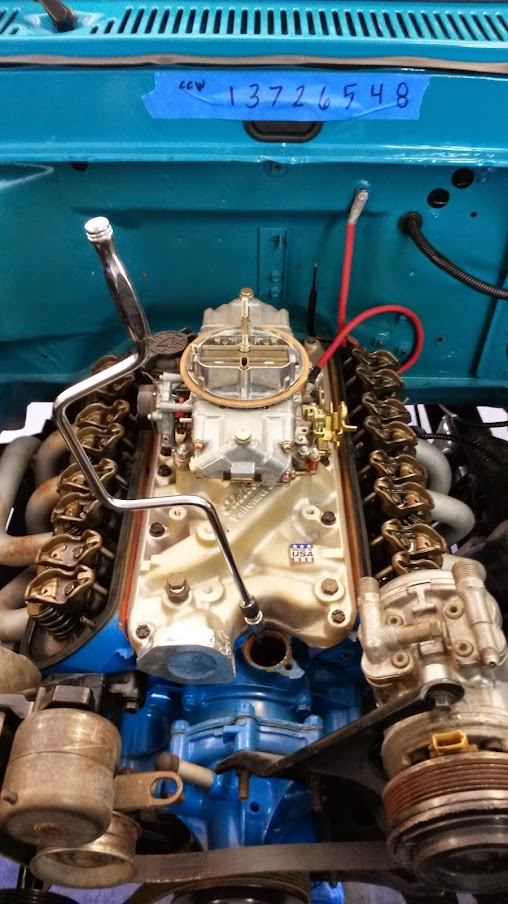
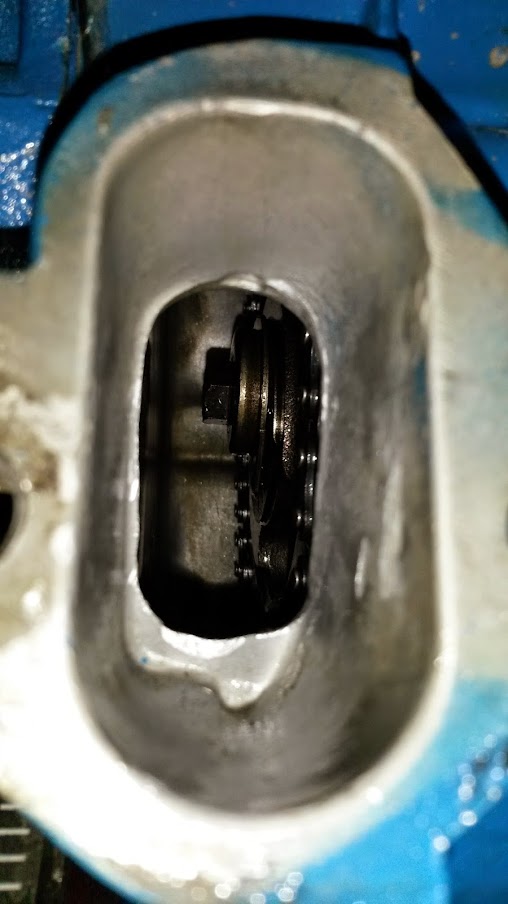
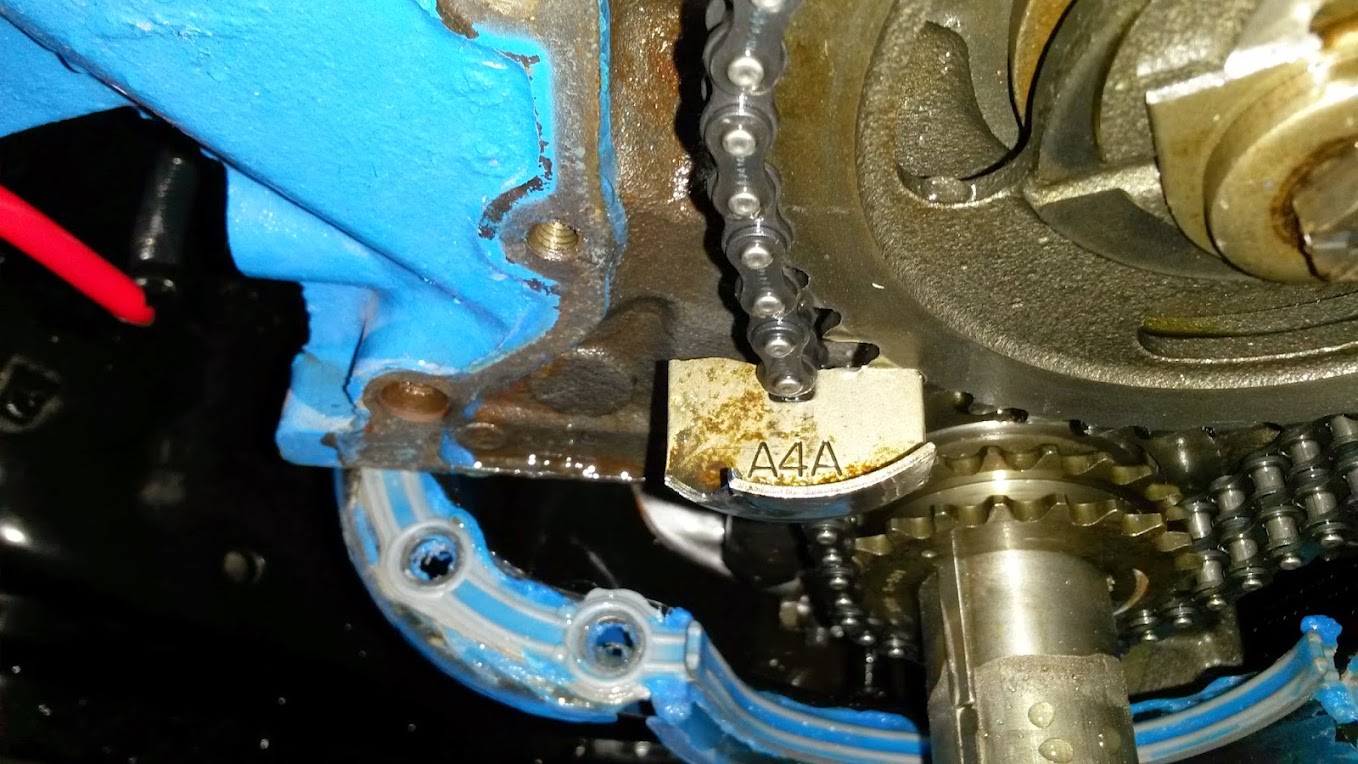
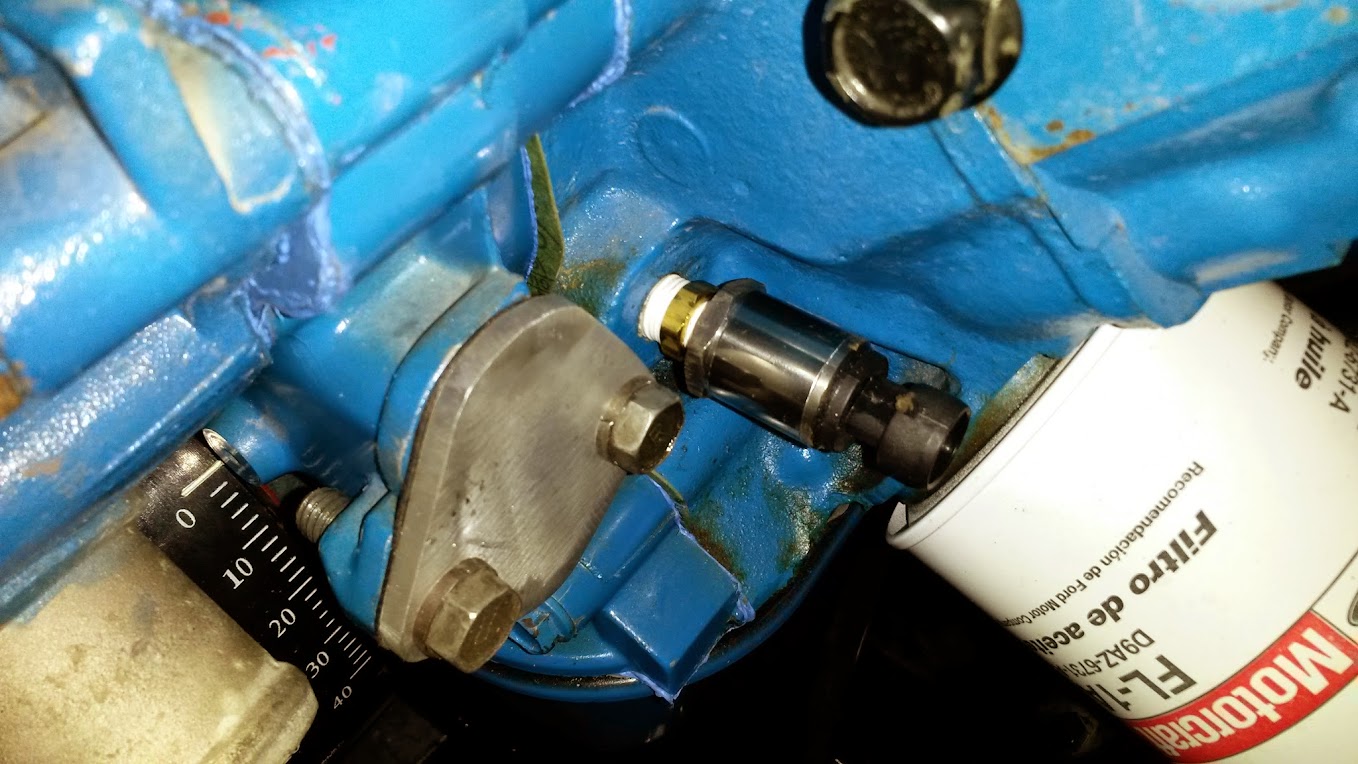
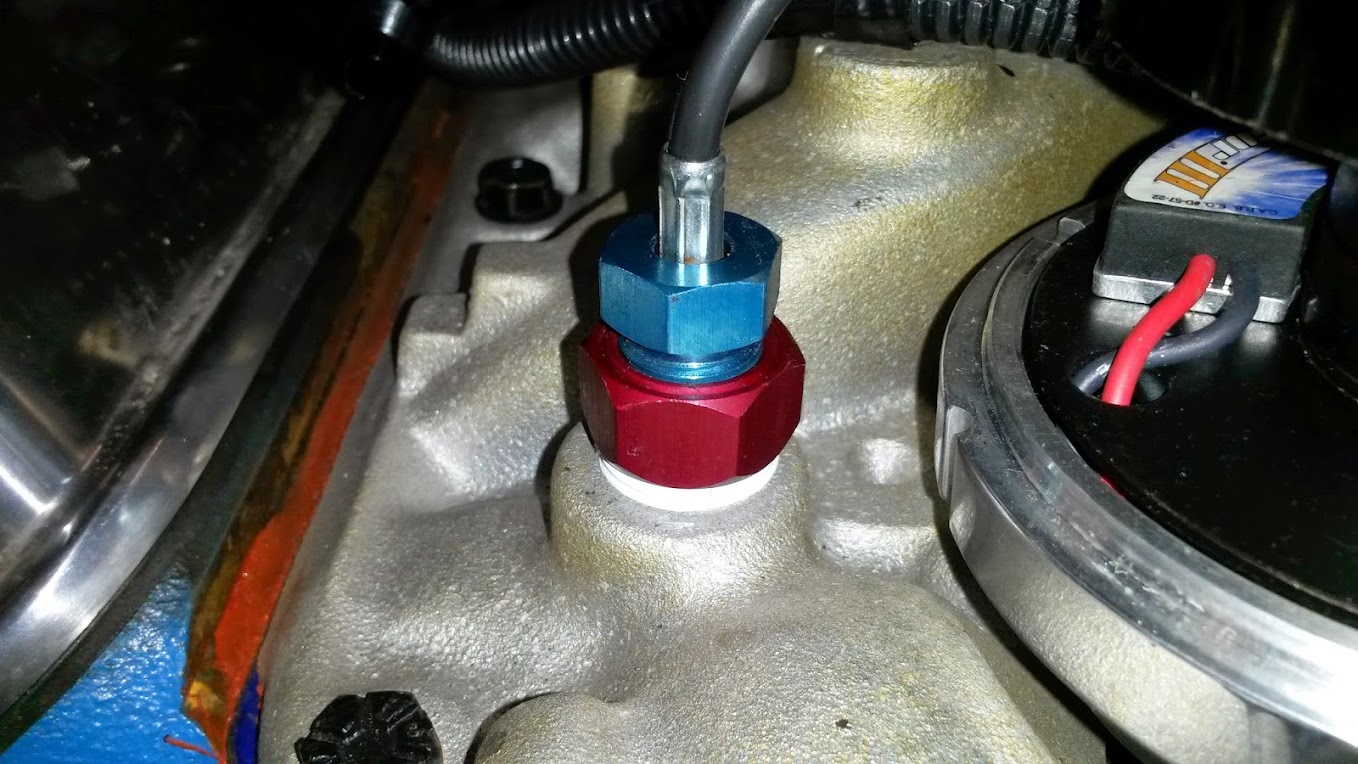
I got the front of the engine reassembled and installed my fuel pump blockoff plate.
Image
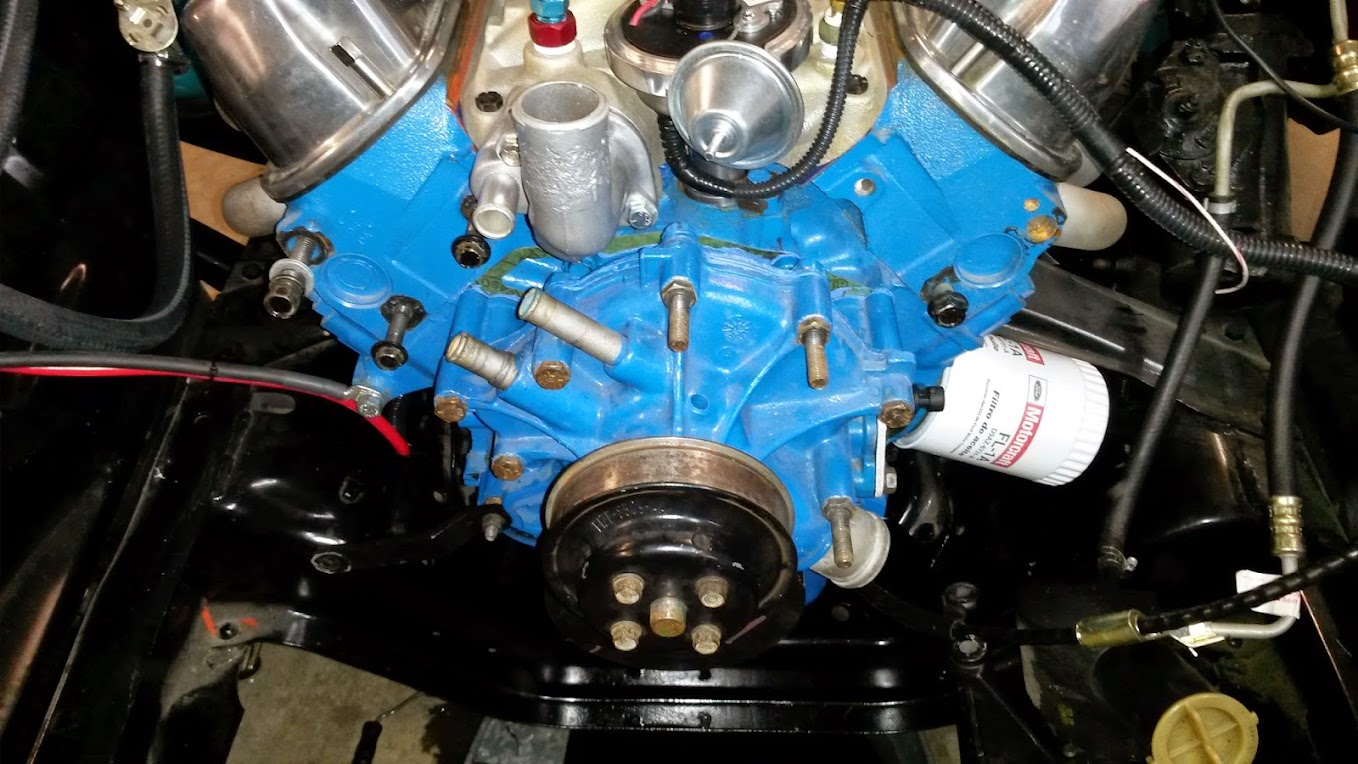
You can also see the sending unit for the oil pressure gauge.
Image

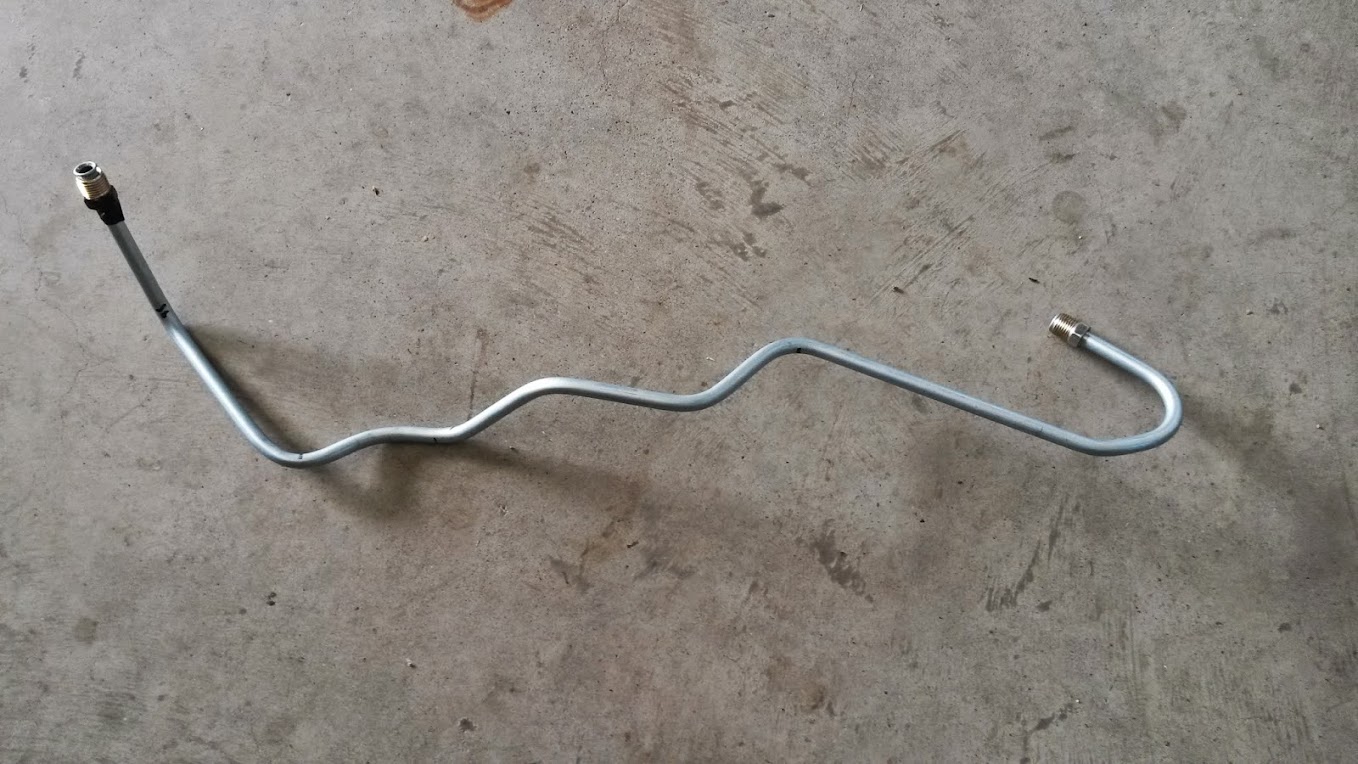
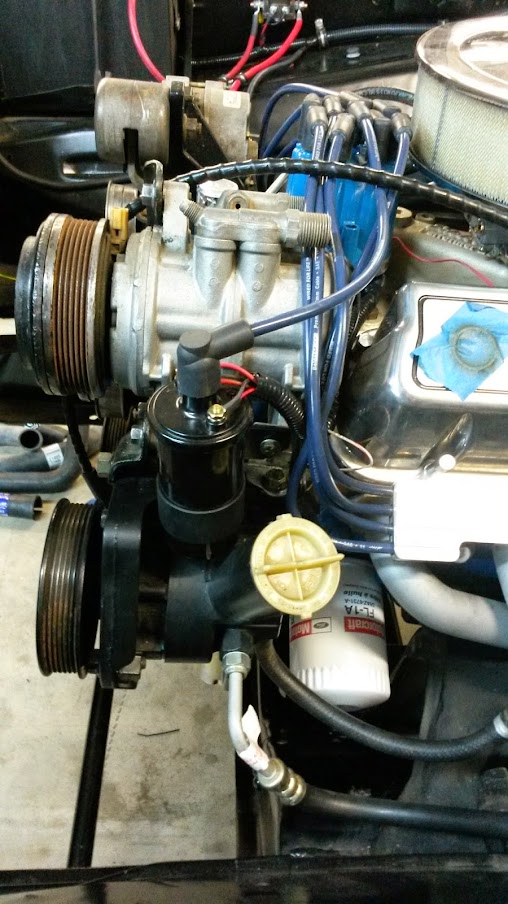
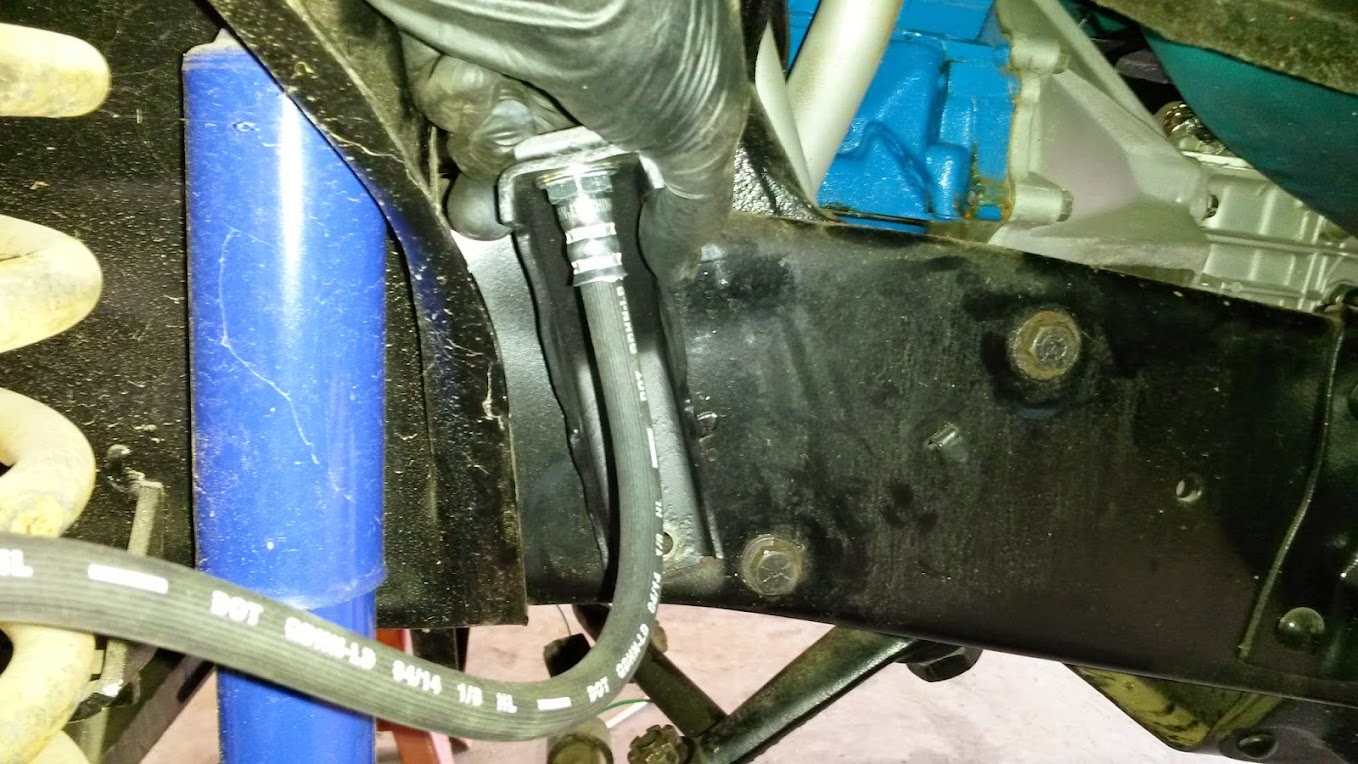
I installed the -6AN fuel inlet and line I ordered. The Swivel fit Earl's connections were surprisingly easy to install, and I didn't have any leaks.
Image
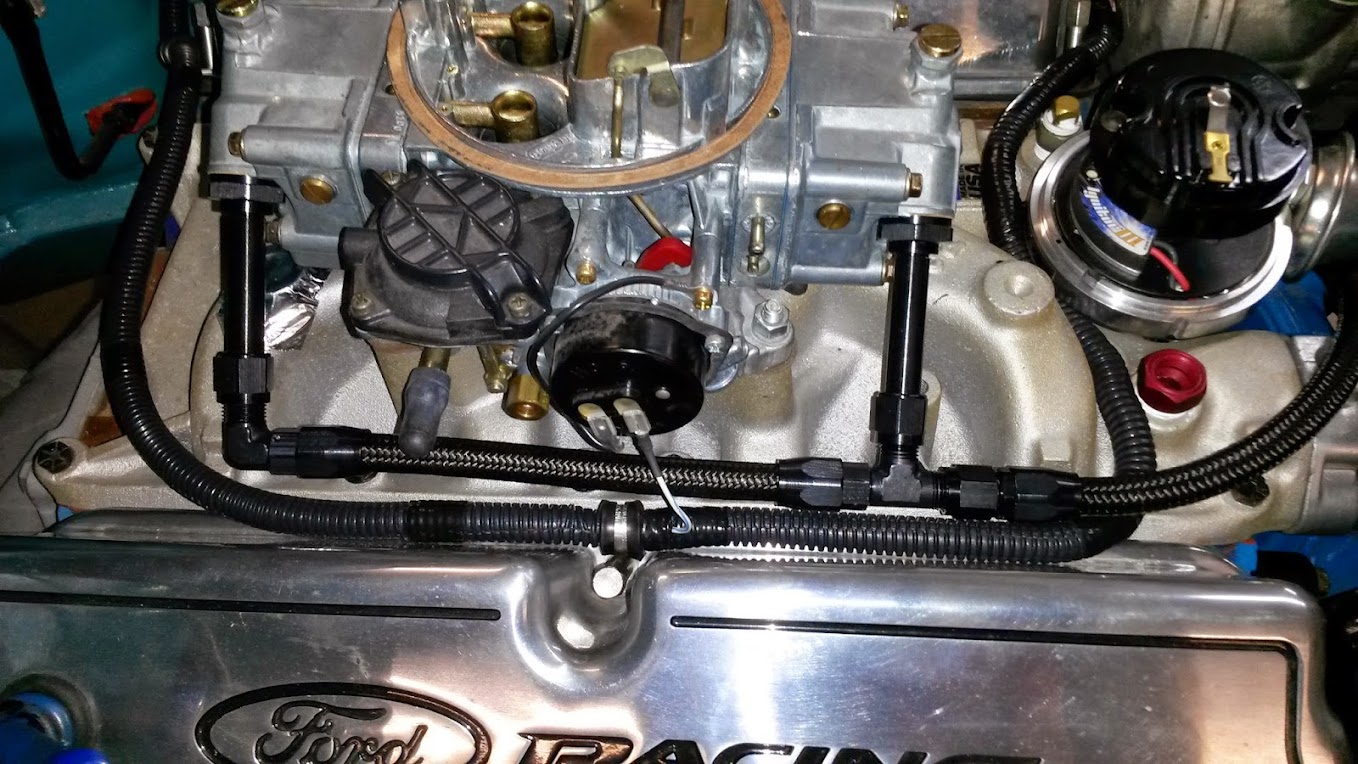
This fuel line was expensive ($50 for 6 ft) but I really like the look and fit.
Image

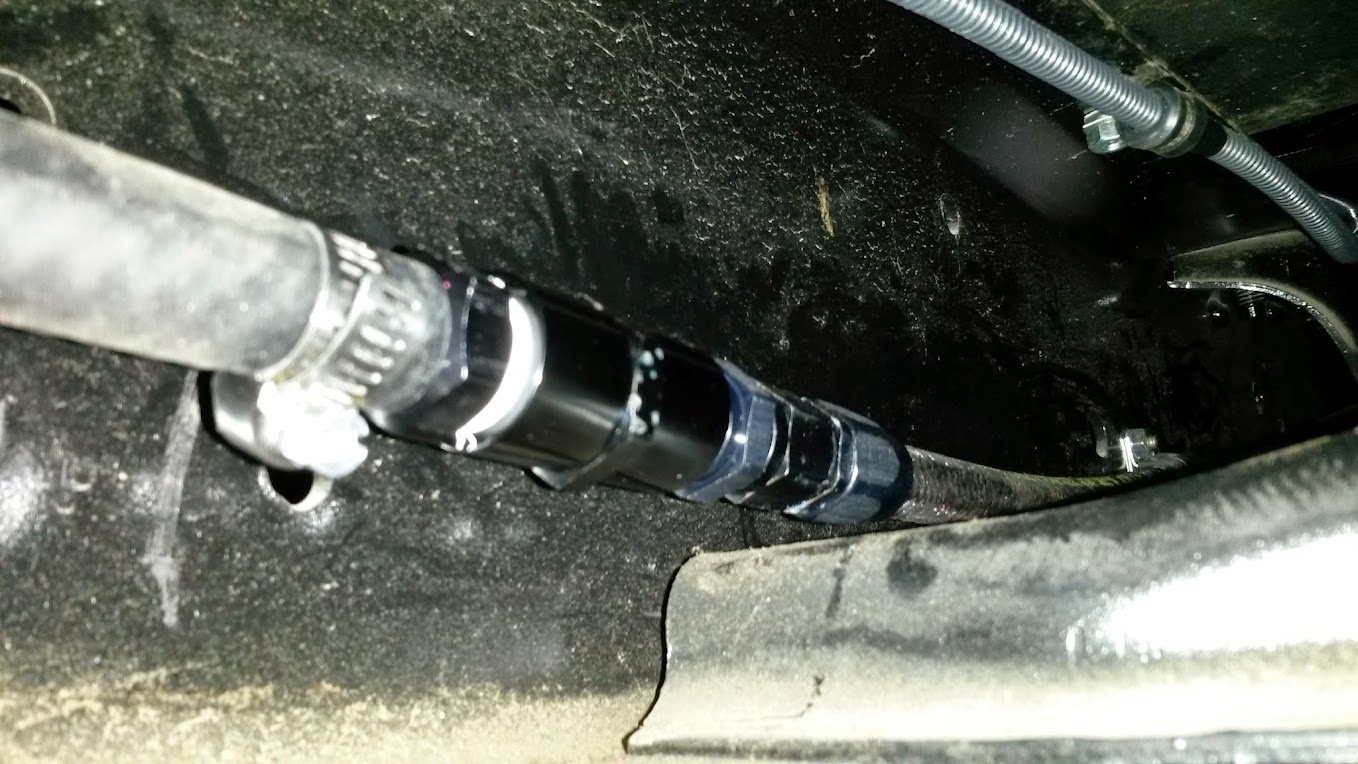
I have some fittings to go from -6AN male to 3/8" hose barb. The plan is to eventually run -6AN line all the way to the tank, but this was just so I could hear the engine run and make sure everything sounded alright.
Image

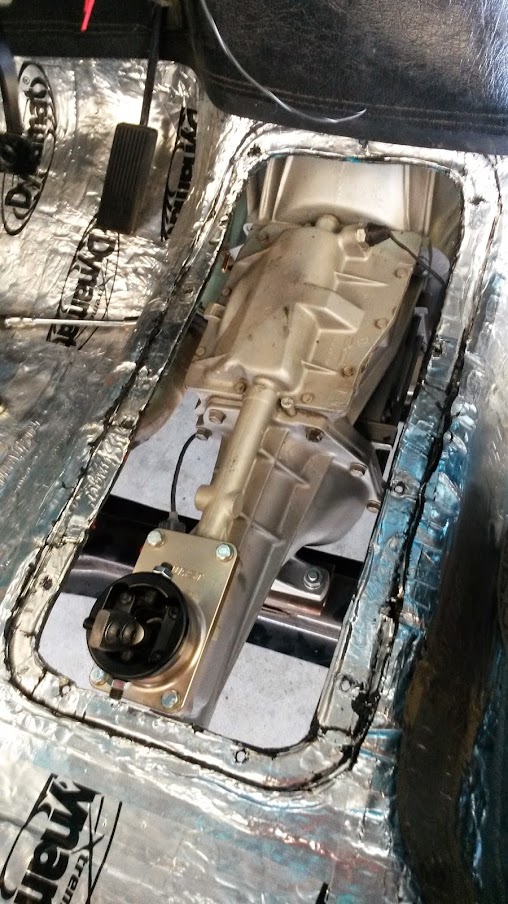
This is the sending unit for my speedometer. I didn't have it hooked up yet, but for some reason the speedometer was reading between 40 and 60 MPH while I was test running the engine.
Image

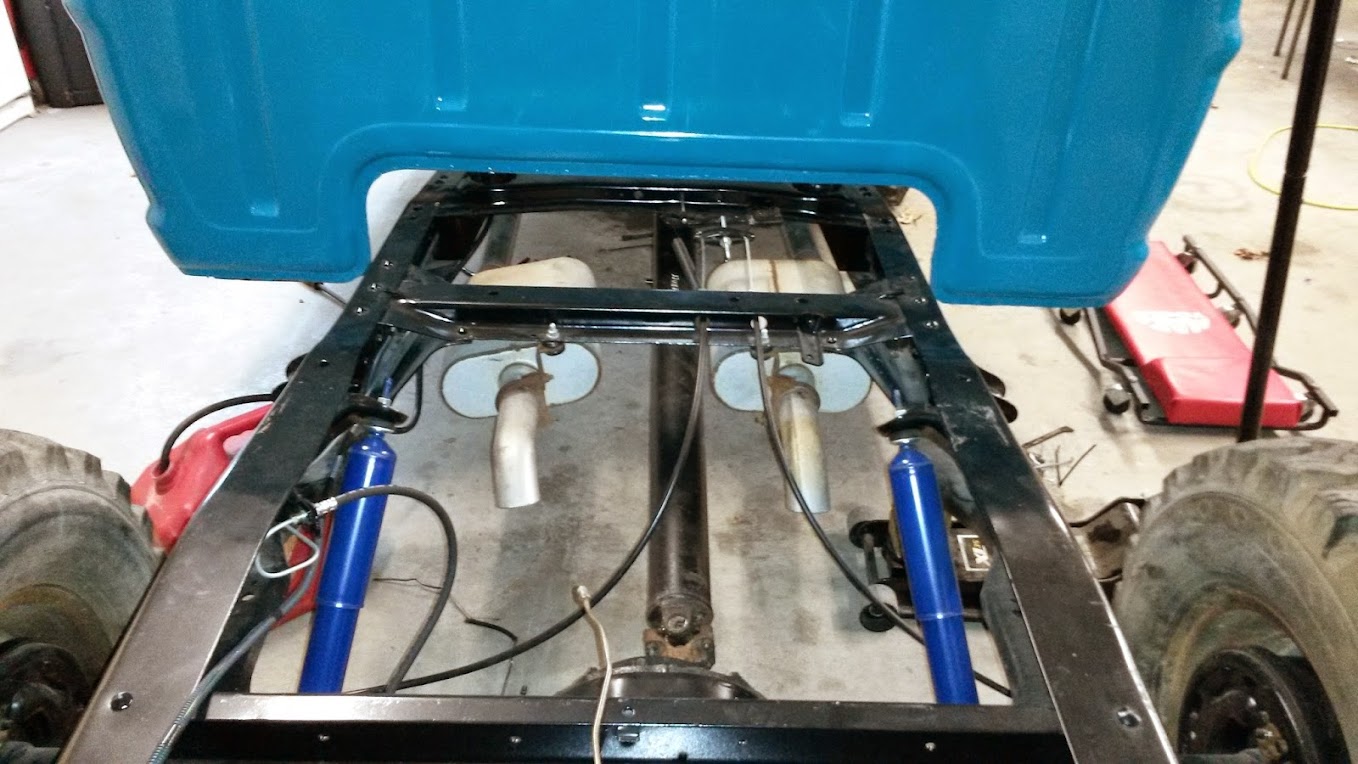
I cranked the engine up and there was a massive exhaust leak somewhere. I had previously just installed the old exhaust, and never really adjusted it. Here, I have adjusted the passenger side, and had to bend the header collector slightly so it was not interfering with a crossmember.
Image

After adjusting the exhaust, there was still a leak. I could feel it coming out of the #4 port and thought it was the gasket. After removing it, all looked well. I used a mirror and found an open threaded hole in the back of the head. I assume it was for some sort of emission component that the Mustang utilized. I found a 7/8" bolt, shortened and threaded it into the hole.
Image

All exhaust leaks fixed, and adjusted the idle mixture to 1 3/4 turns out, it runs like a top.

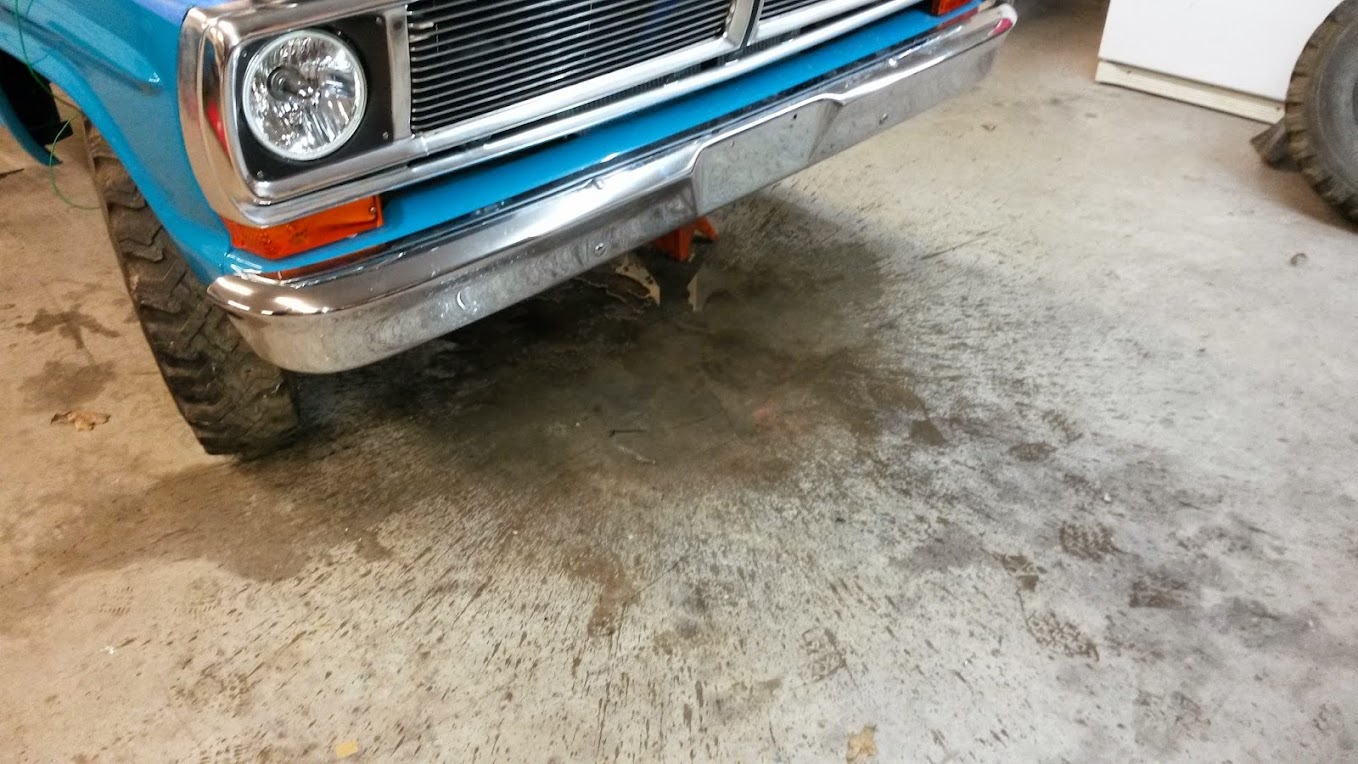
I may have added a little too much water to the cooling system, and when the thermostat opened the first time I had a geyser.
Image
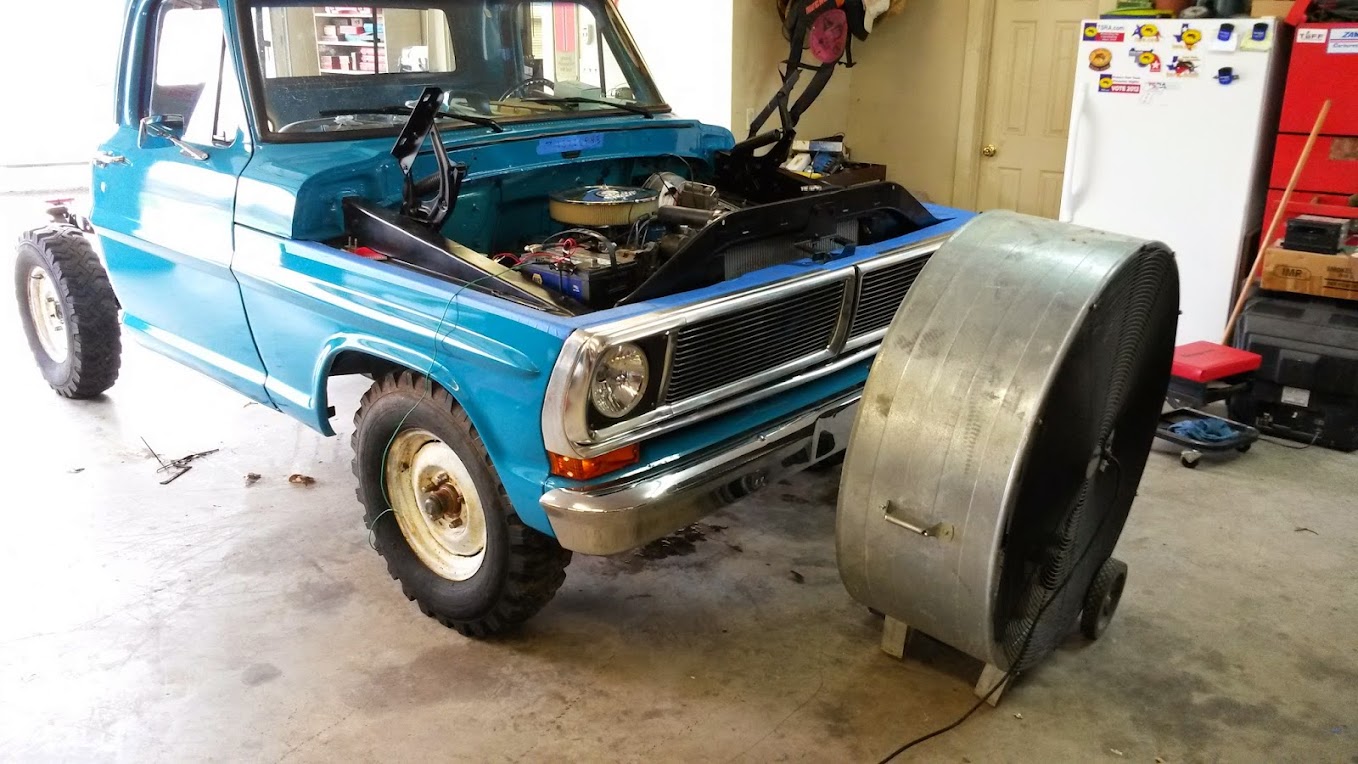
The fan helped with cooling until I can get a new e-fan installation kit and wire the fan.
Image

This is where one of the return lines from the heater is supposed to go, but I didn't have the correct fittings when I was testing. I had the return heater hose just pinched off, and my temperature probe installed here.
Image

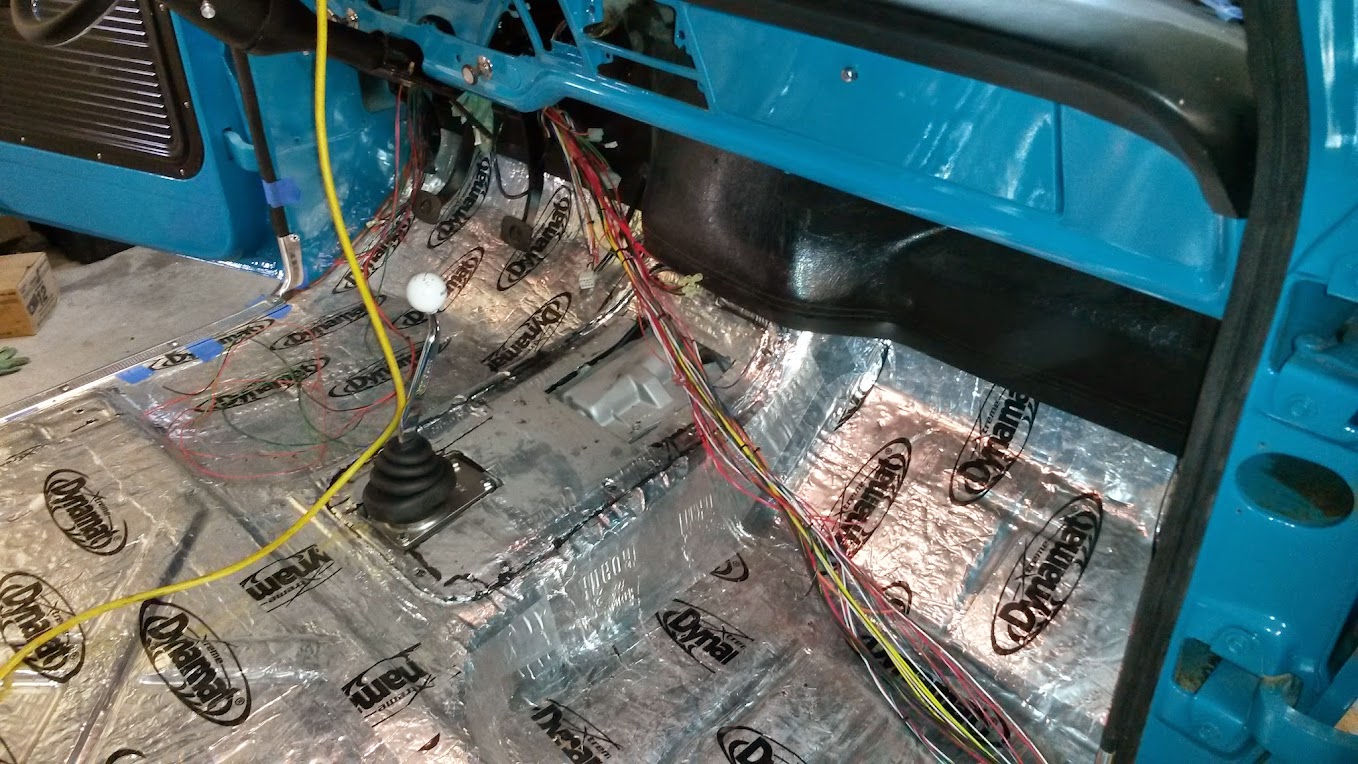
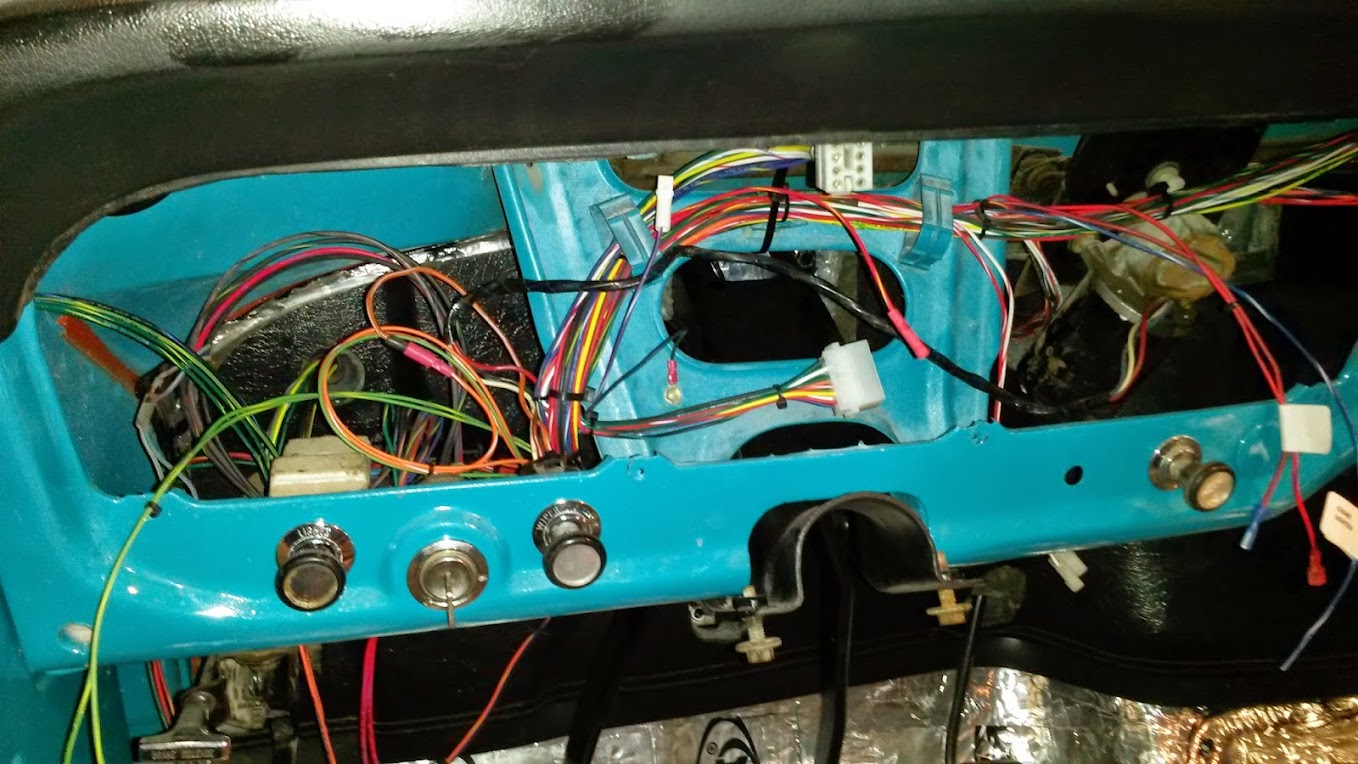
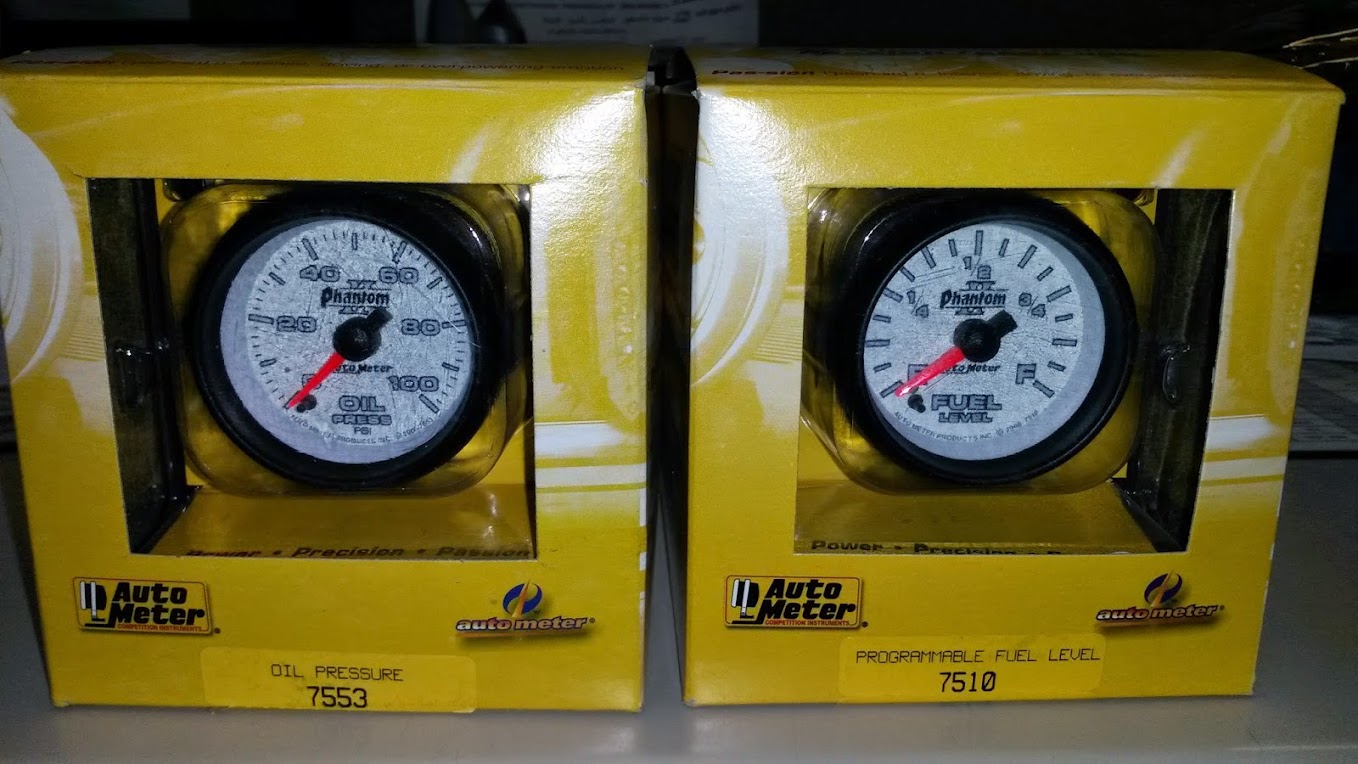
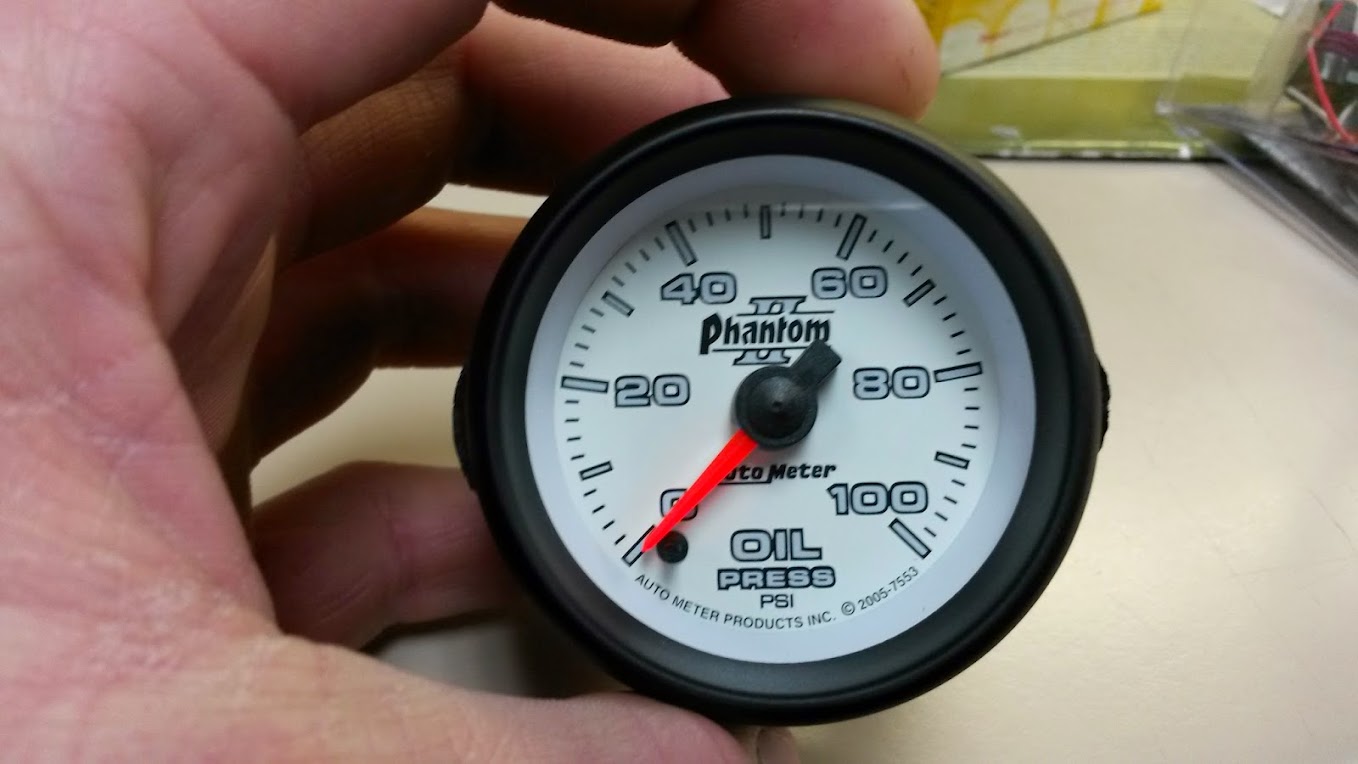
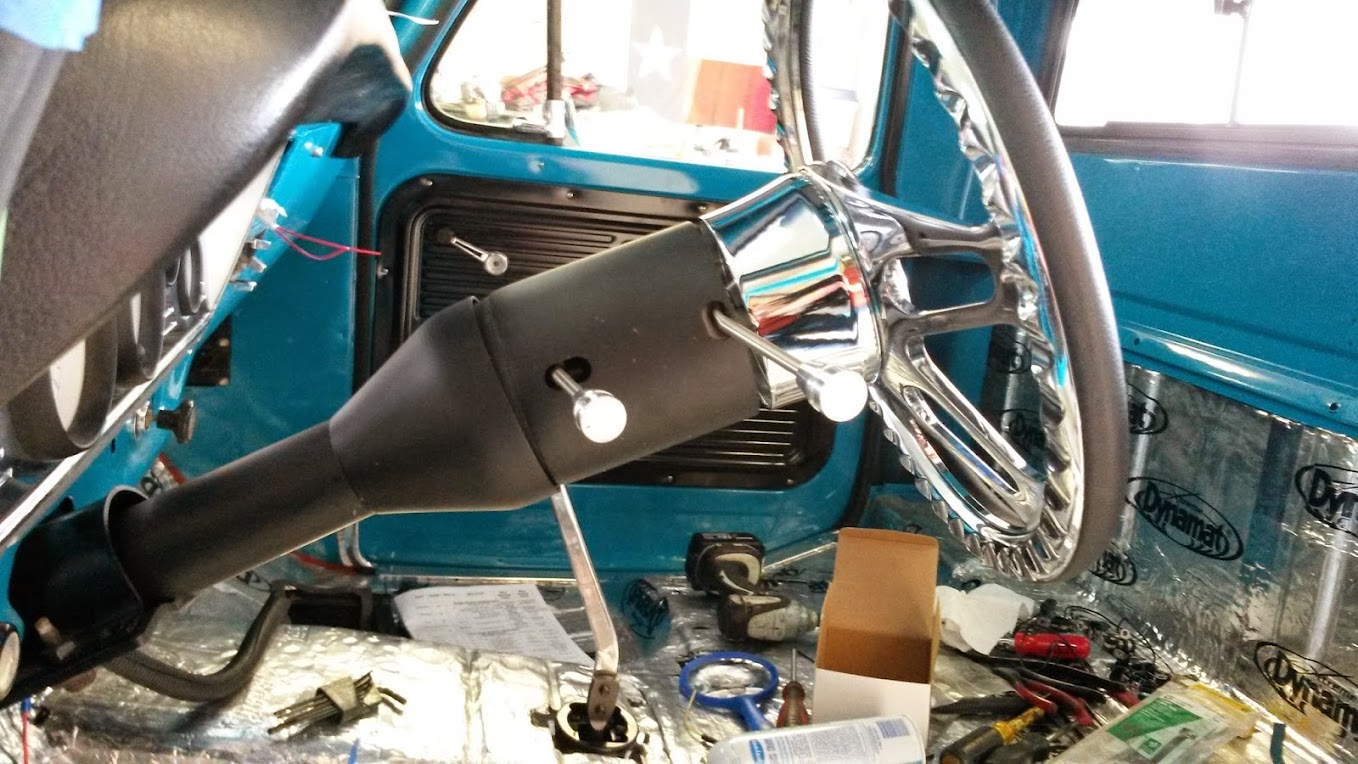
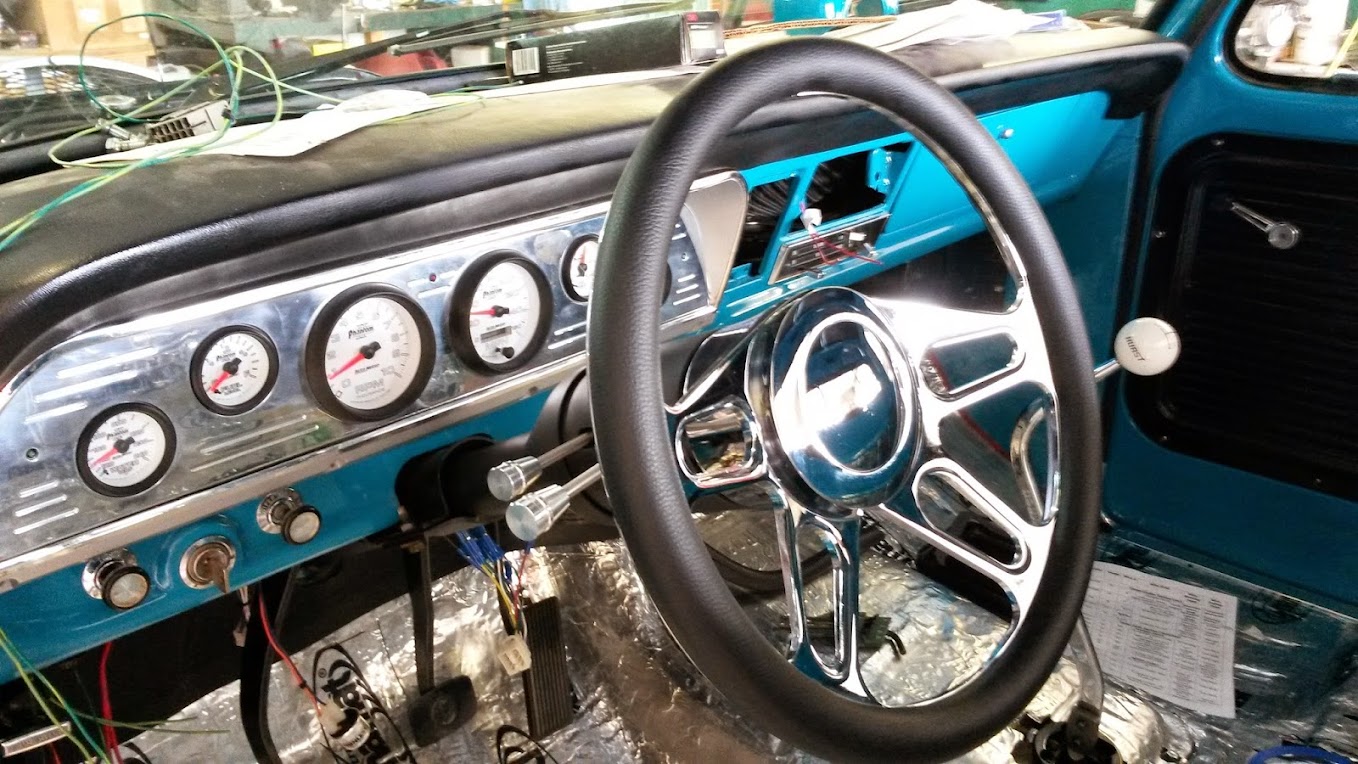
Finally got all the gauges installed into the cluster, wired up, and installed. We will need to go back and put loom on all the wires, but this worked for testing.
Image
Image
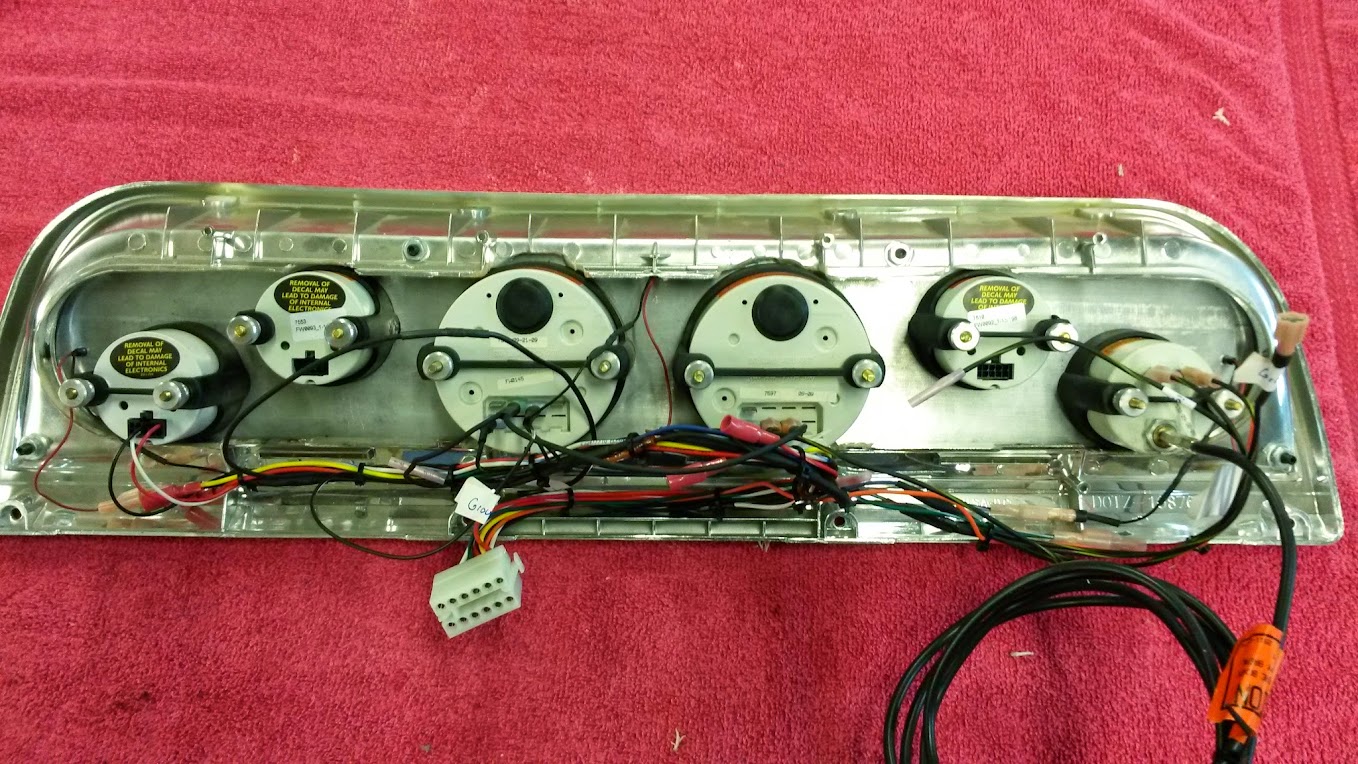
The bezel is filthy, but I couldn't help but install it with the column to see what it would look like.
Image
Image
Image

Onto the brakes...

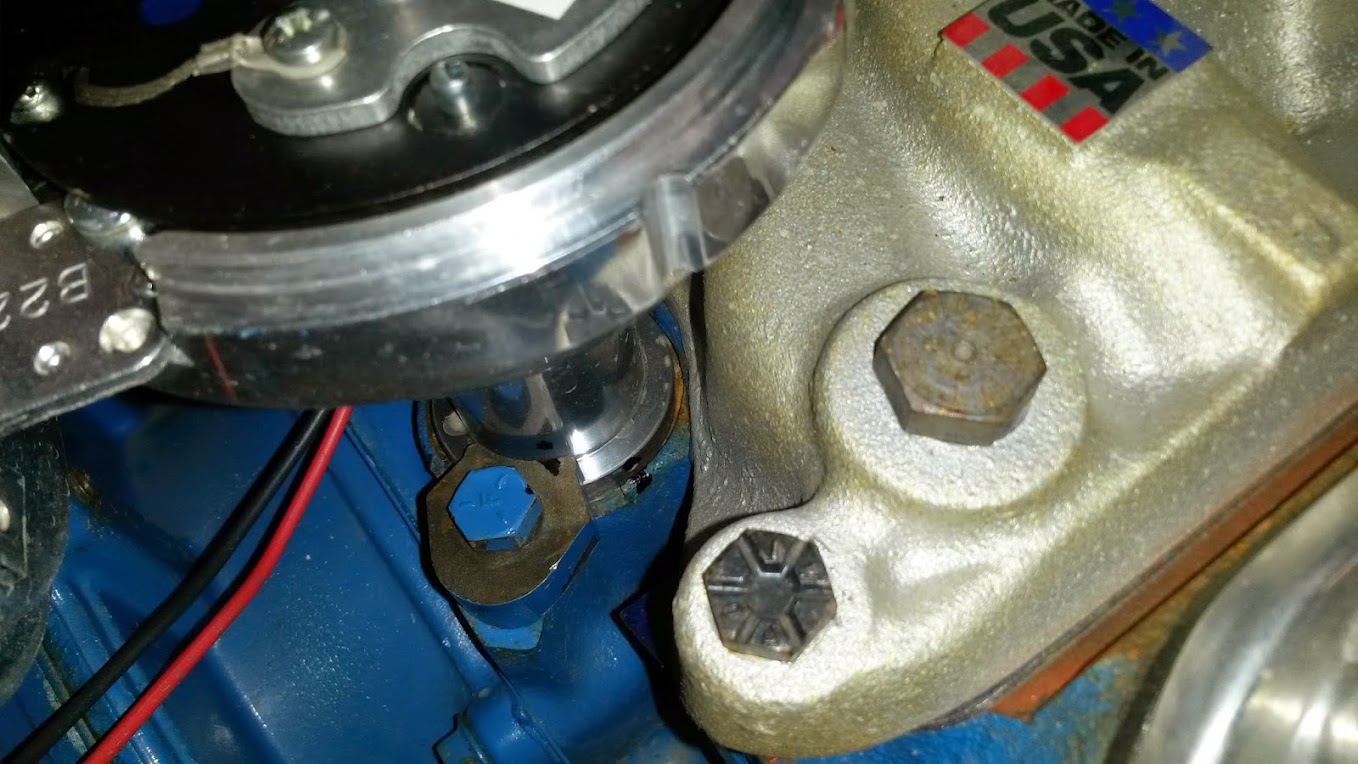
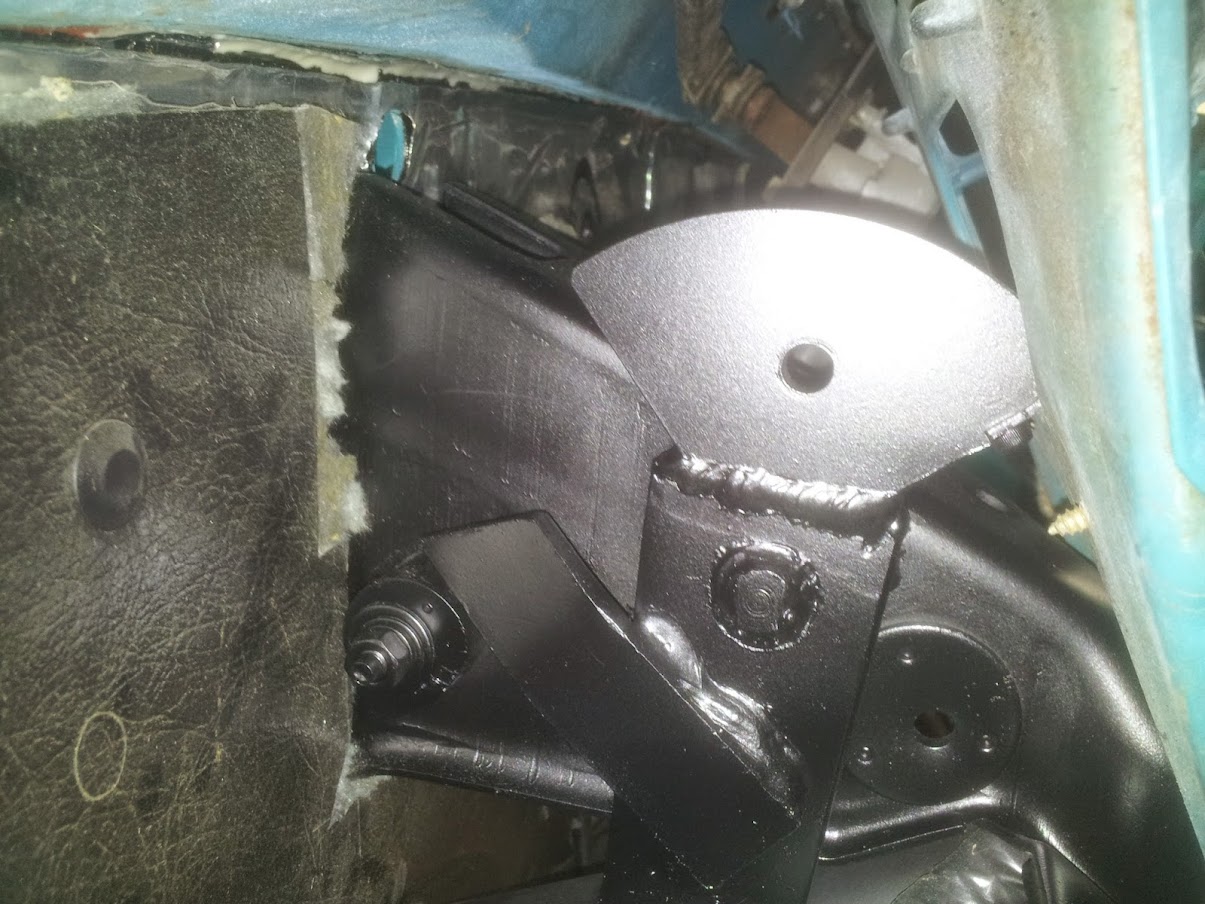
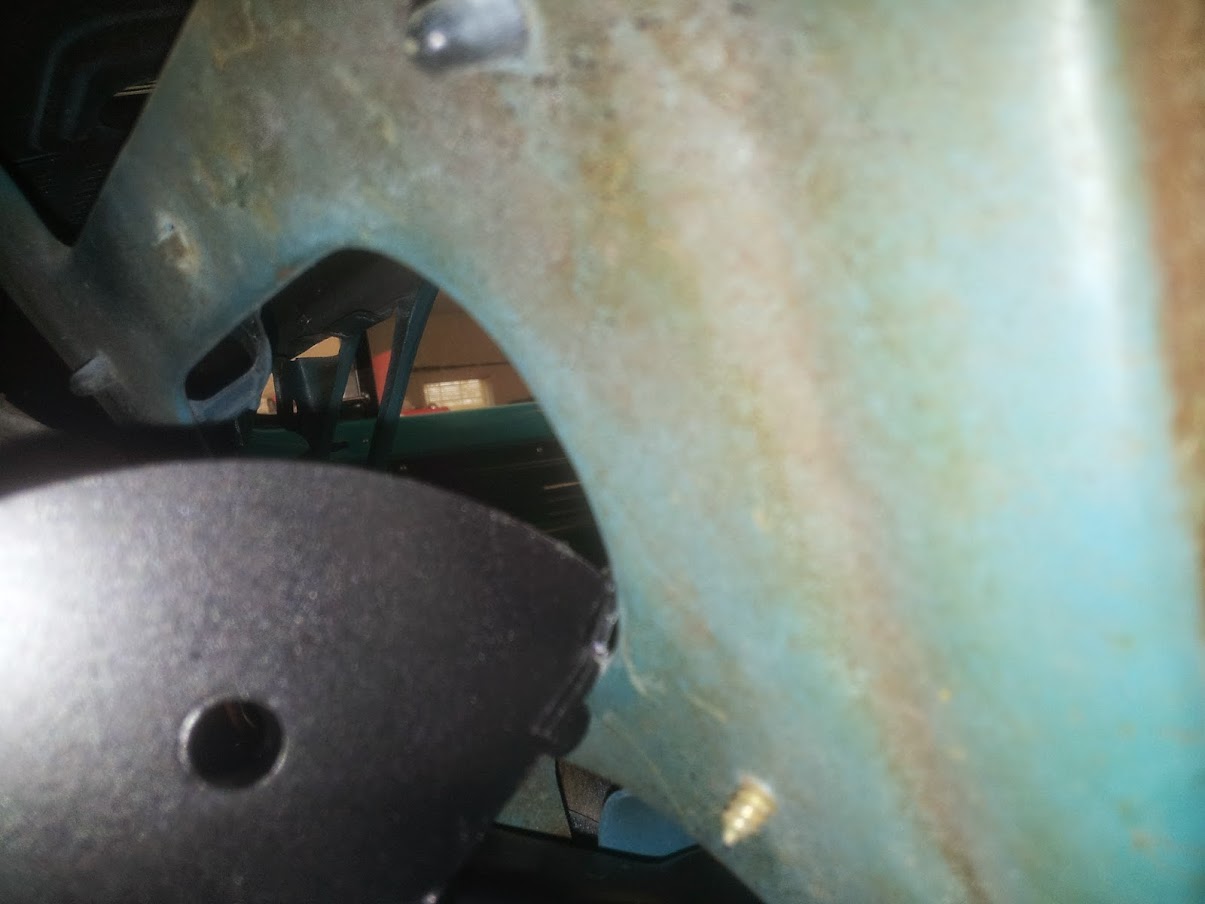
I am still having trouble figuring out how to mount the driver's side brake hose bracket. You can see where the original bracket was.
Image

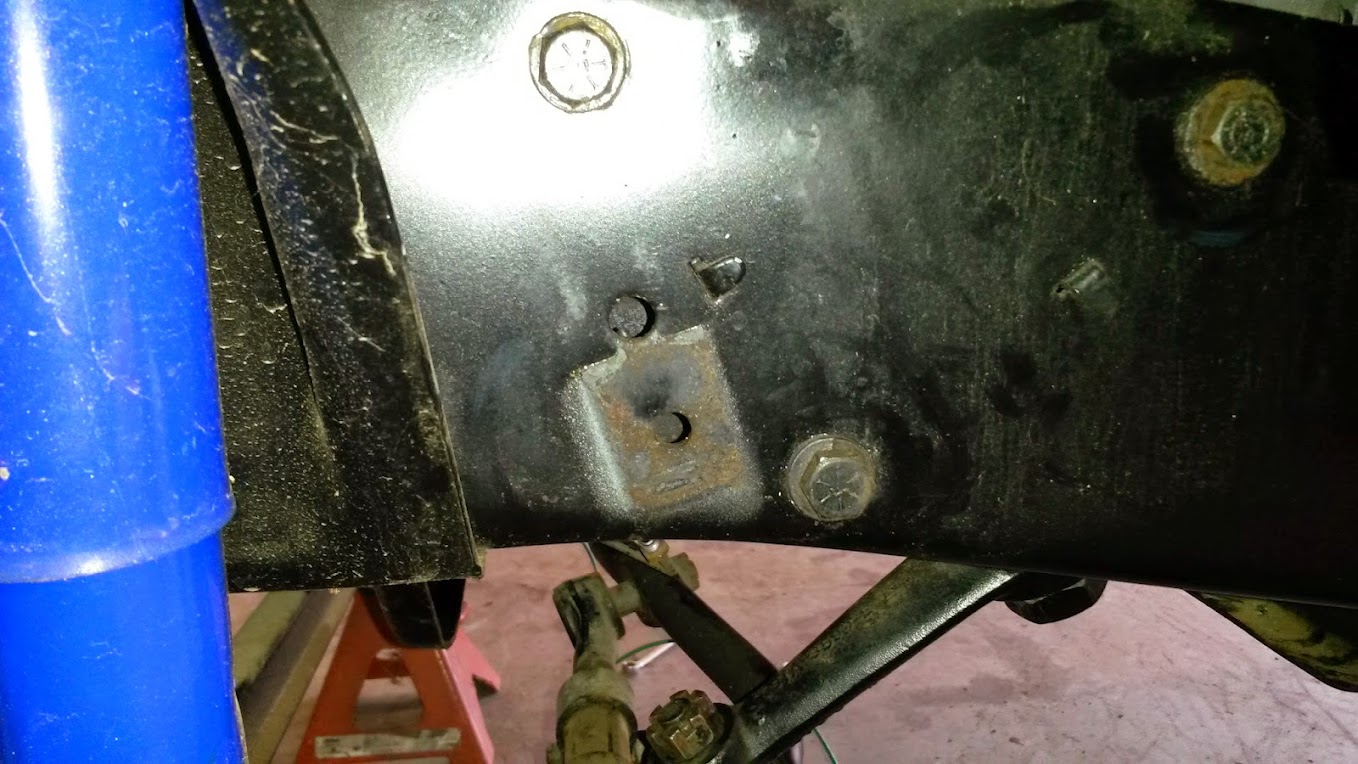
New bracket mocked into place. If I use the existing hole, there is a tab for the sector mounting that is in the way. With the sector installed, I cannot see a good way to mount the bracket. Will I have to remove the sector and then drill two new holes, or am I missing something simple?
Image
Image

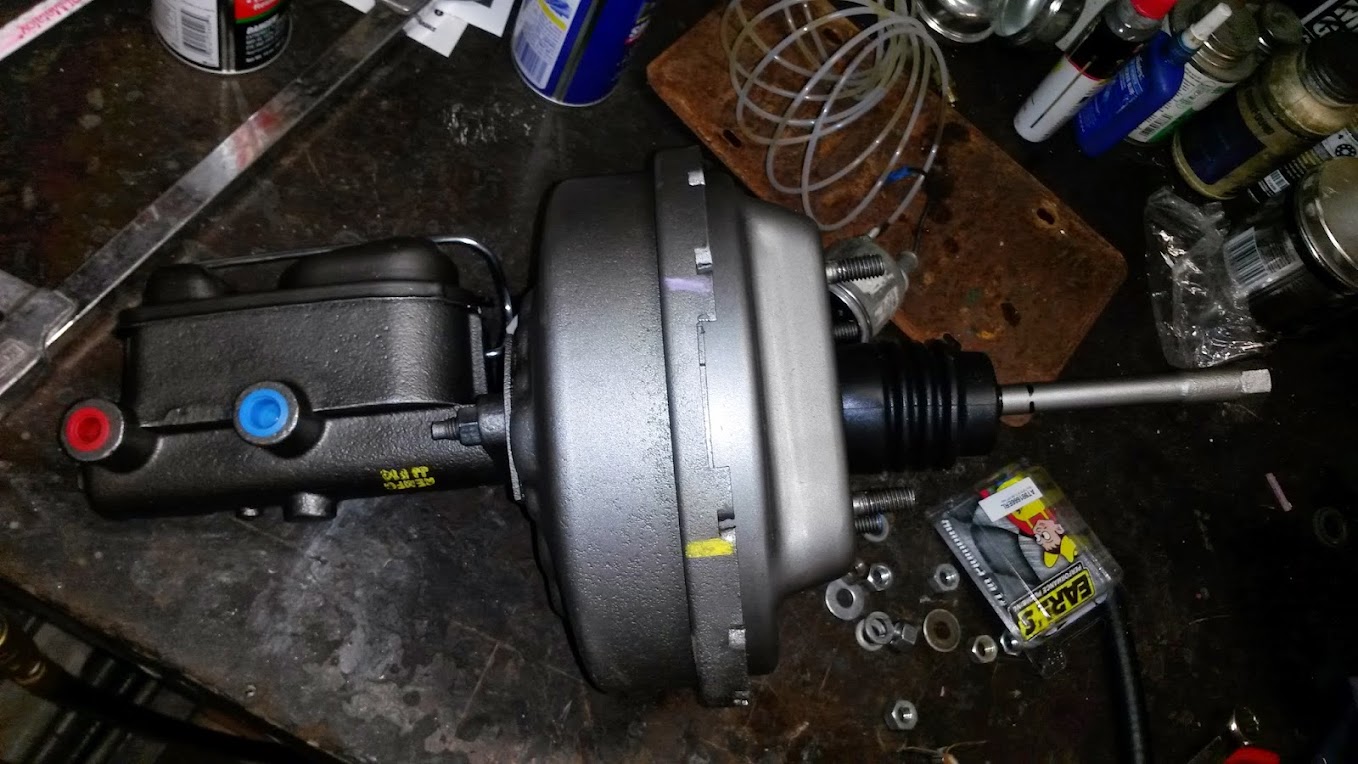
I ordered a new booster and Master cylinder for a 68 F350. It is the 8" booster, but is about an inch thinner than the one I have on another 68. Is the new design just thinner, or is the old one a dual diaphragm and the new one a single?

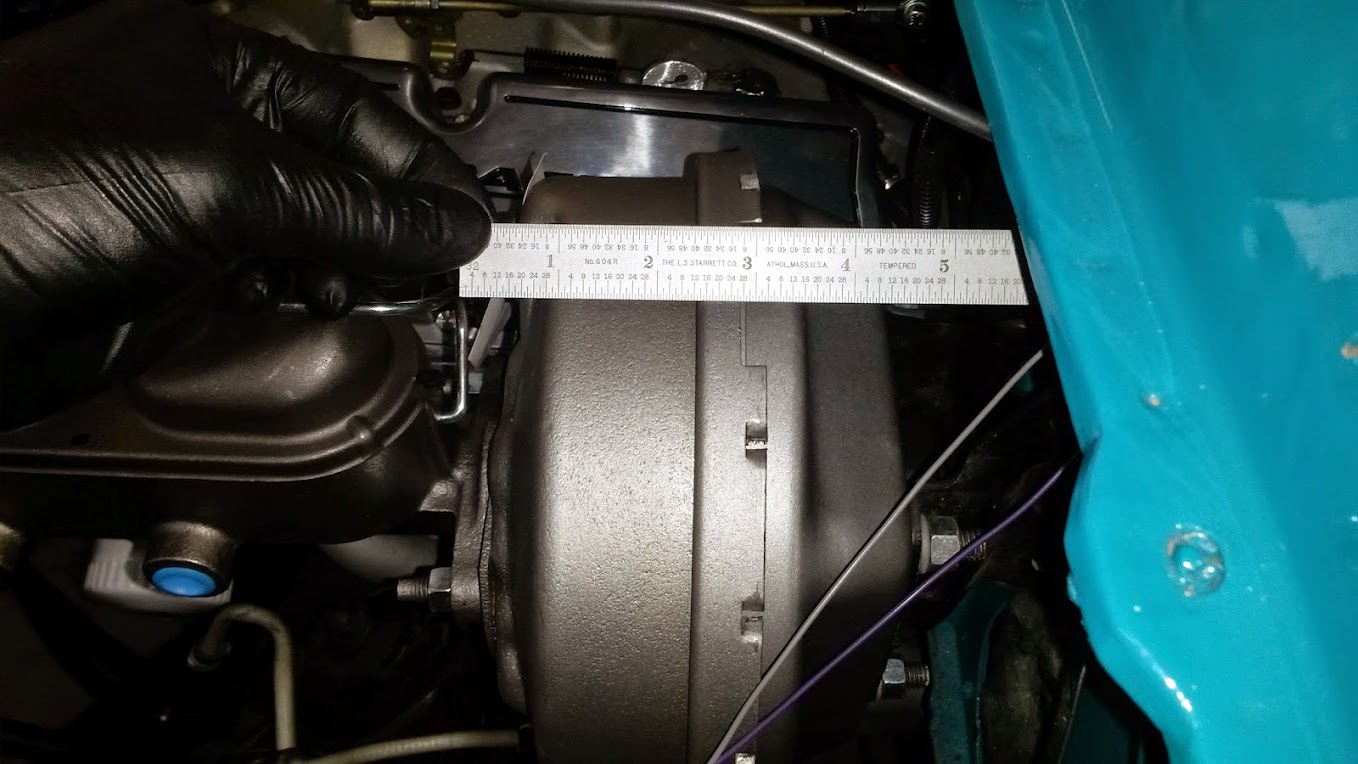
New booster: It is a little over 4.5" from master mounting surface to the bracket mounting surface.
Image
Image

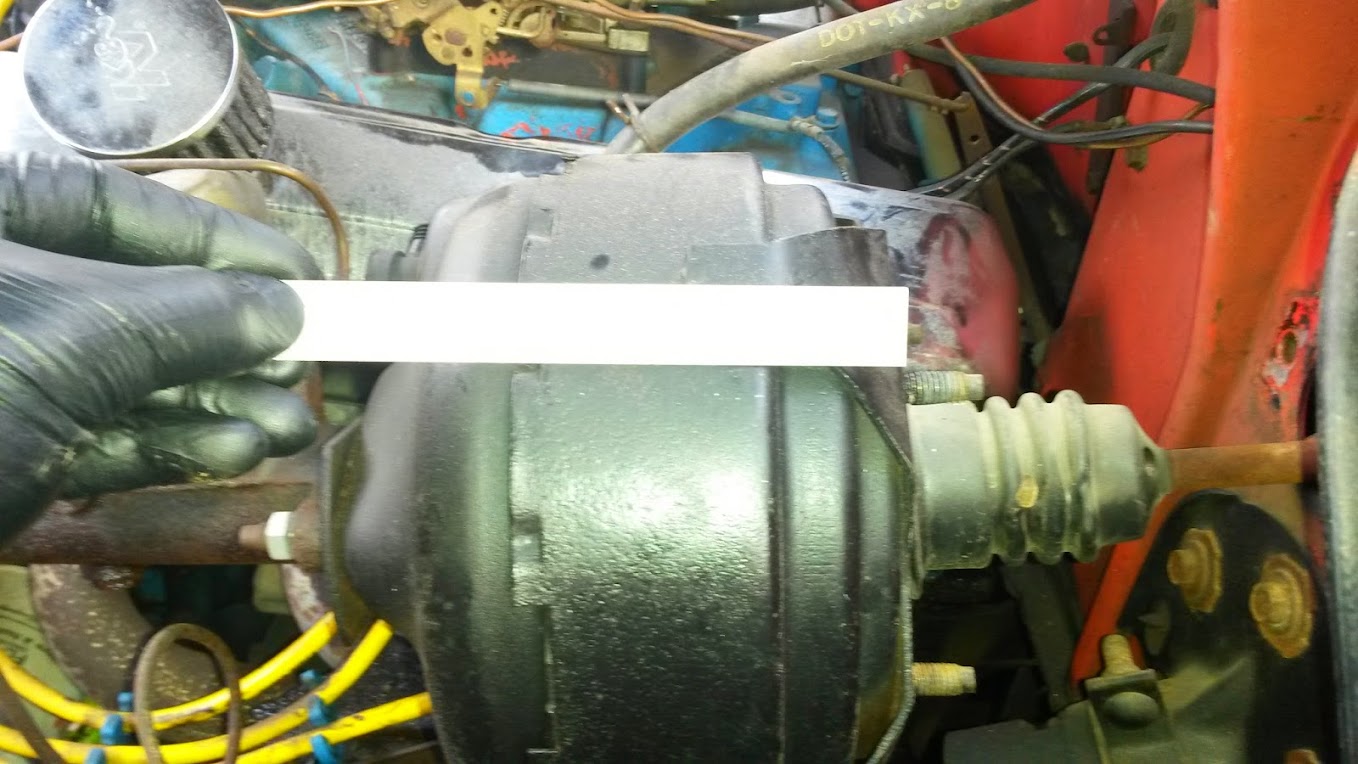
Old booster that I assume is for the 68. I know you cannot read the measurement, but it is a little over 5" from the master mounting surface to the bracket mounting surface.
Image

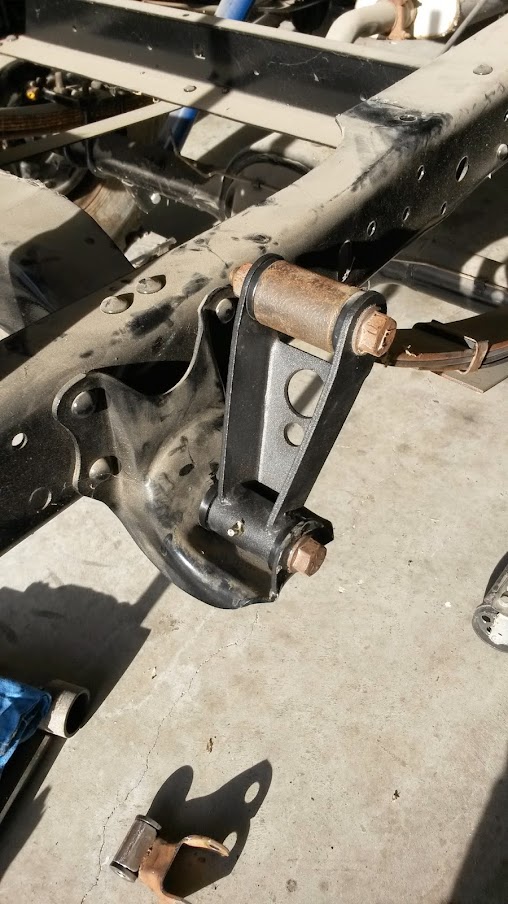
This is just a picture of the sway bar I installed. It is from LMC.
Image

My remaining obstacles to get it on the road are, fuel tank, finish the brake system (bend all lines, mount prop. valve, make or buy booster brackets), a couple odd loose wires, and seat brackets.
1971 f100 Custom, SWB, 302, T5
"It can't be that hard."
User avatar
shortstack
New Member
New Member
Posts: 129
Joined: Wed Sep 22, 2010 9:45 am
Location: Austin TX

Re: 1971 short wide (shortstack)

Post by shortstack »

1971 f100 Custom, SWB, 302, T5
"It can't be that hard."
User avatar
Mancar1
100% FORDified!
100% FORDified!
Posts: 5390
Joined: Thu Jun 10, 2010 8:13 am
Location: USS Gramps Garage (DD-727) Tehama County, Northern Ca.

Re: 1971 short wide (shortstack)

Post by Mancar1 »

Enjoying following along.
May your sails stay full, and your knots not slip. Unless a slip knot.
Once I thought I was wrong, but I was wrong.
Life is a banquet, and every days a feast.
68 F-250 CS 390 C-6 P/S A/C front disc. 2nd owner.
2016 GMC Terrain Denali 301 HP V-6 AWD.
2009 Silverado Crew Cab, V-8, 4X4.
DD-727
DD-806
AE-35
LSD-39
AS-41
AR-8
Post Reply