Finally back around to my 72 F100

Post progress reports on your project truck(s)

Moderator: FORDification

Post Reply
User avatar
MAK
Blue Oval Fan
Blue Oval Fan
Posts: 514
Joined: Tue Dec 21, 2004 9:35 am
Location: Georgia, Blairsville - Florida, Flagler Beach
Contact:

Finally back around to my 72 F100

Post by MAK »

Well I finally got back around to finding some time to work on the Blue Goose. It’s been a few years since I had replaced the floor pans, did some interior restoration, and patched/primered an extra set of front fenders. Then I got tied-up building our cabin and the truck got put back to weekend construction use for over a year until parked/stored.
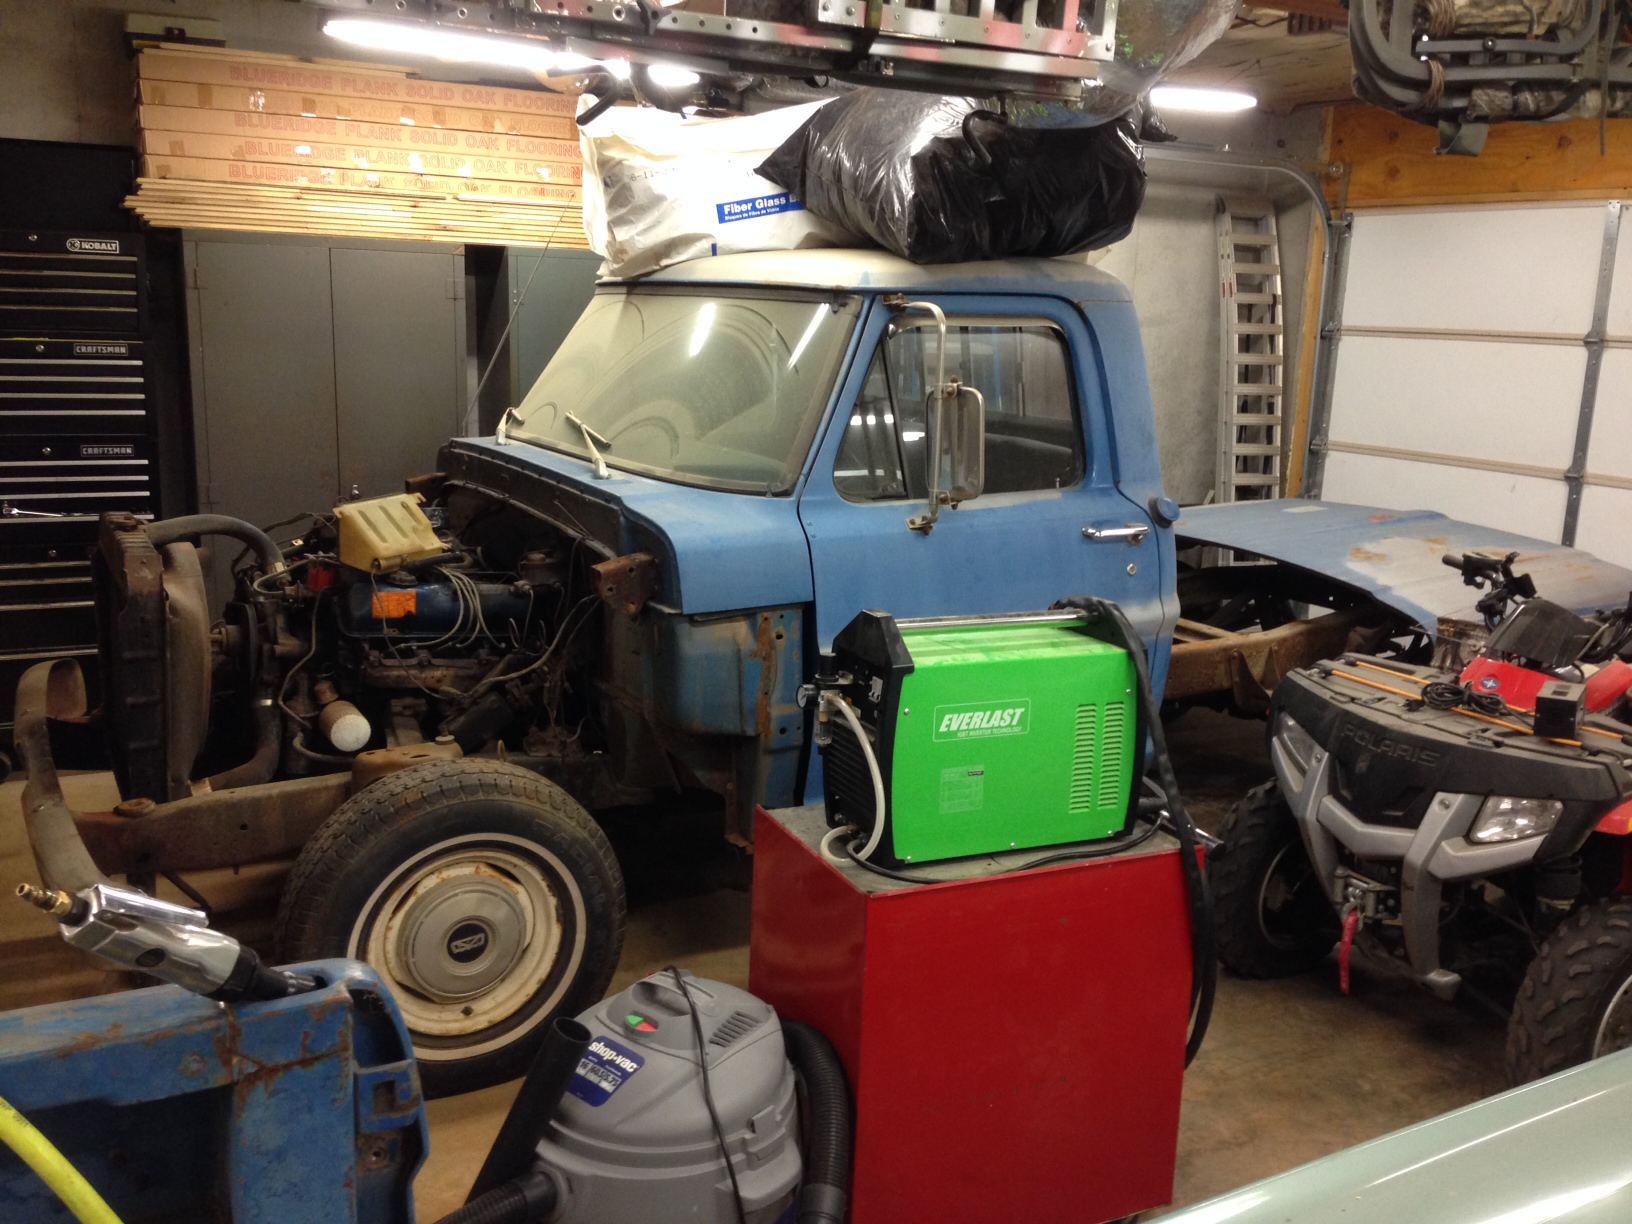
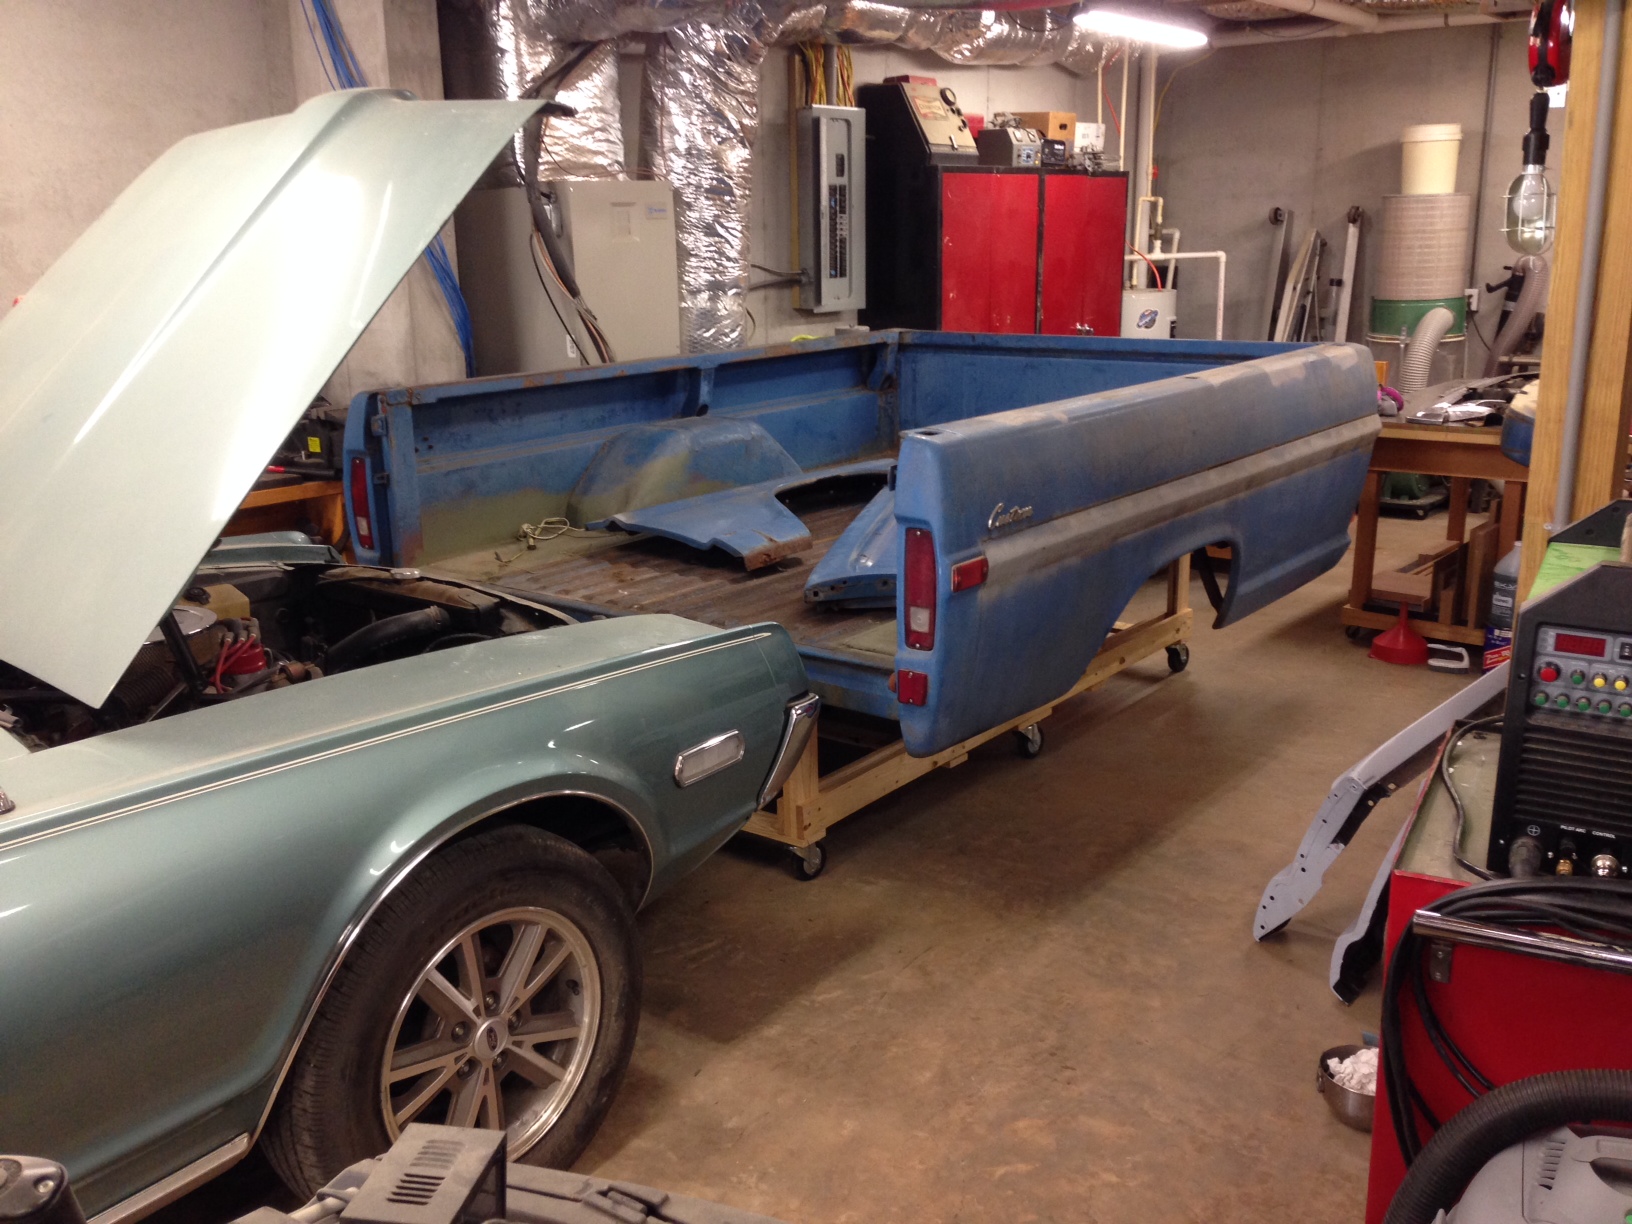
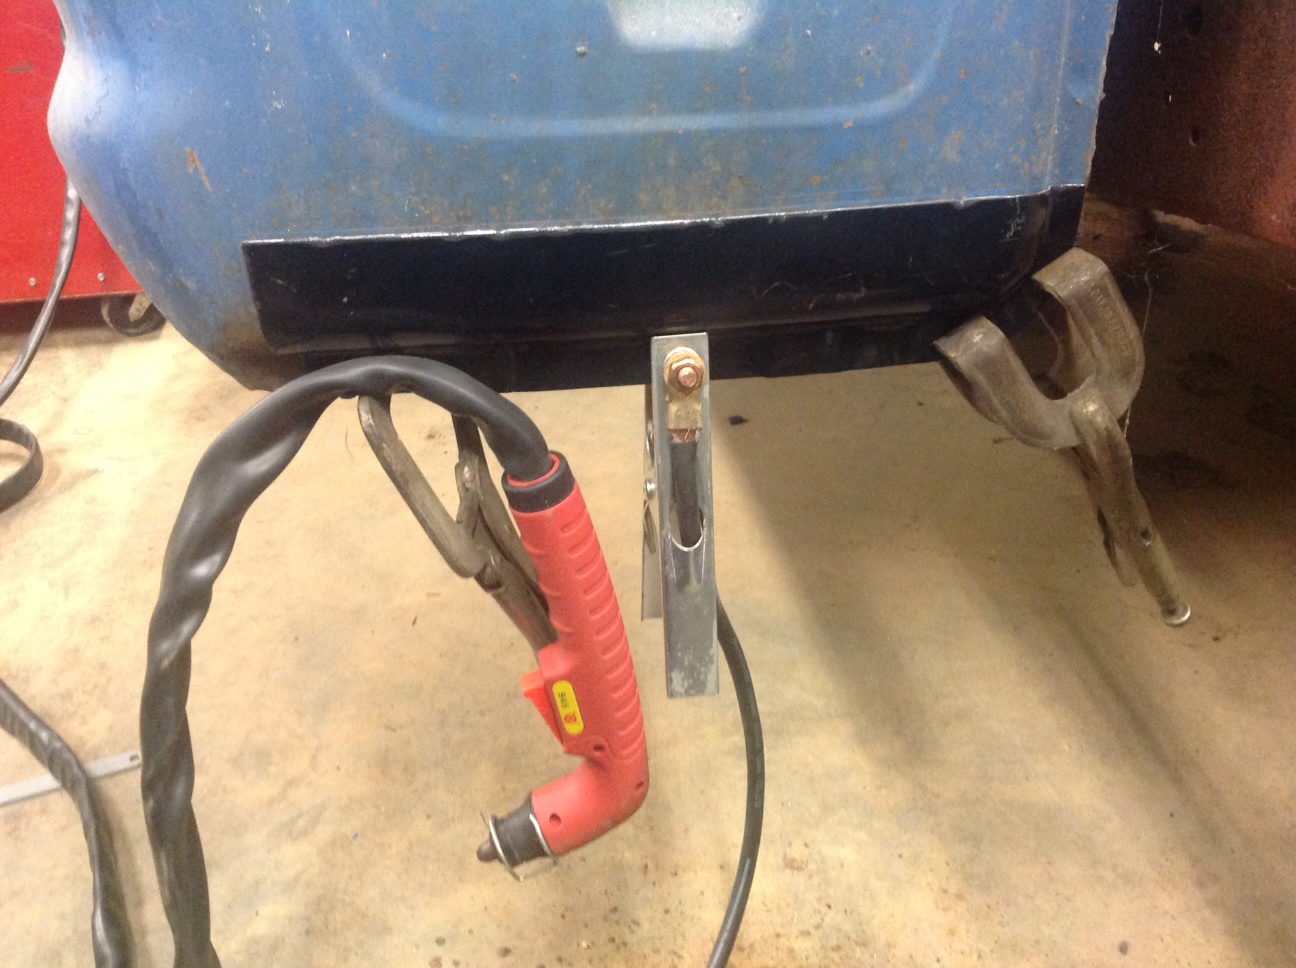
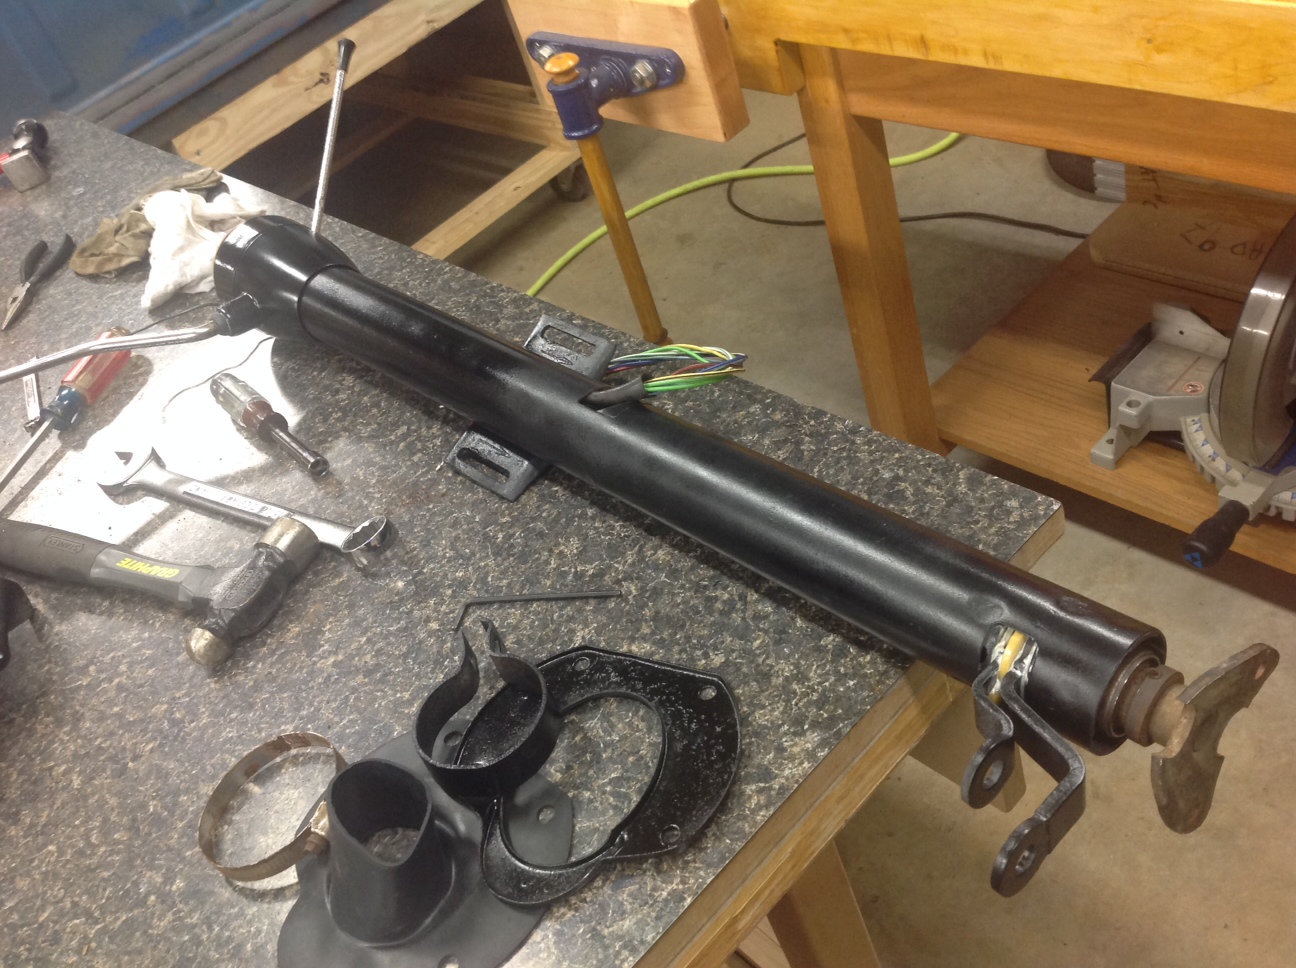
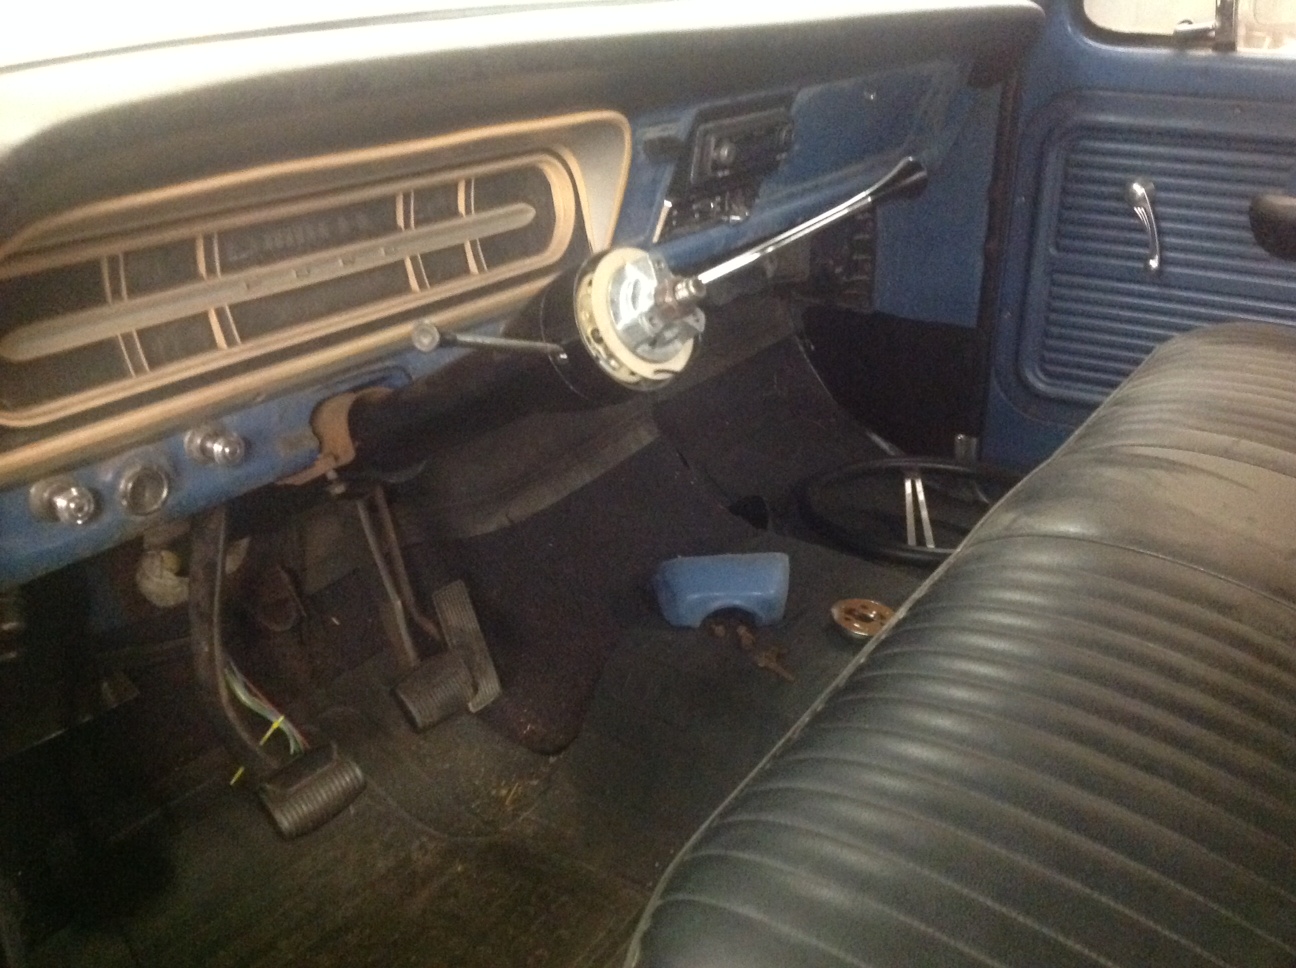
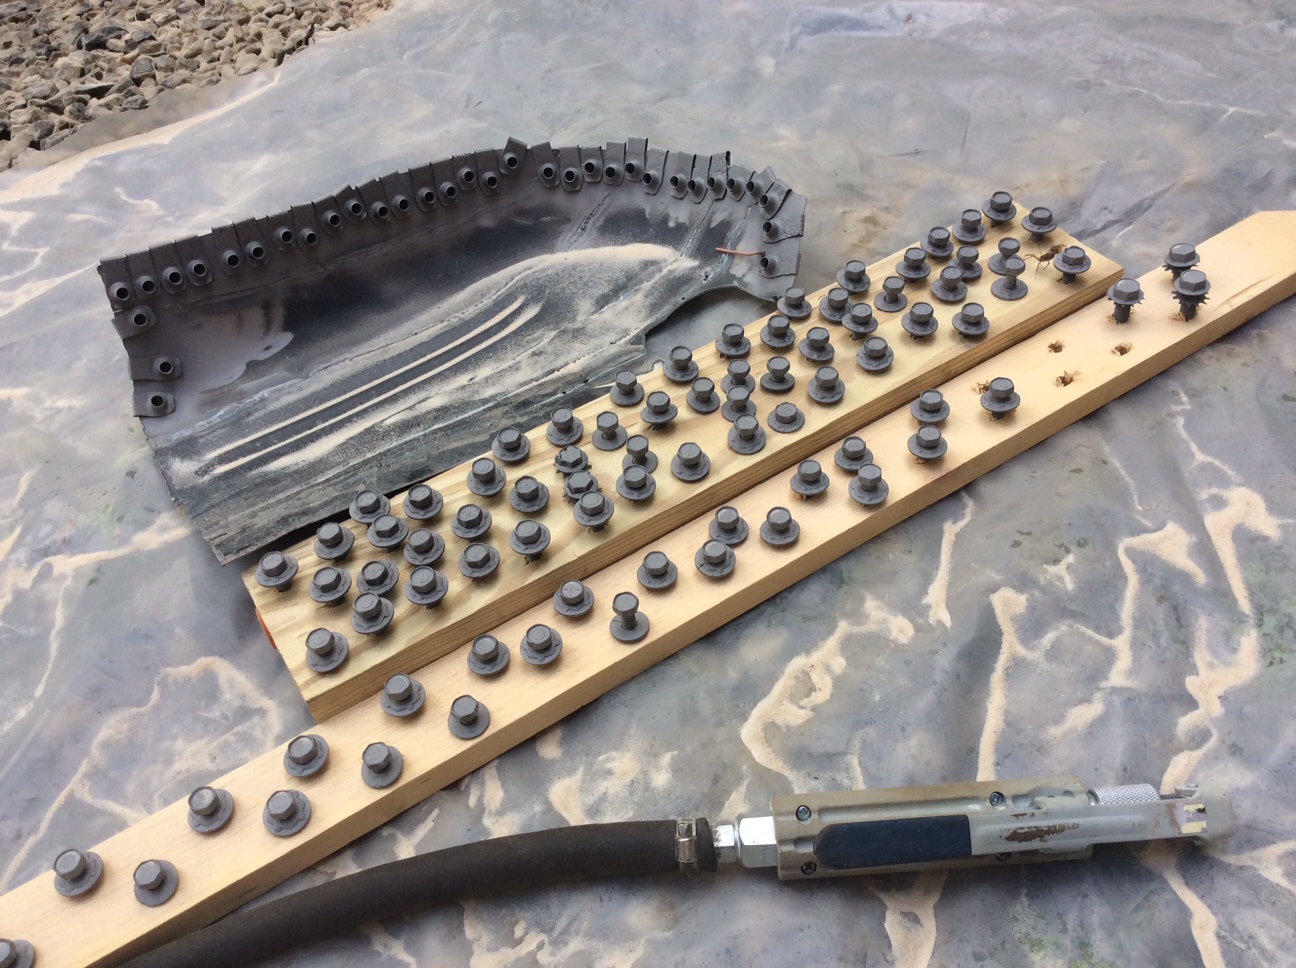
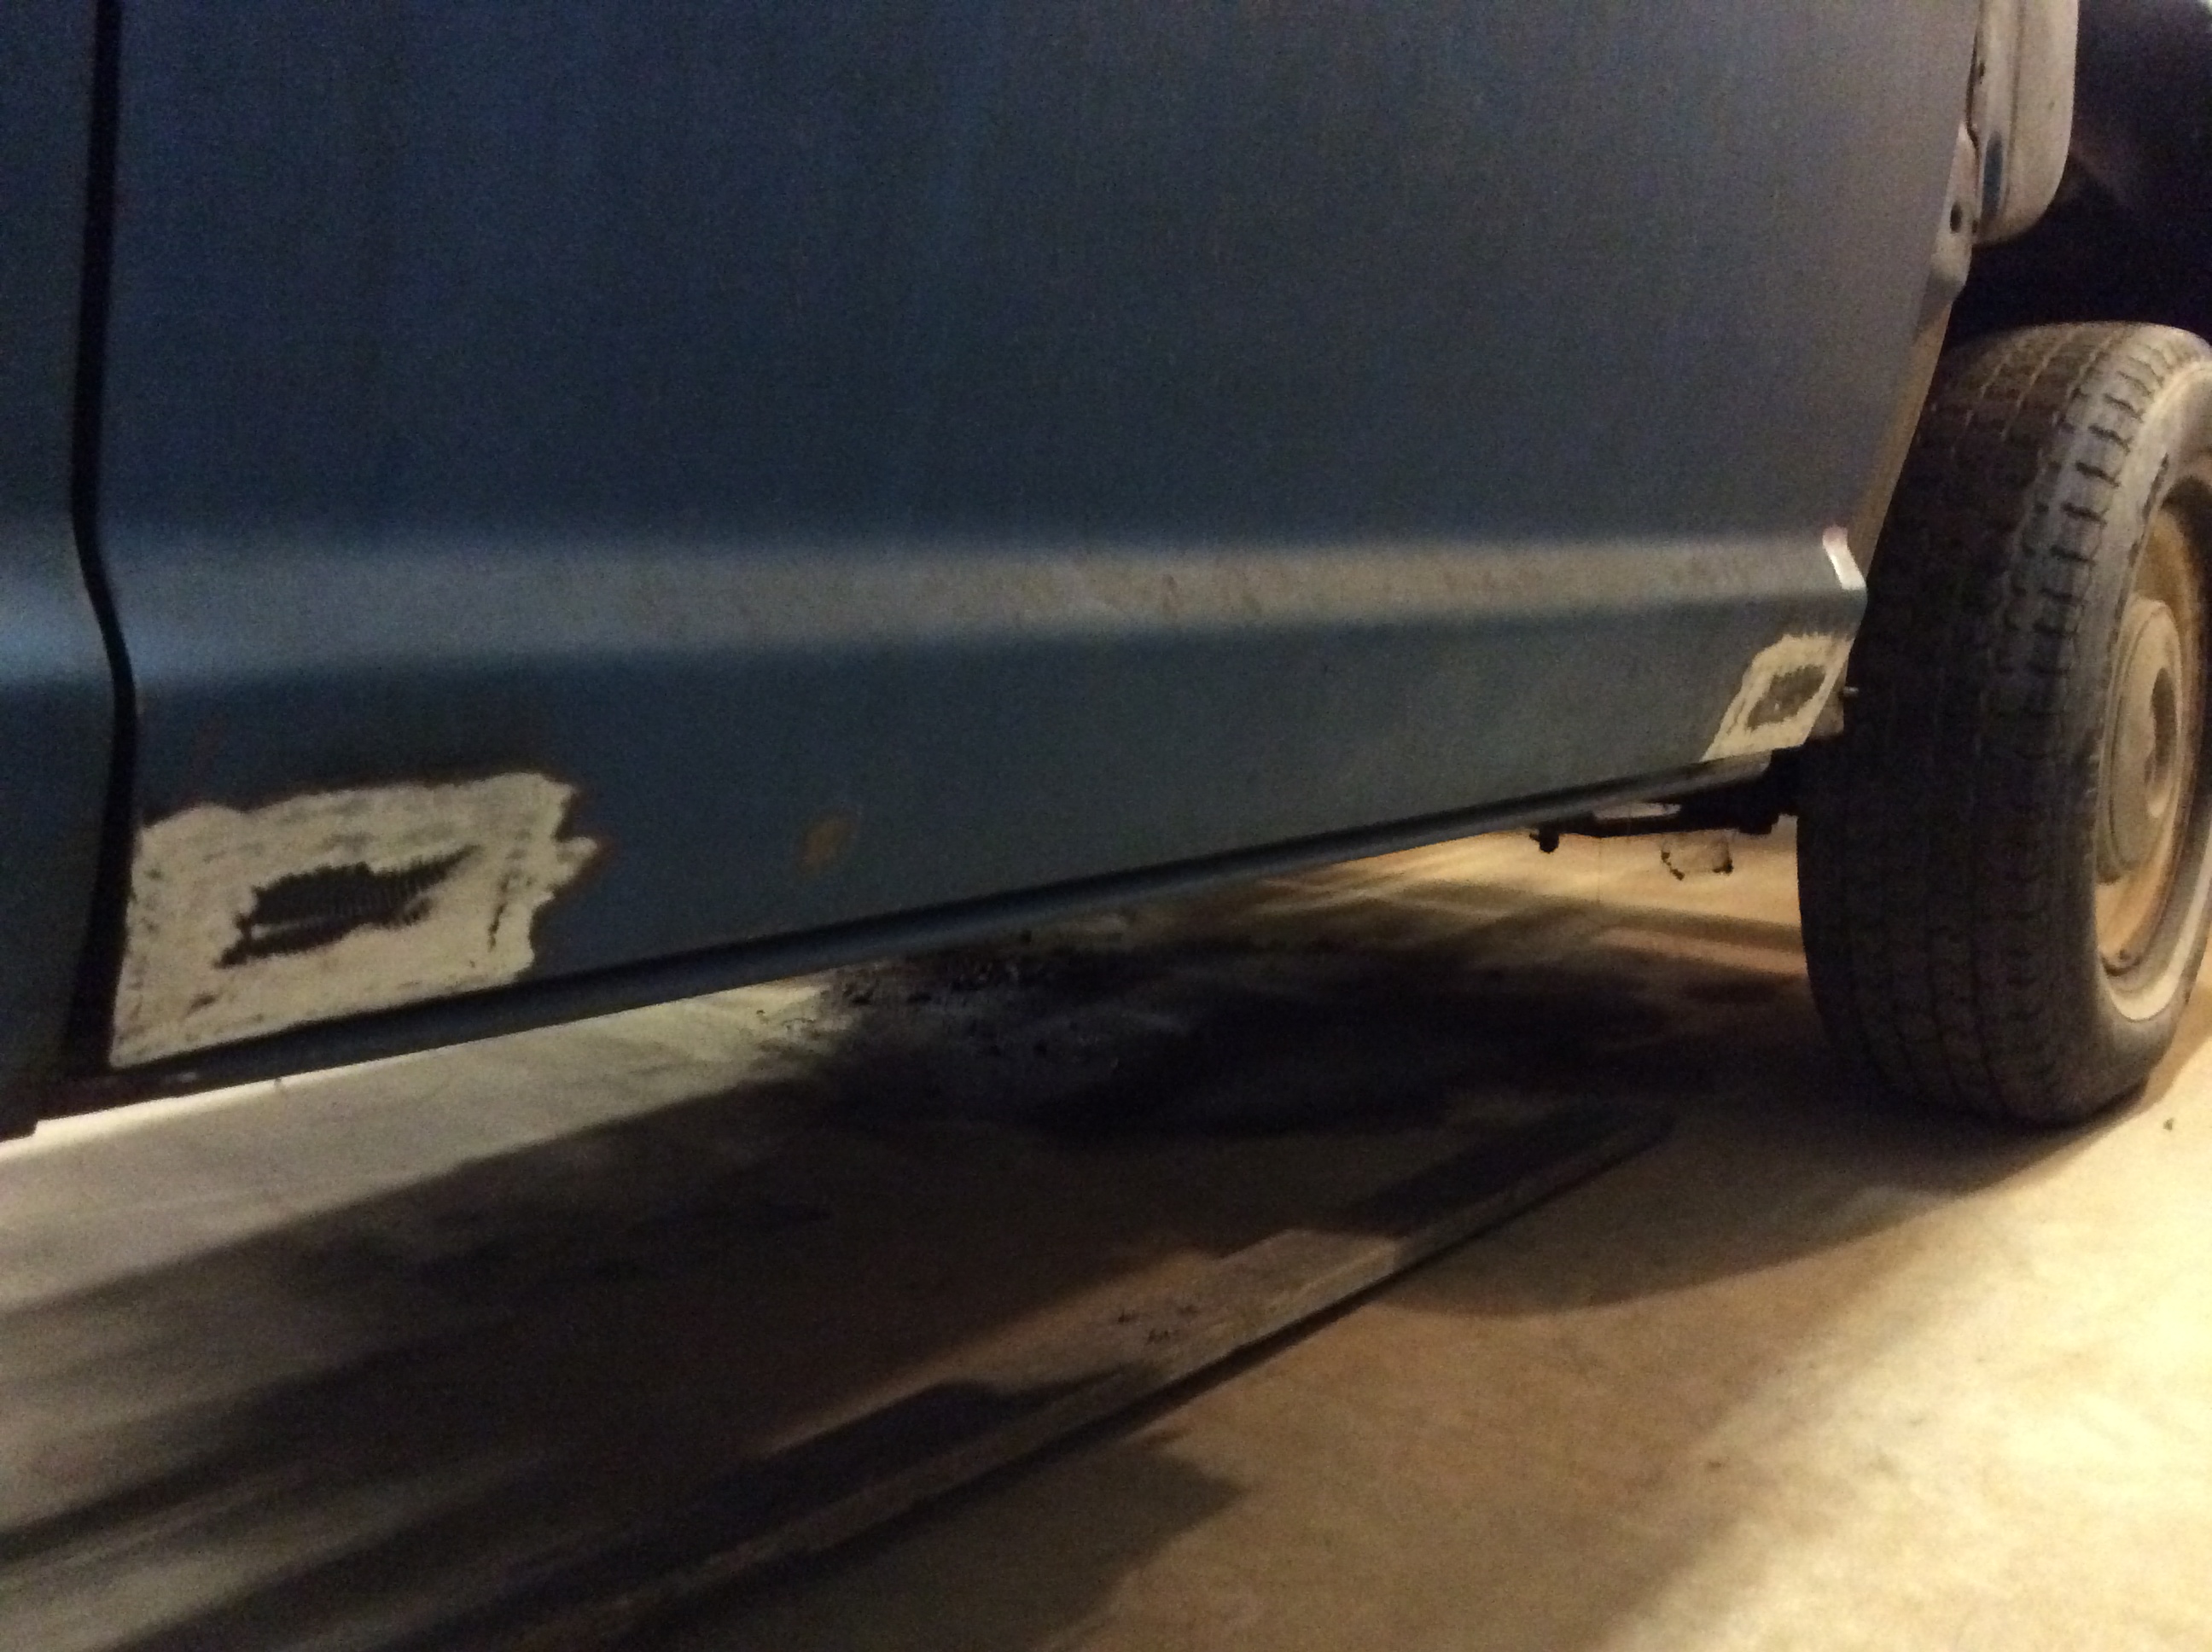
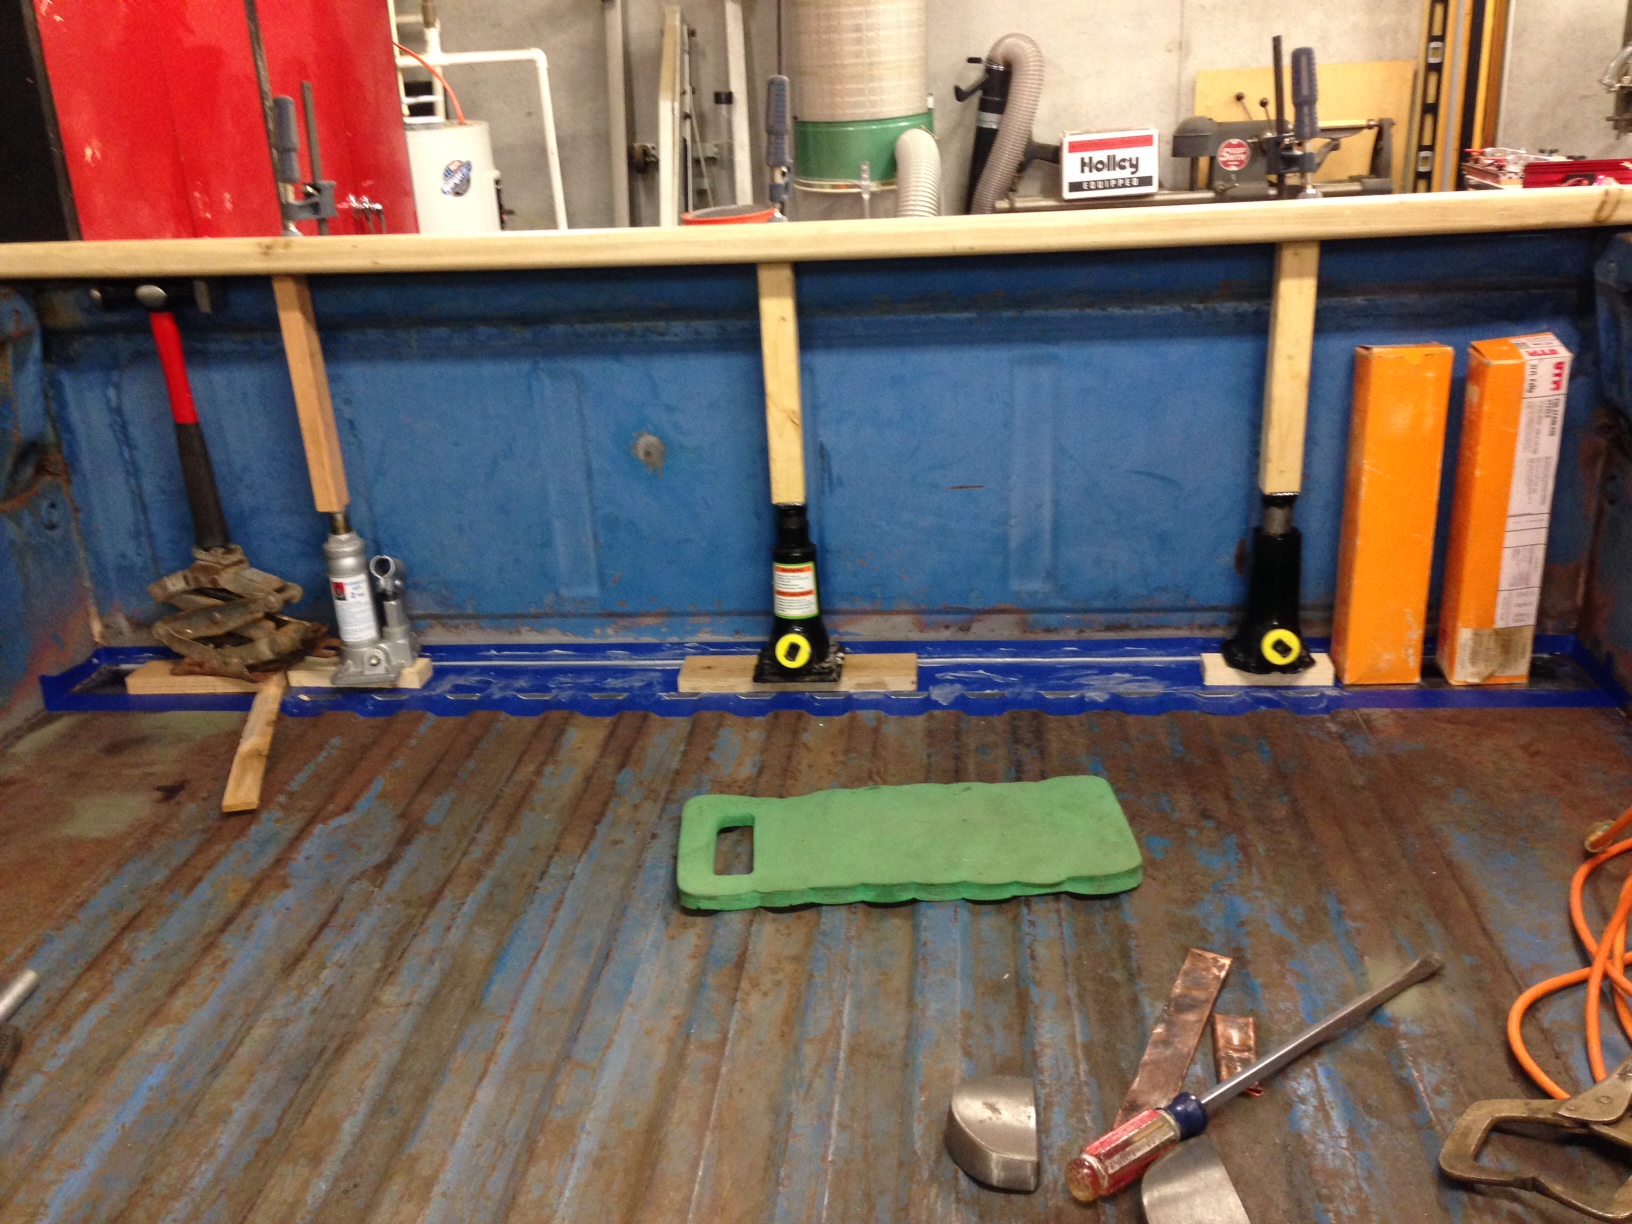
Spent the past couple weekends jumping around from one thing to the next. Disassembly, some sand blasting, scrubbing with Ospho, converting to power steering, cutting, and welding in some patches.
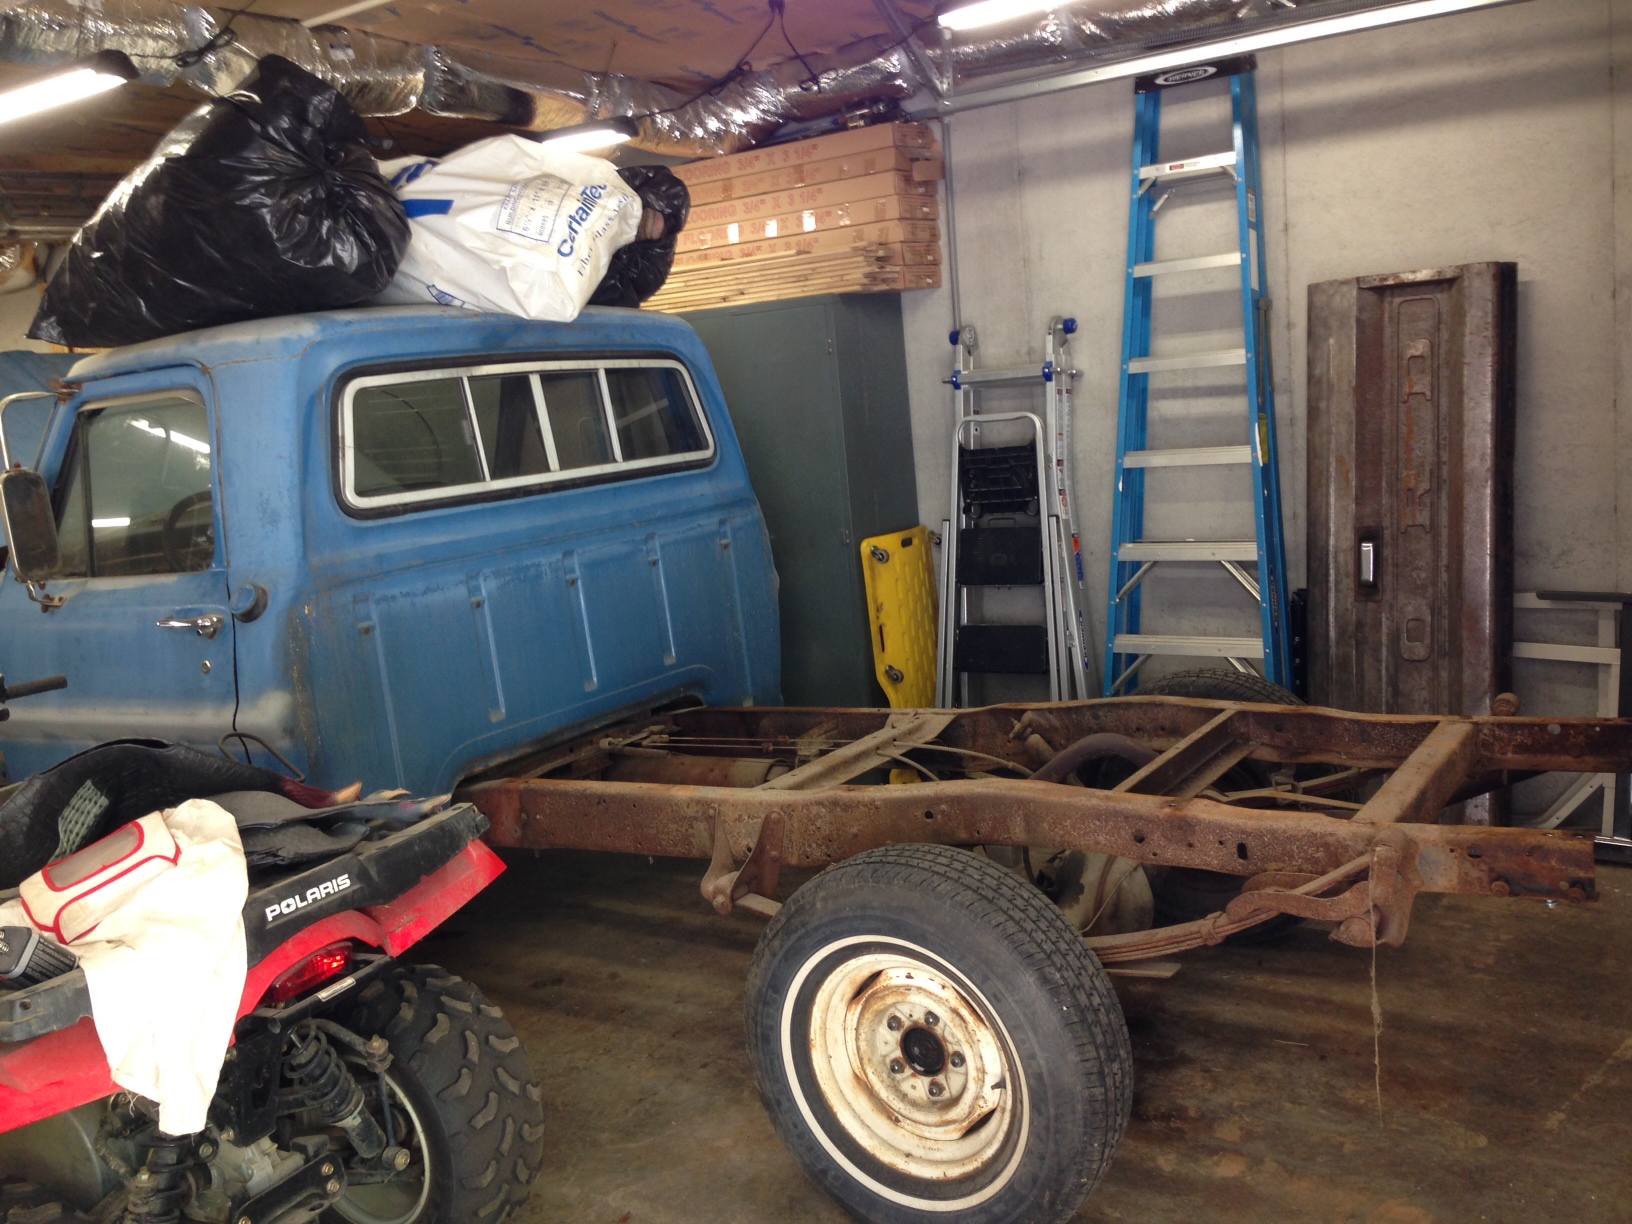
I’m really struggling with how far I want to take this. I would really like to just take care of the rust-through, paint and get it back as an occasional driver. Not really looking for a show car but I’m still trying to decide how much time I want to invest on the frame and bottom of the bed for instance. i.e. Do I go ahead and spend a few weekends blasting the exposed areas of the frame and painting and also attack the bottom of the bed, or just leave it? (I’m sure not going to pull the cab and strip the frame further.)
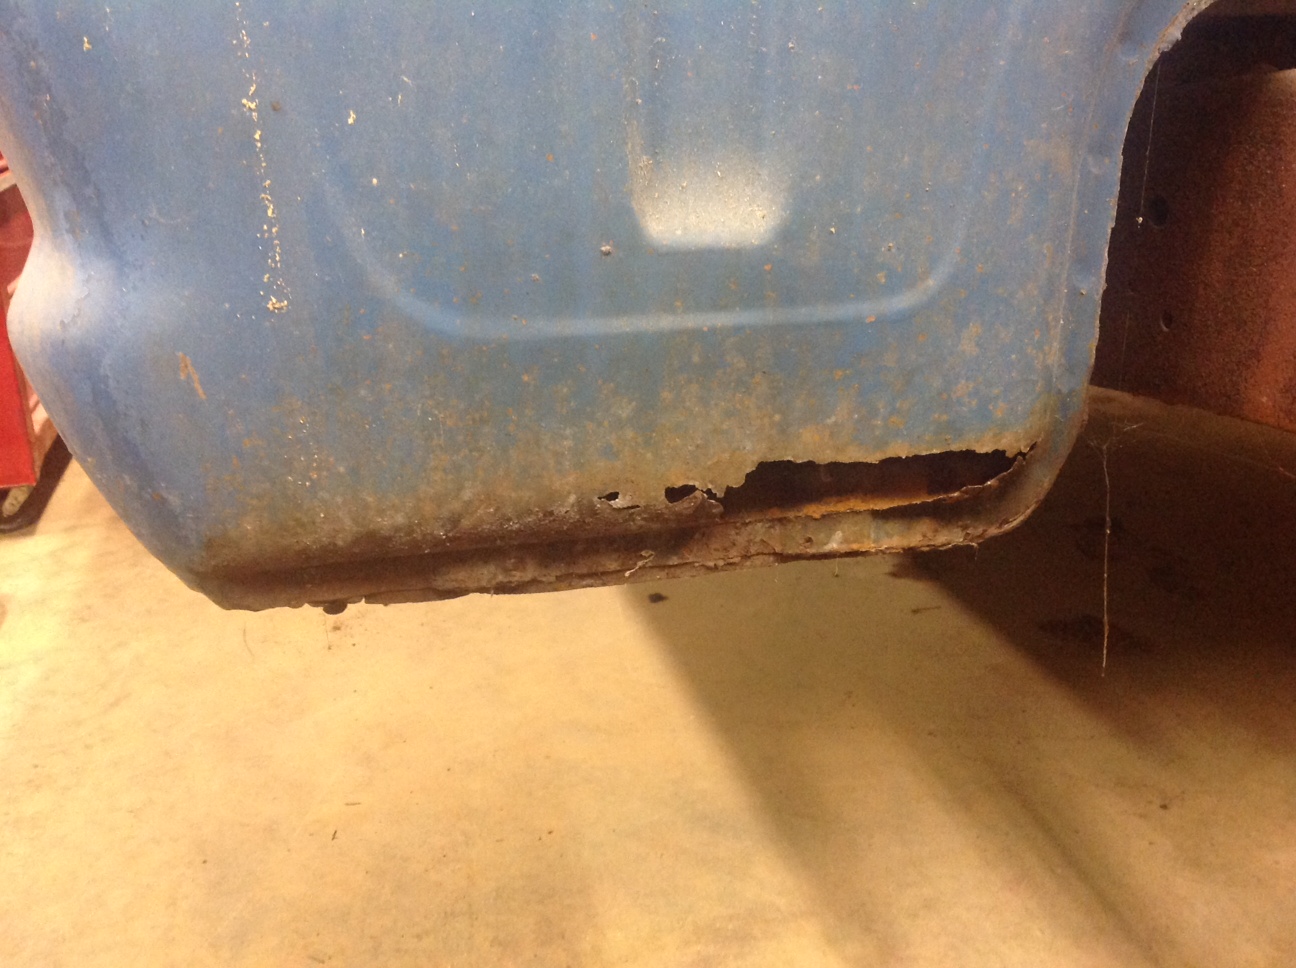
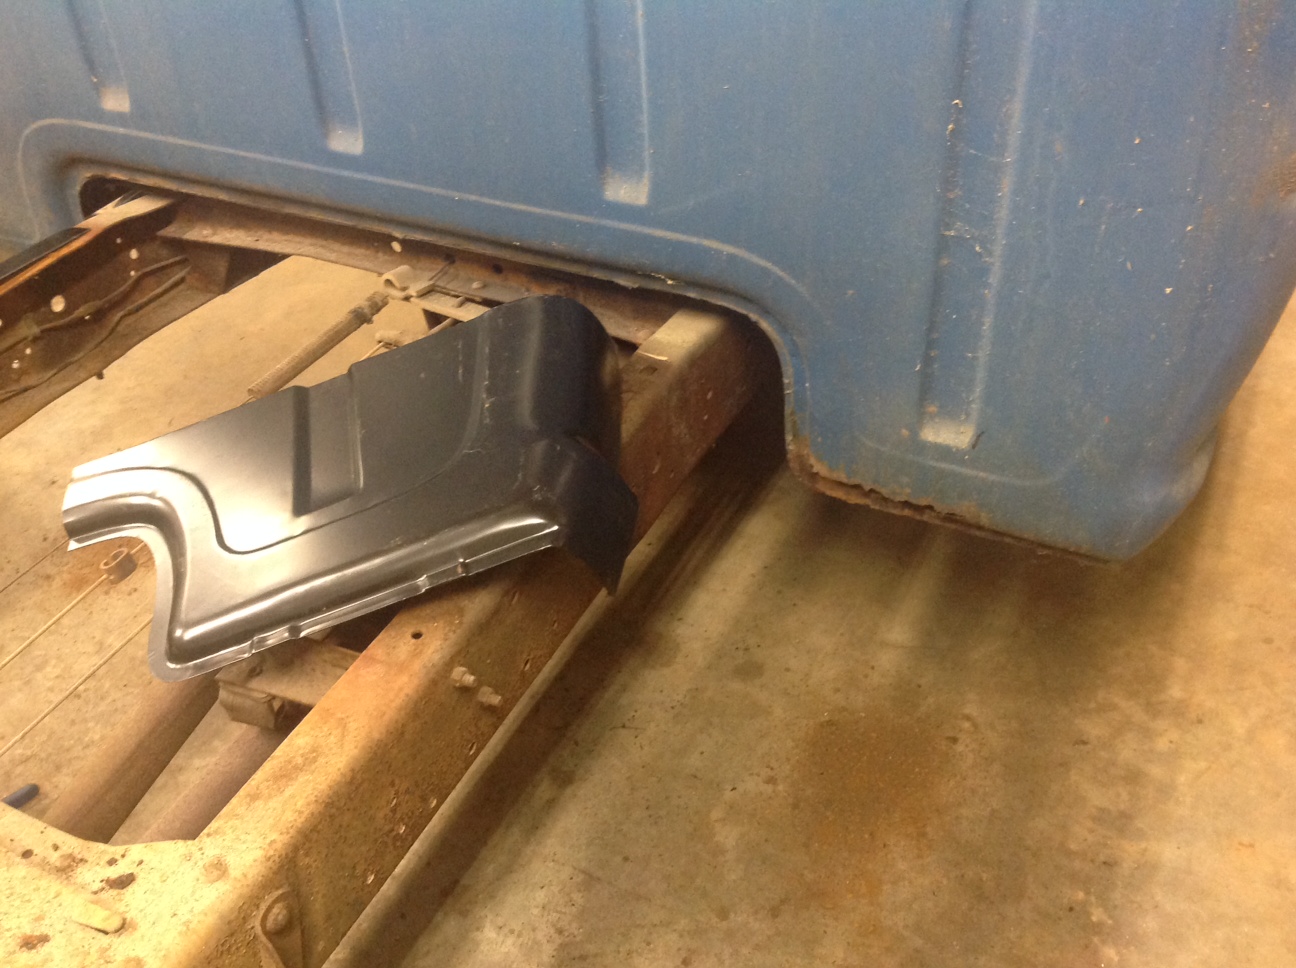
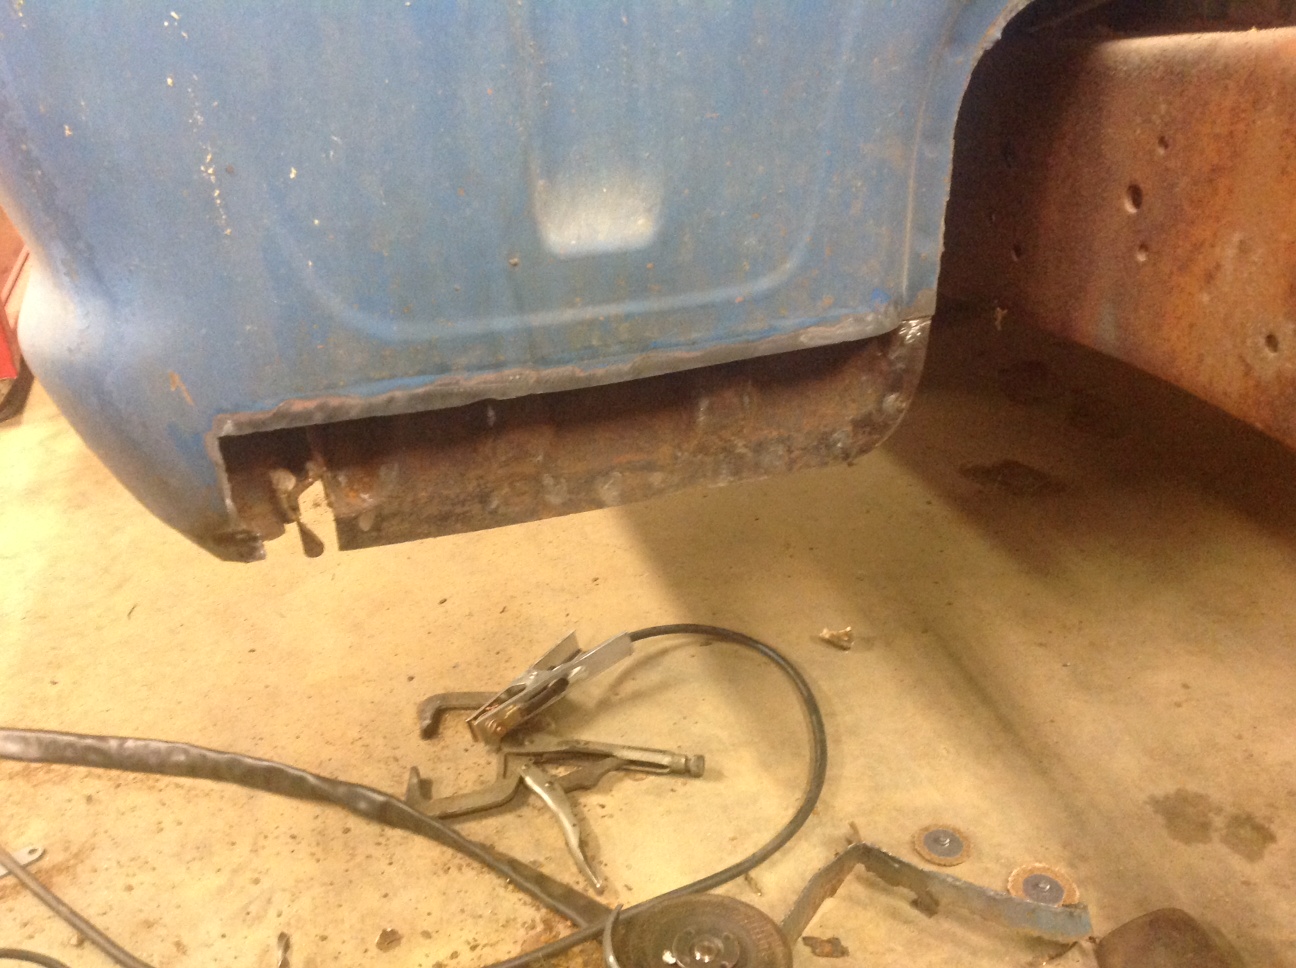
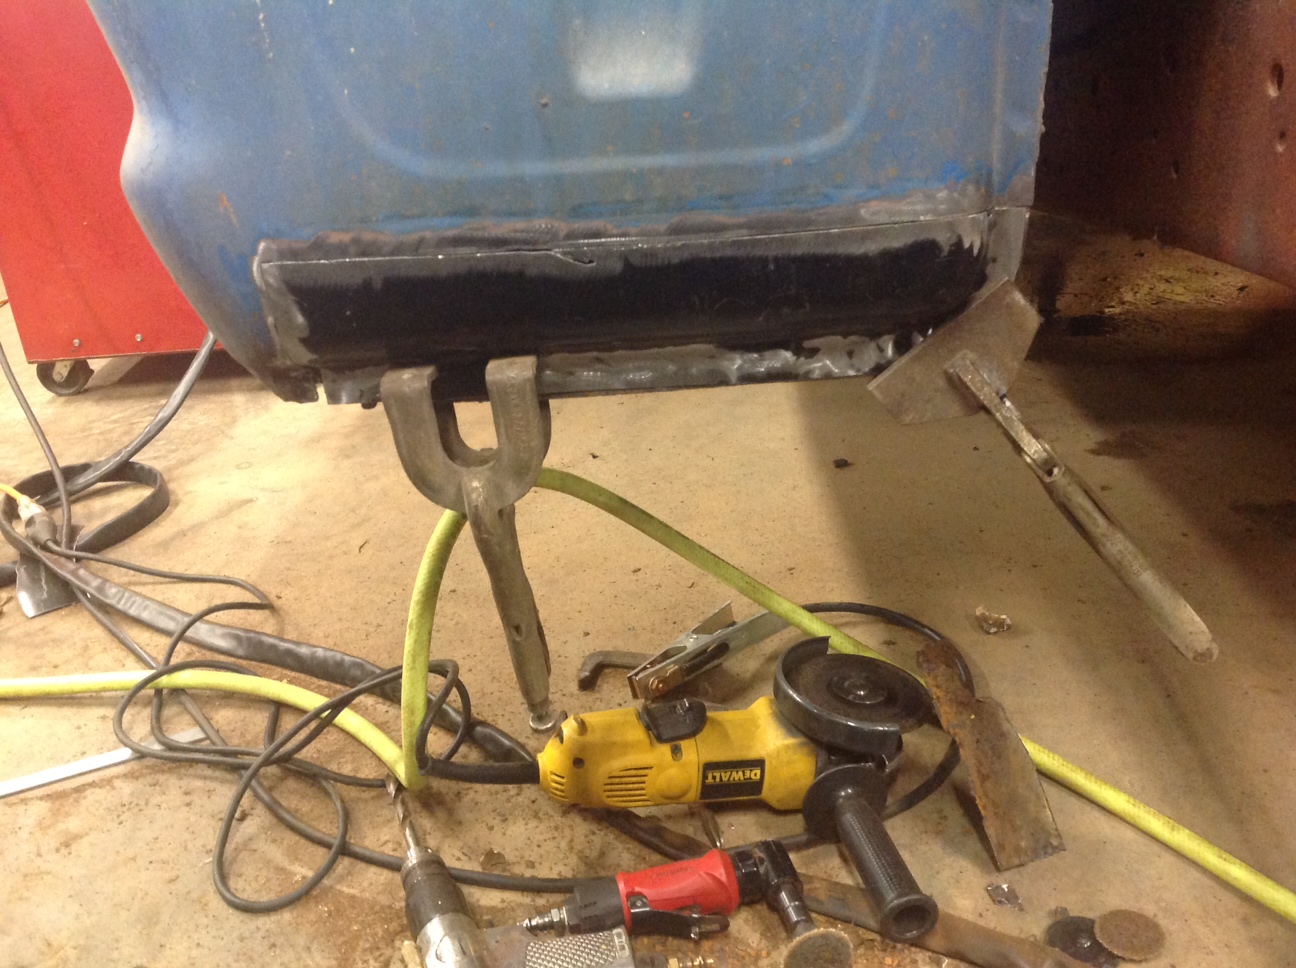
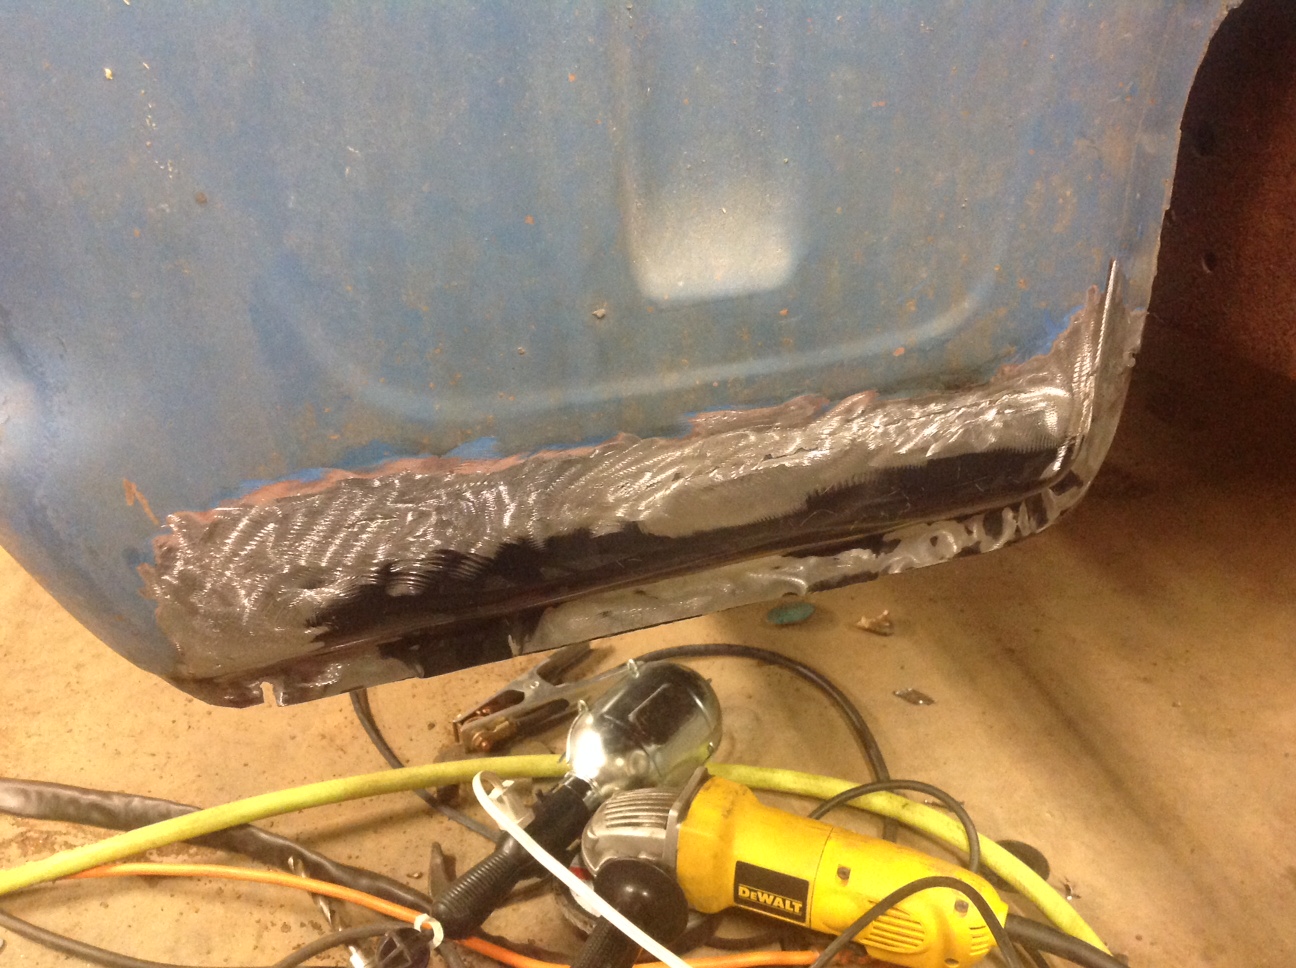
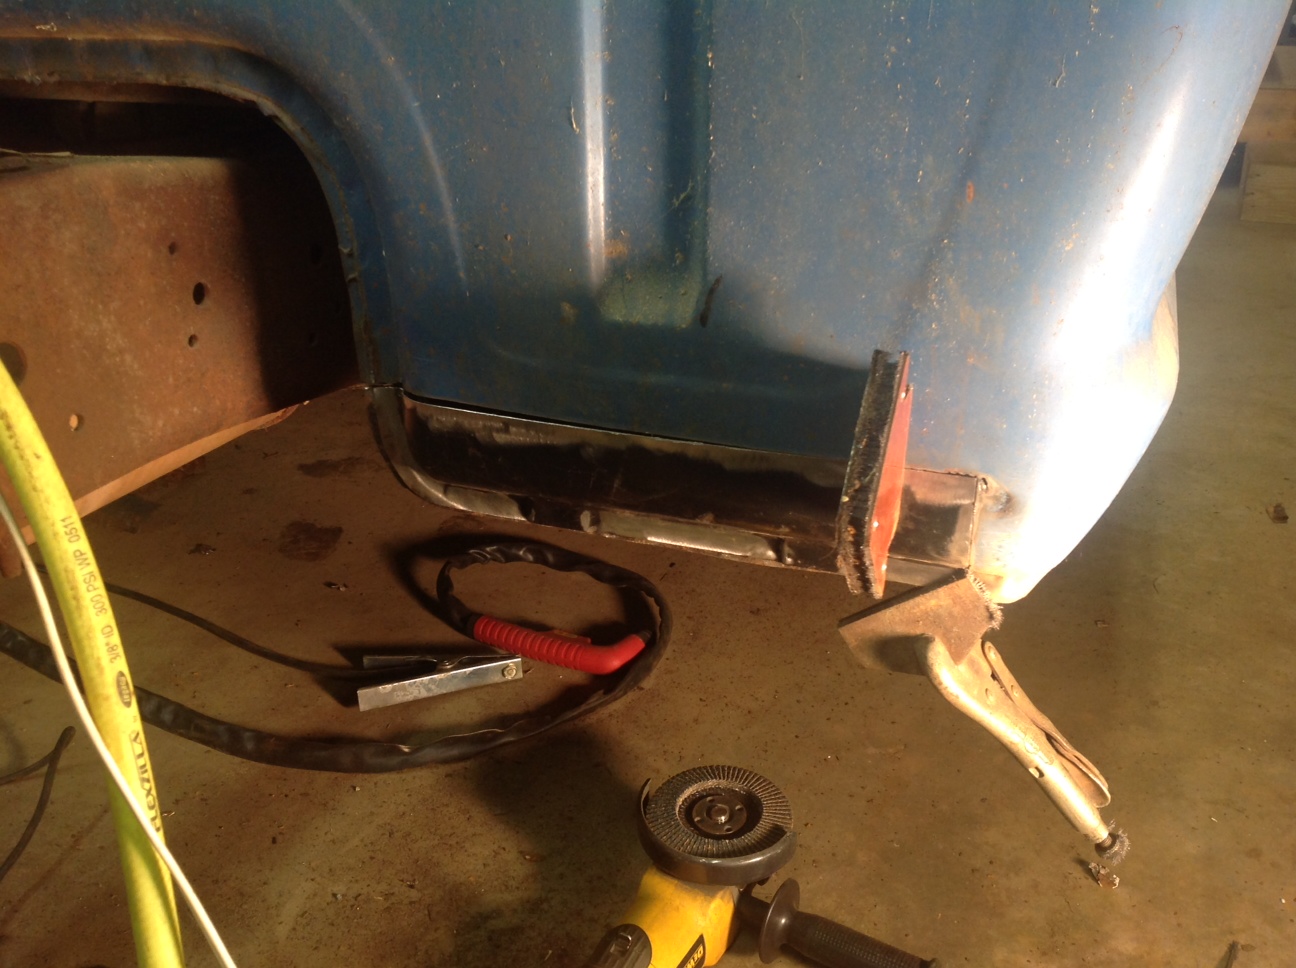
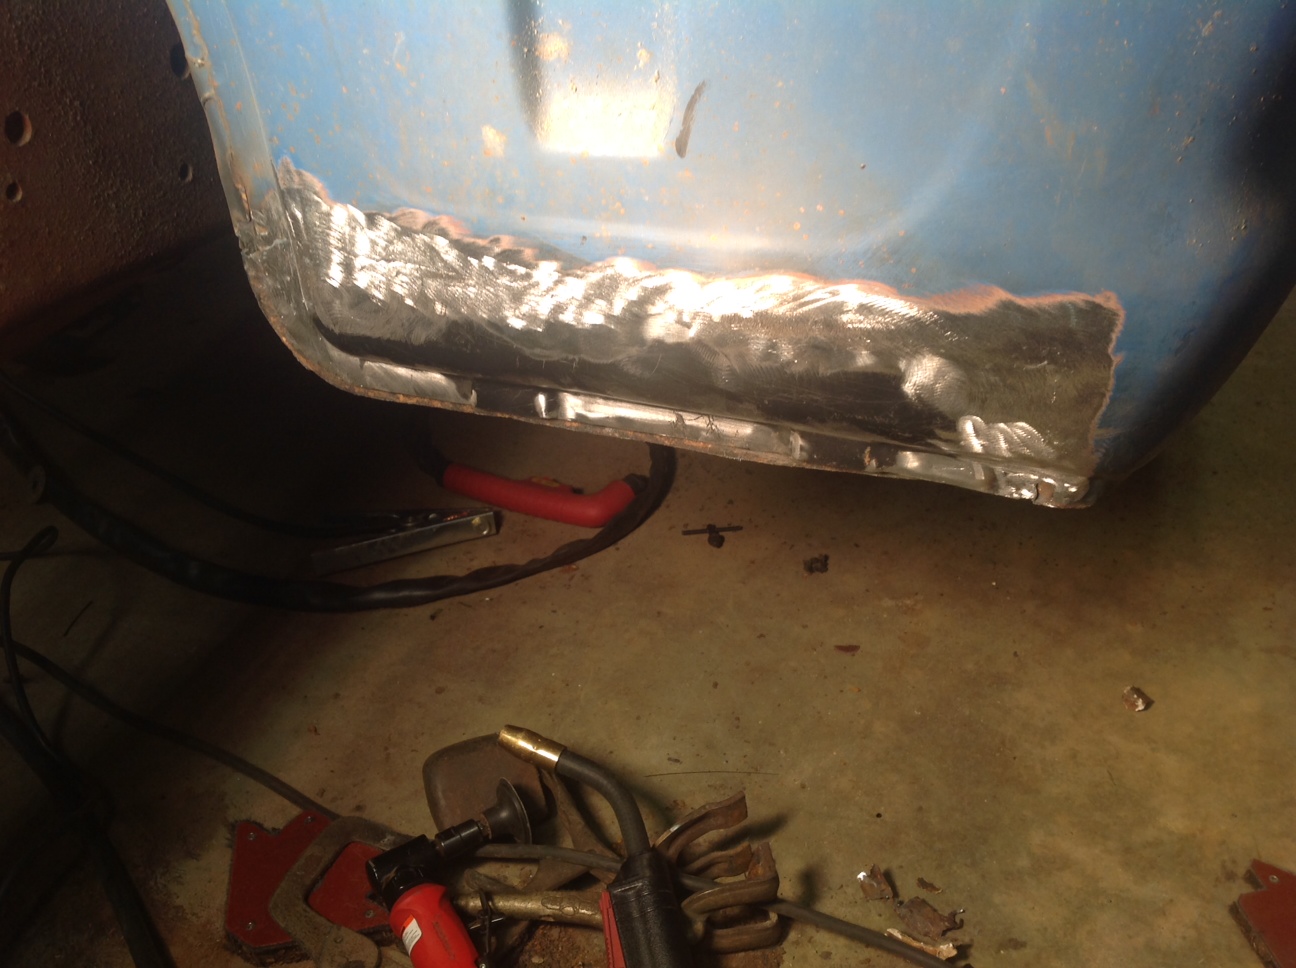
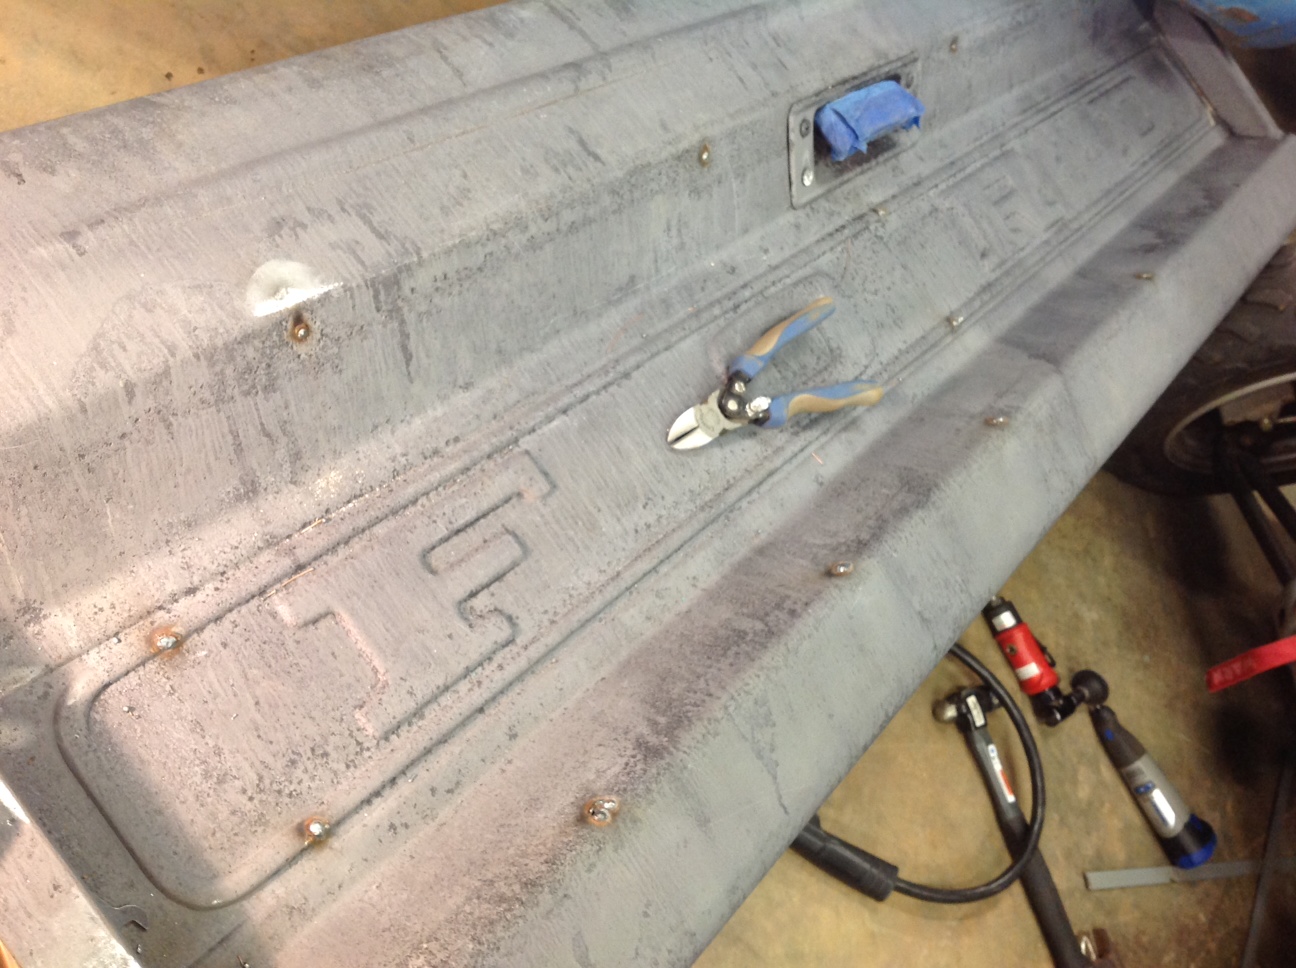
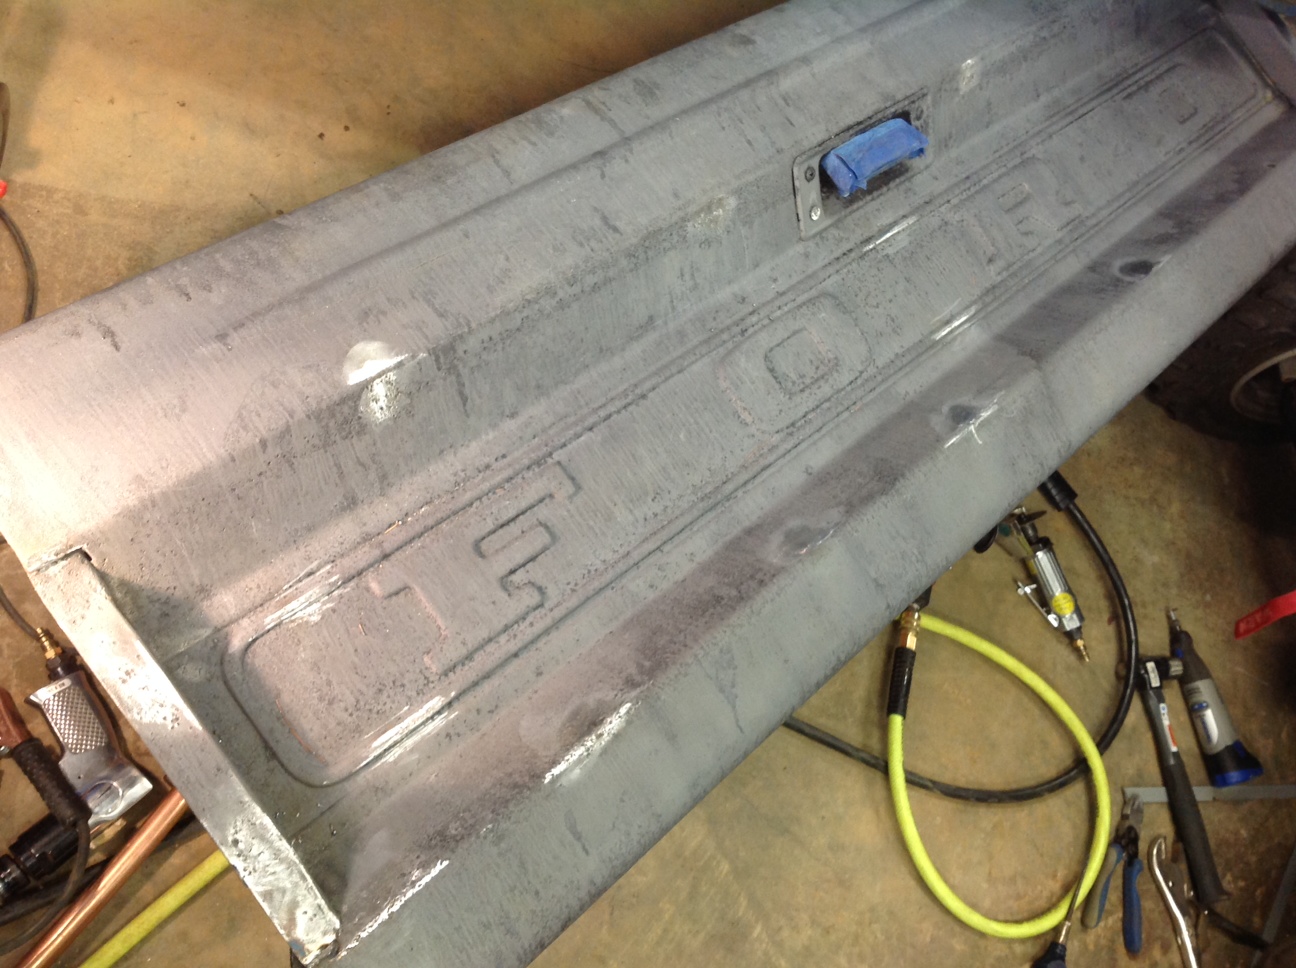
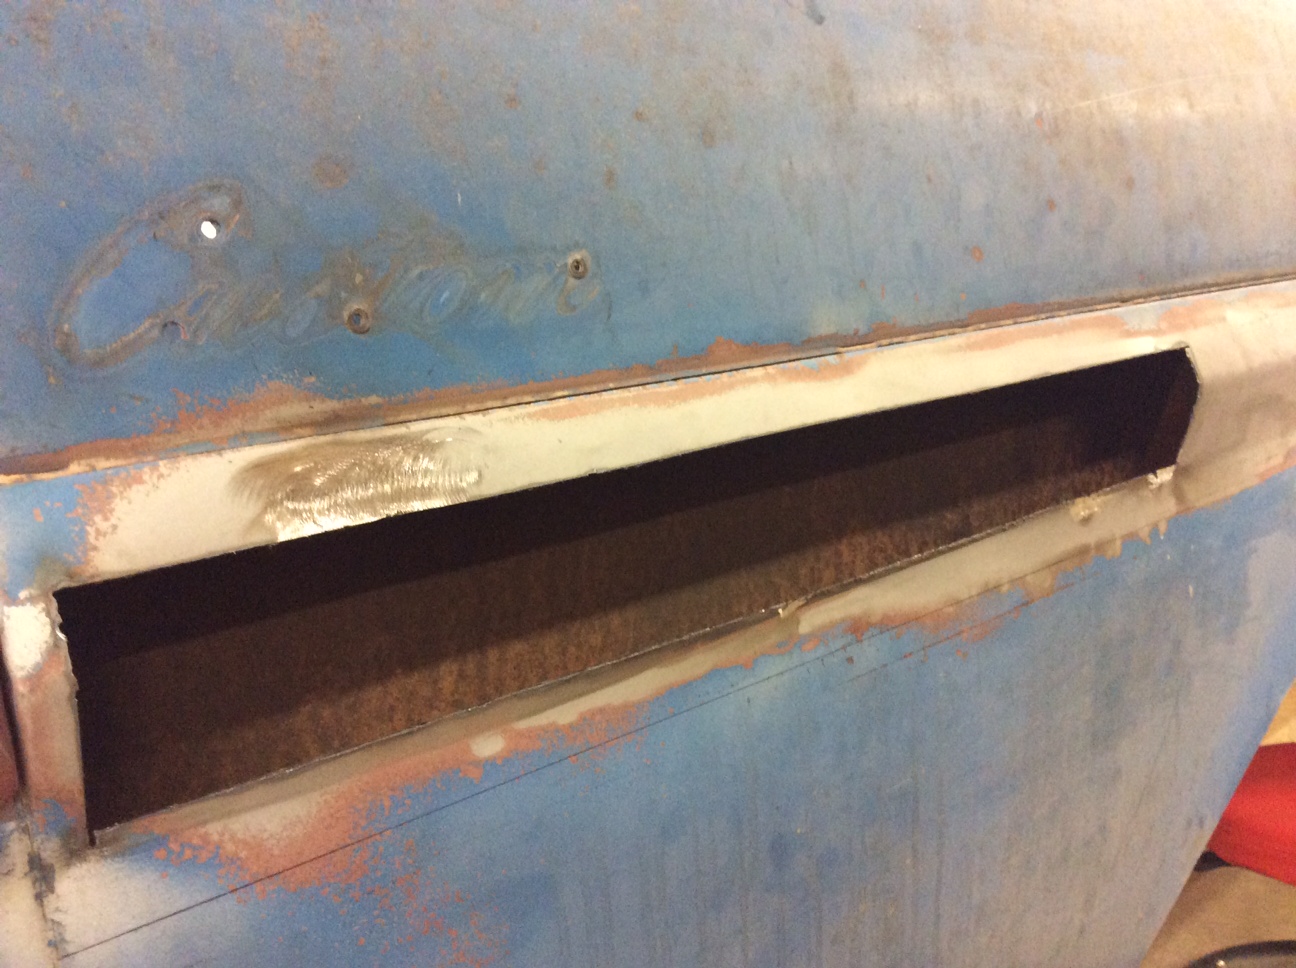
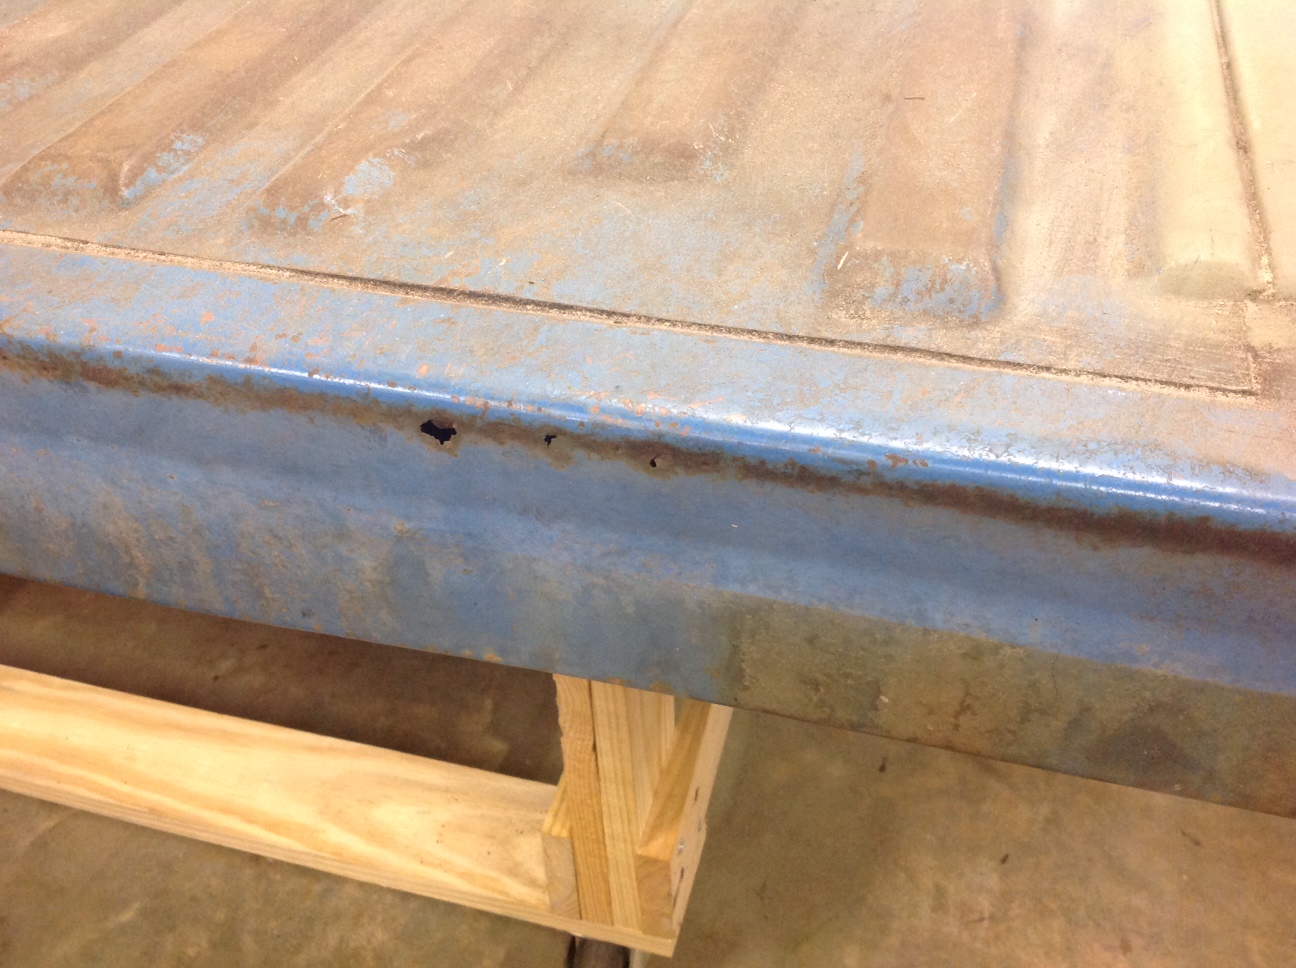
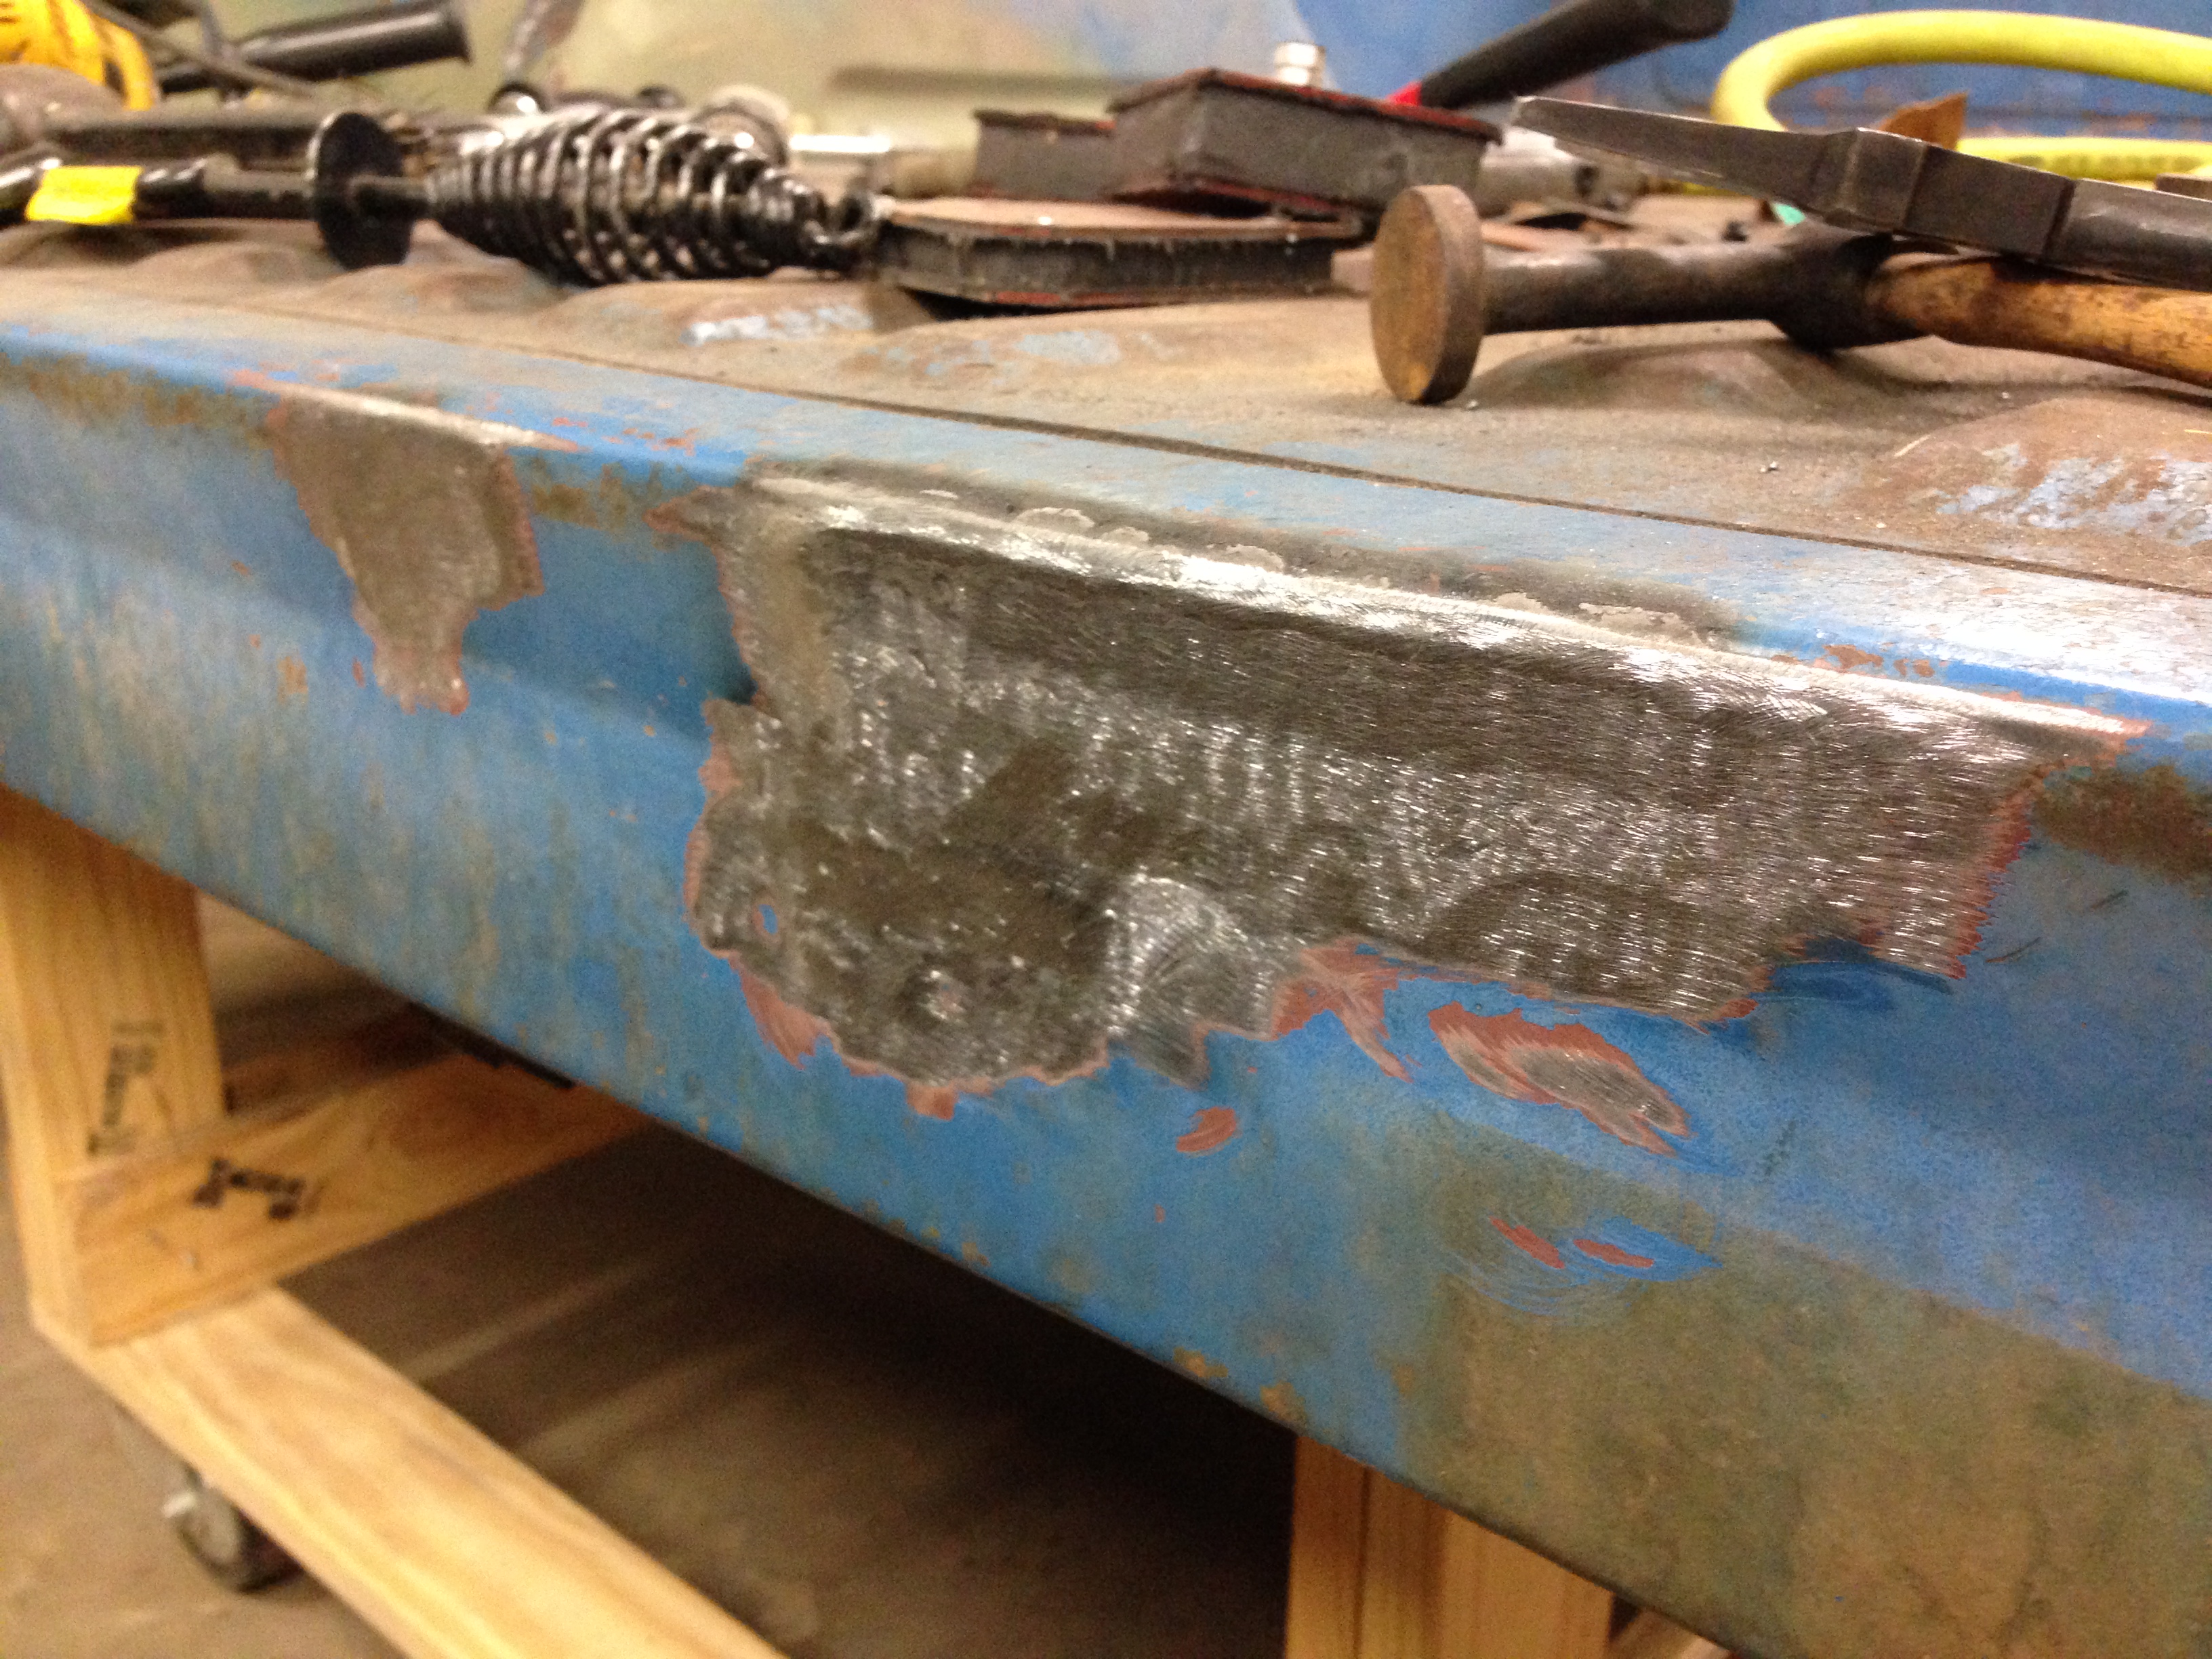
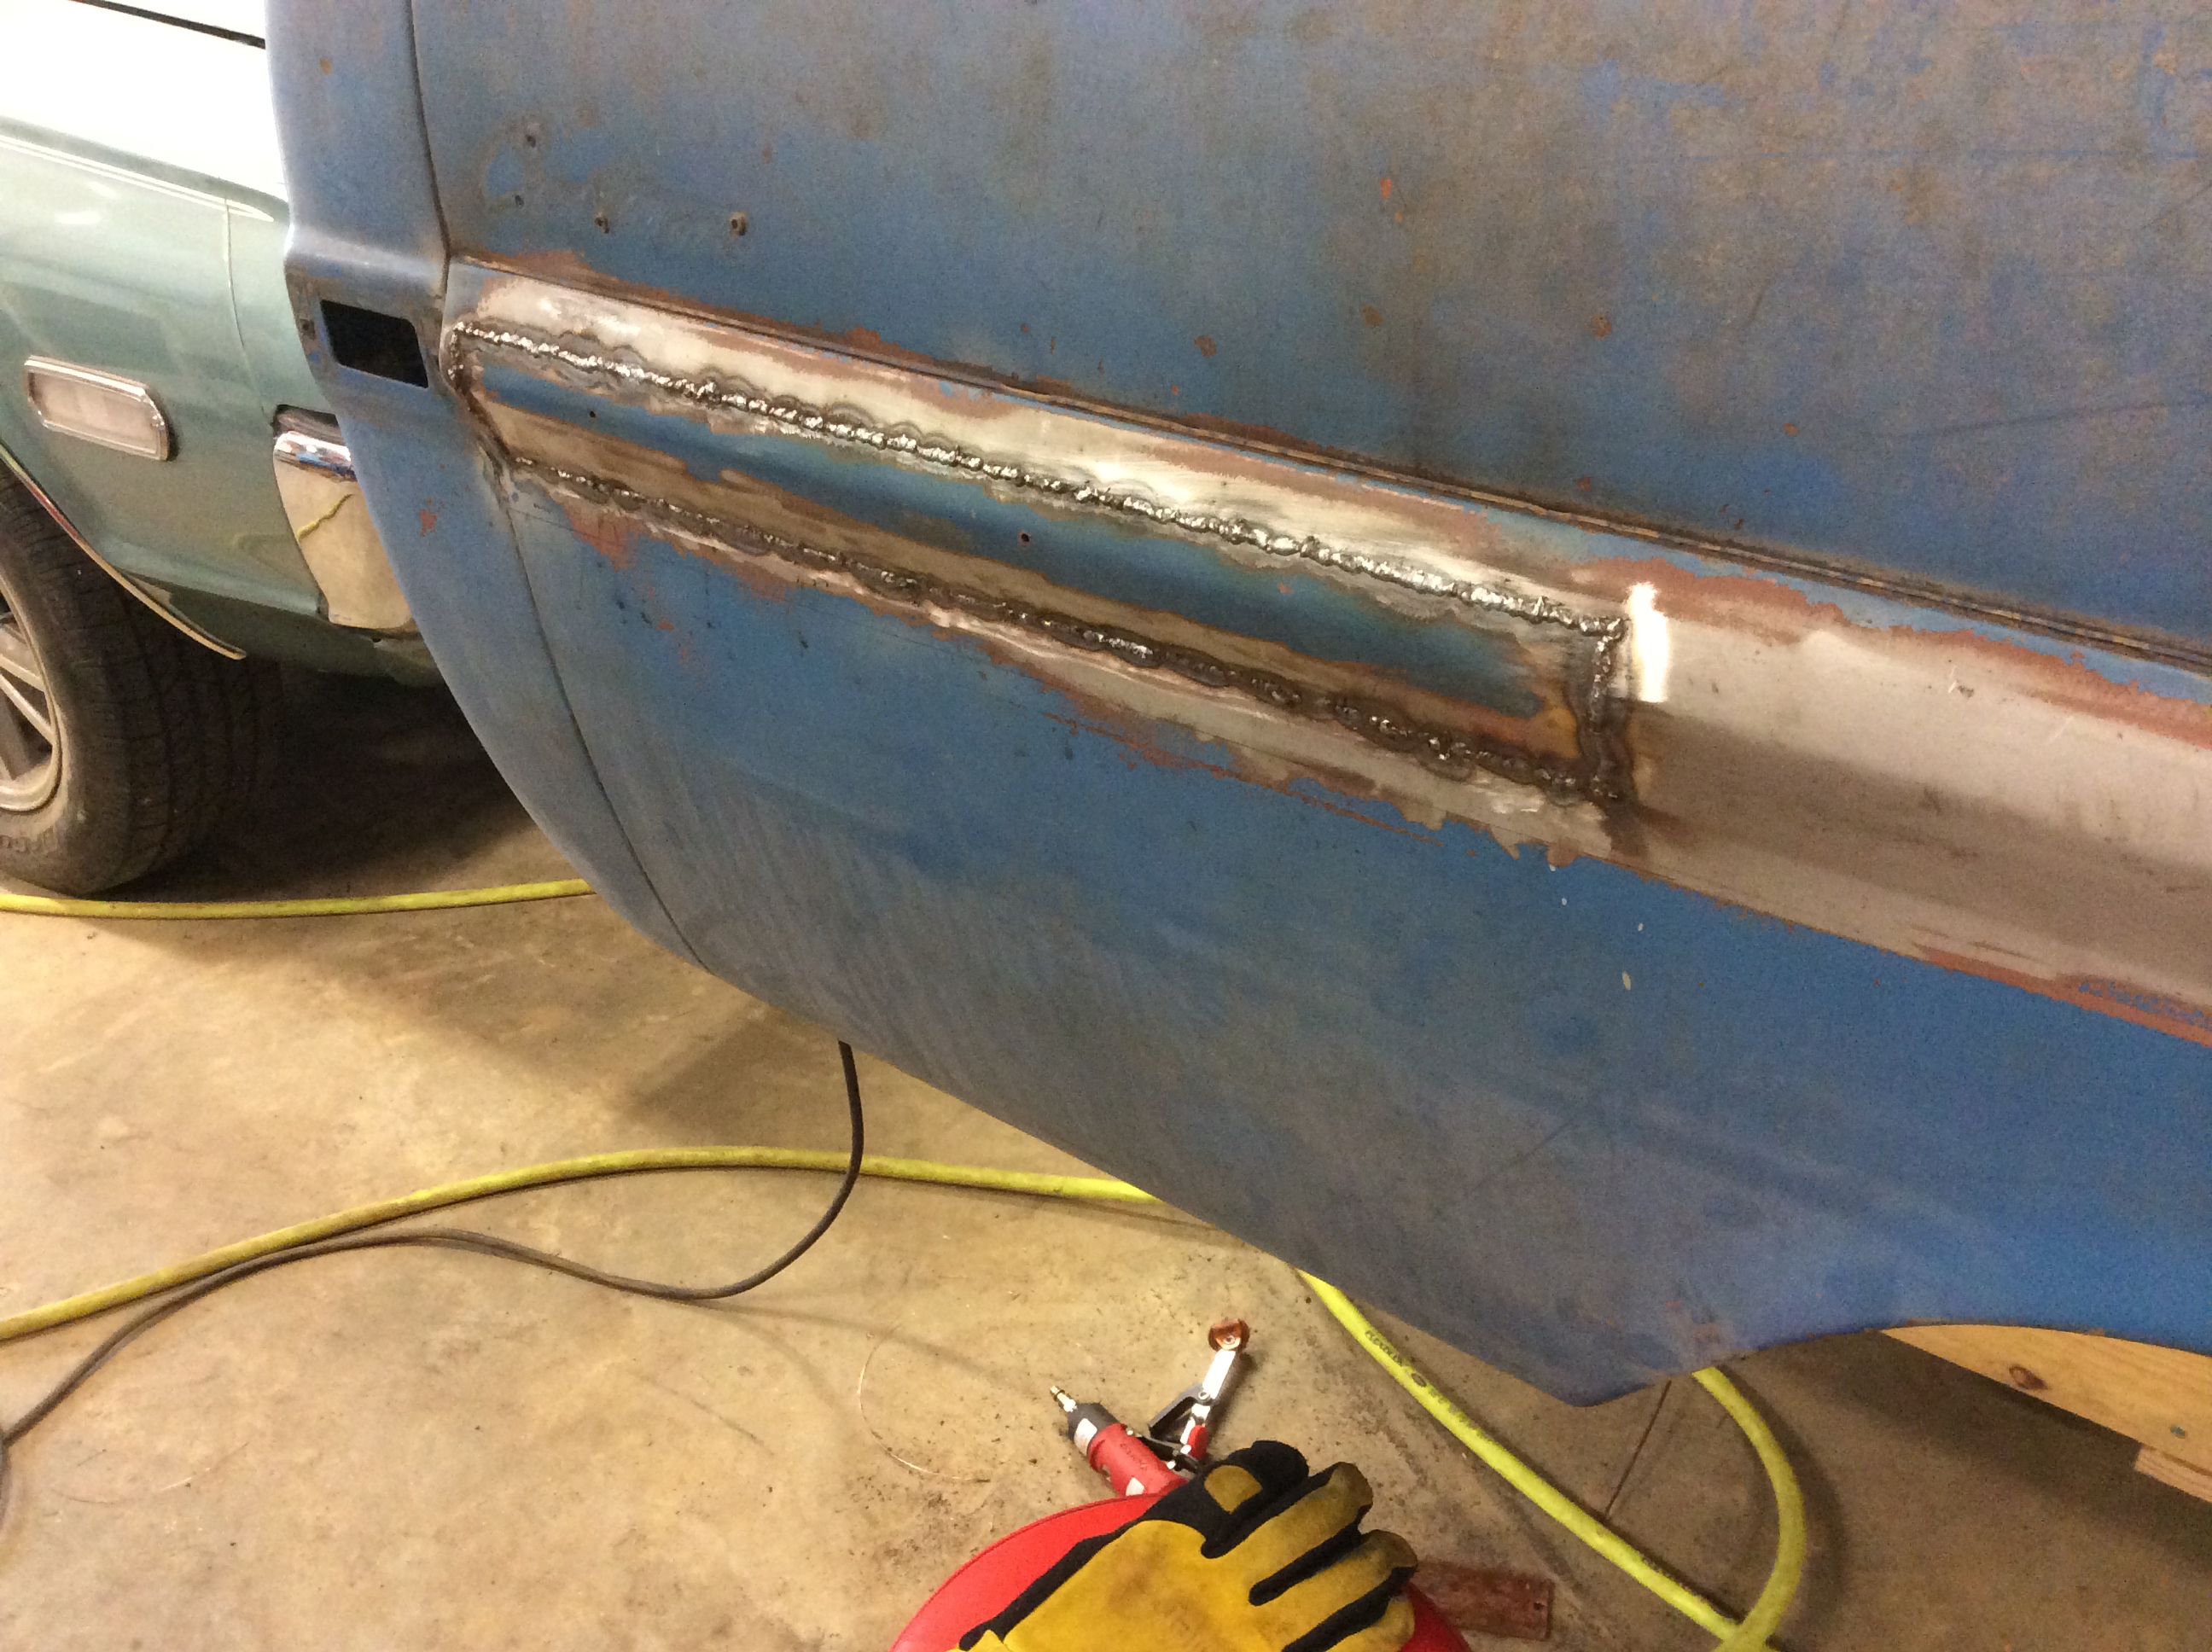
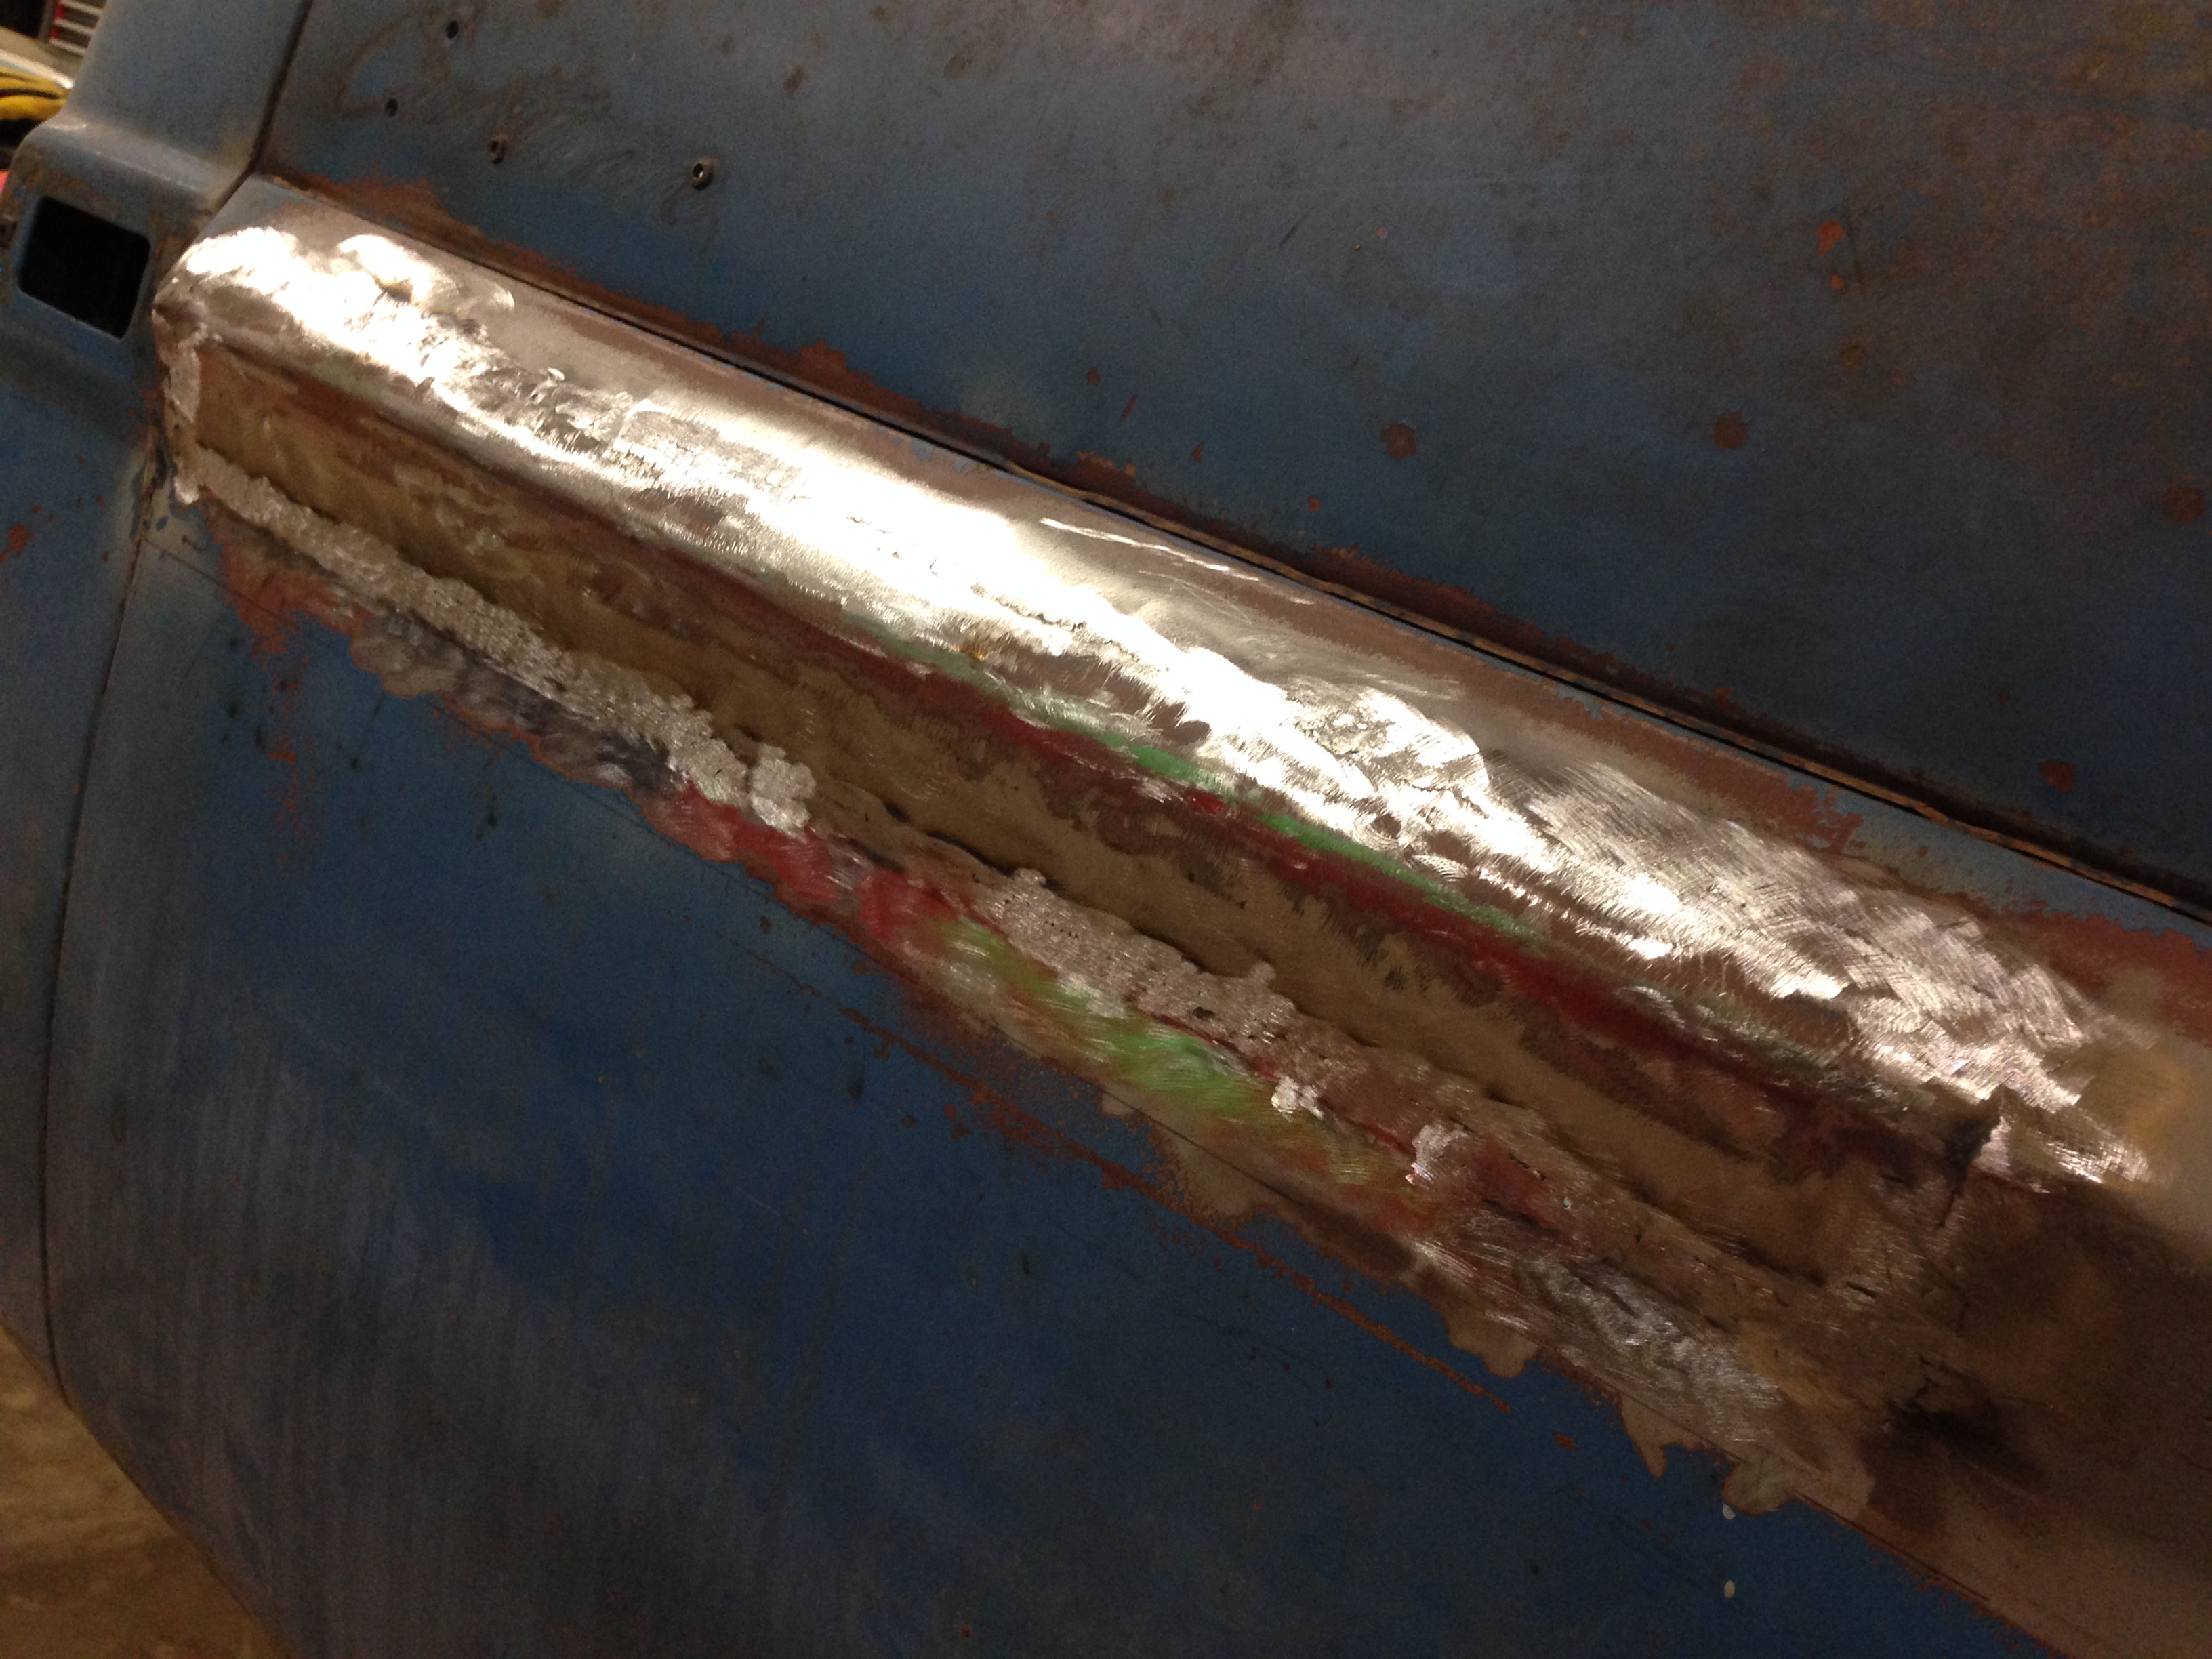
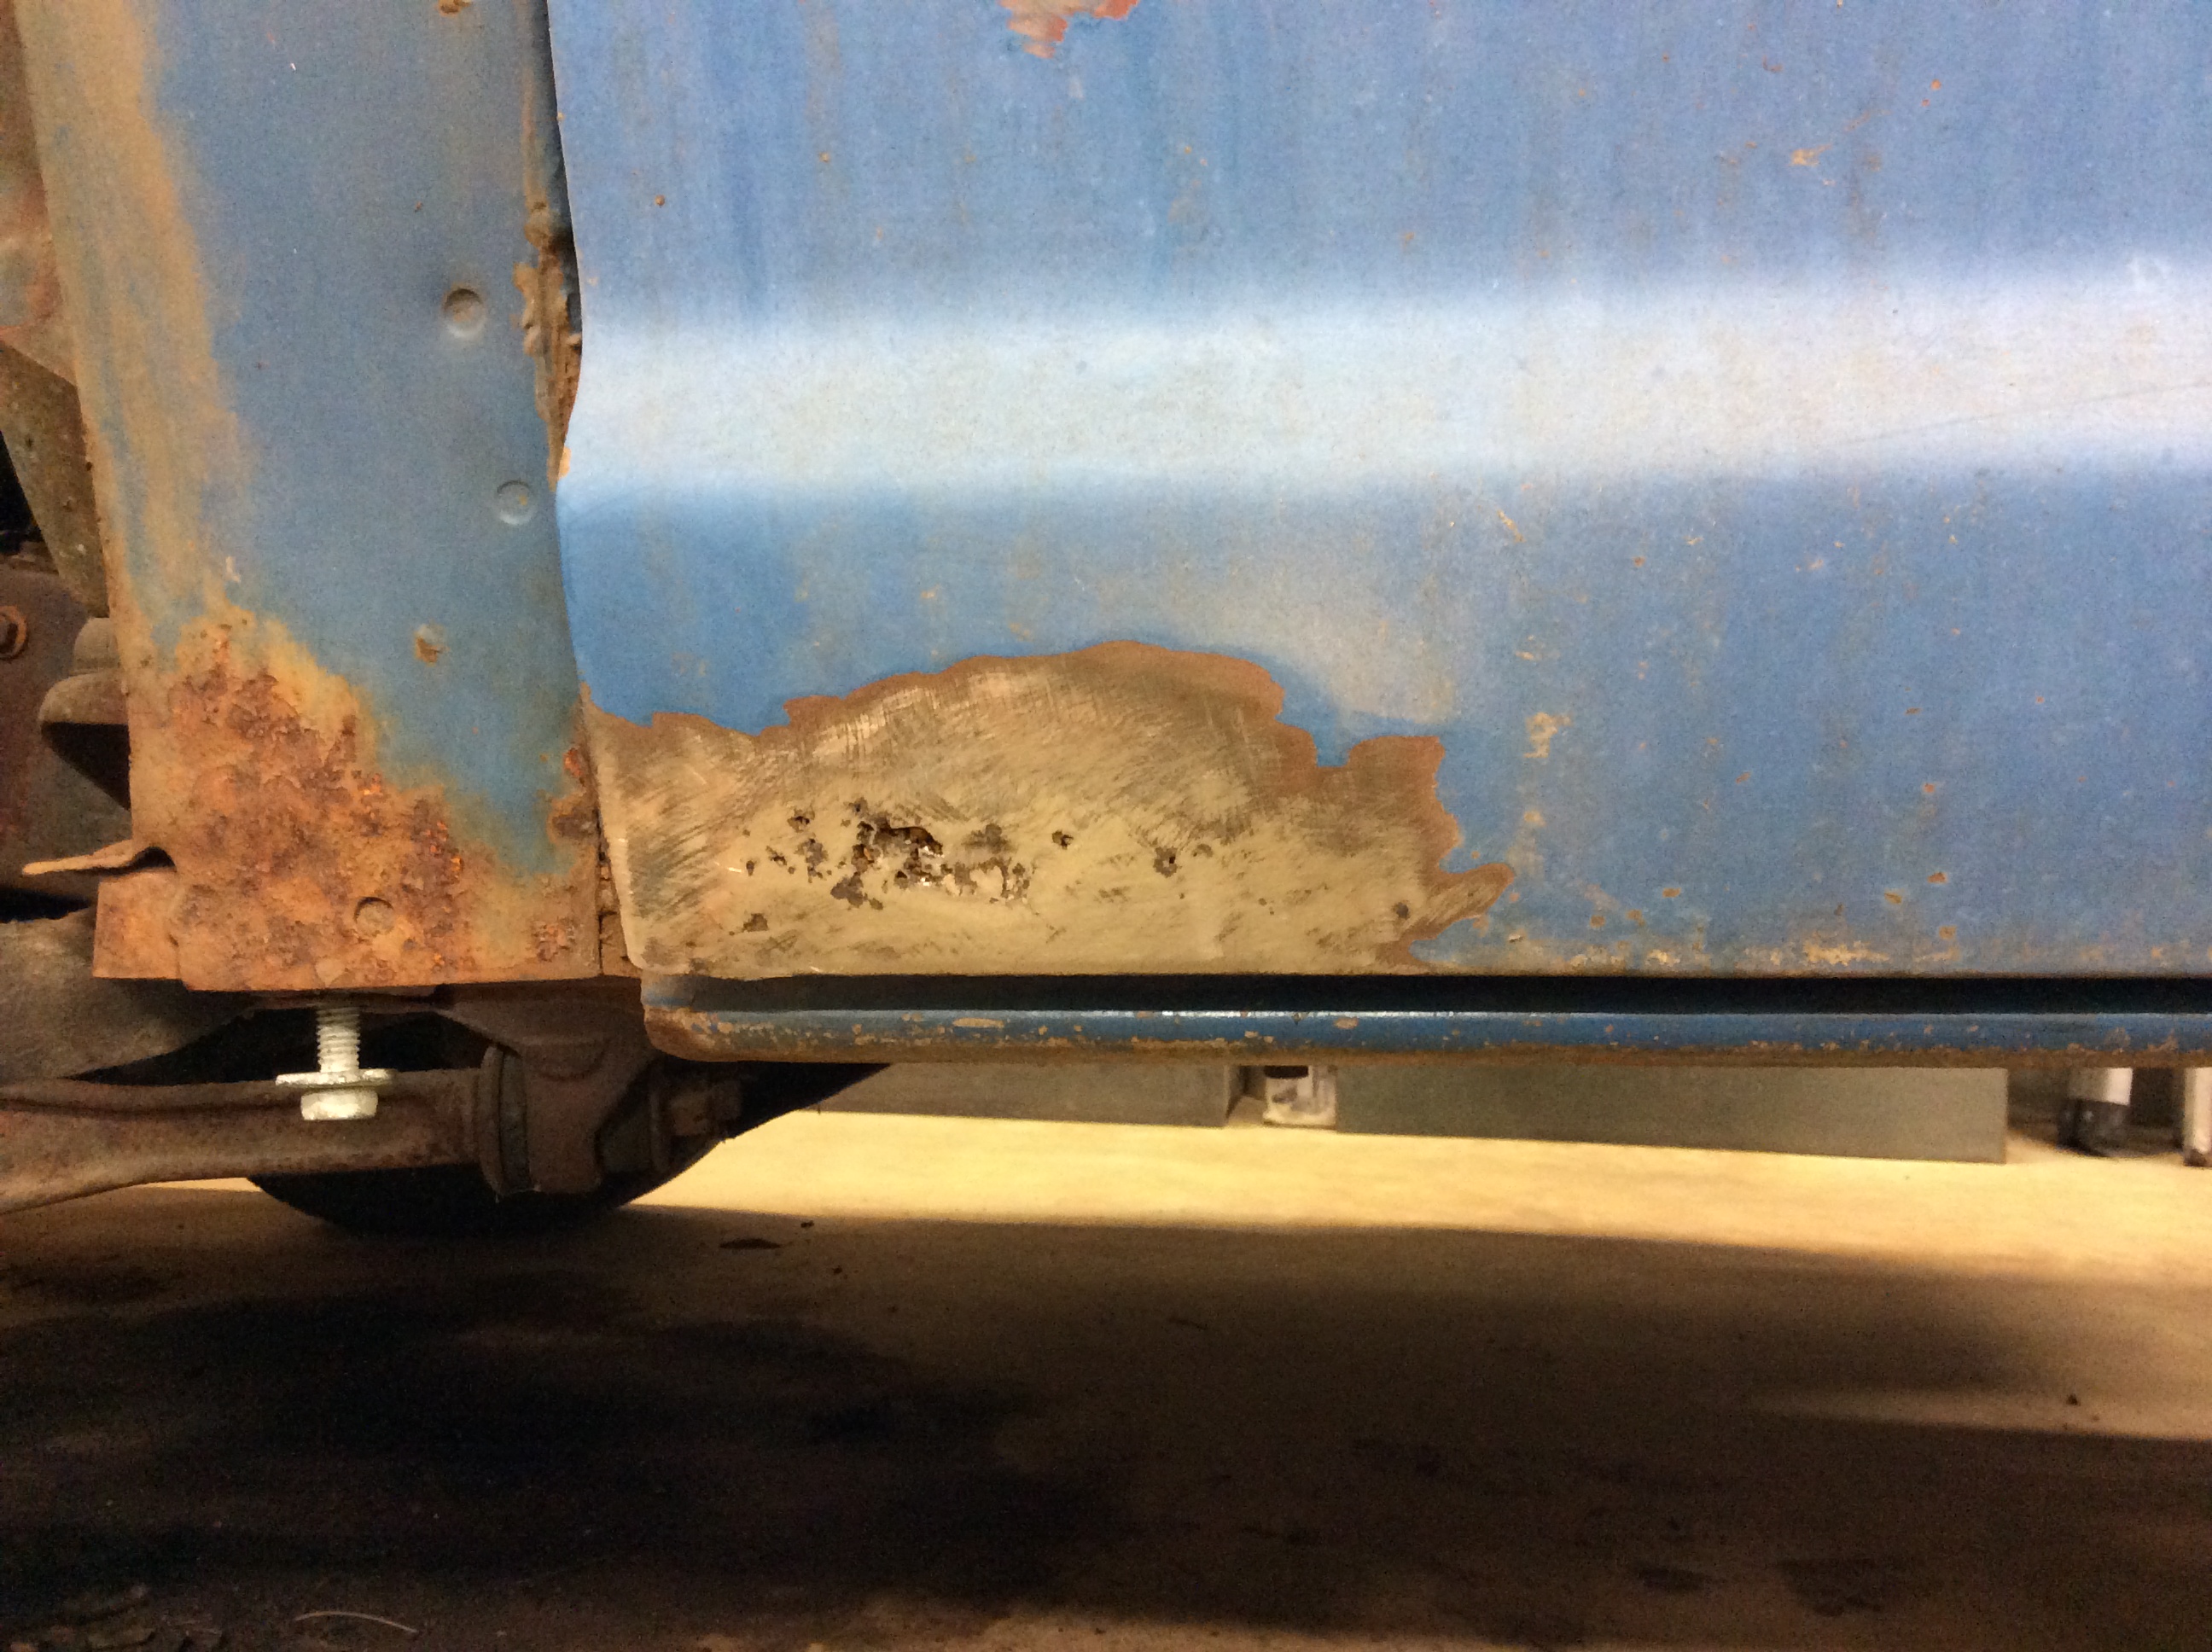
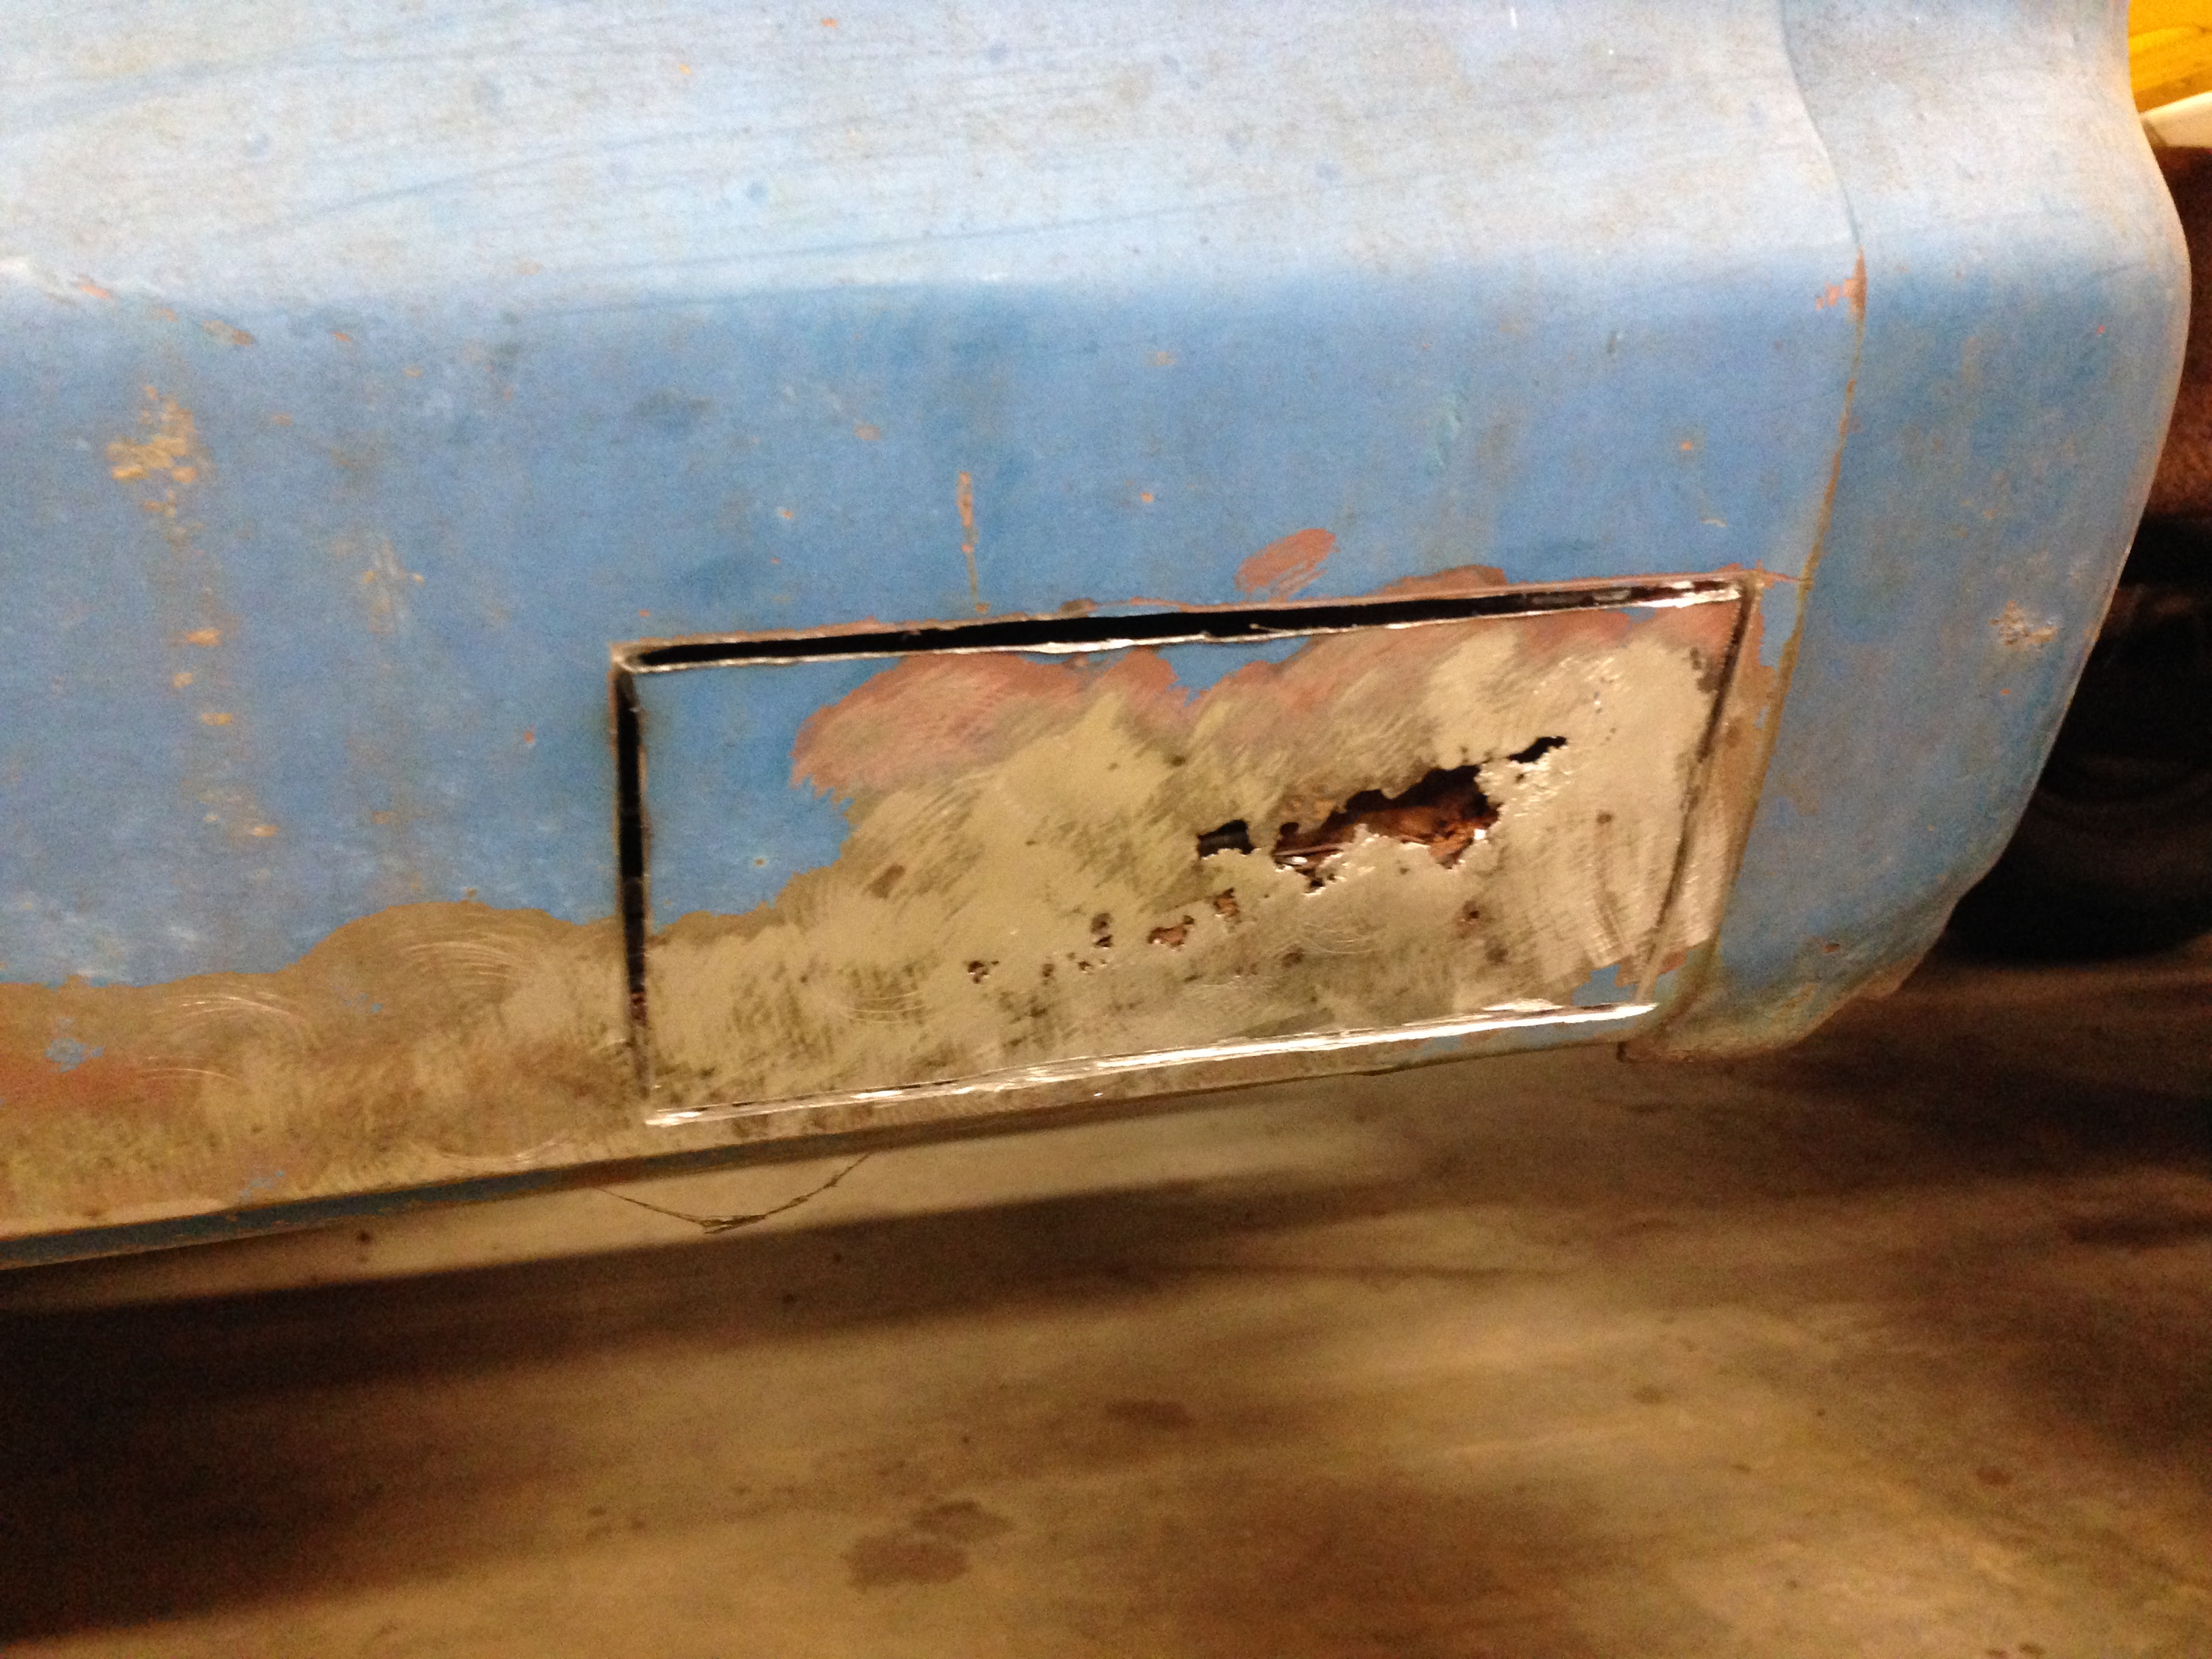
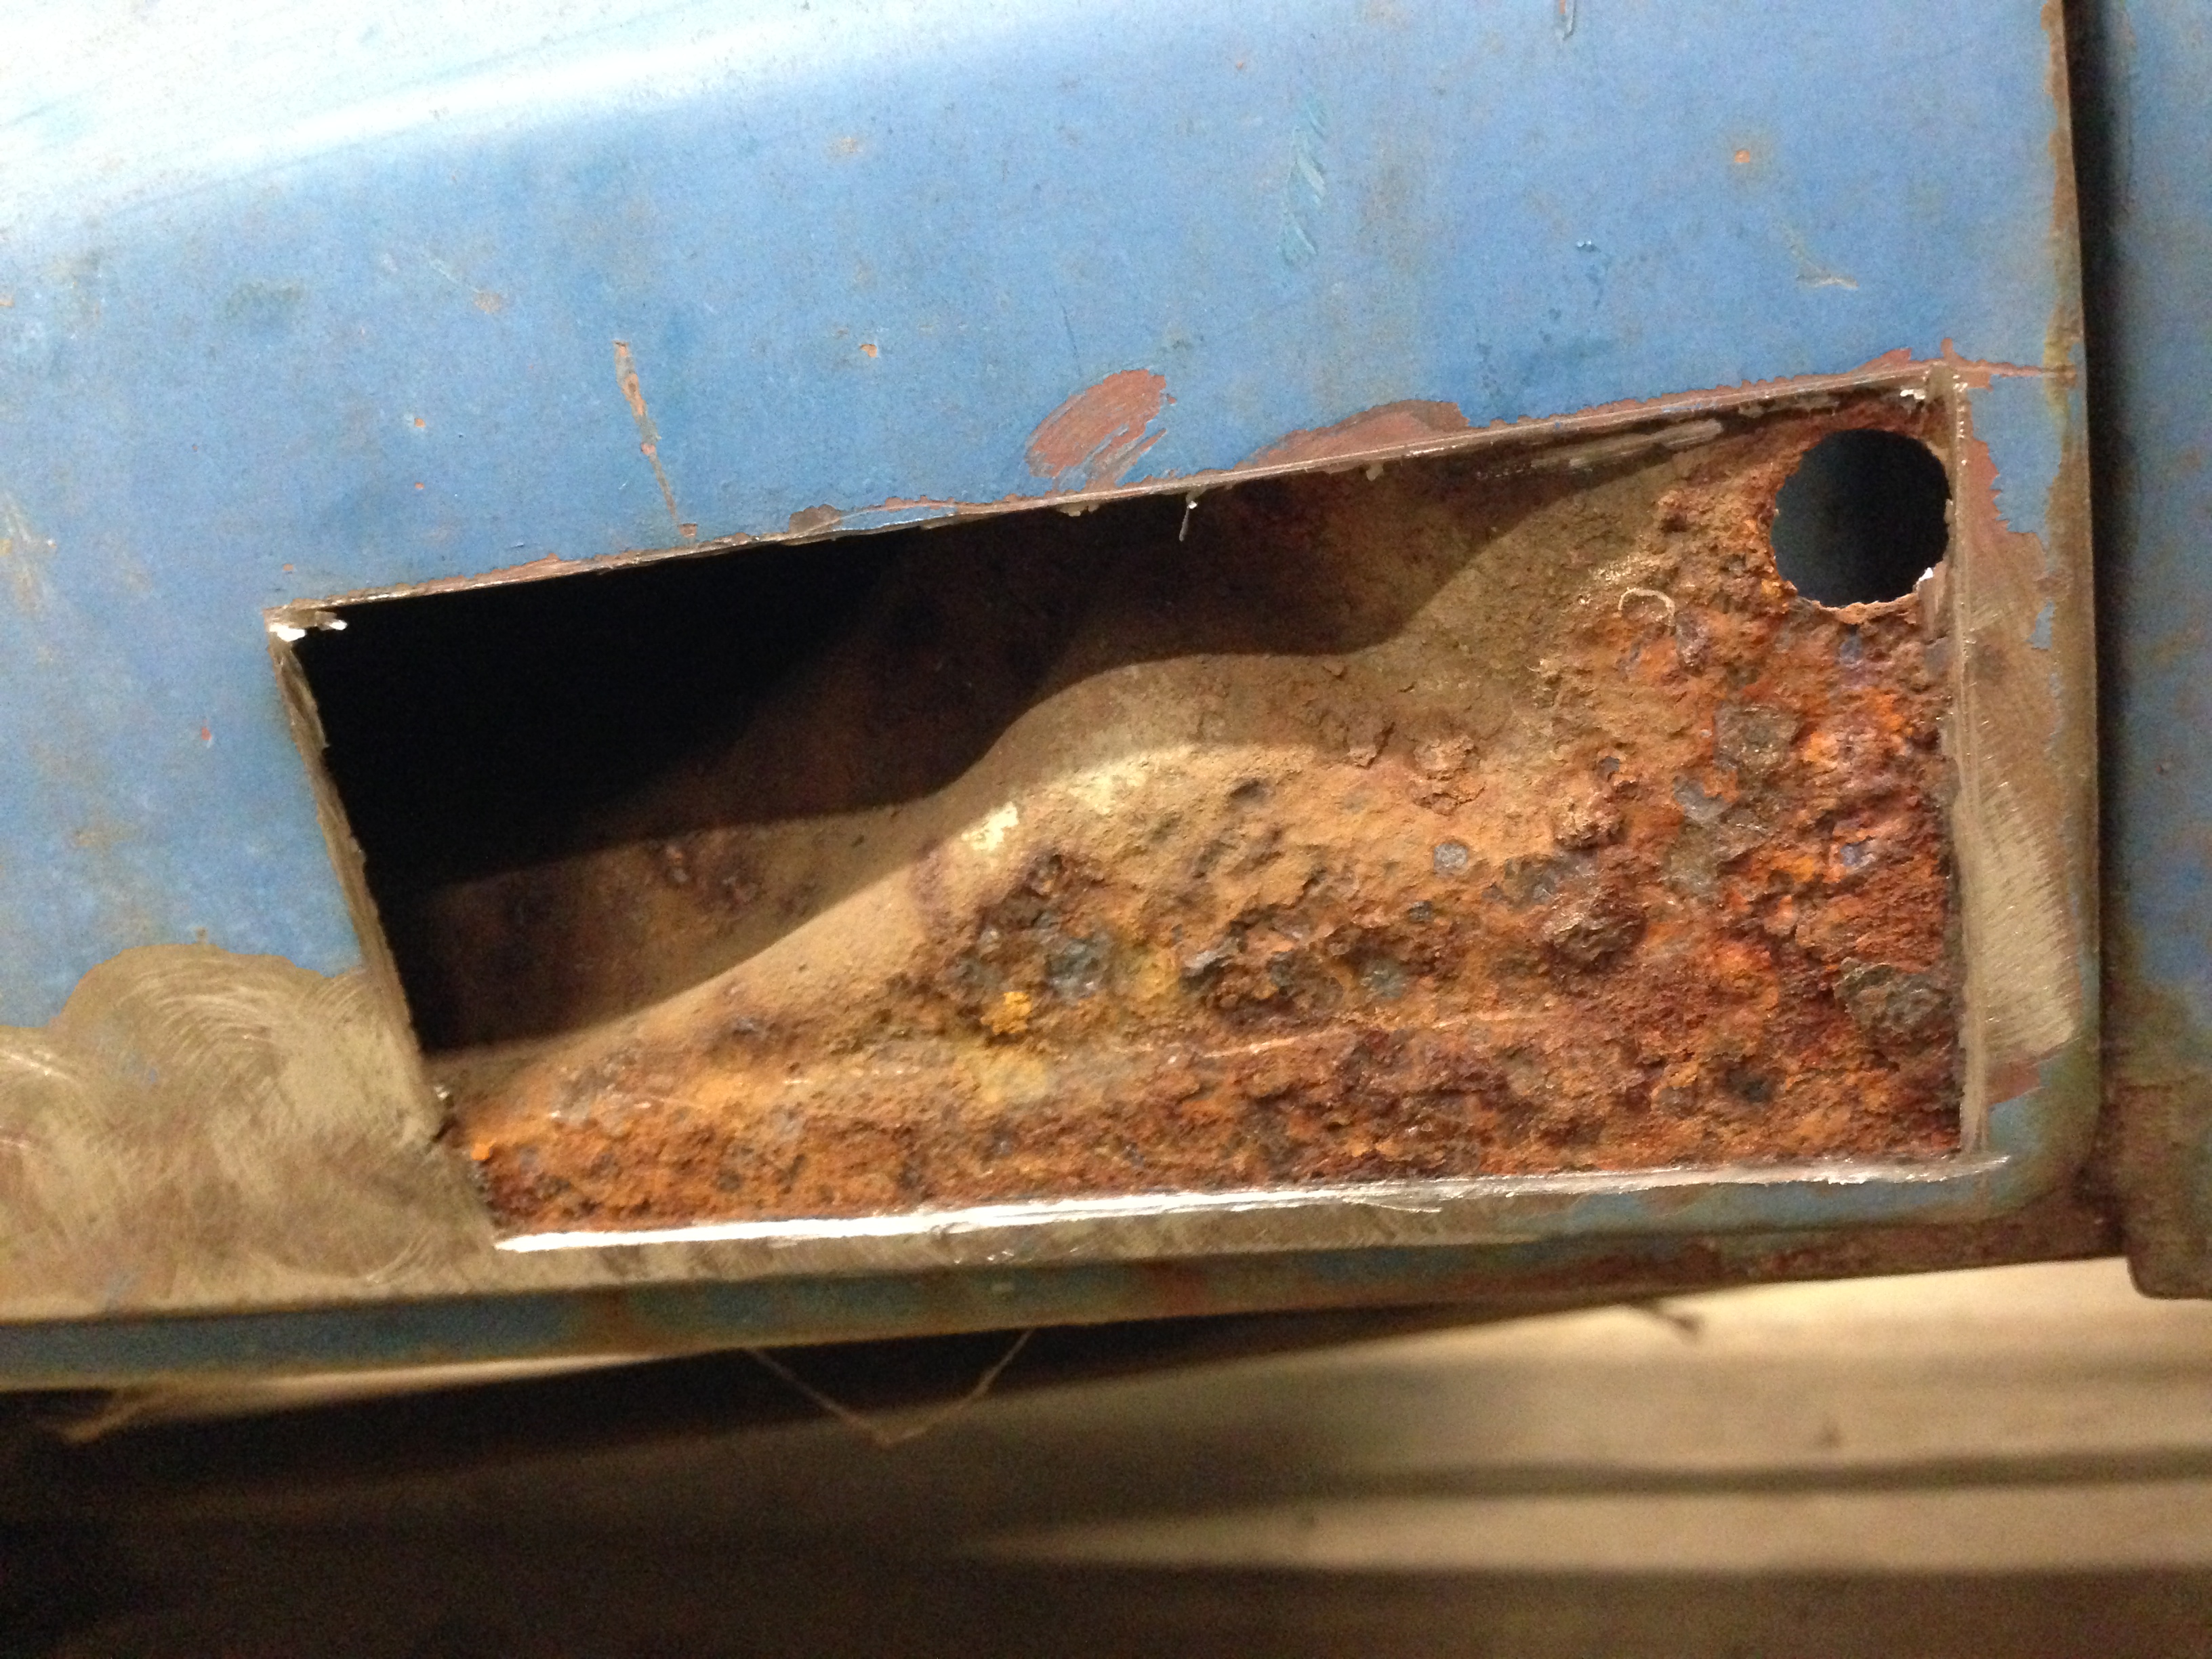
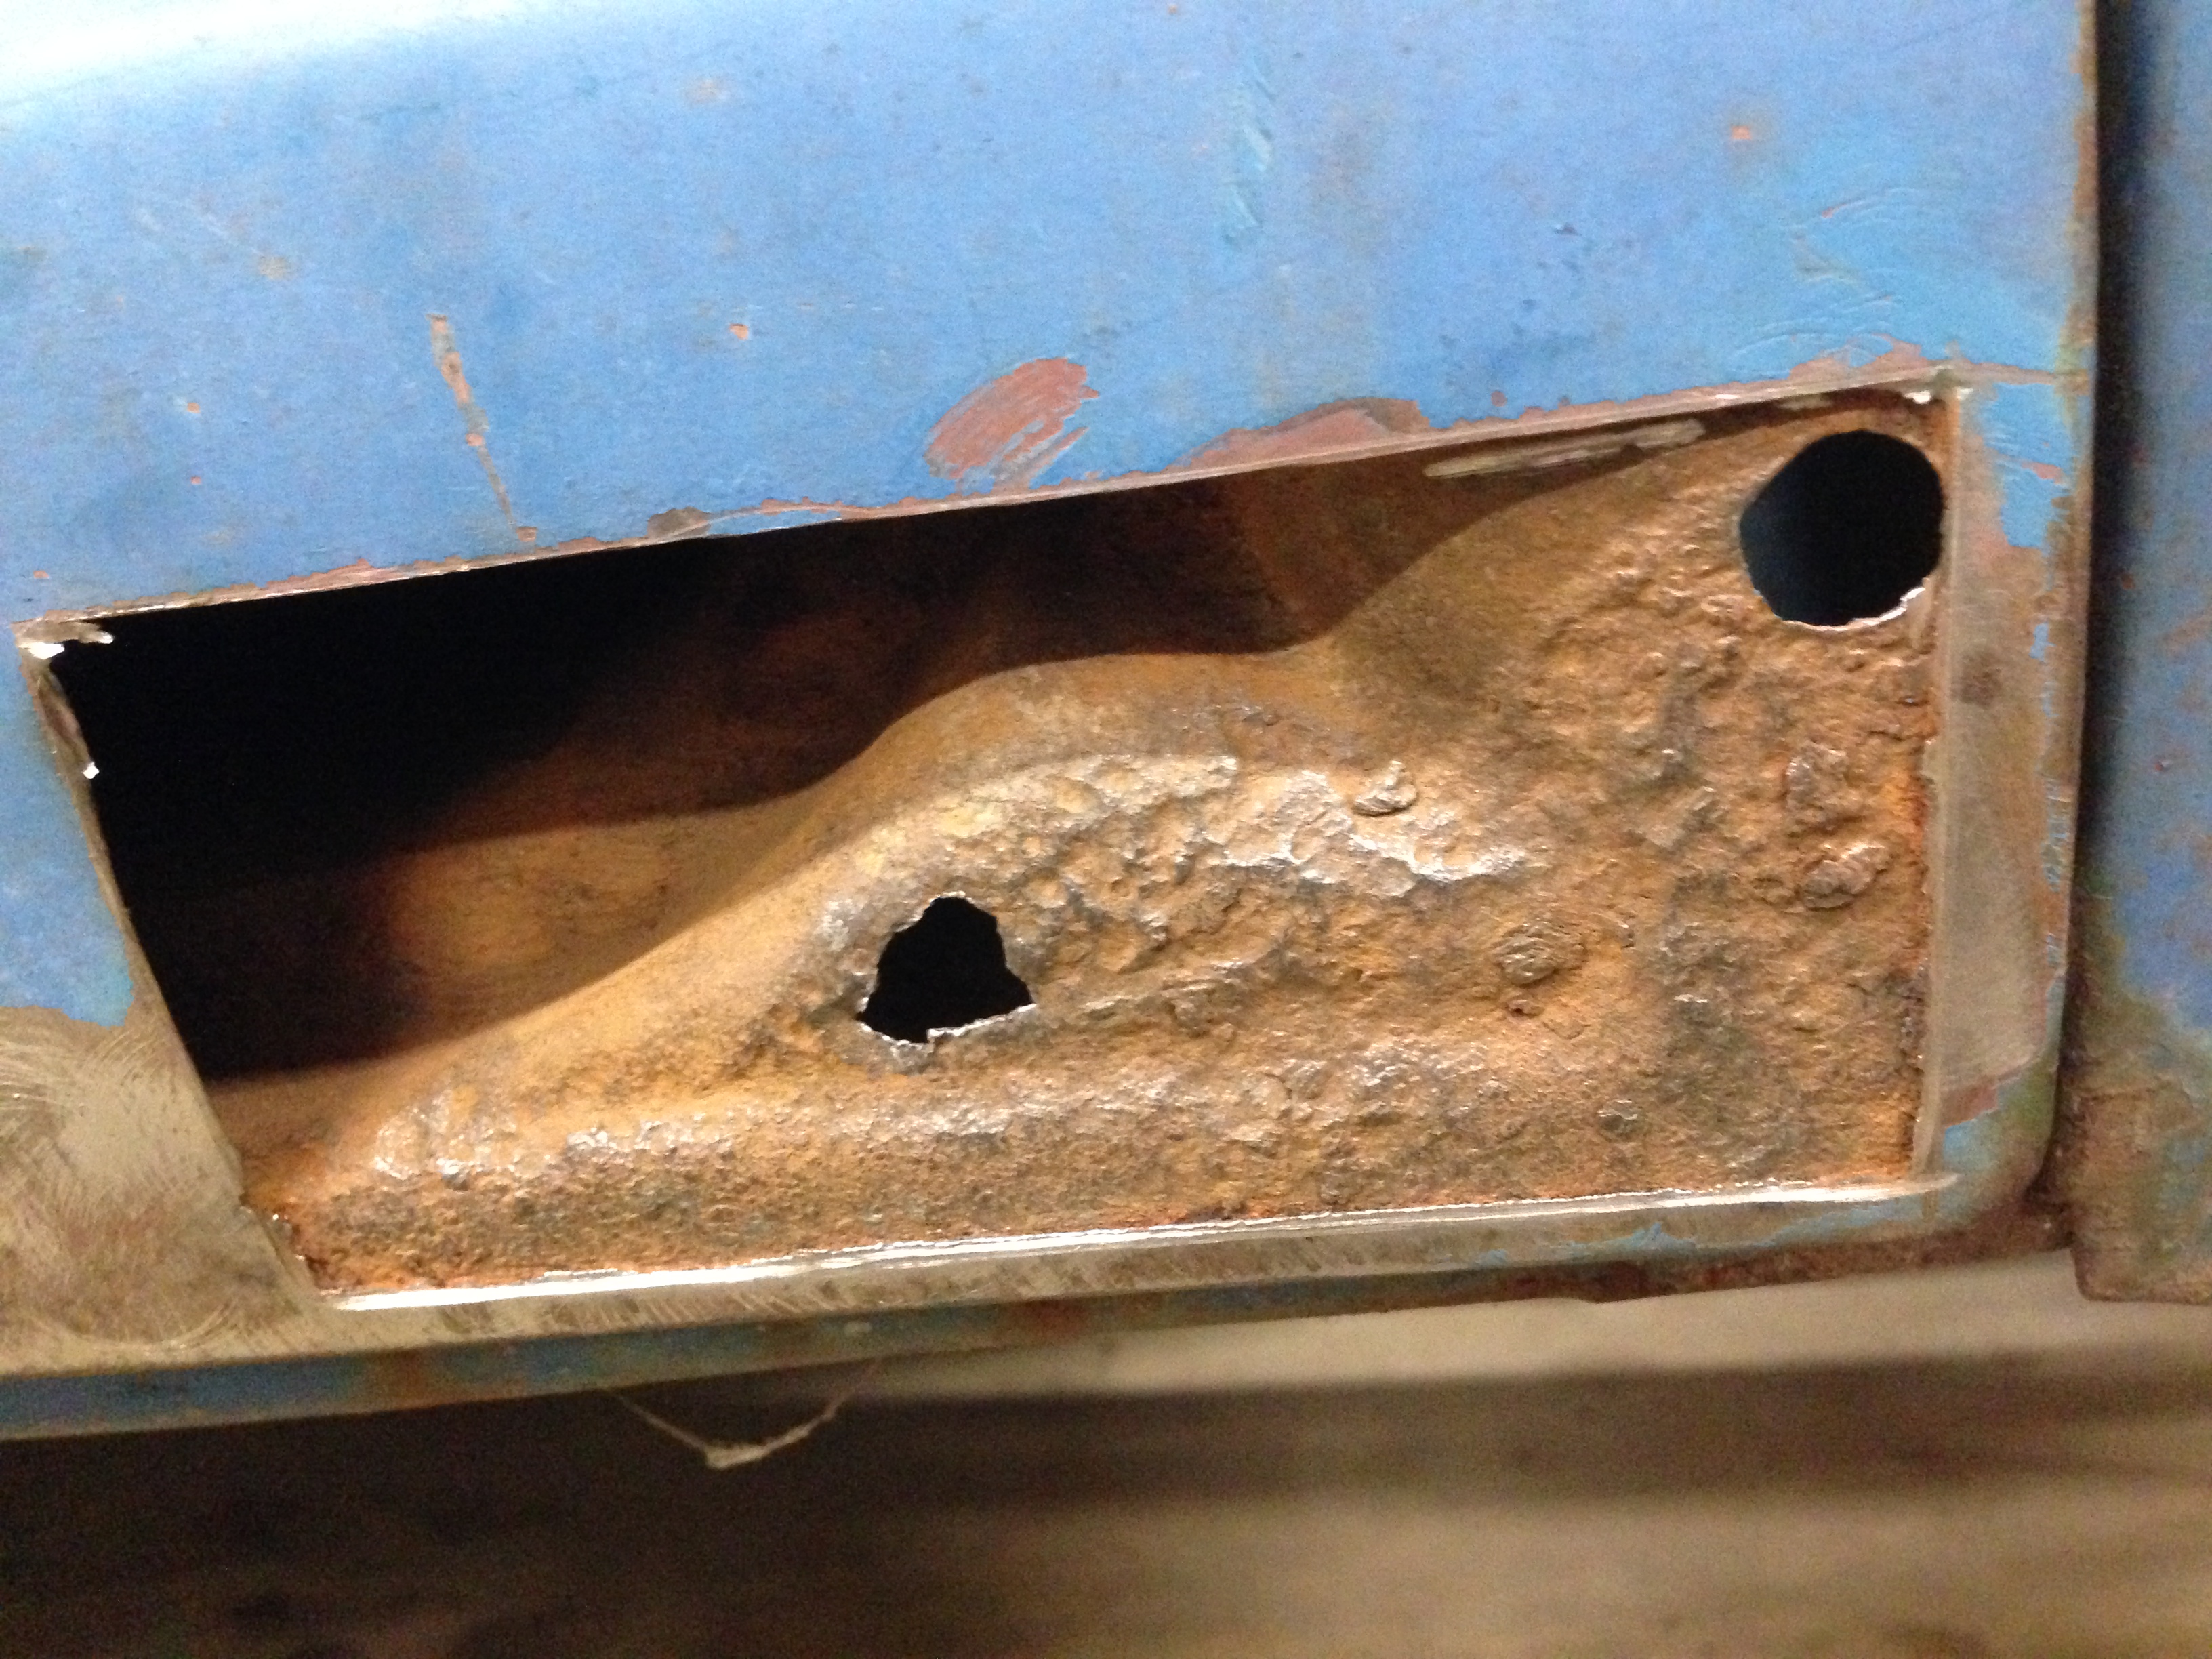
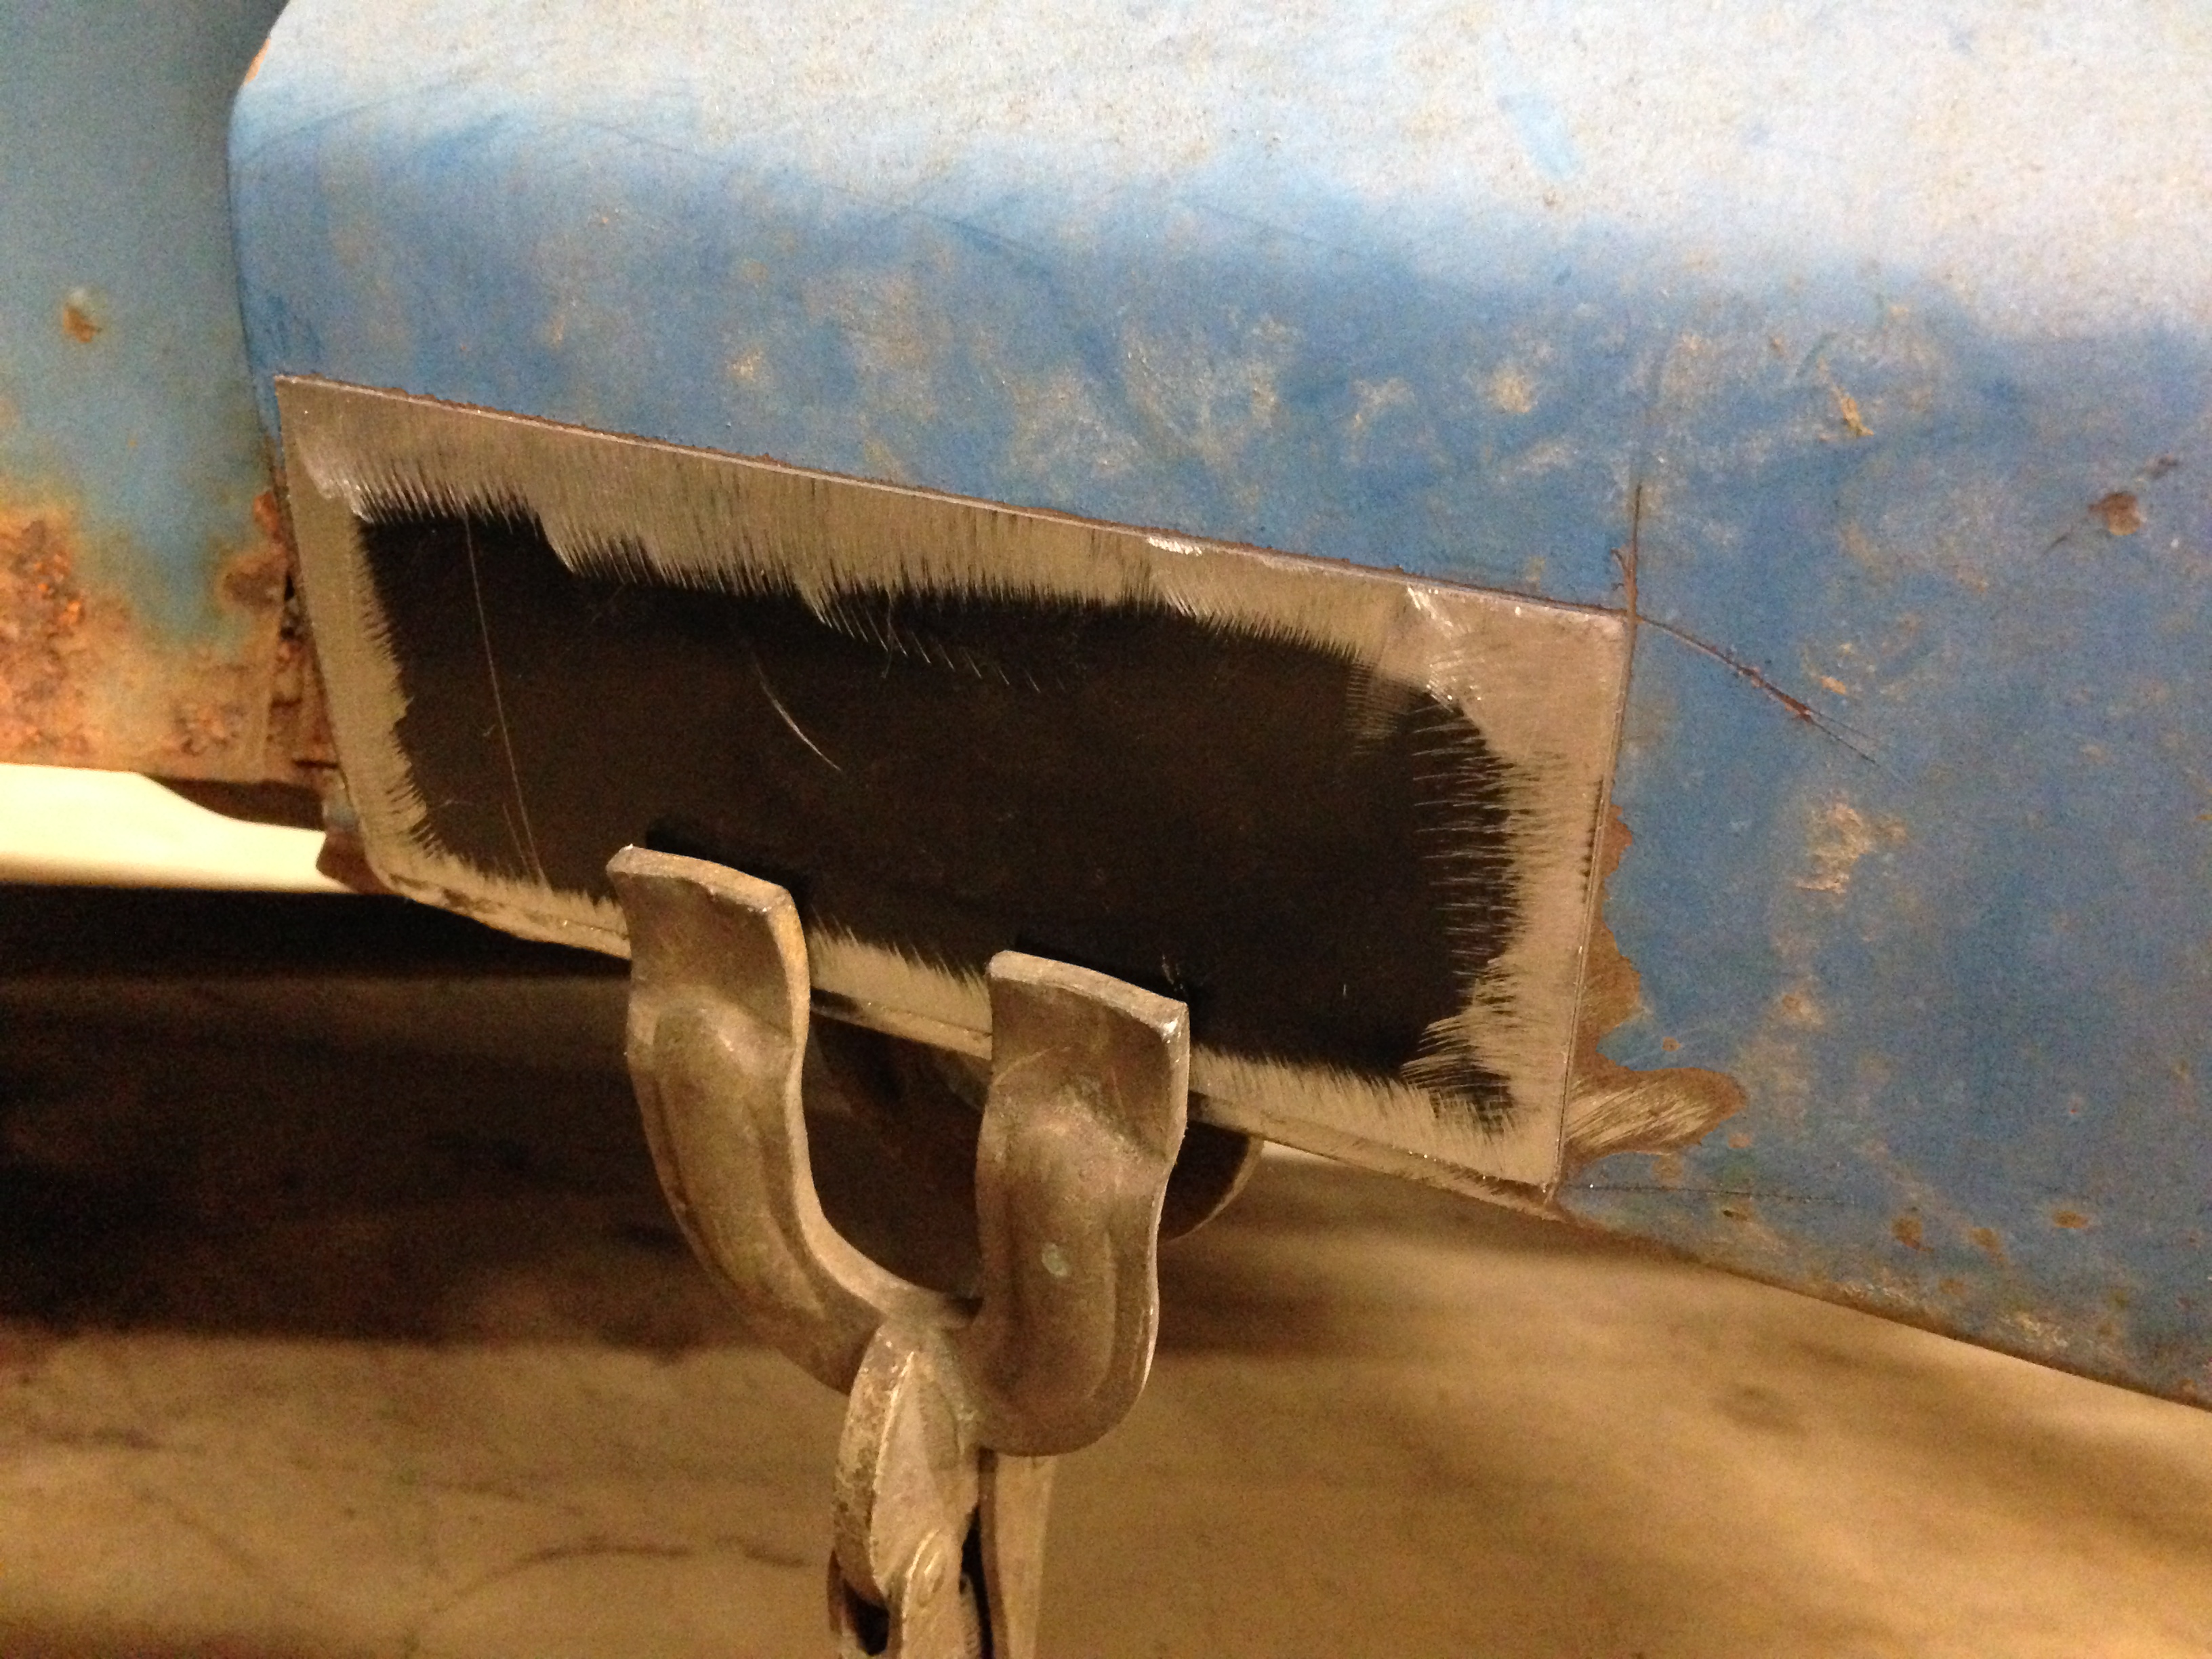
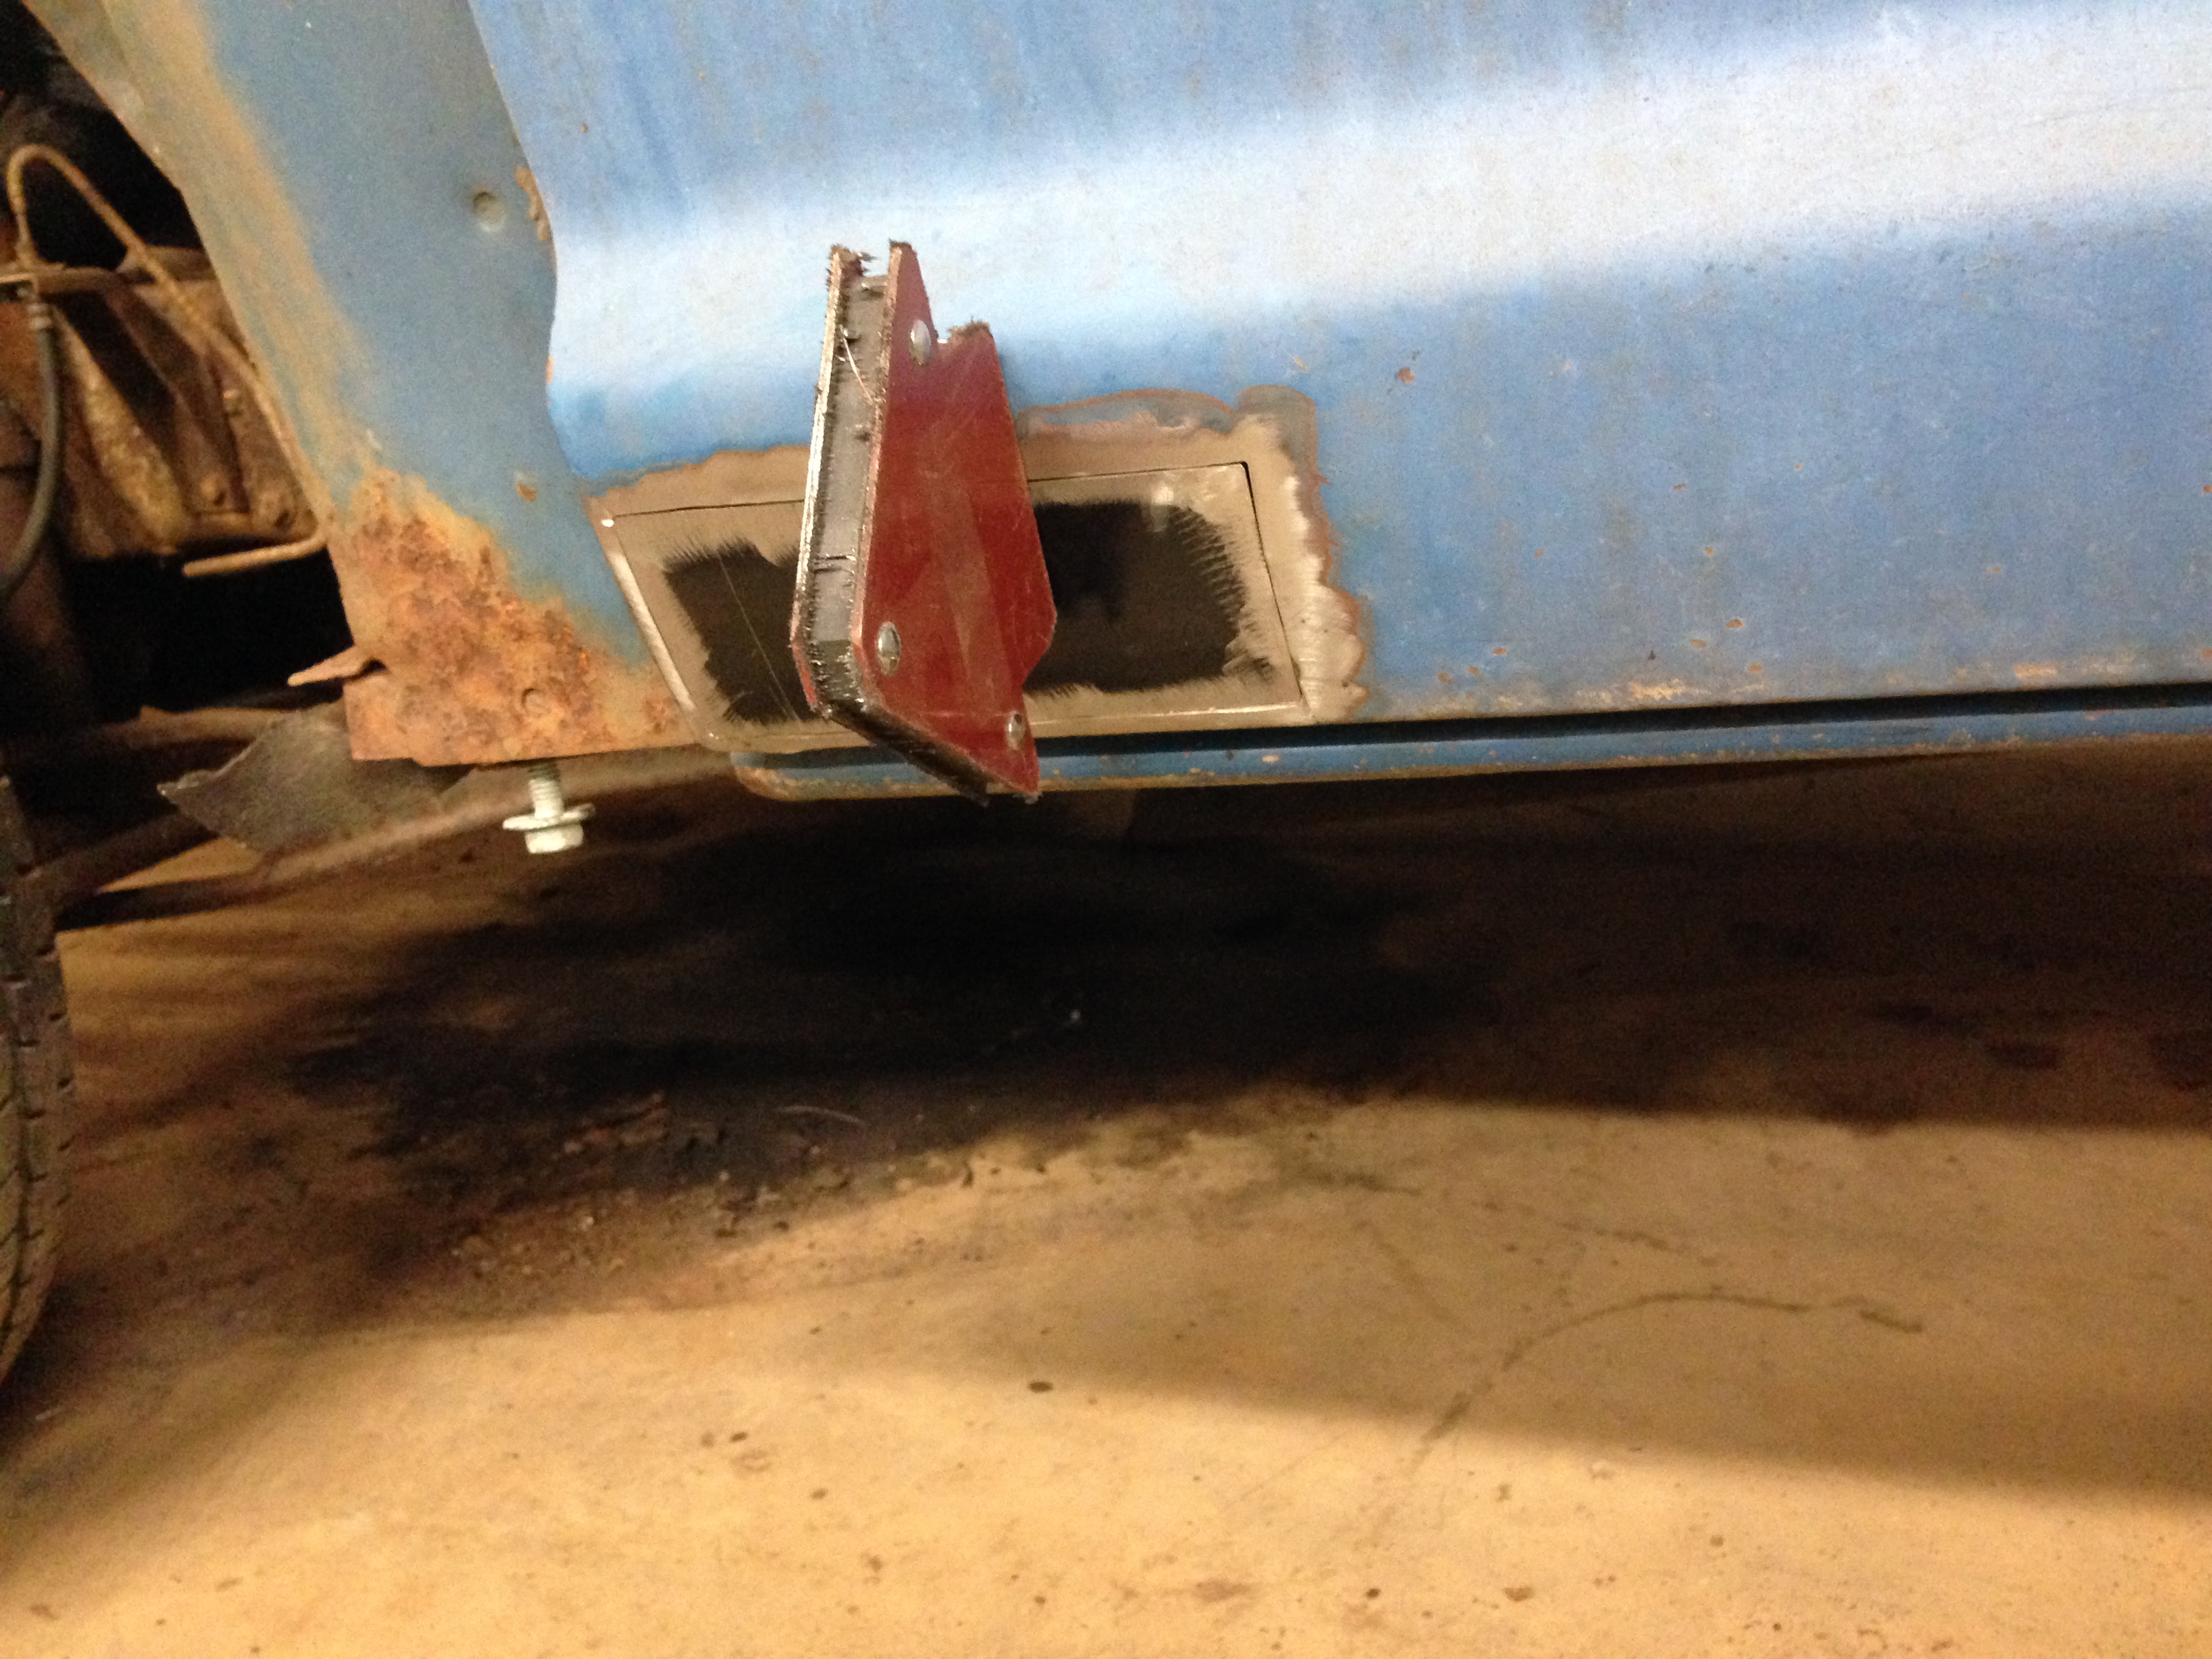
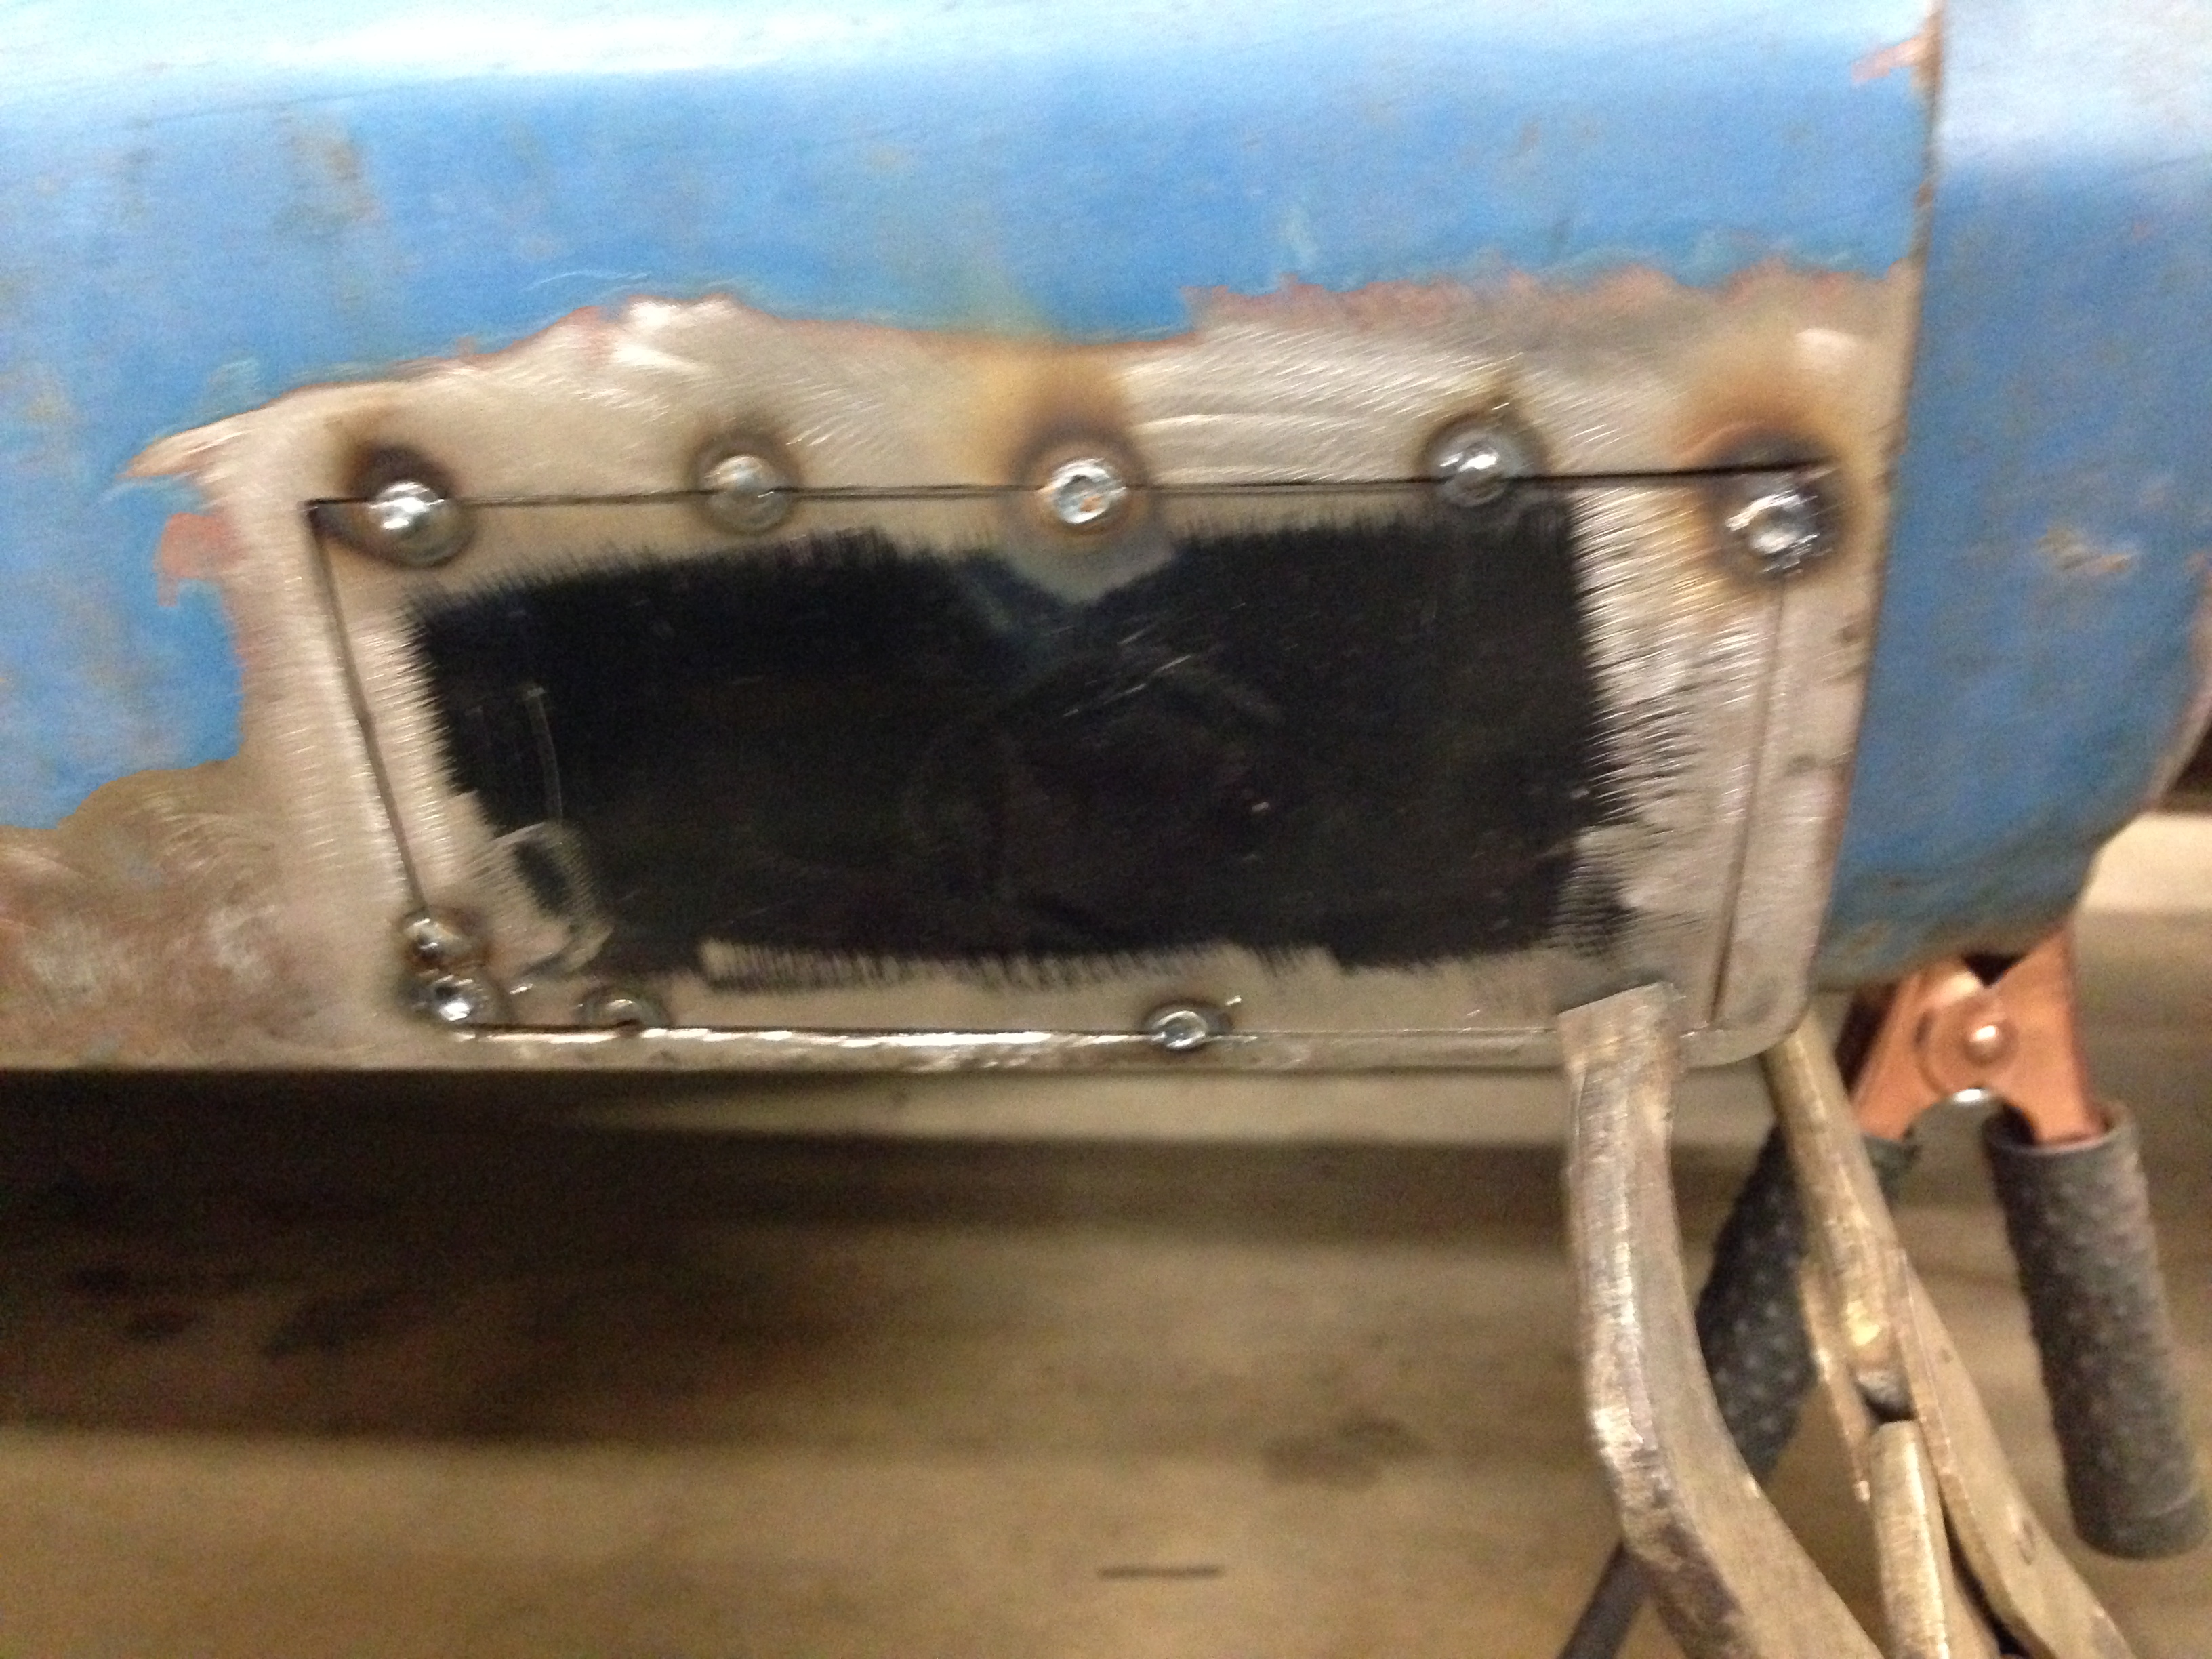
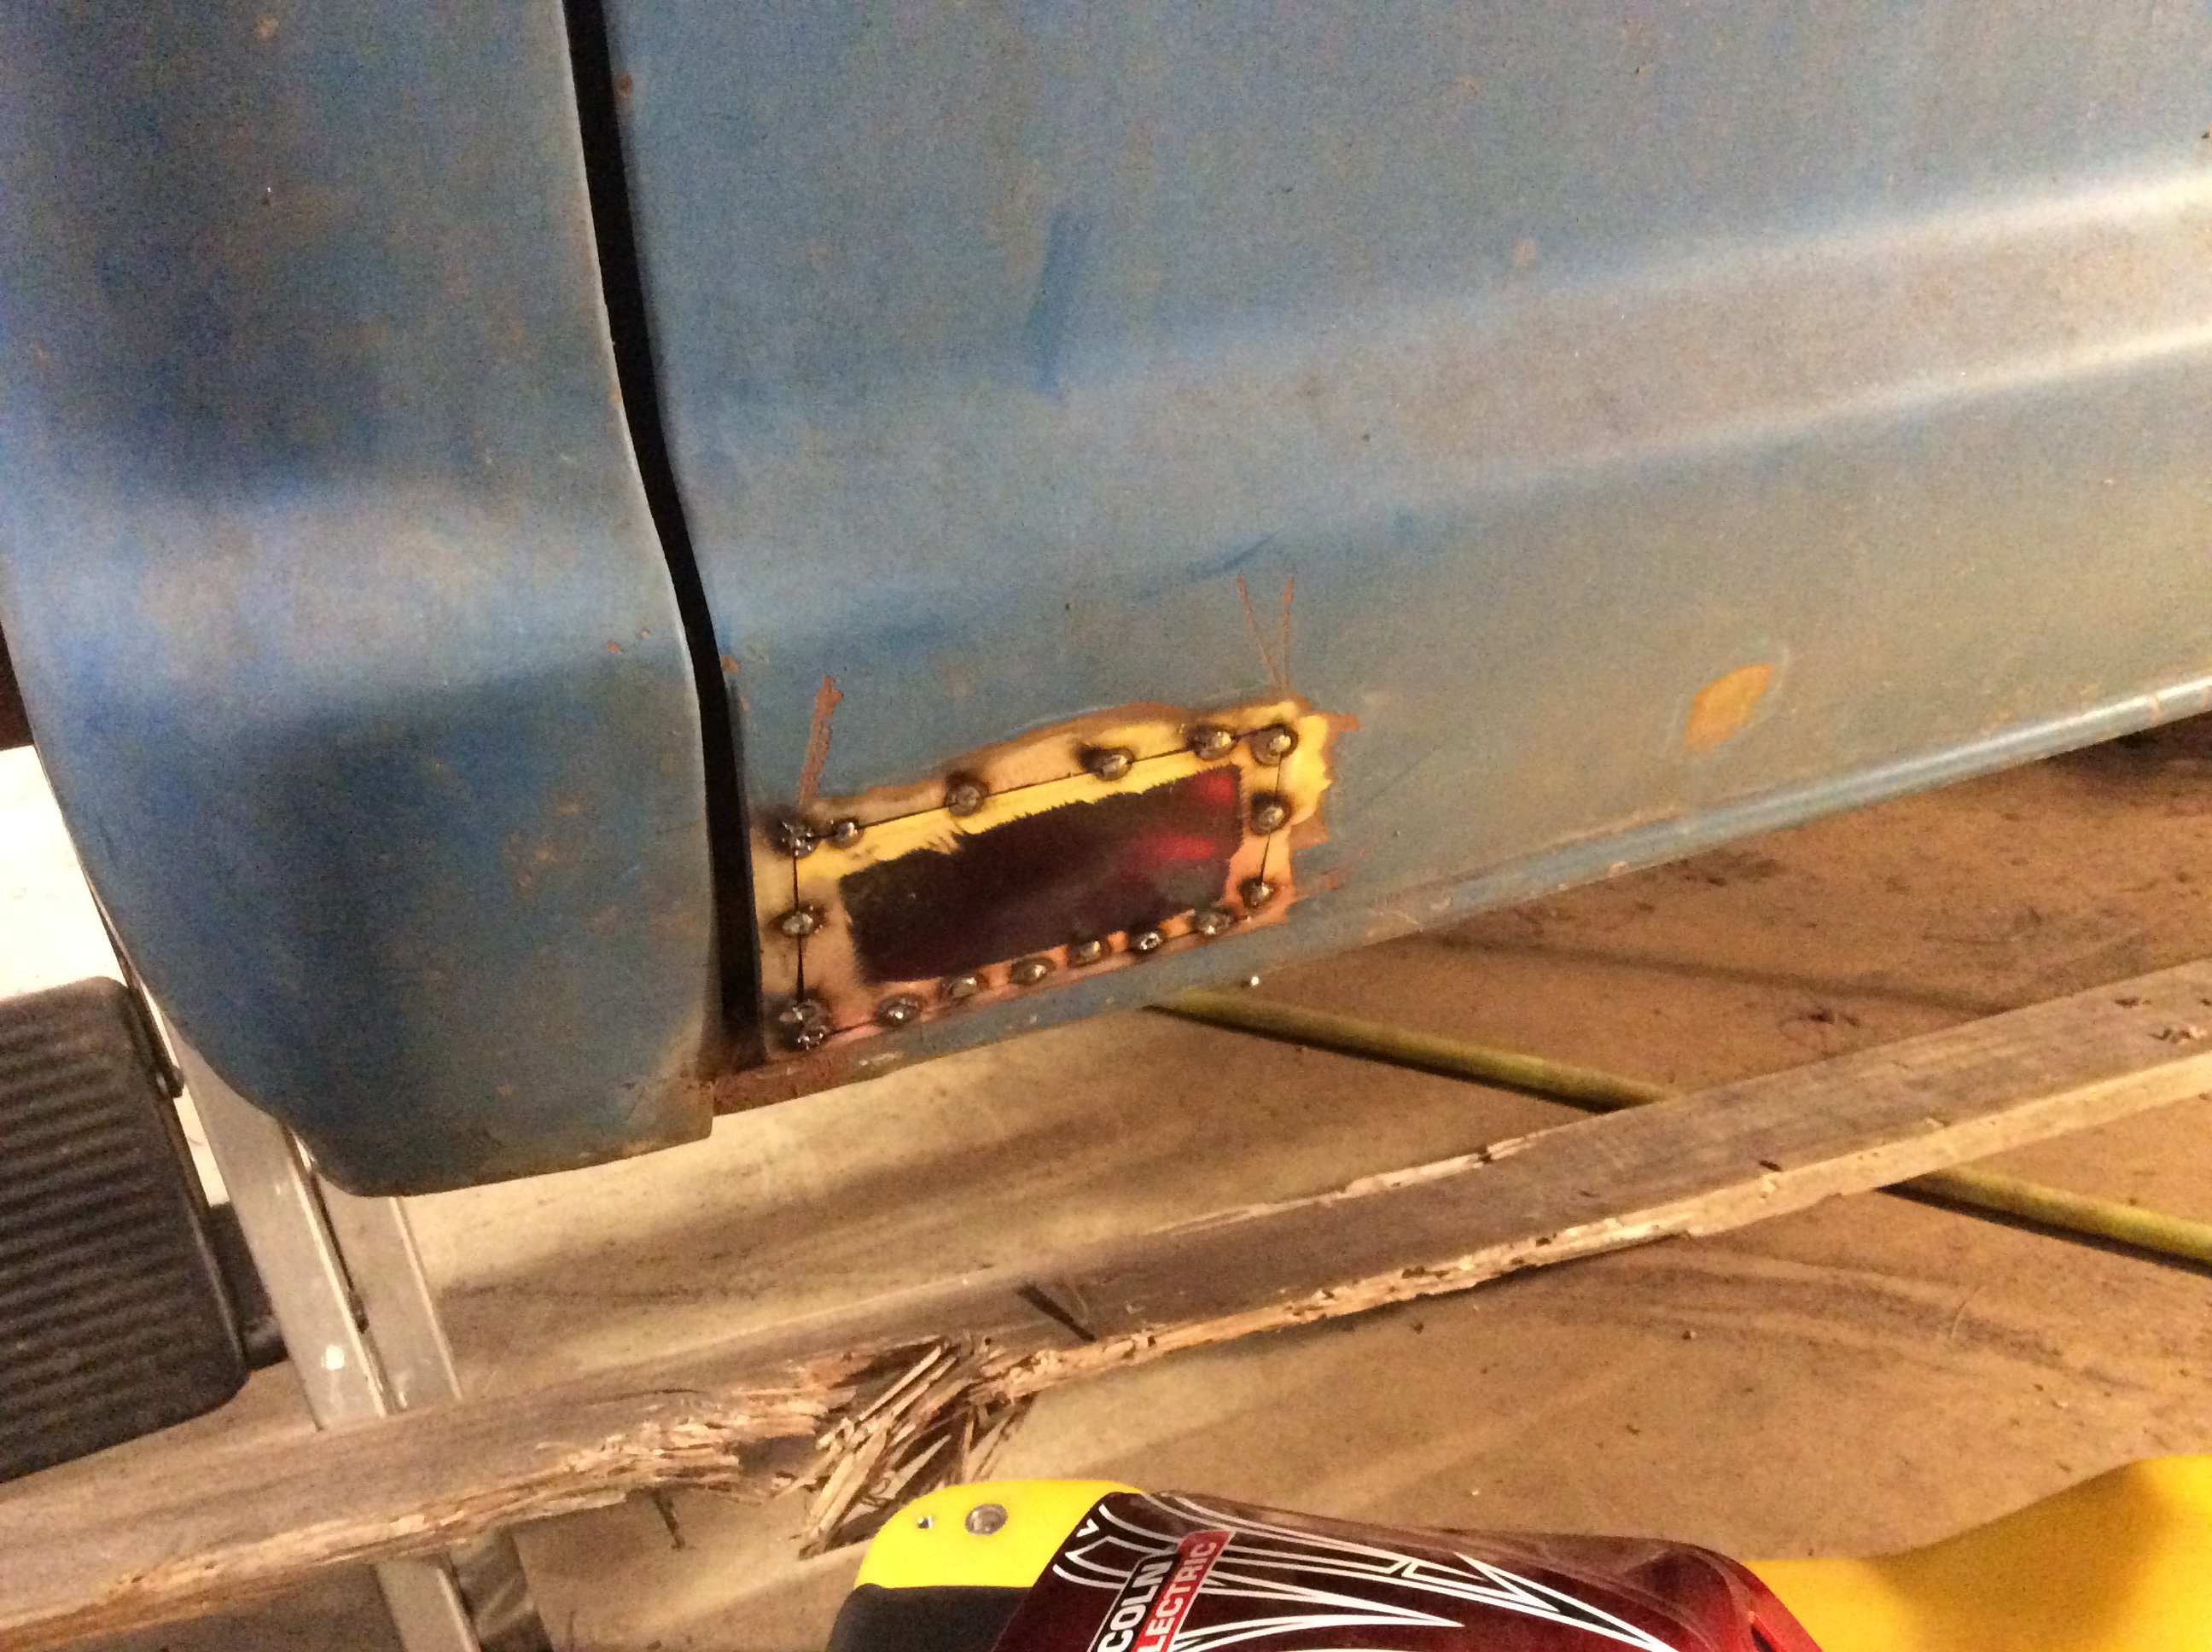
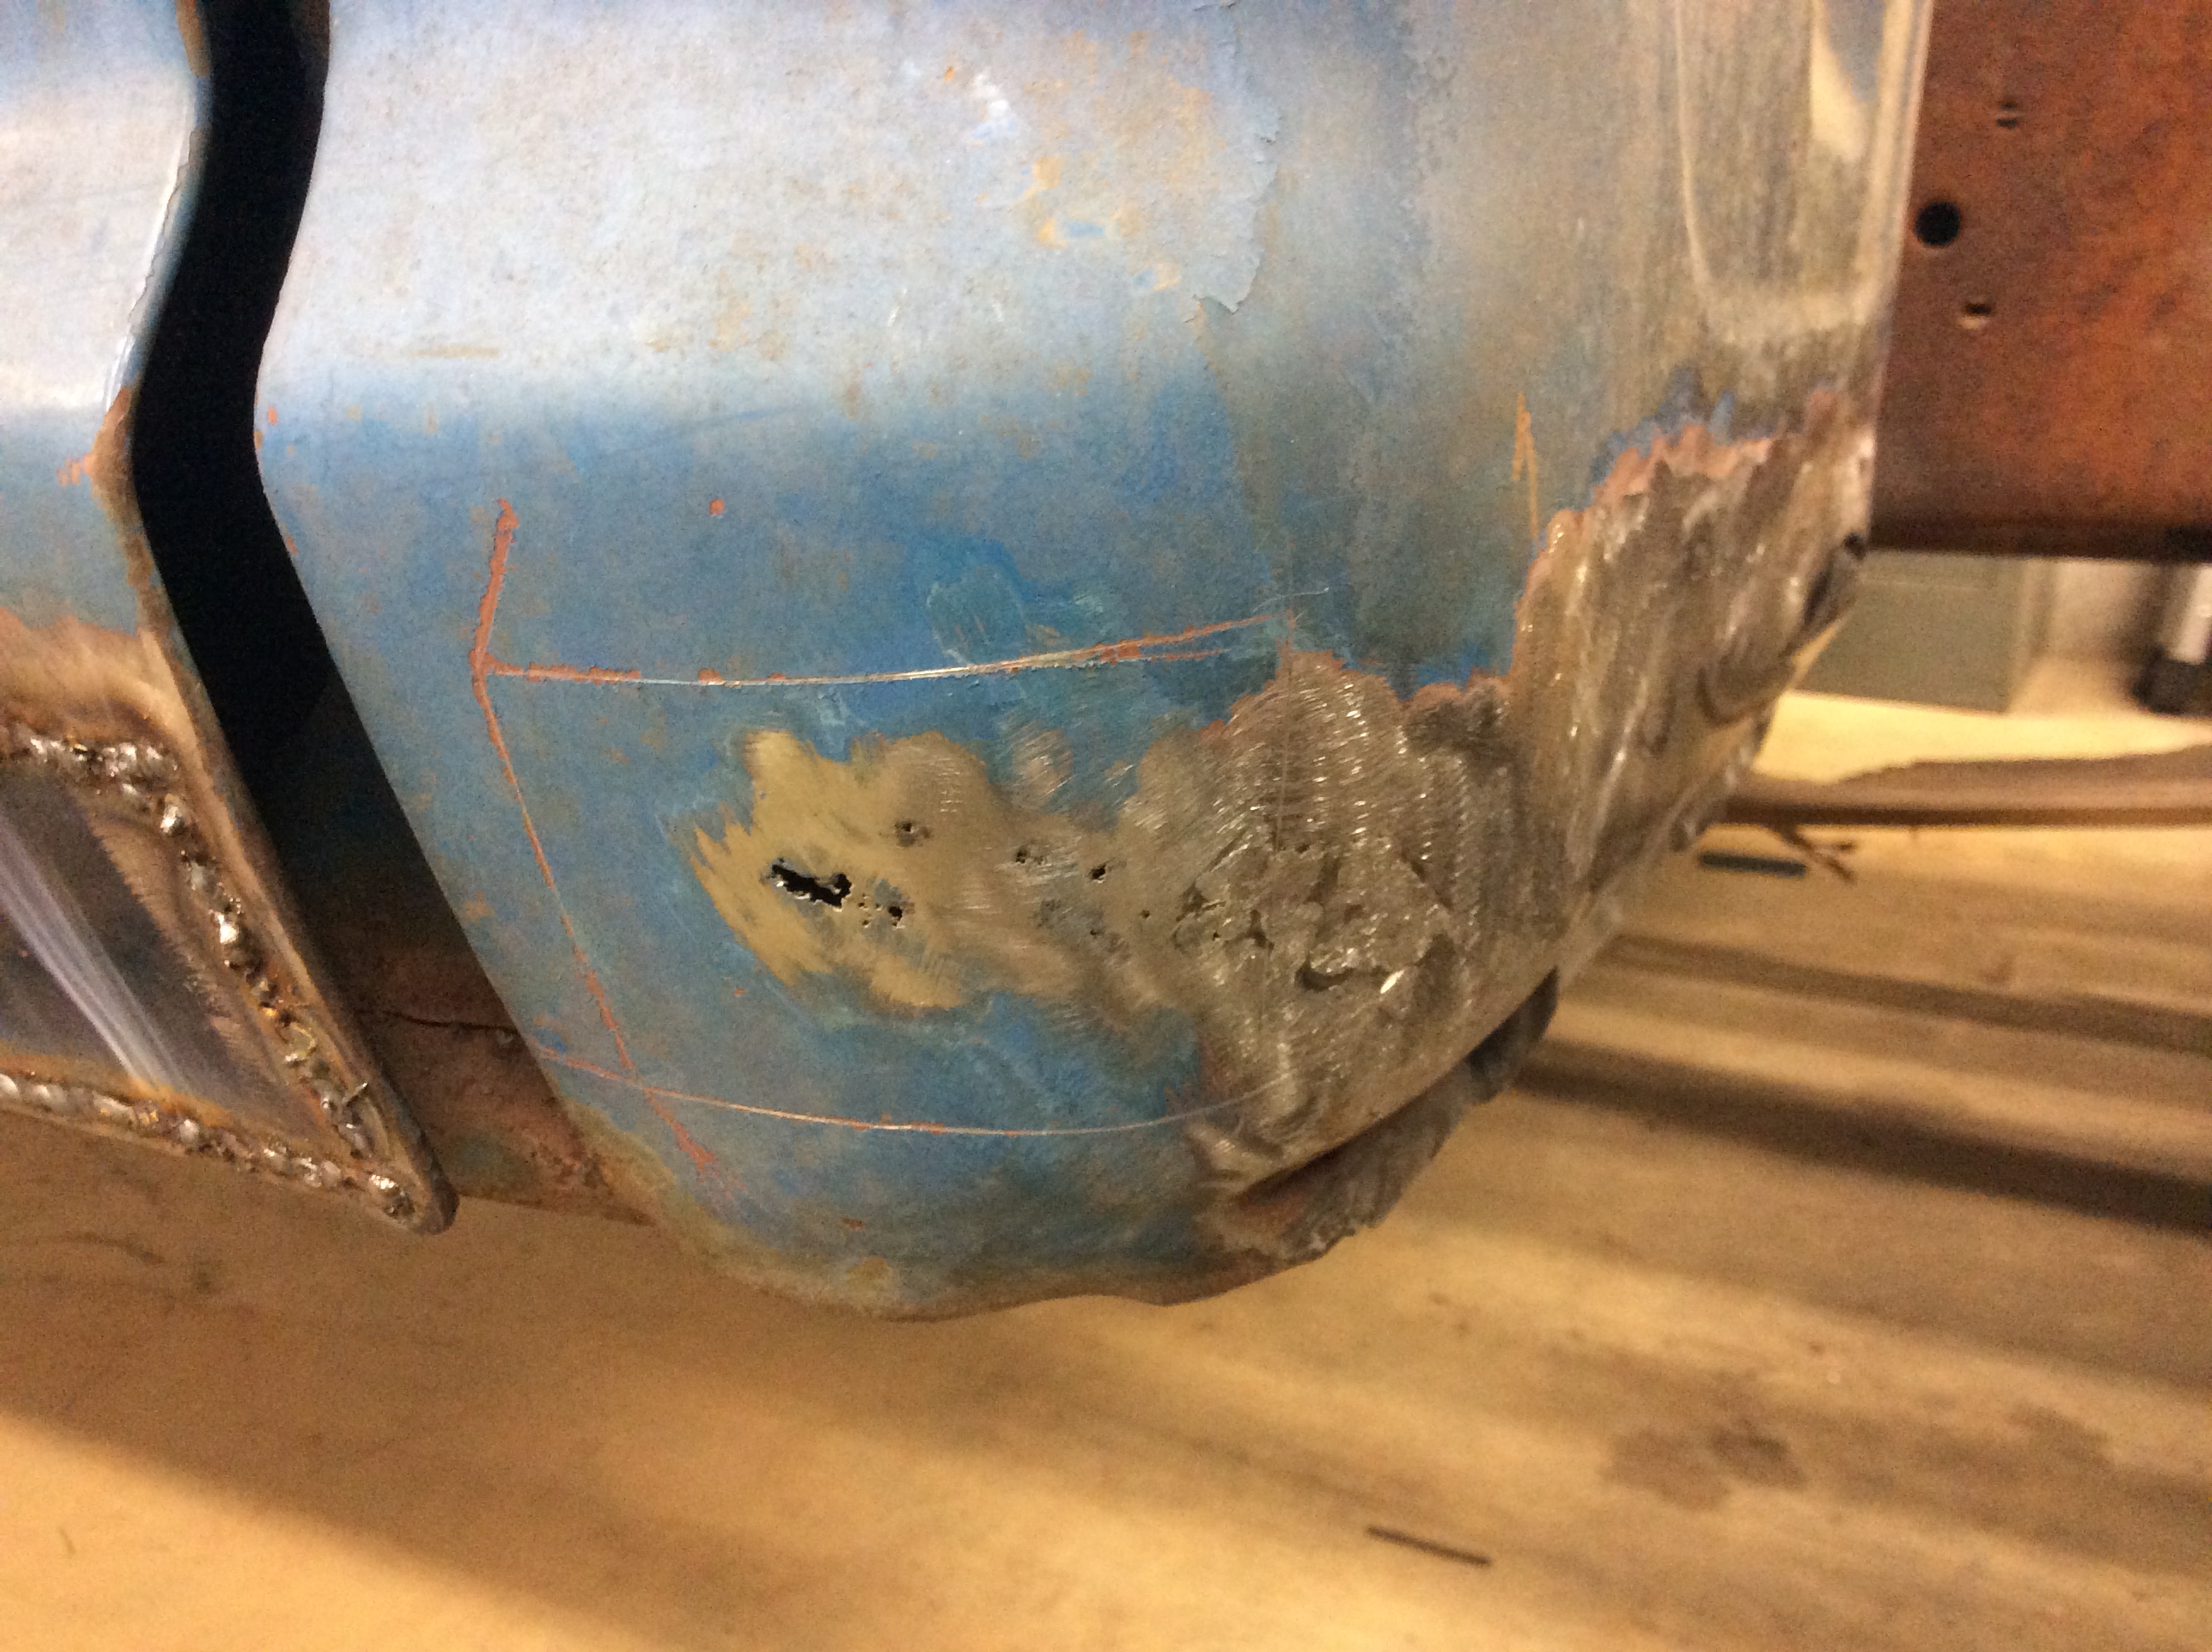
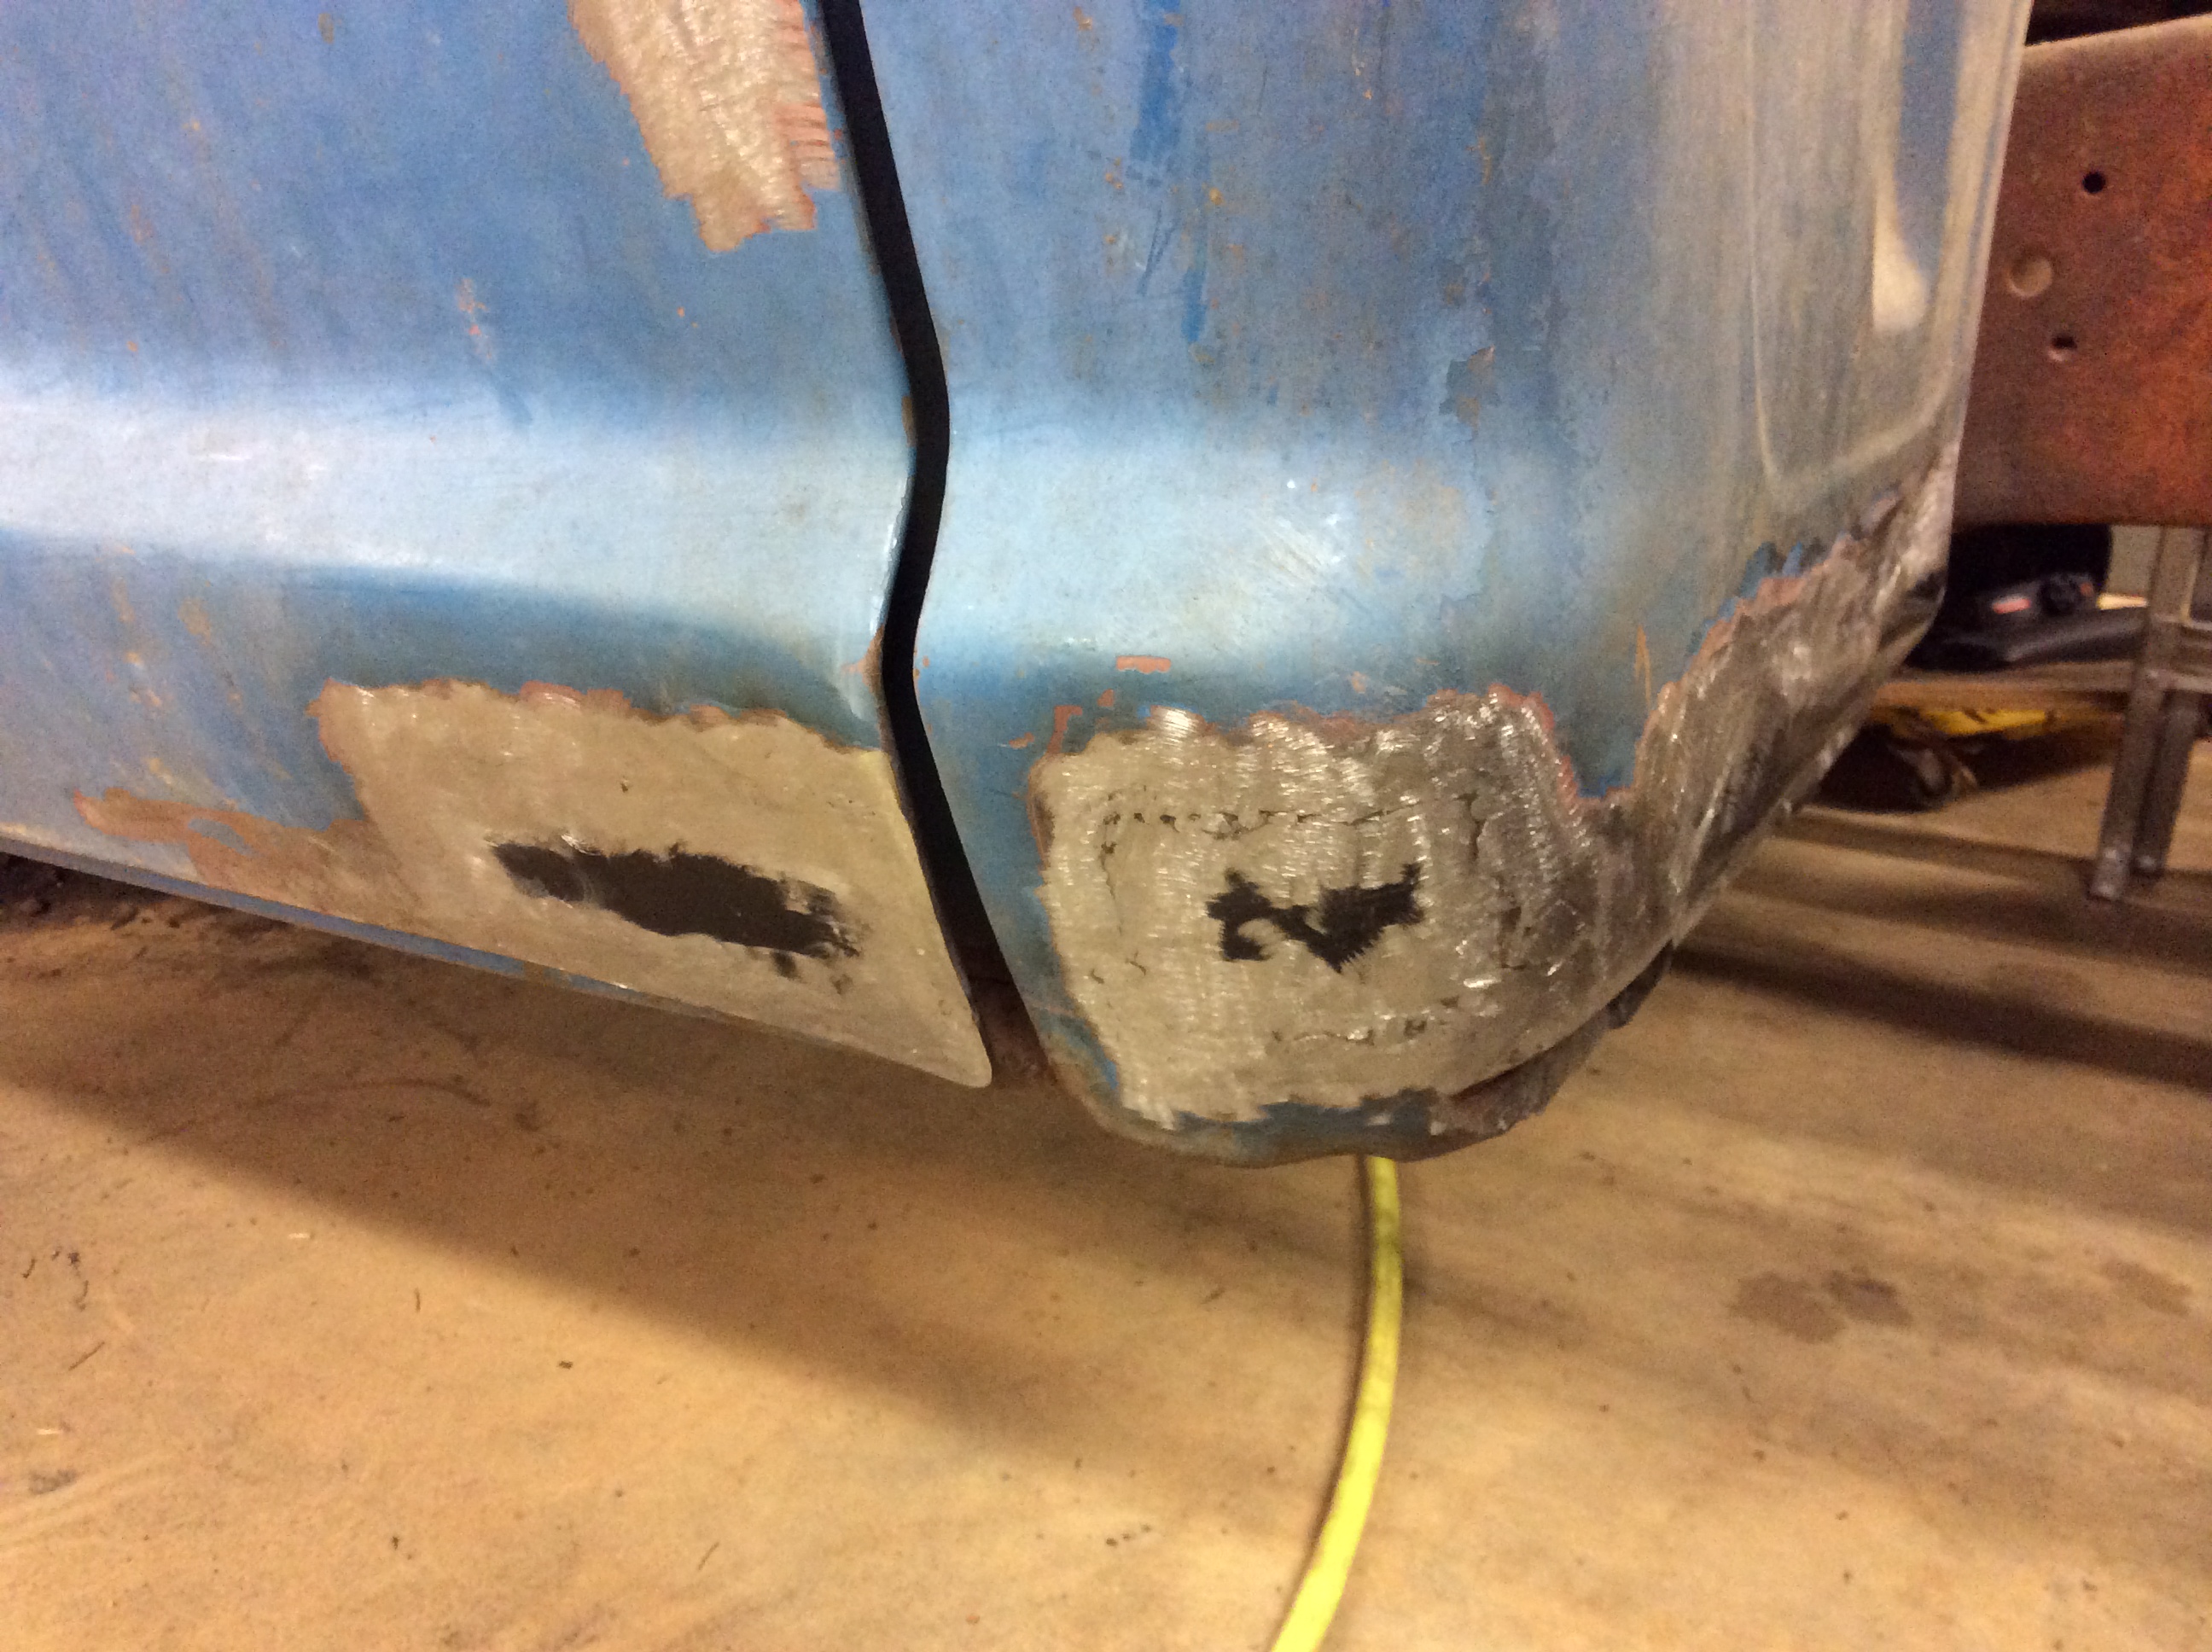
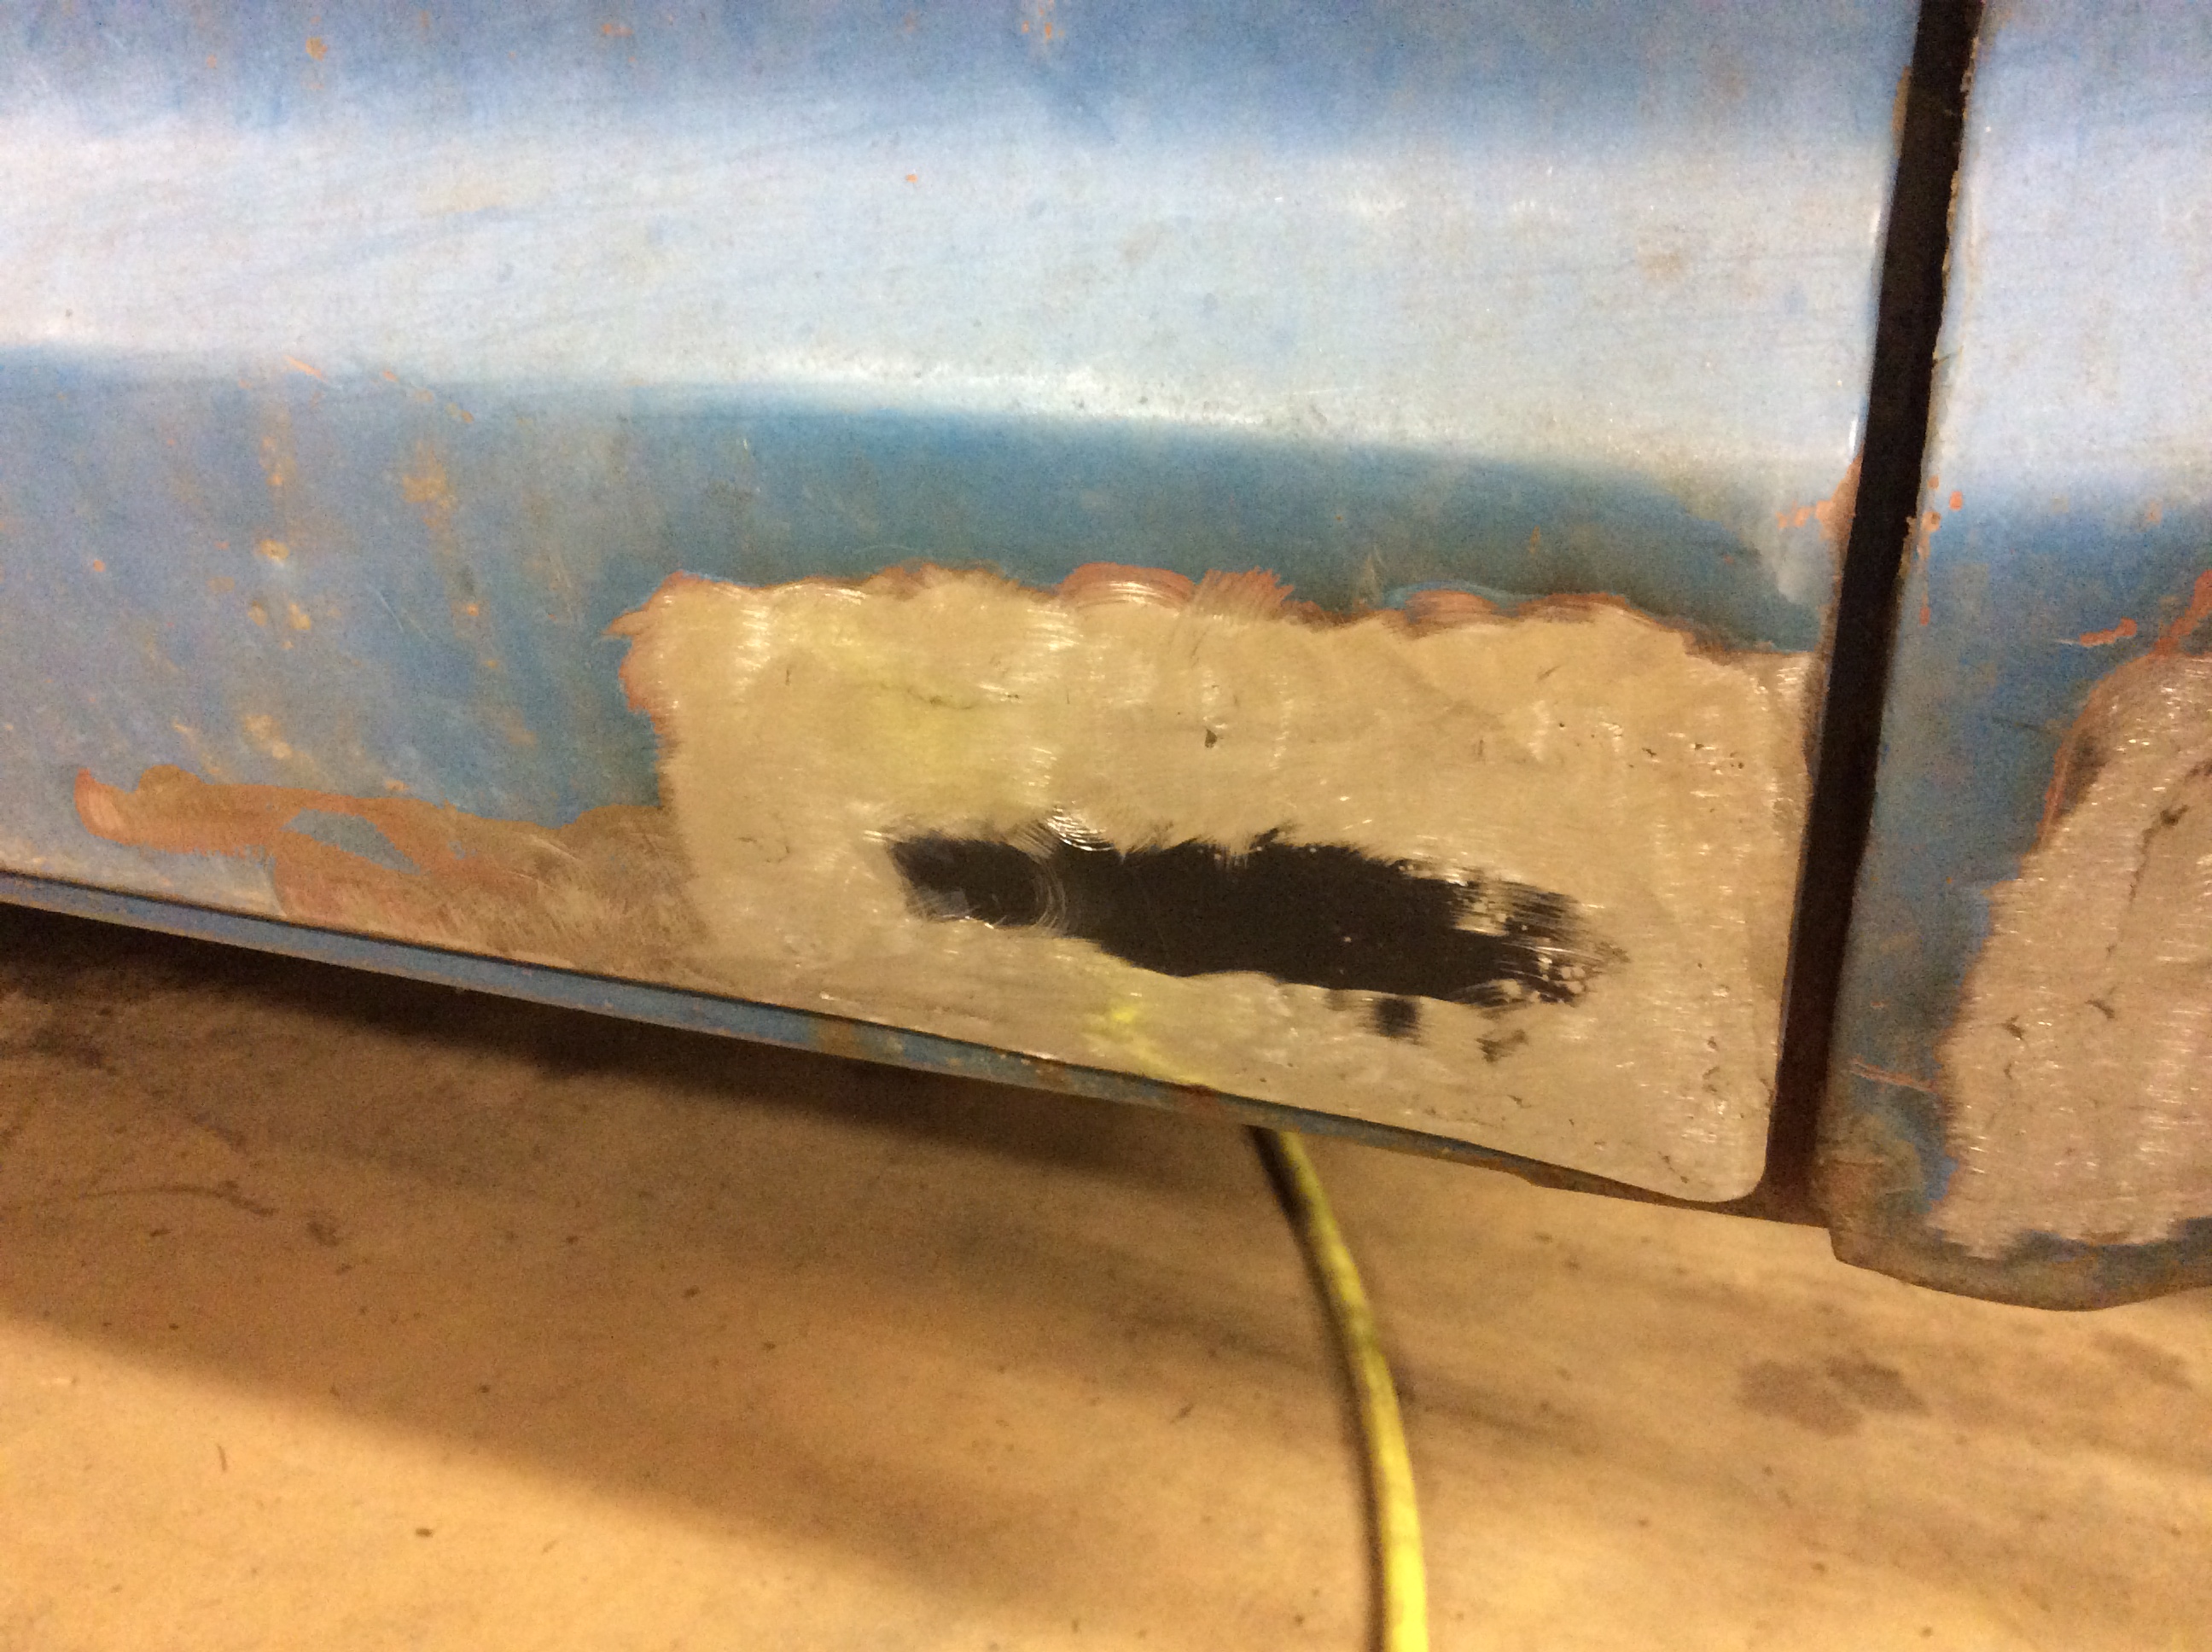
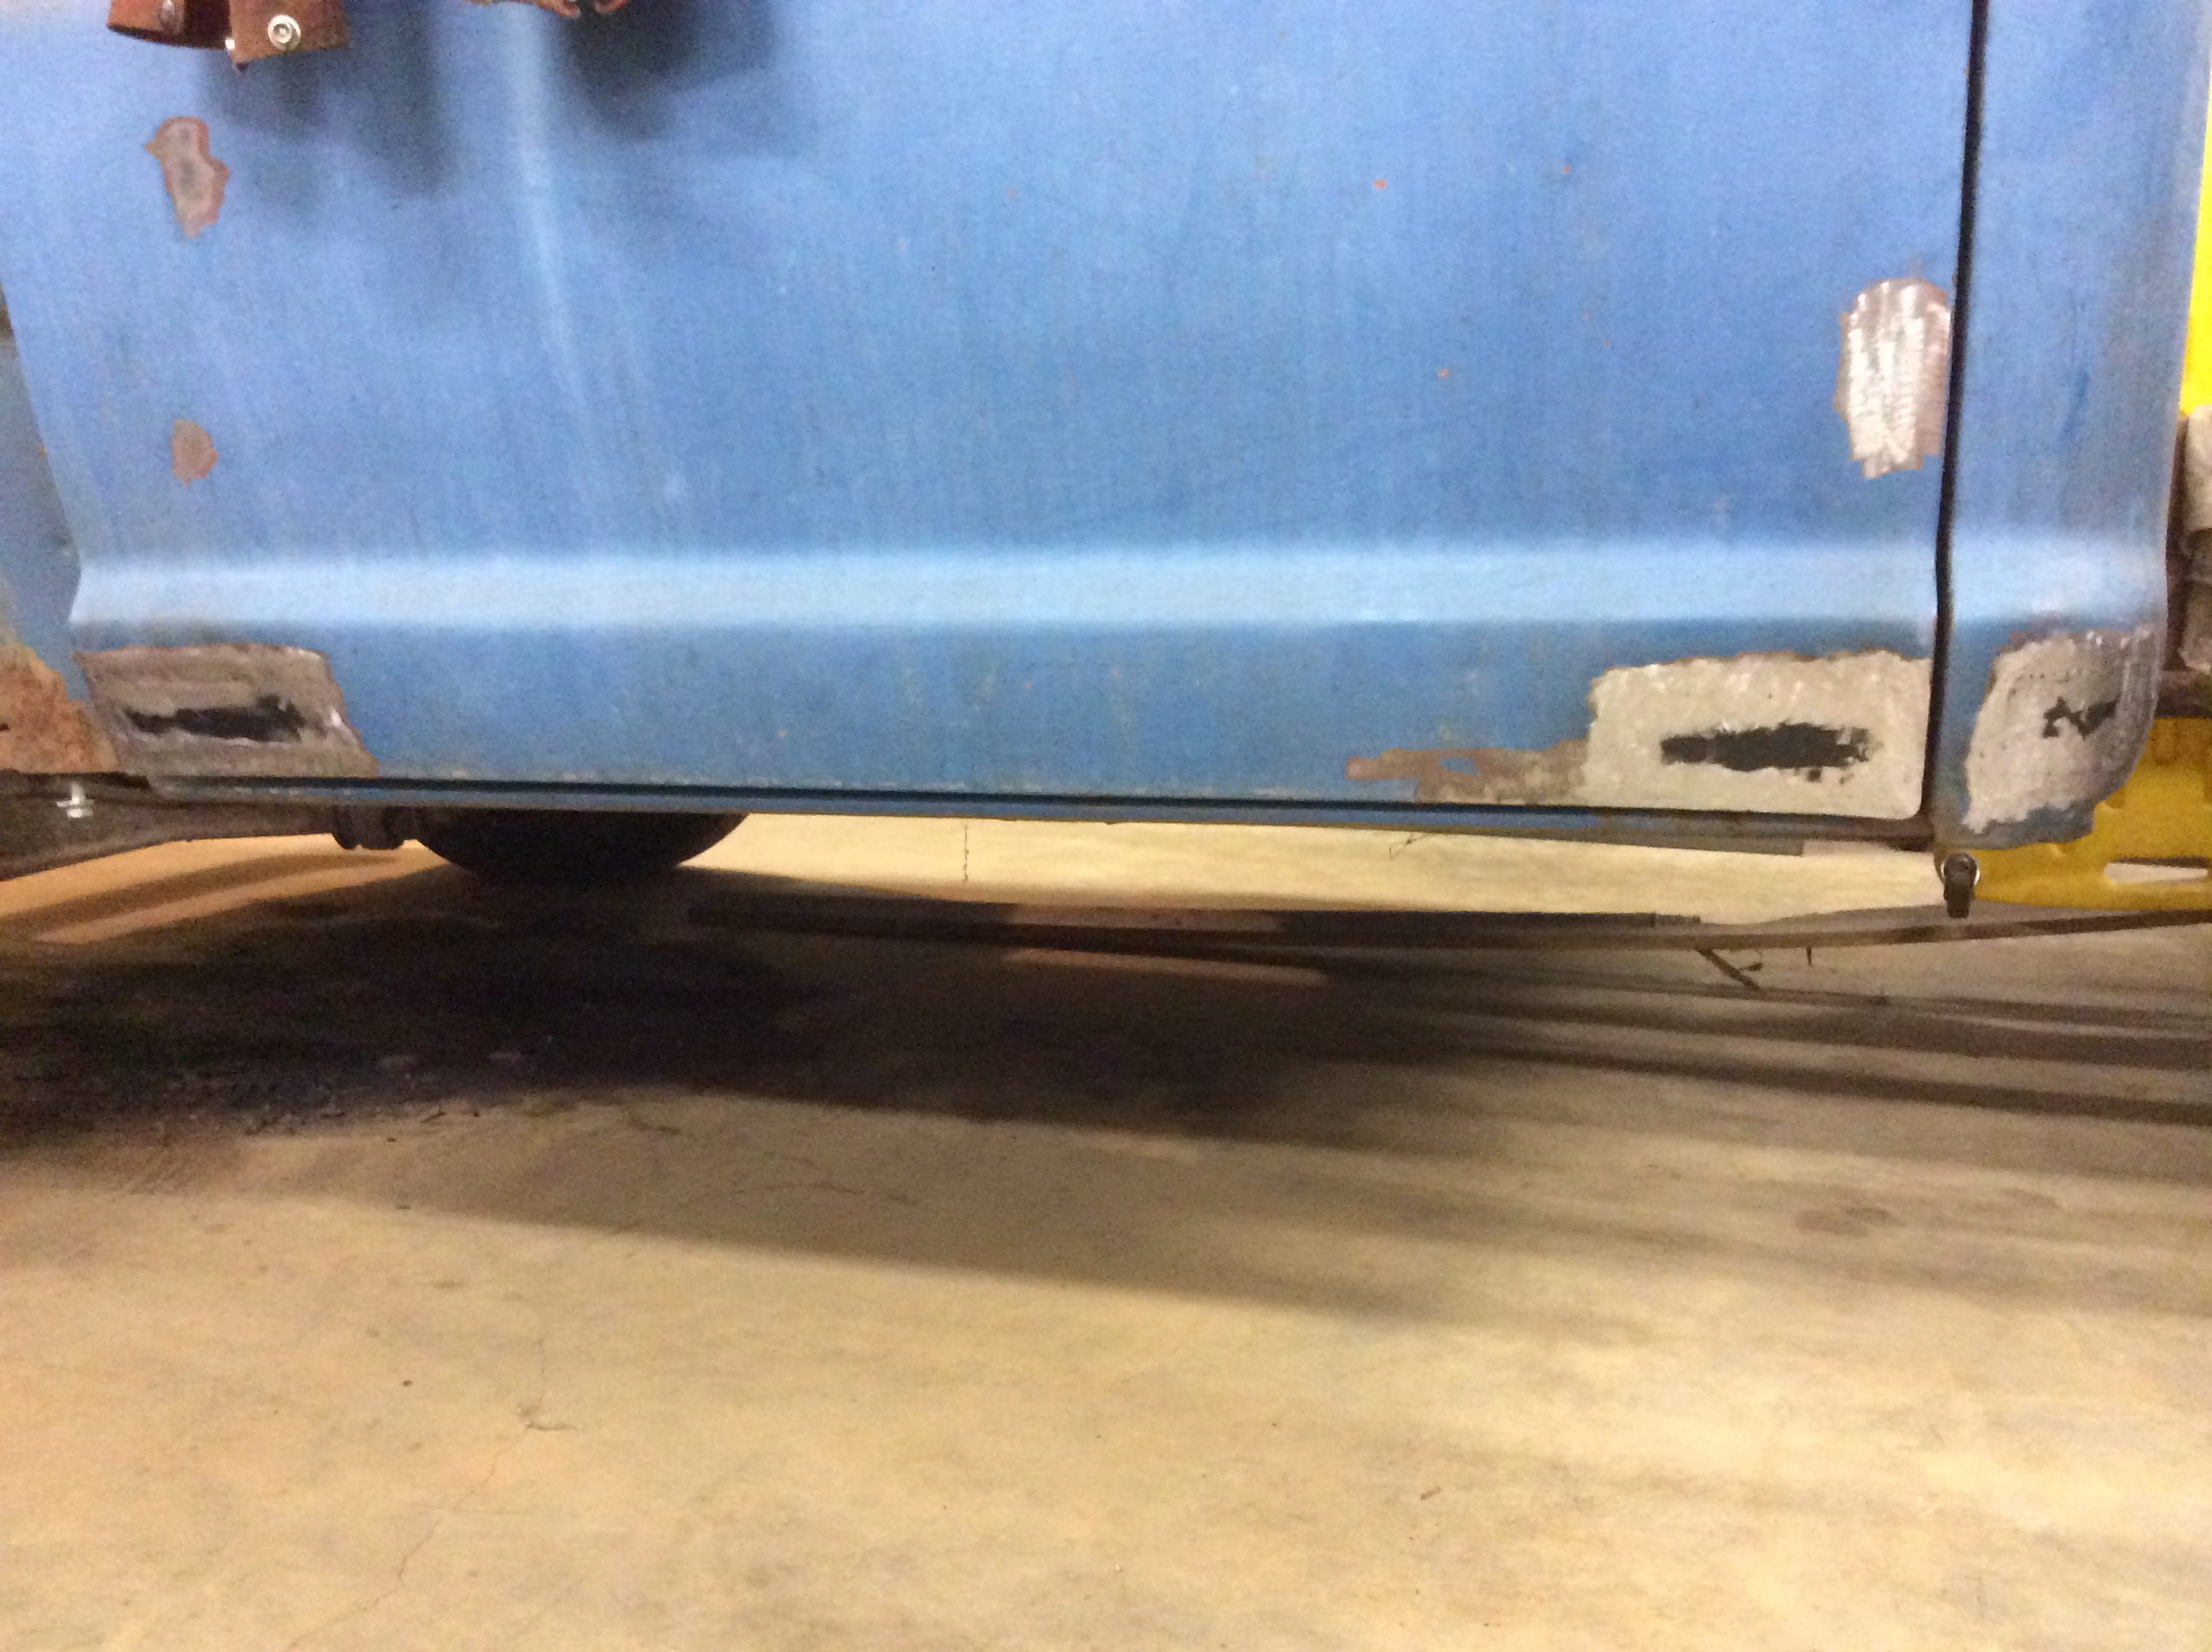
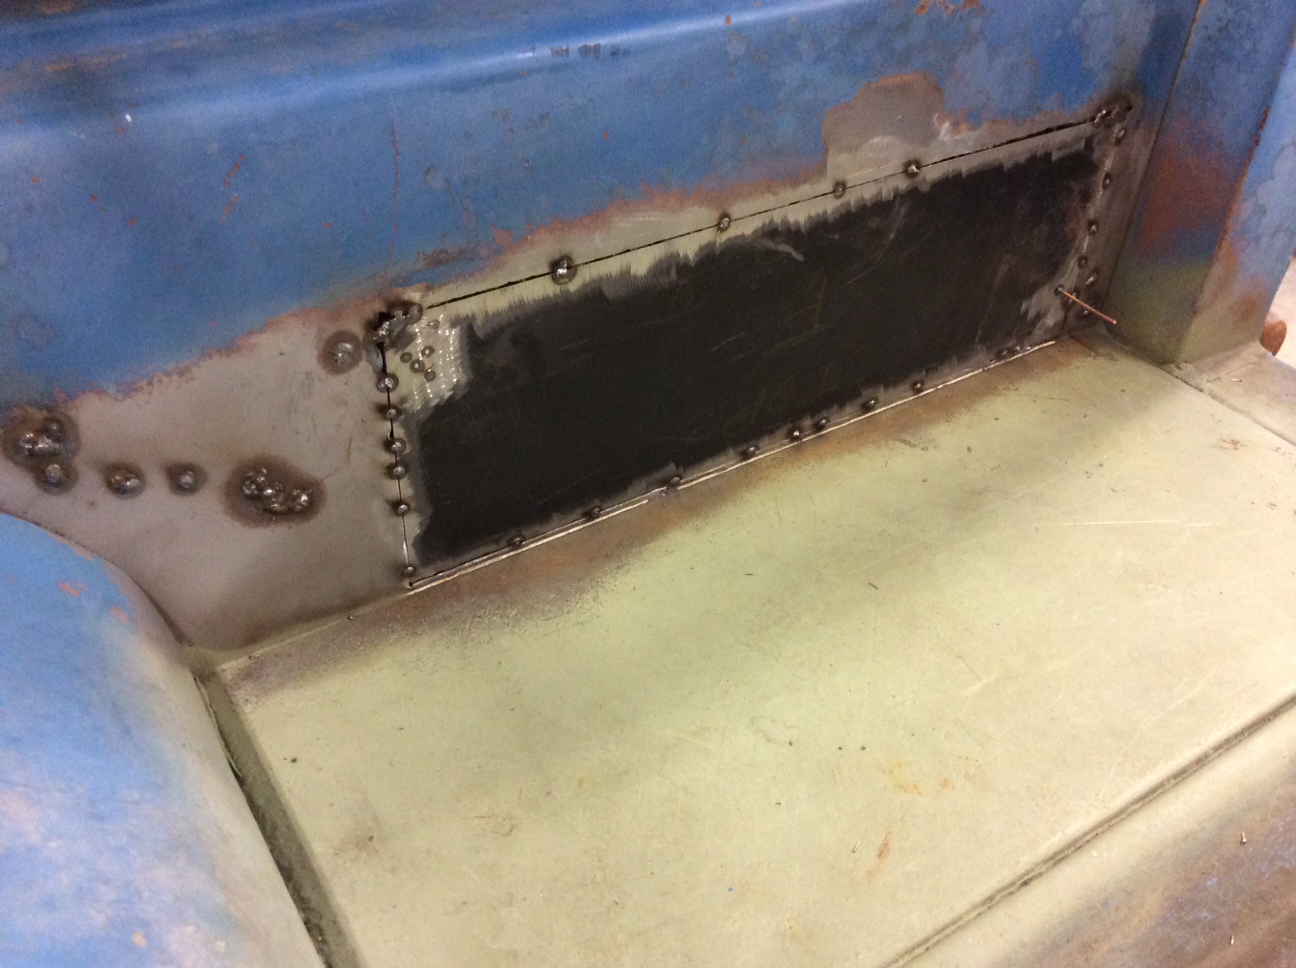
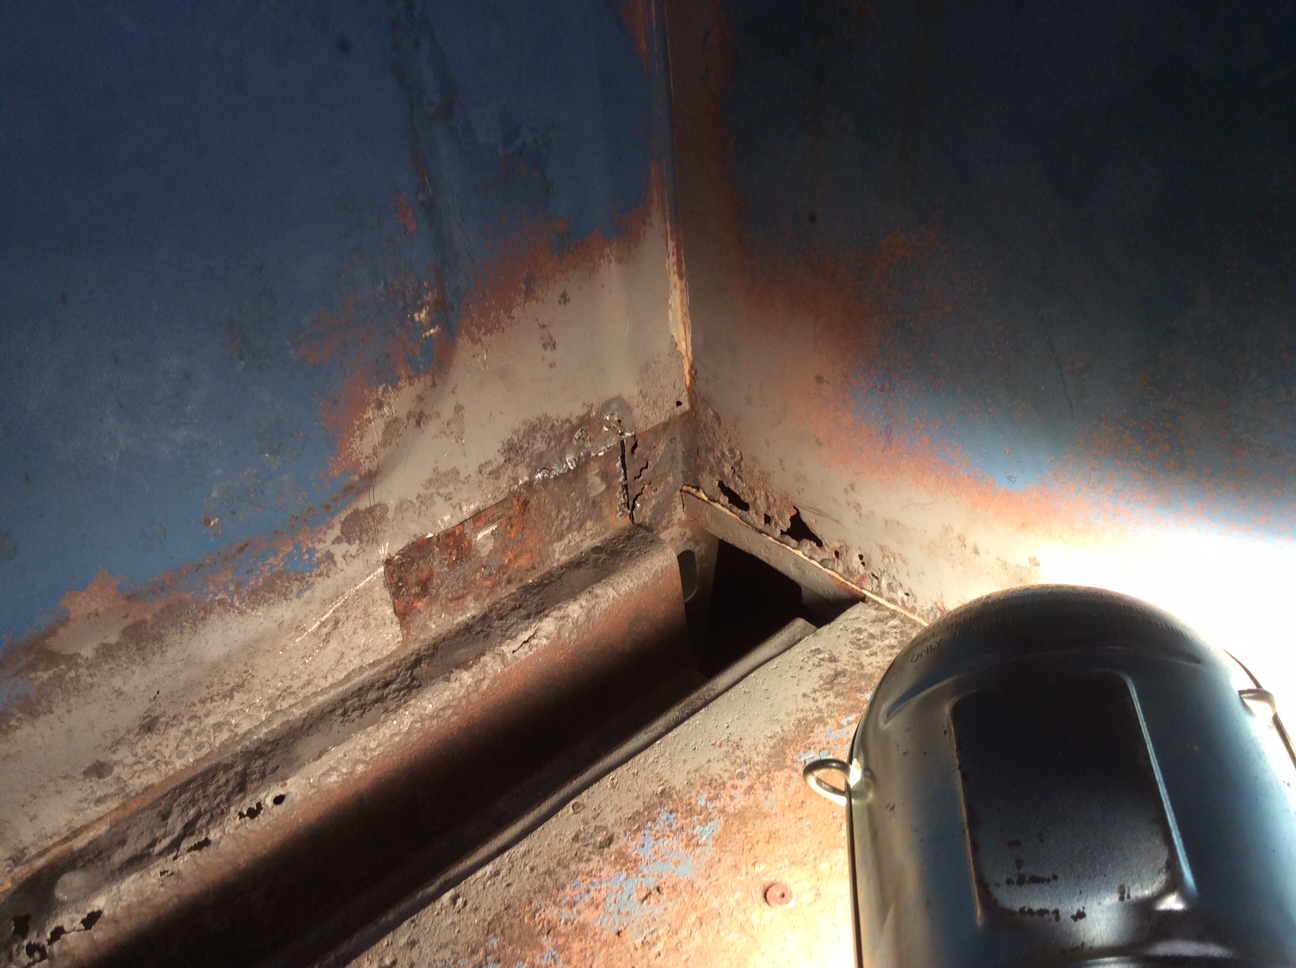
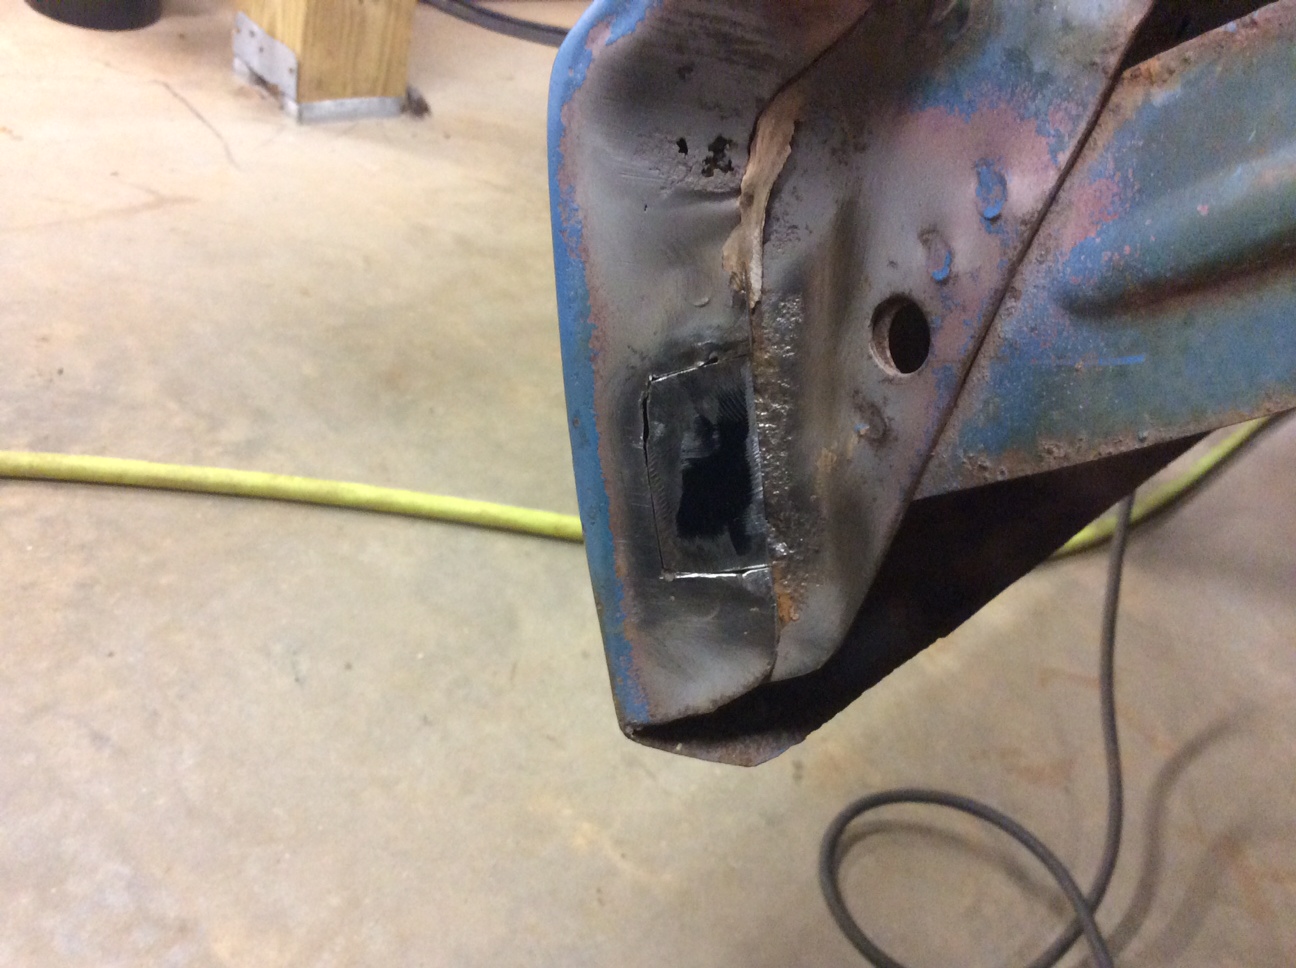
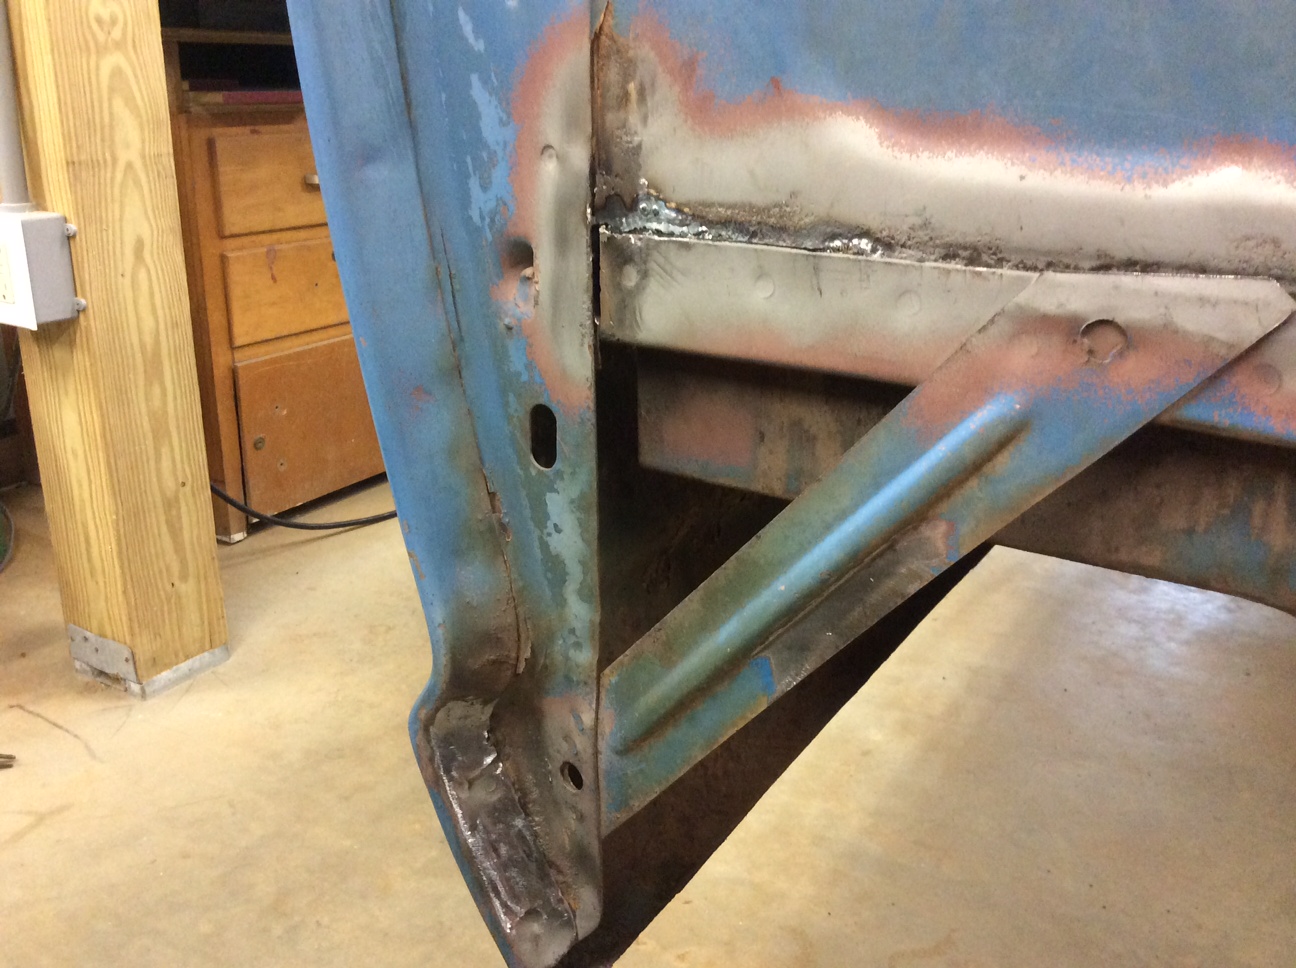
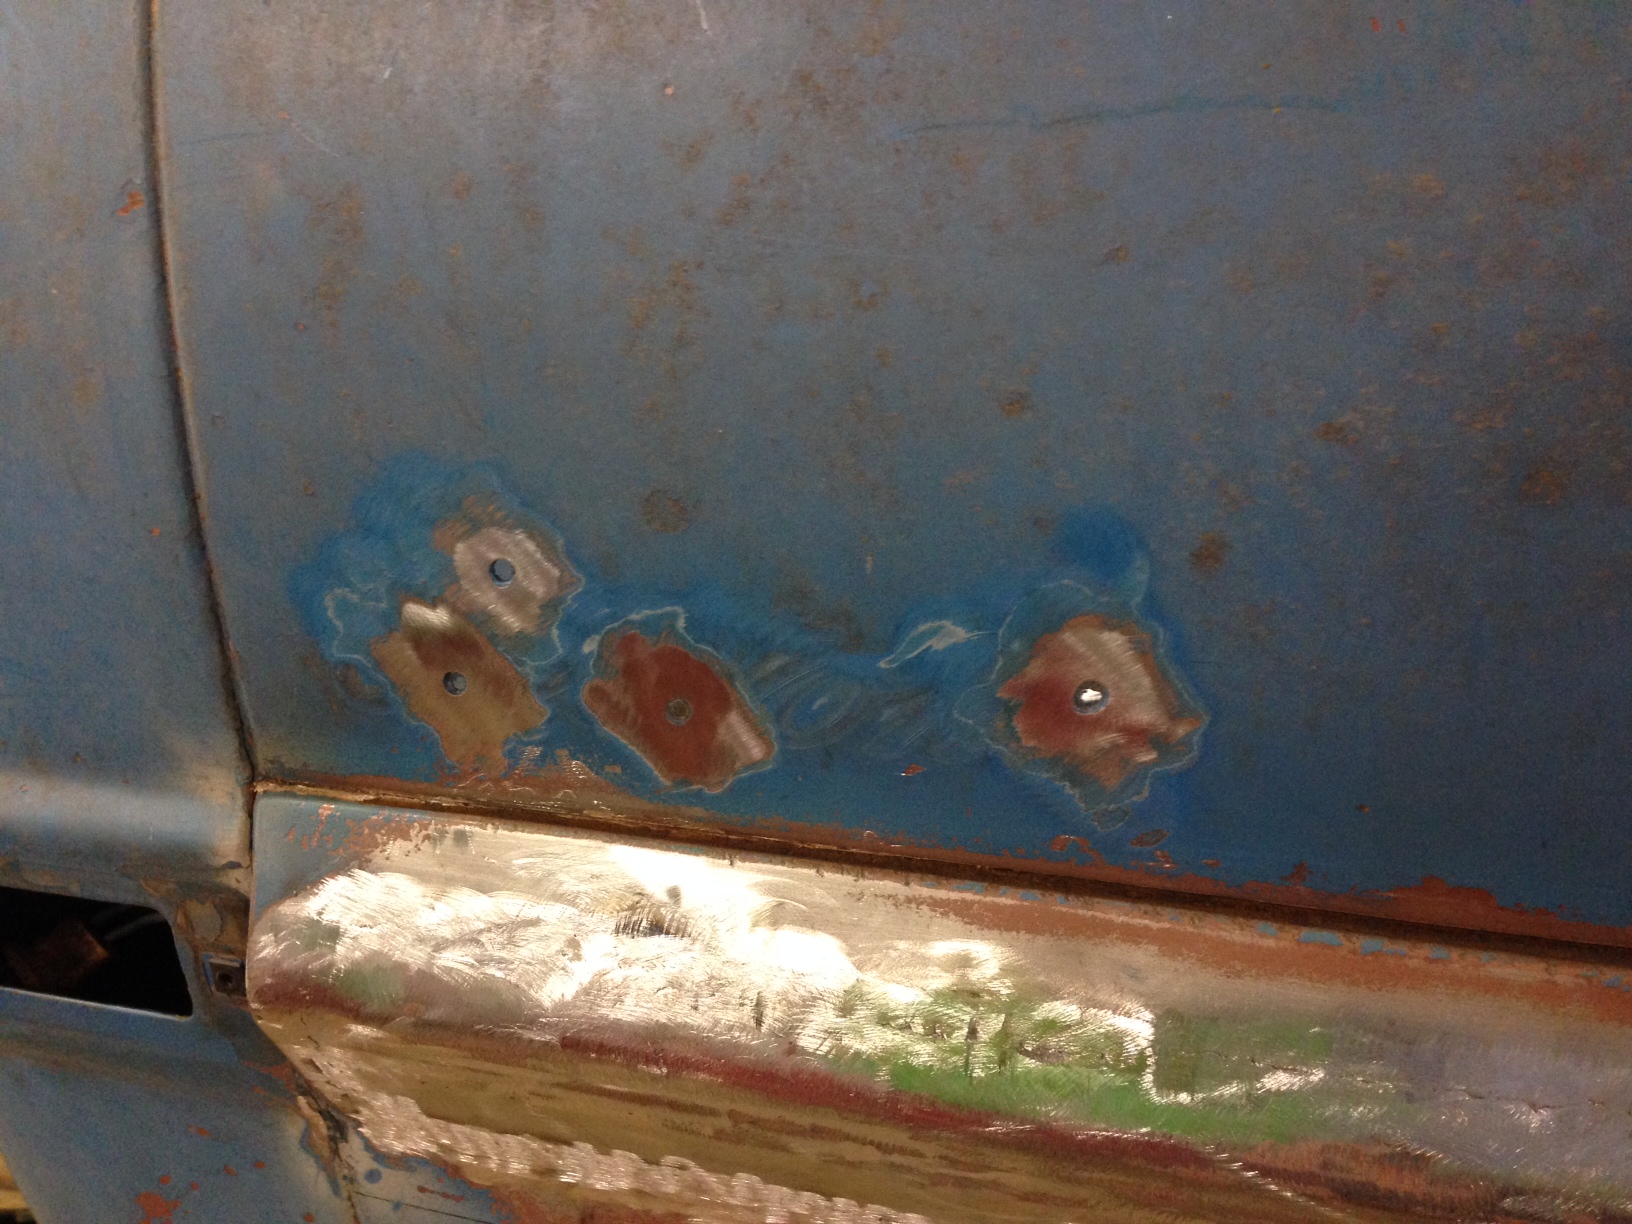
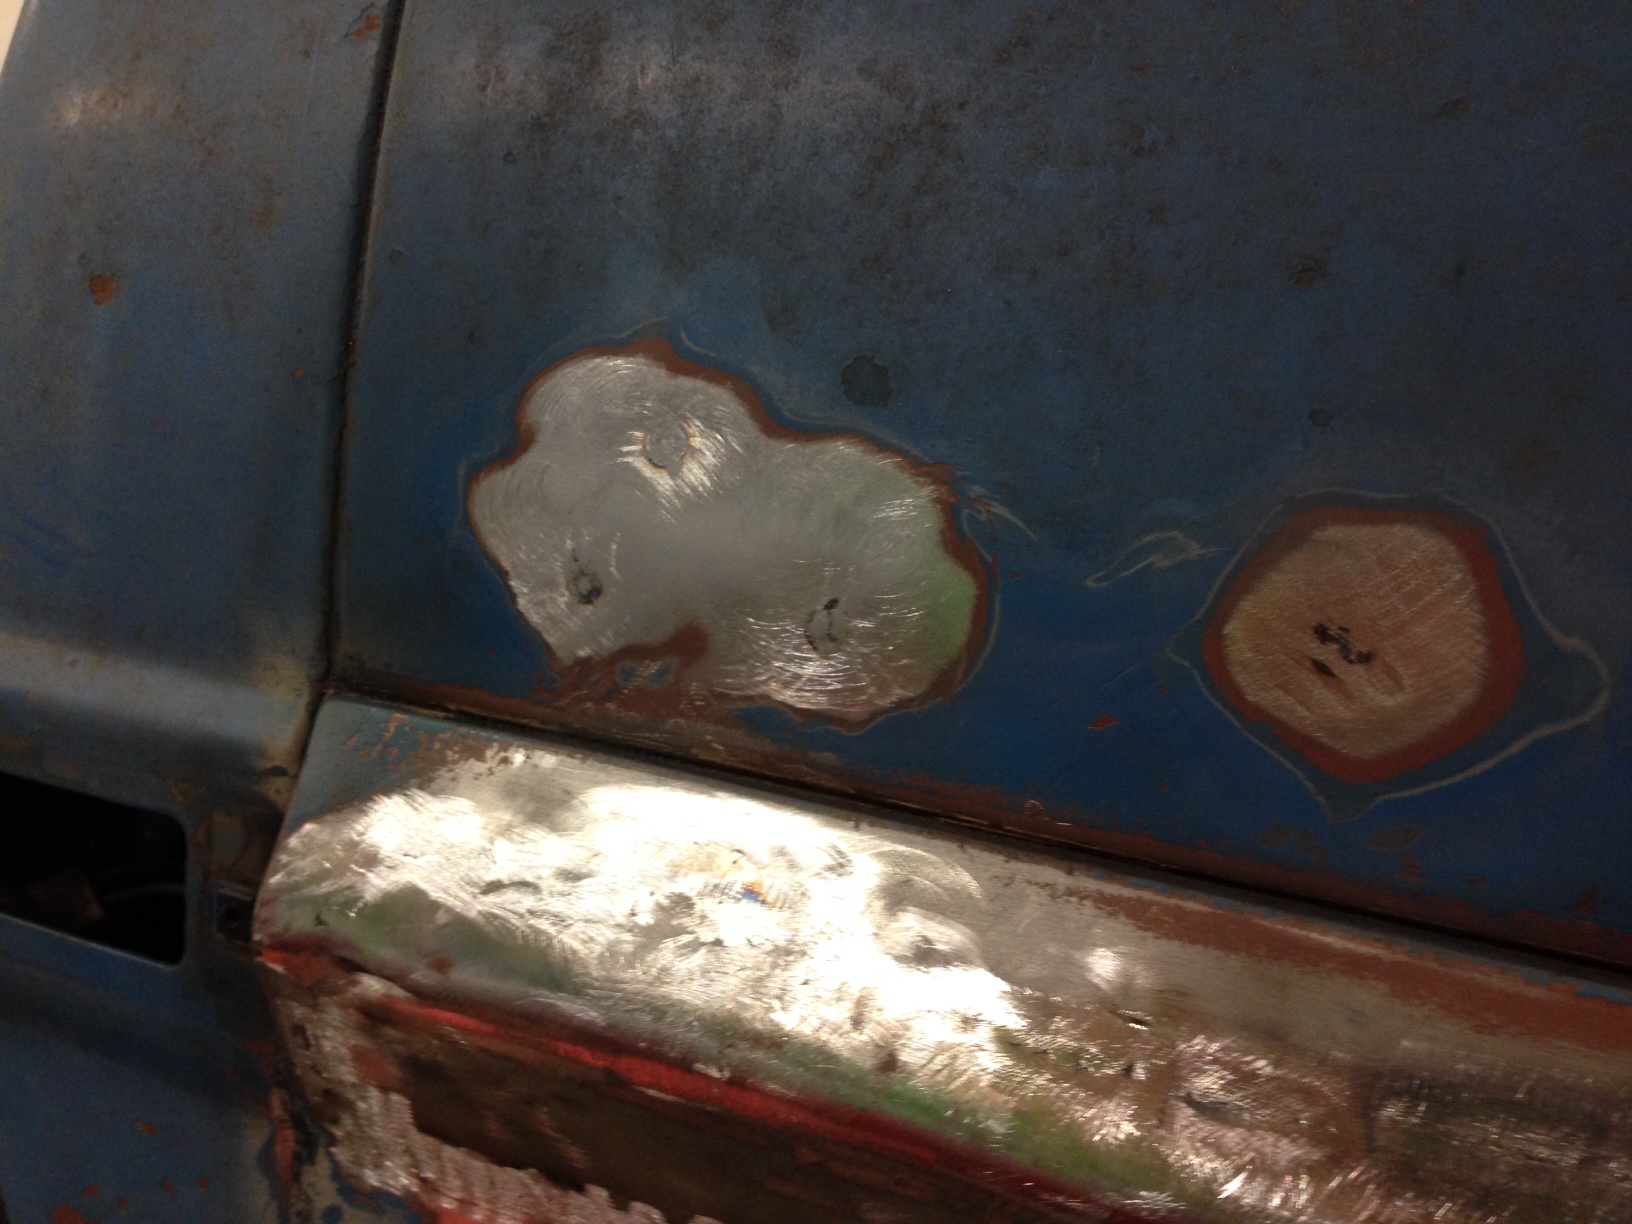
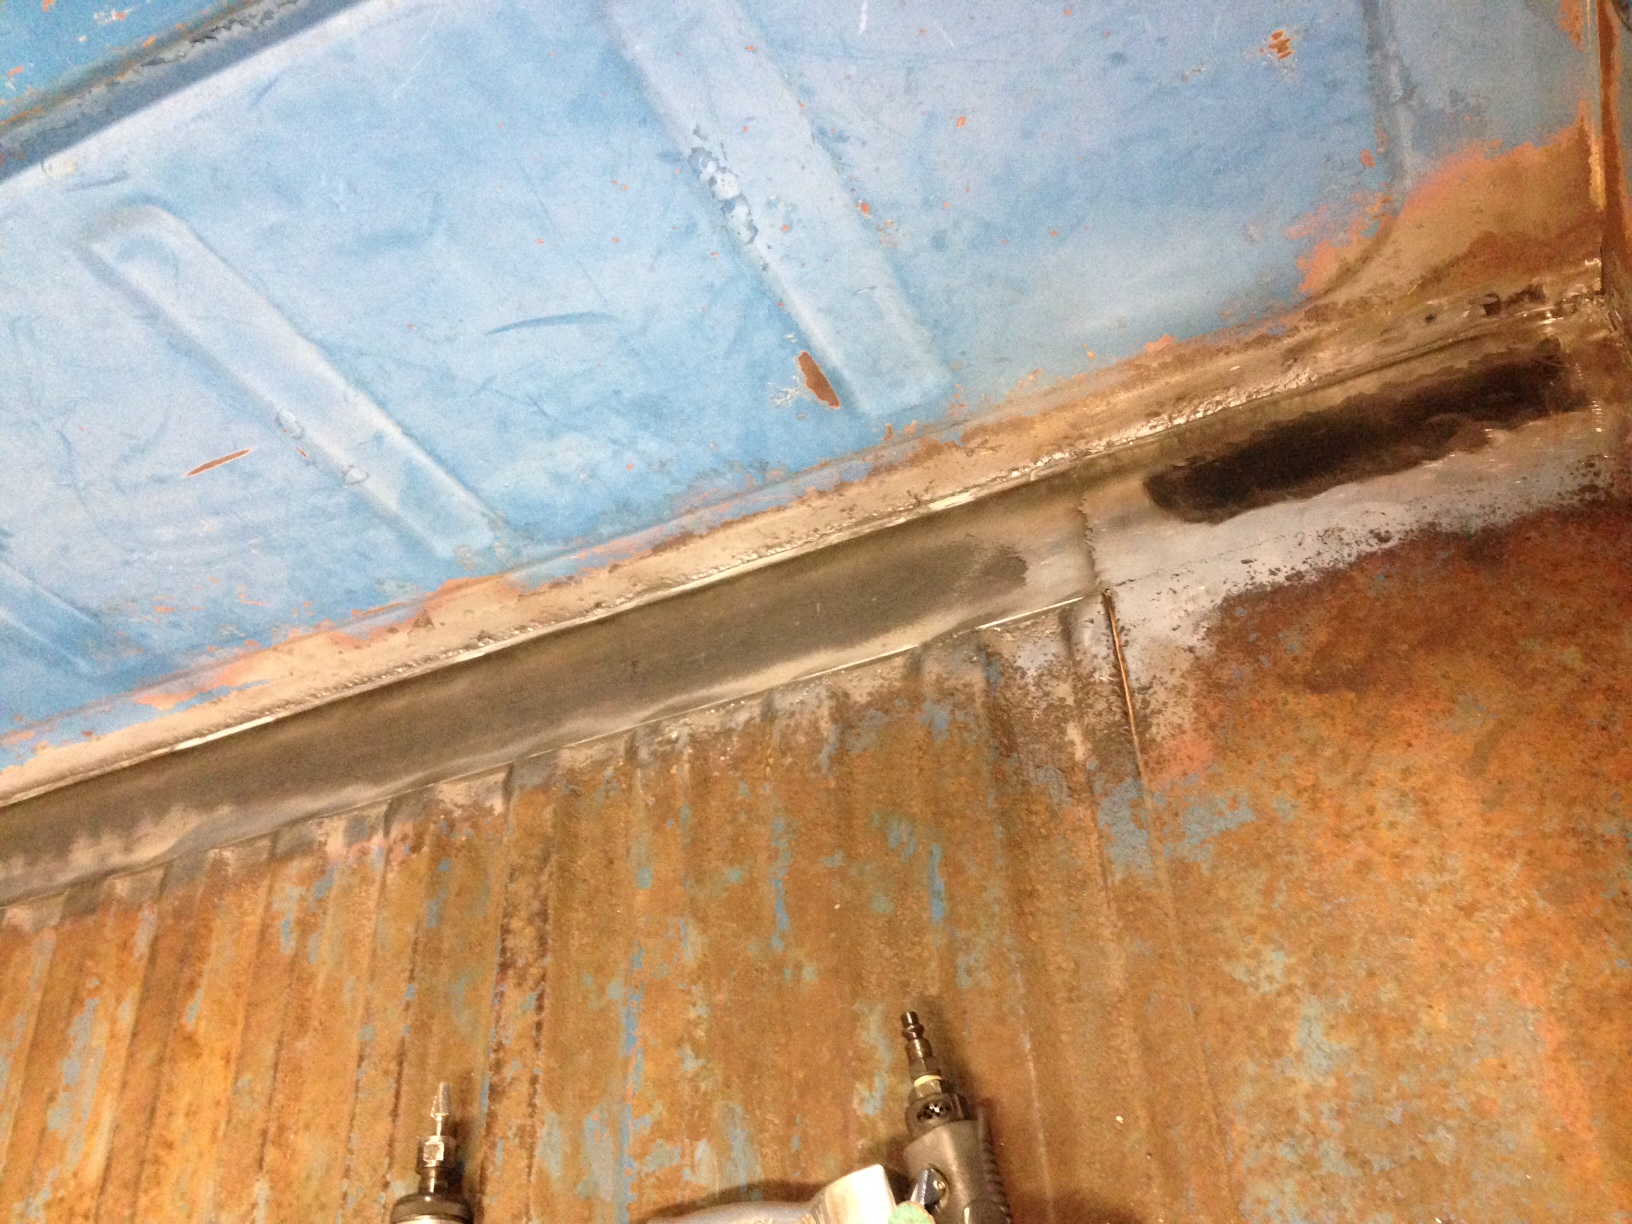
Patching so far has been the cab corners and the tailgate including filling some trim holes.
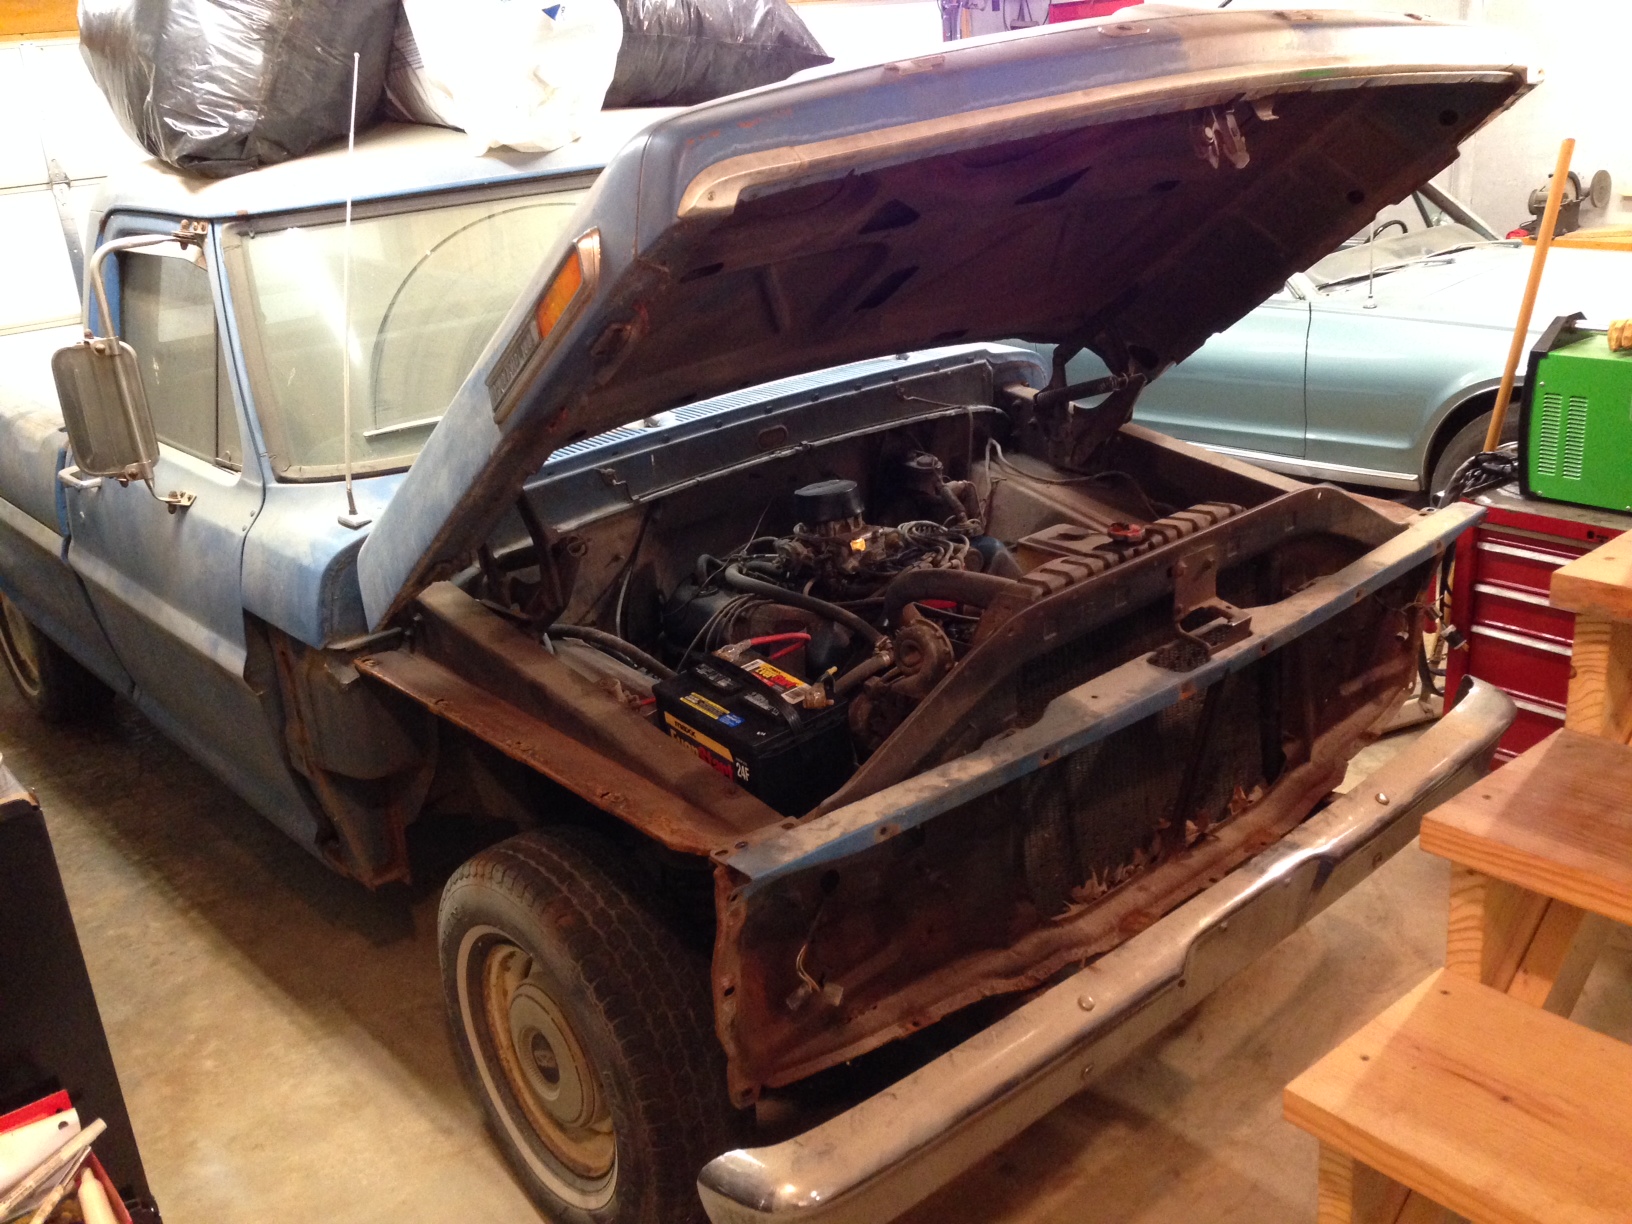
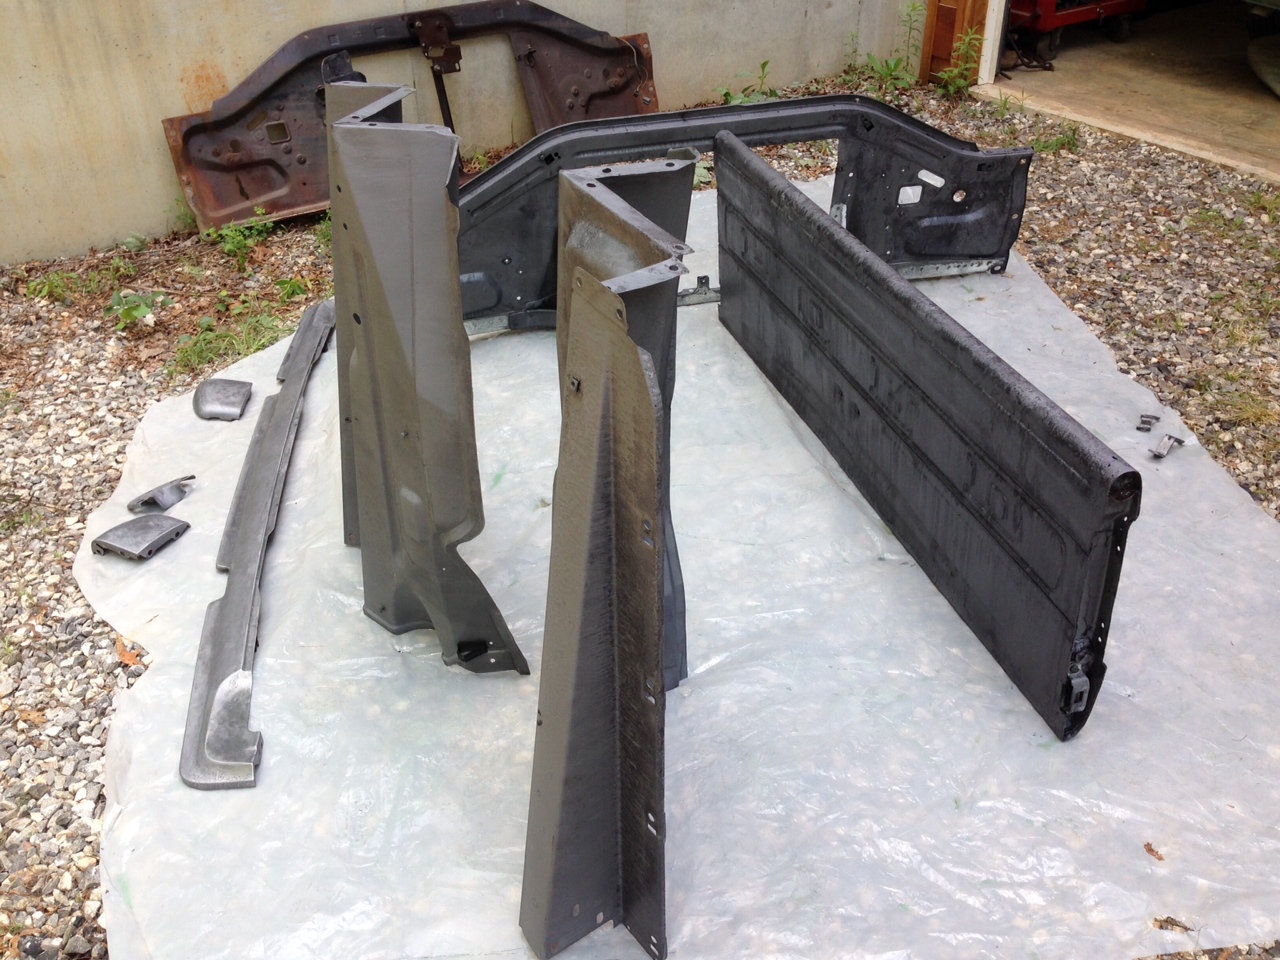
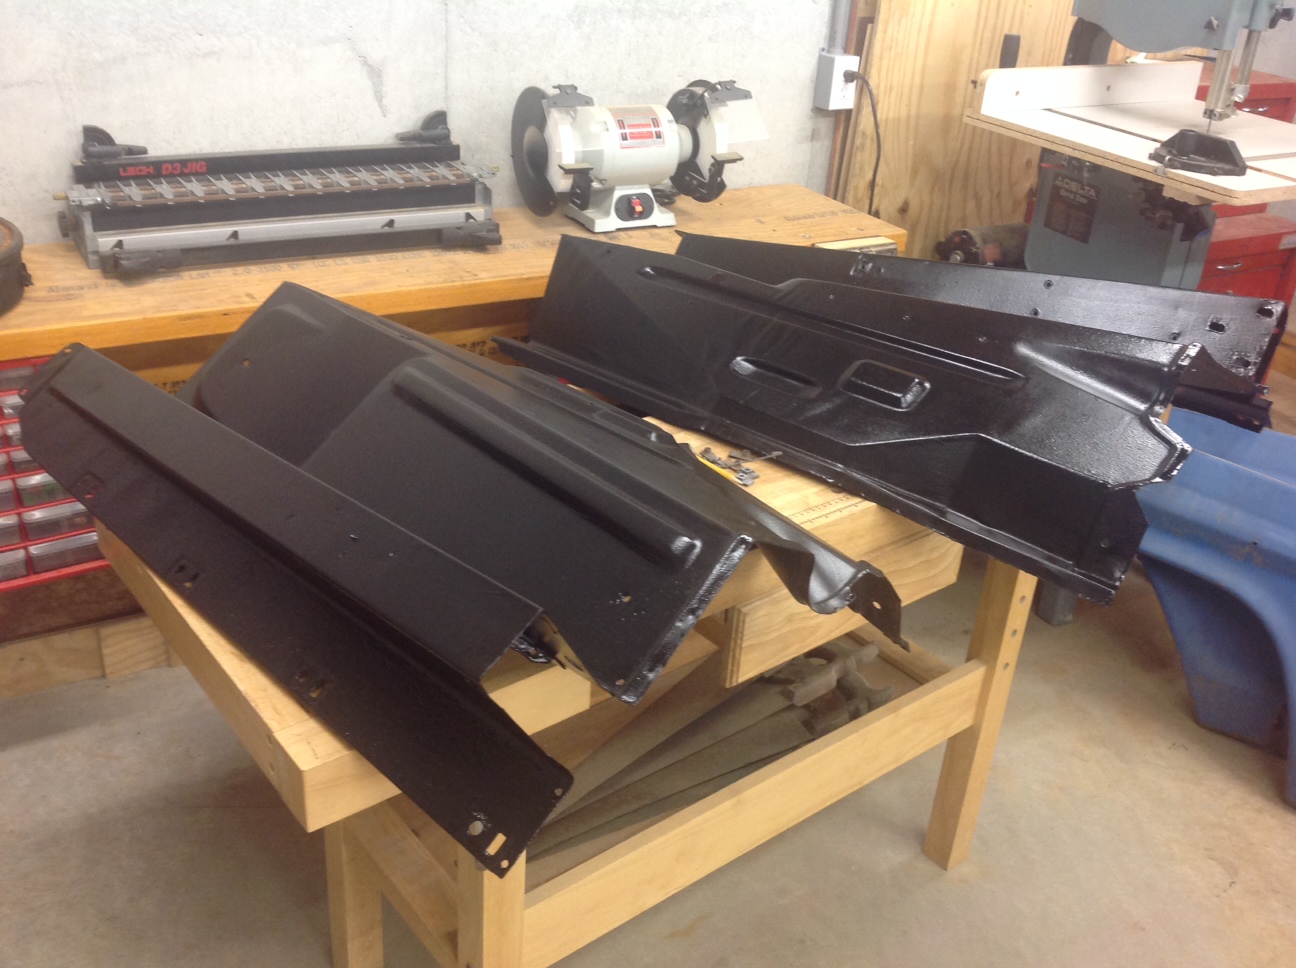
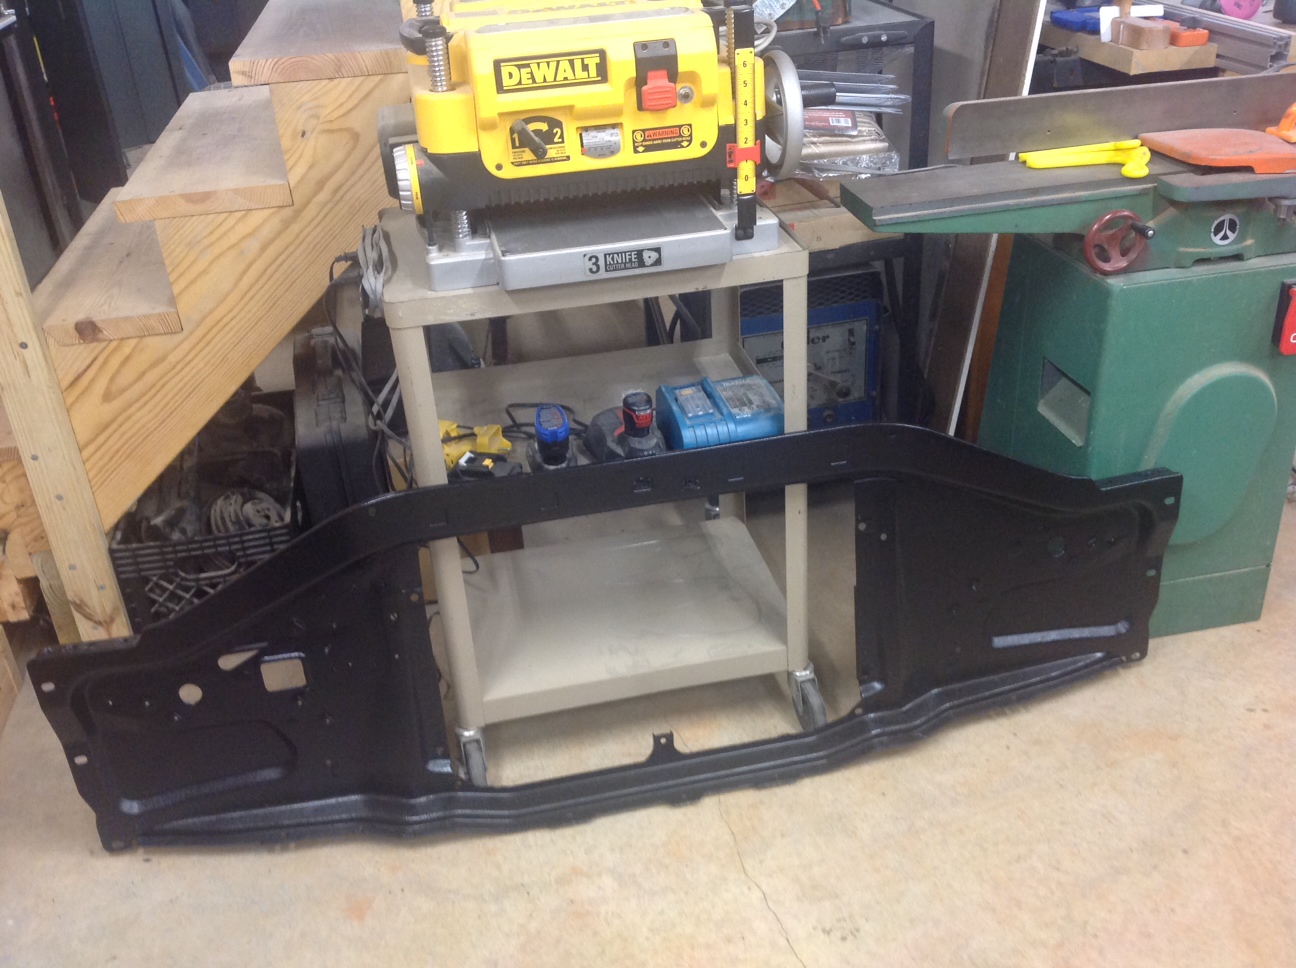
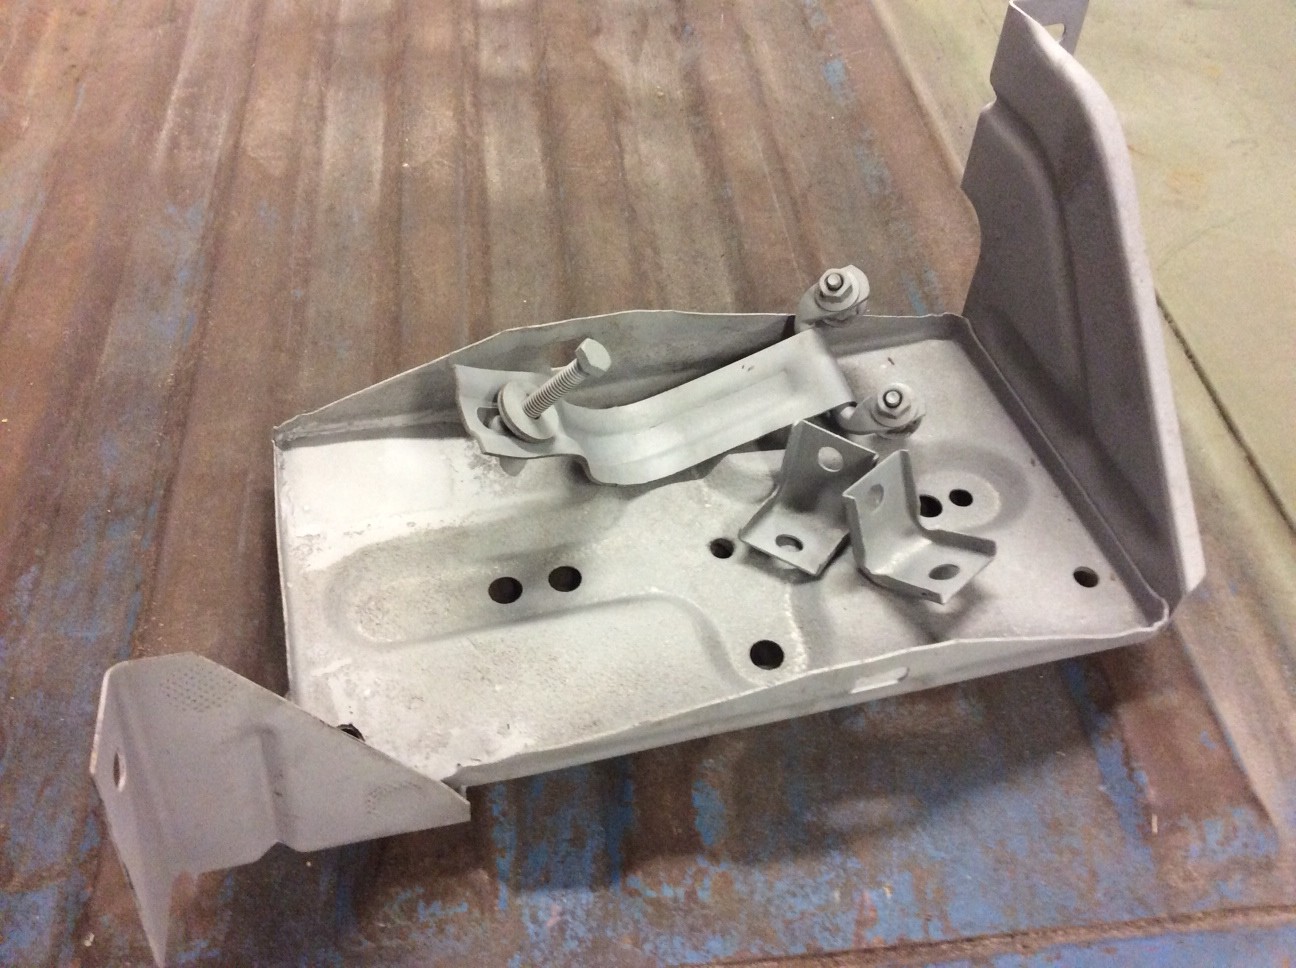
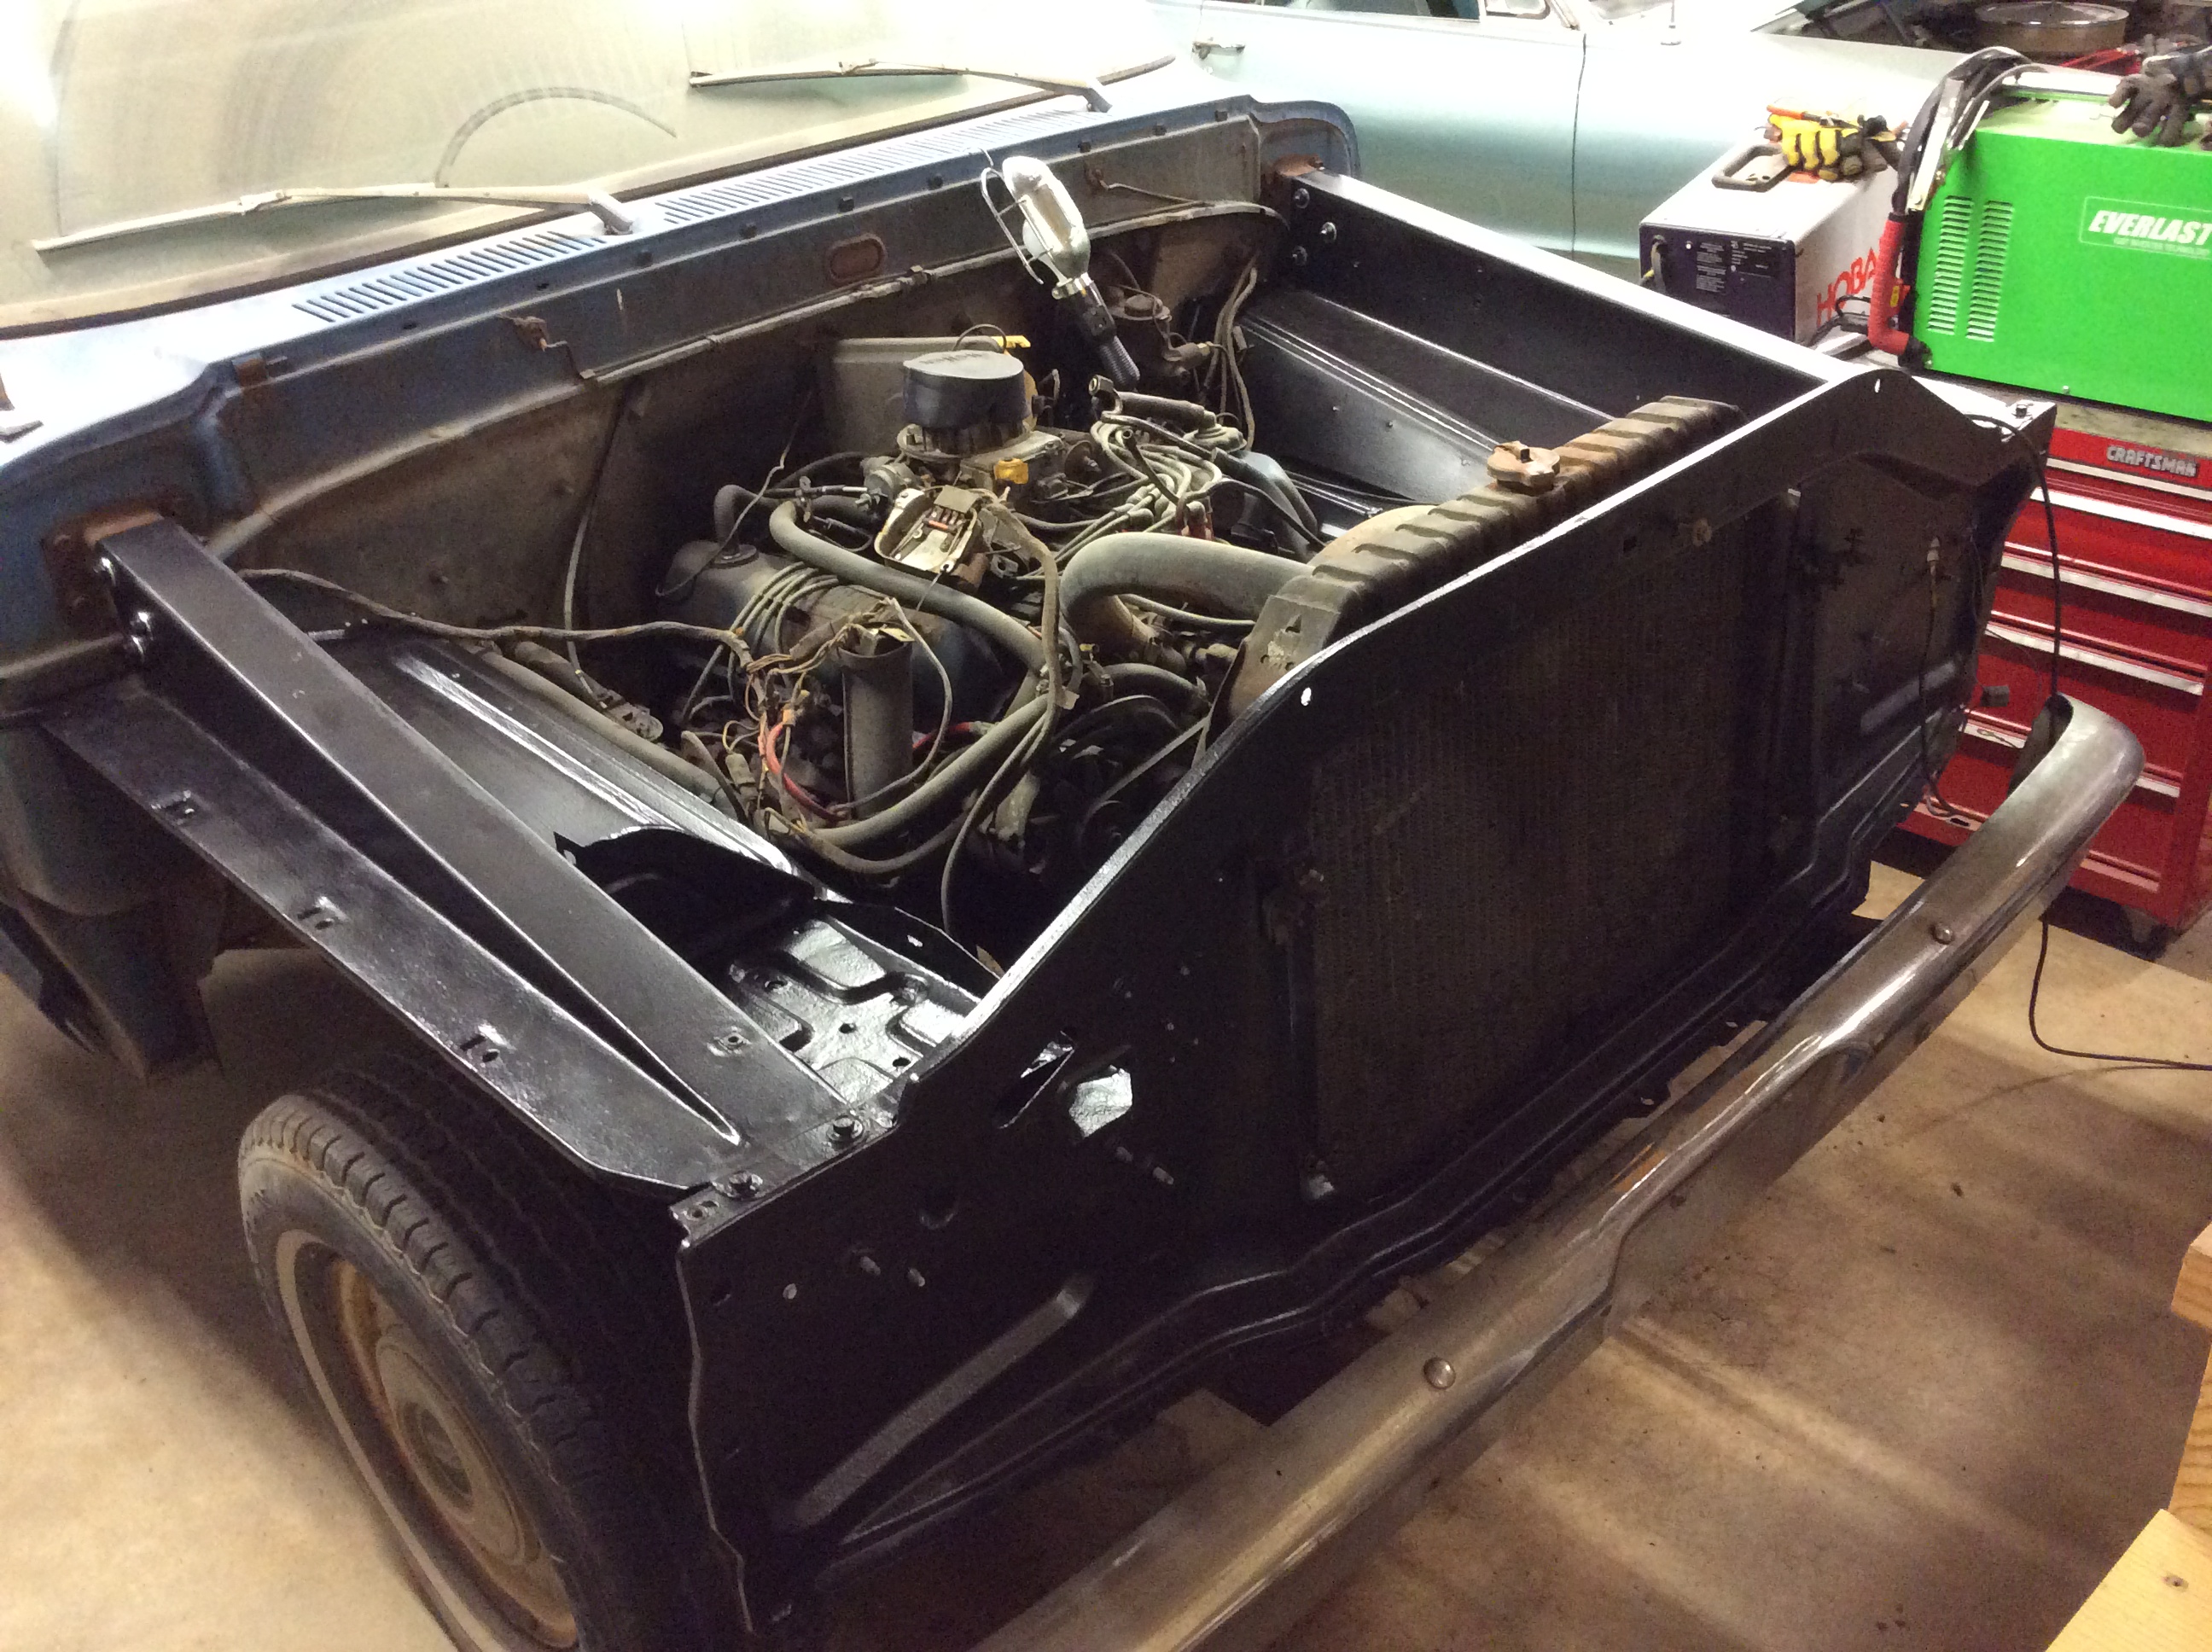
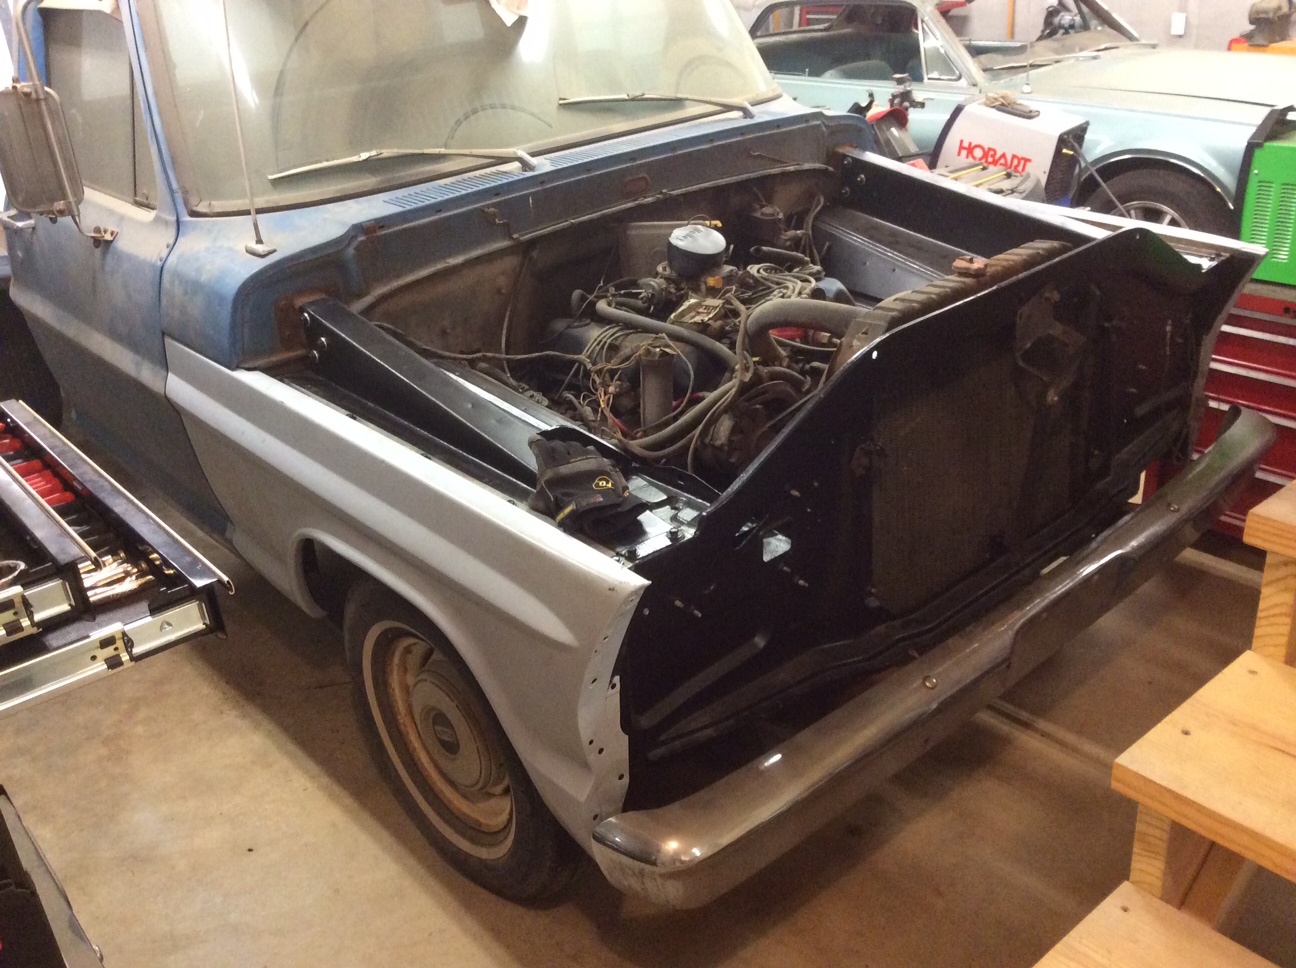
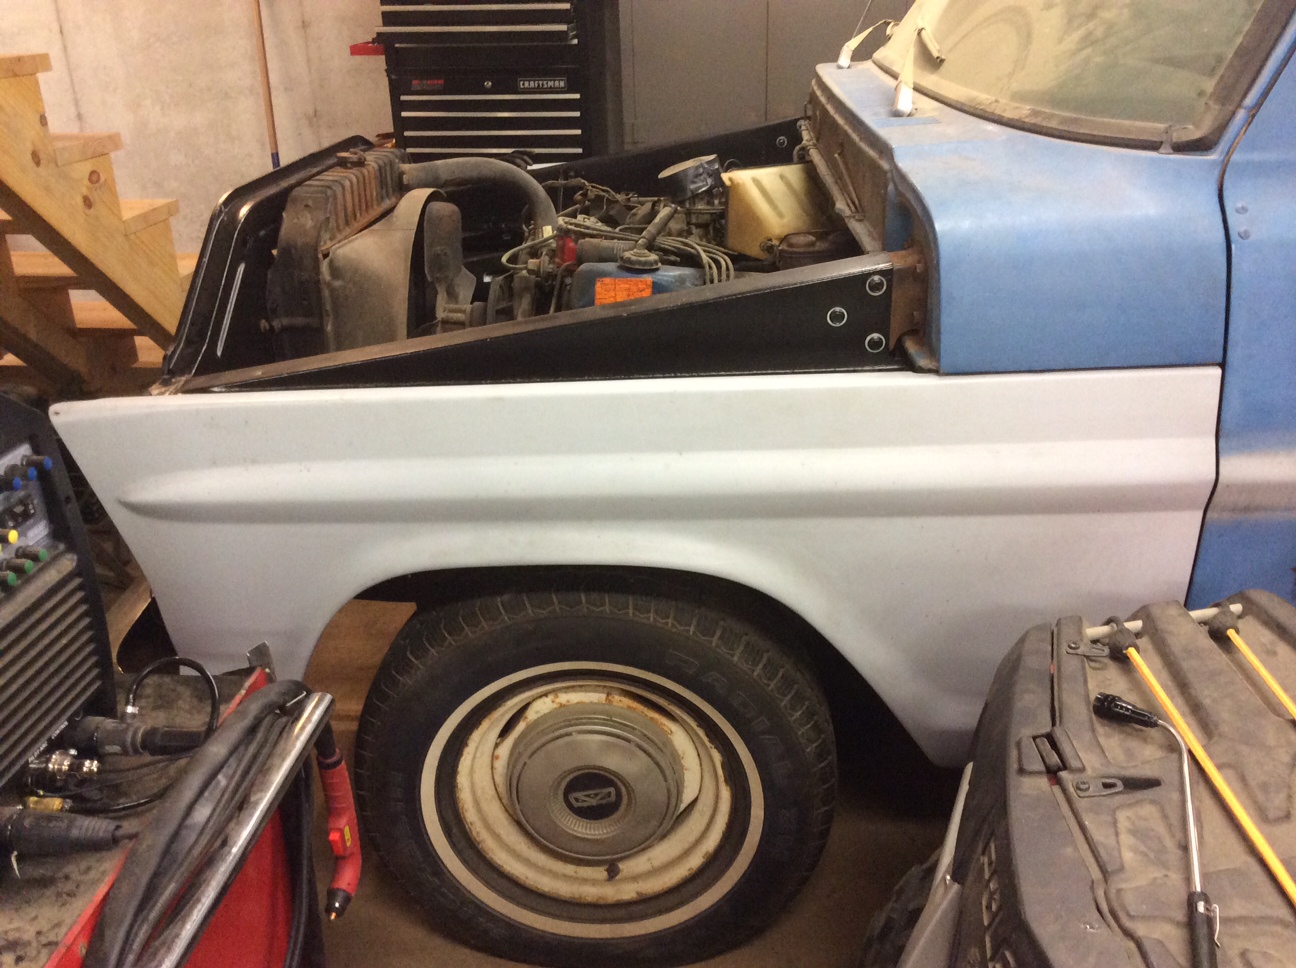
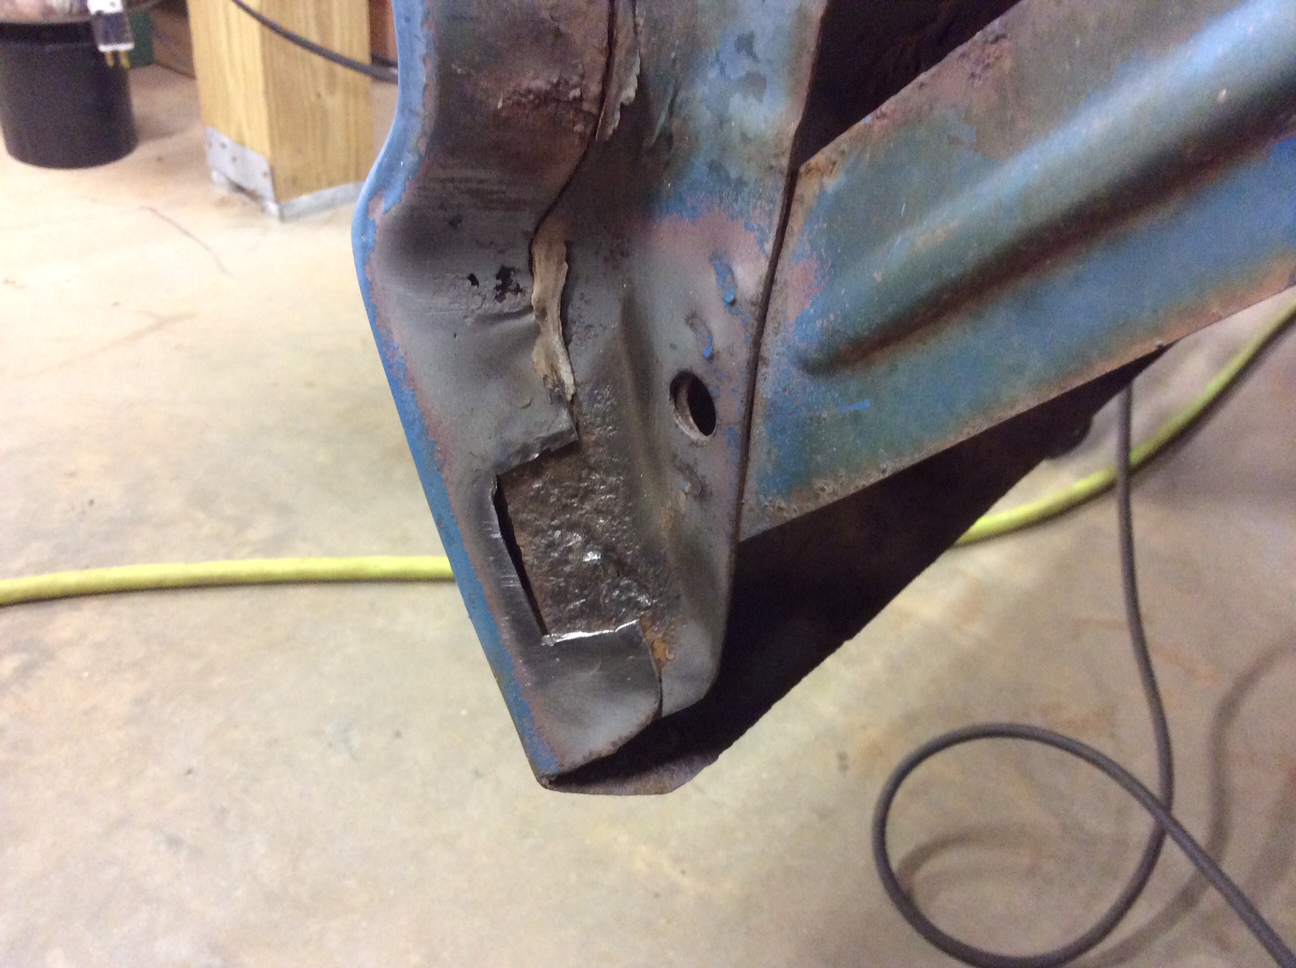
Blasted some inner fenders and the radiator support and patched a hole. Still have to paint with Zero-Rust which I used on the inside of the front fenders and cab floor after patching.
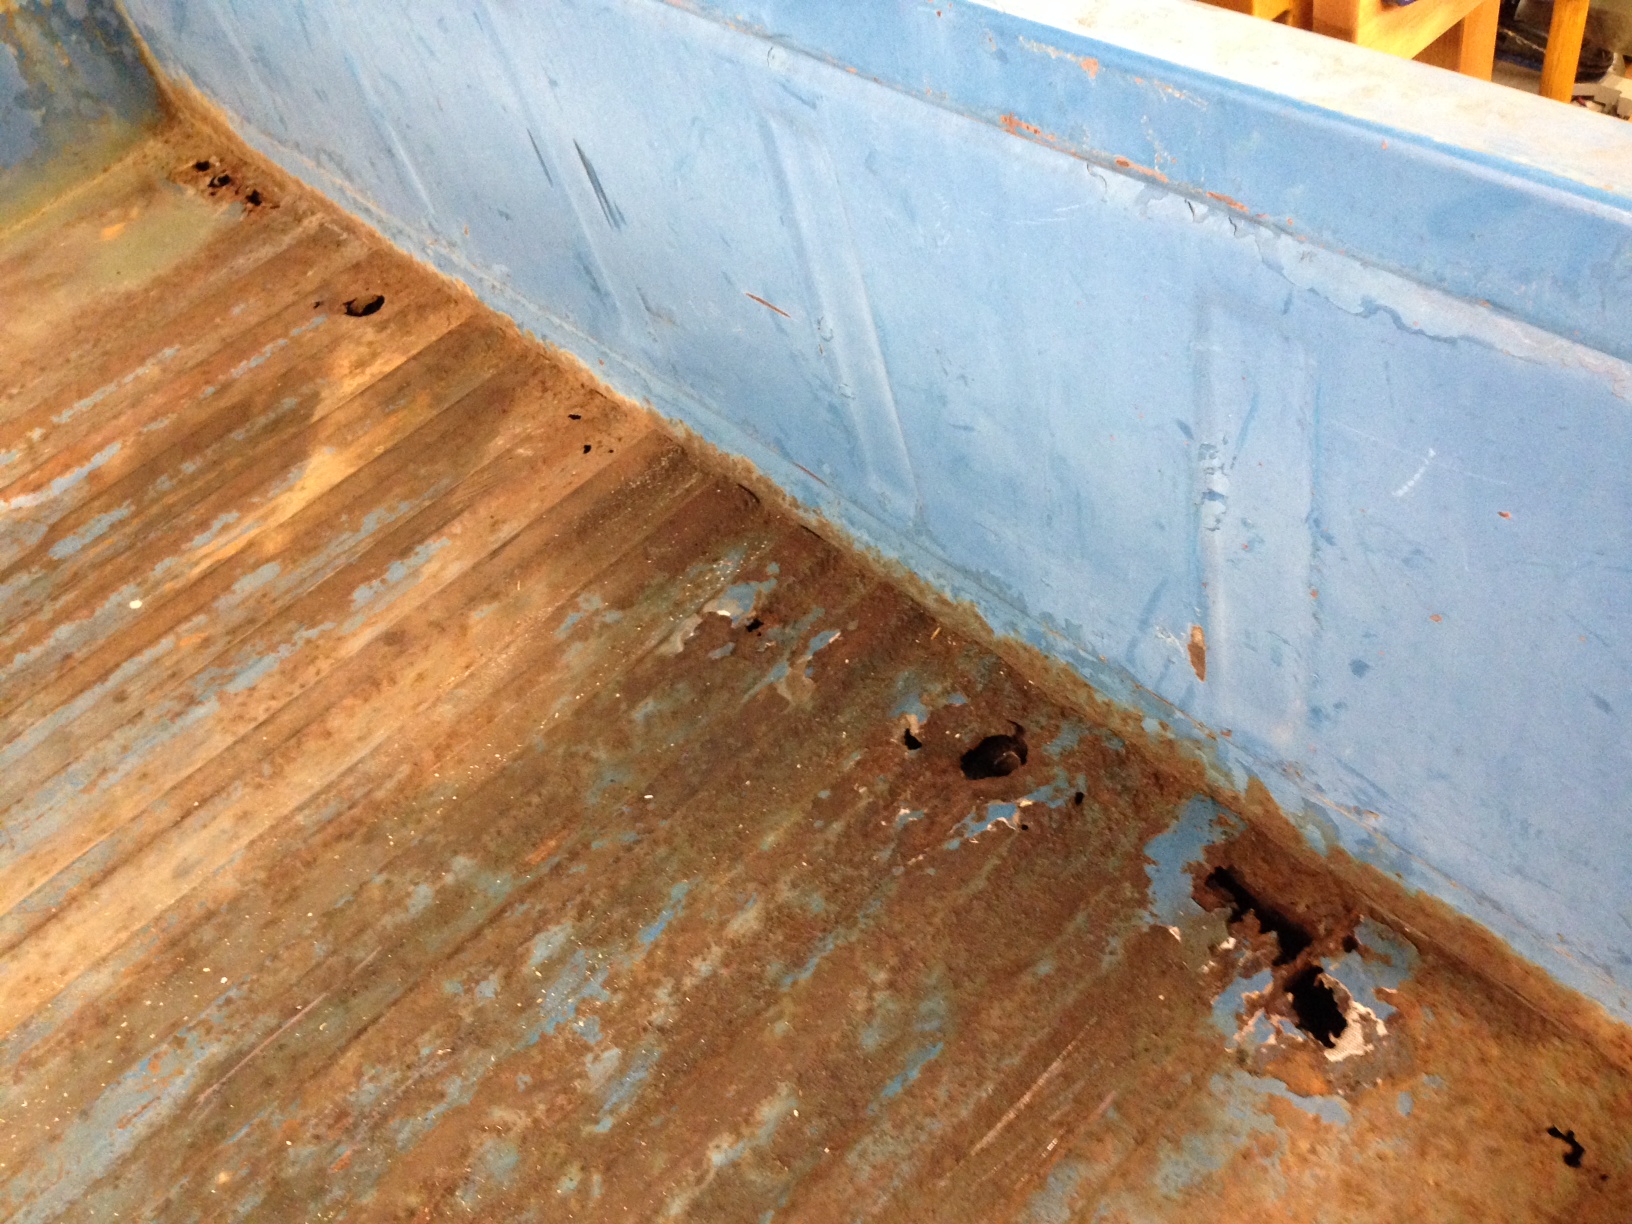
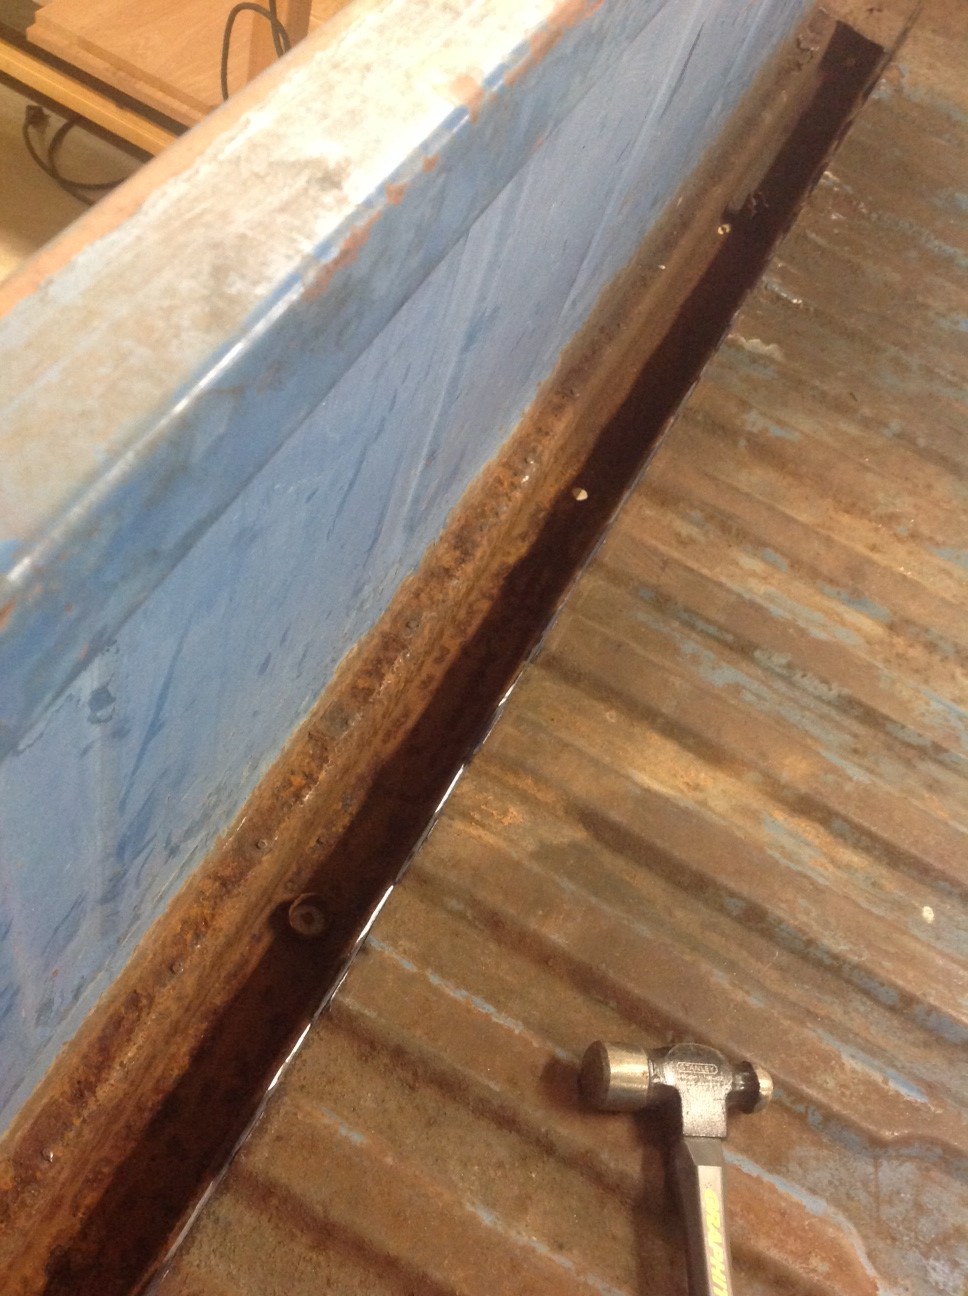
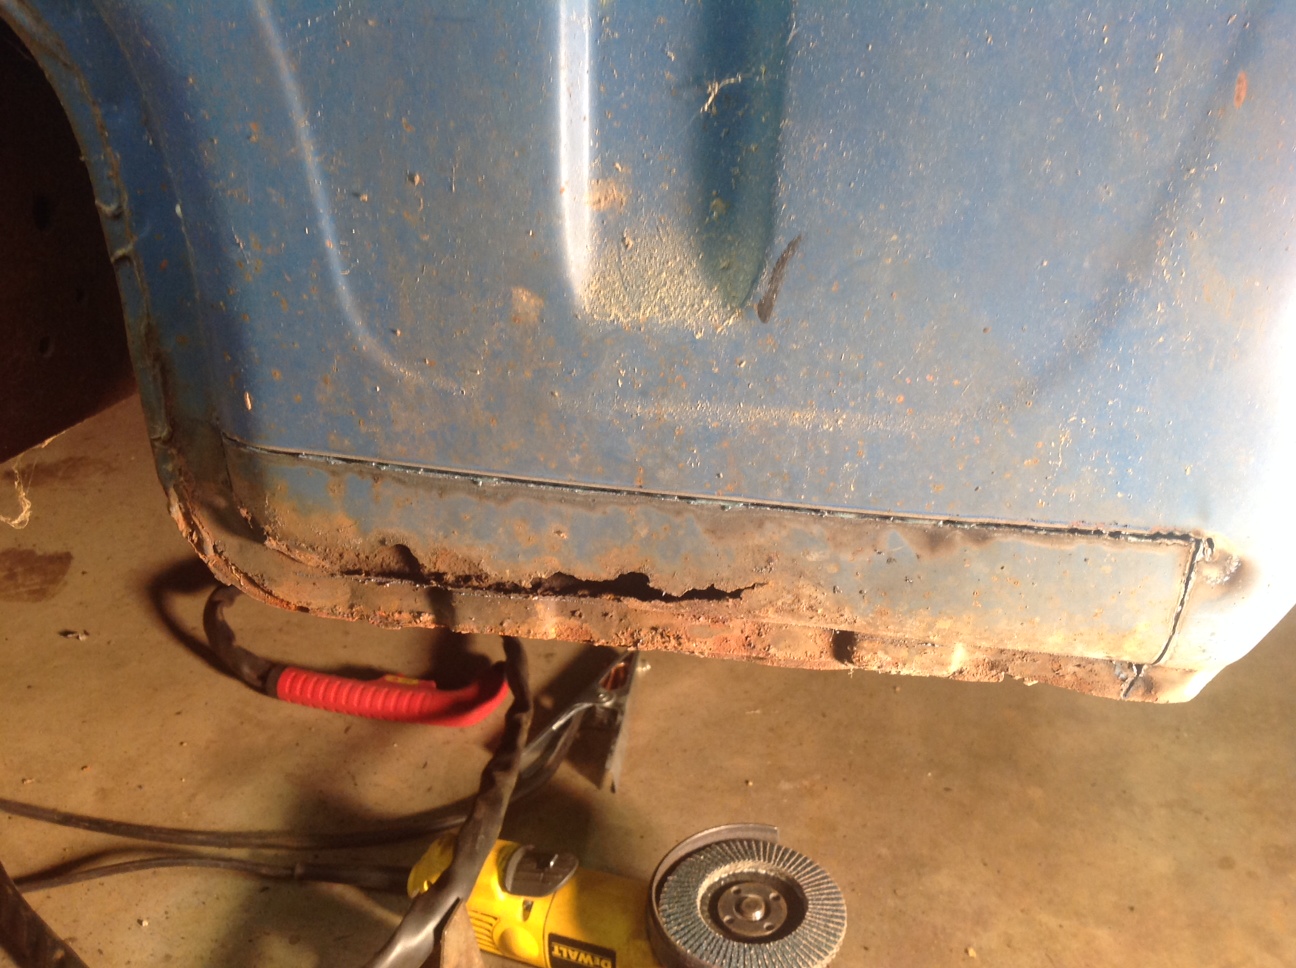
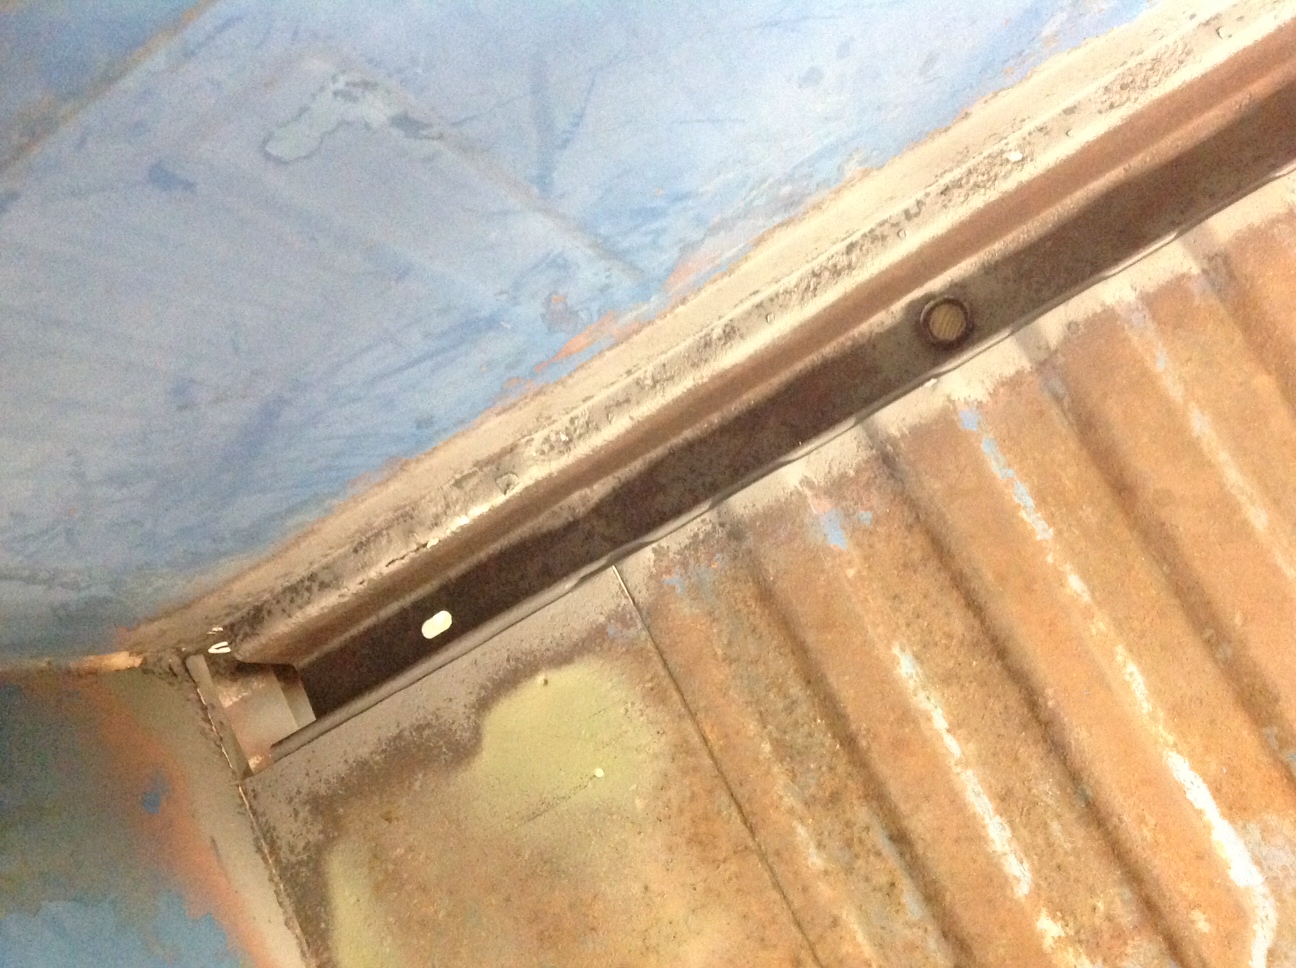
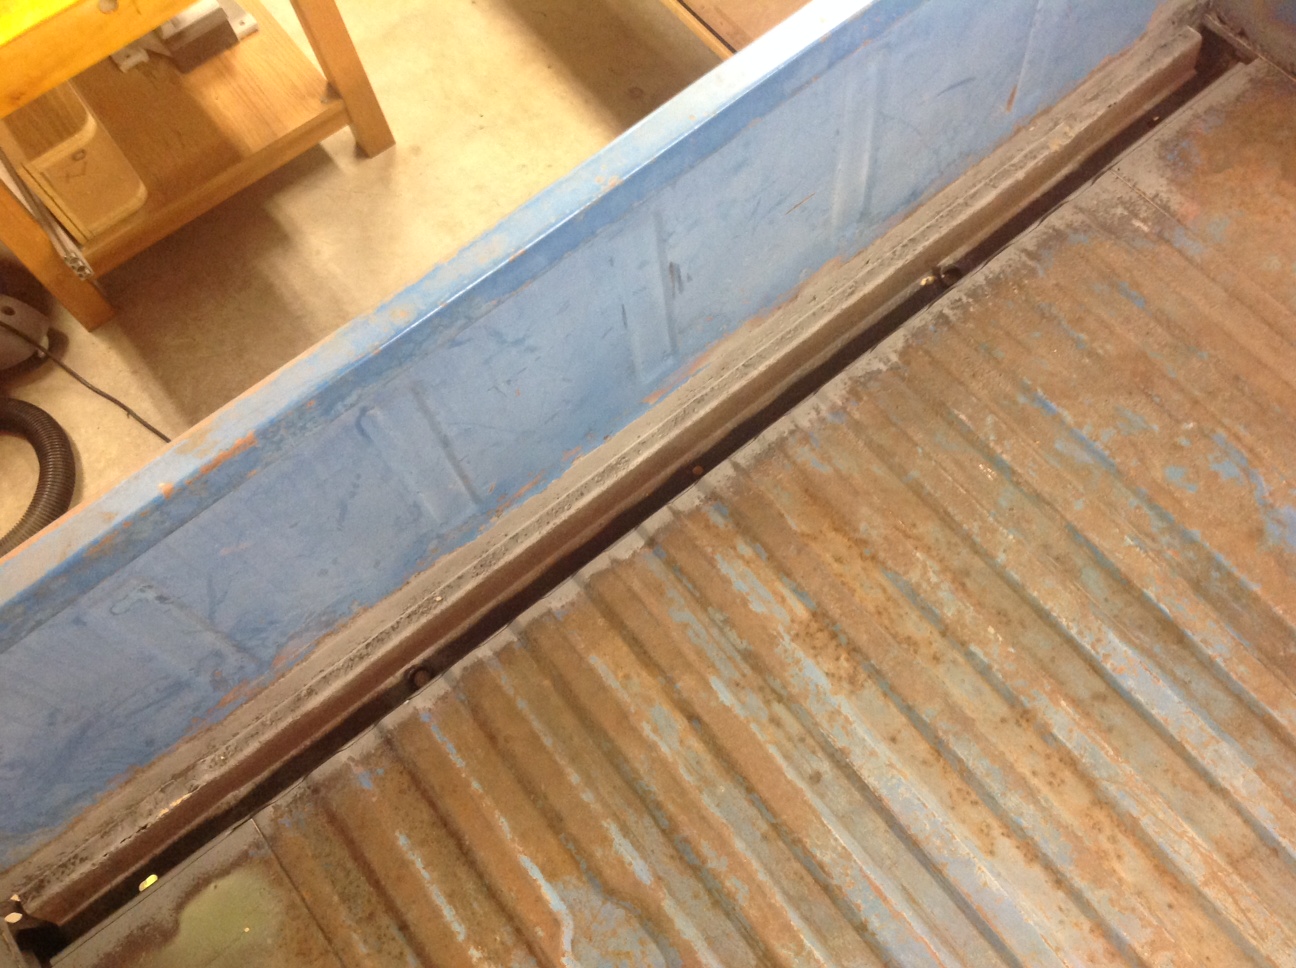
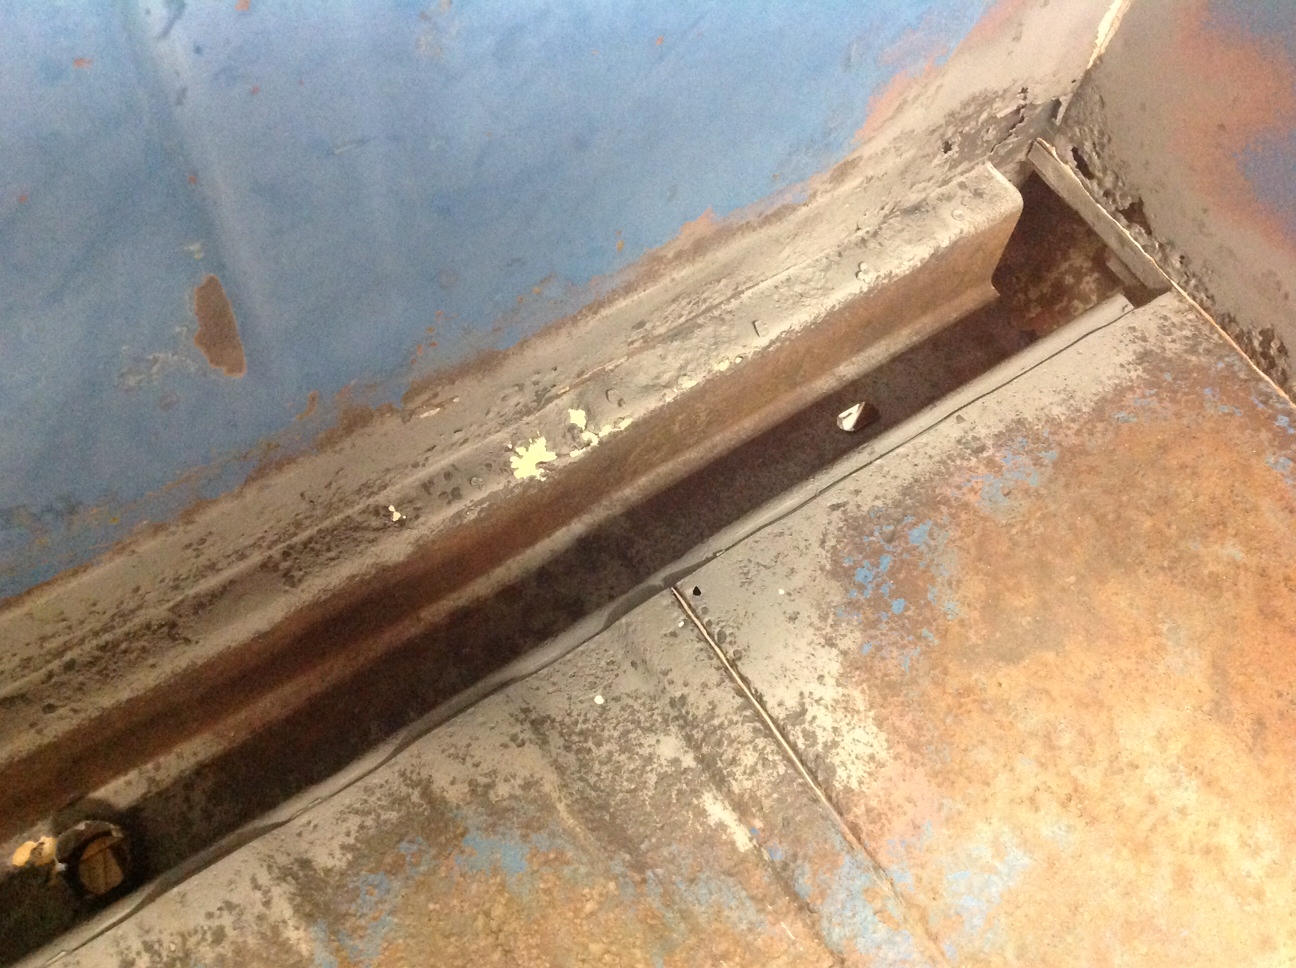
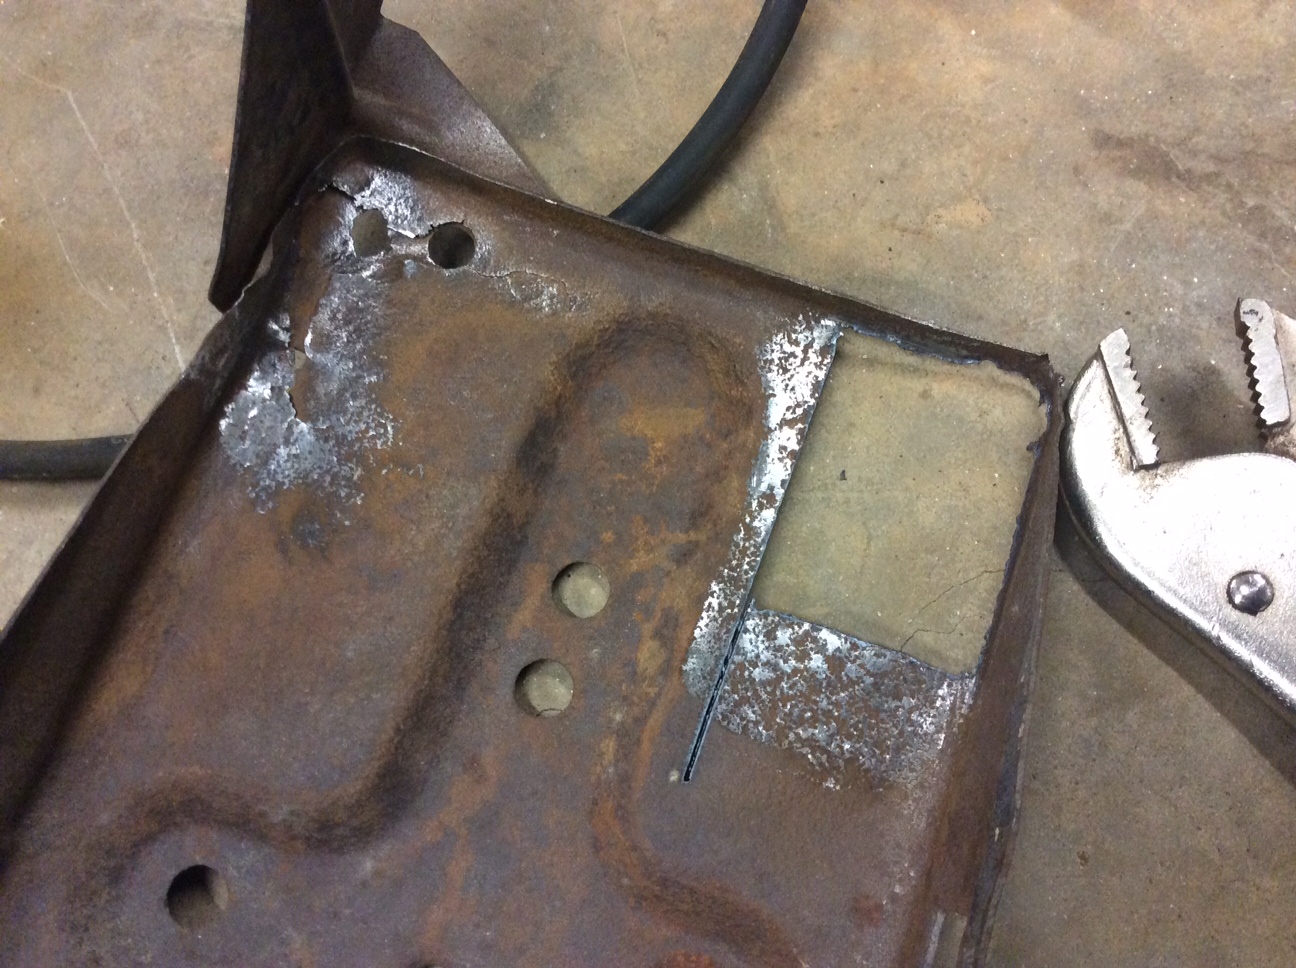
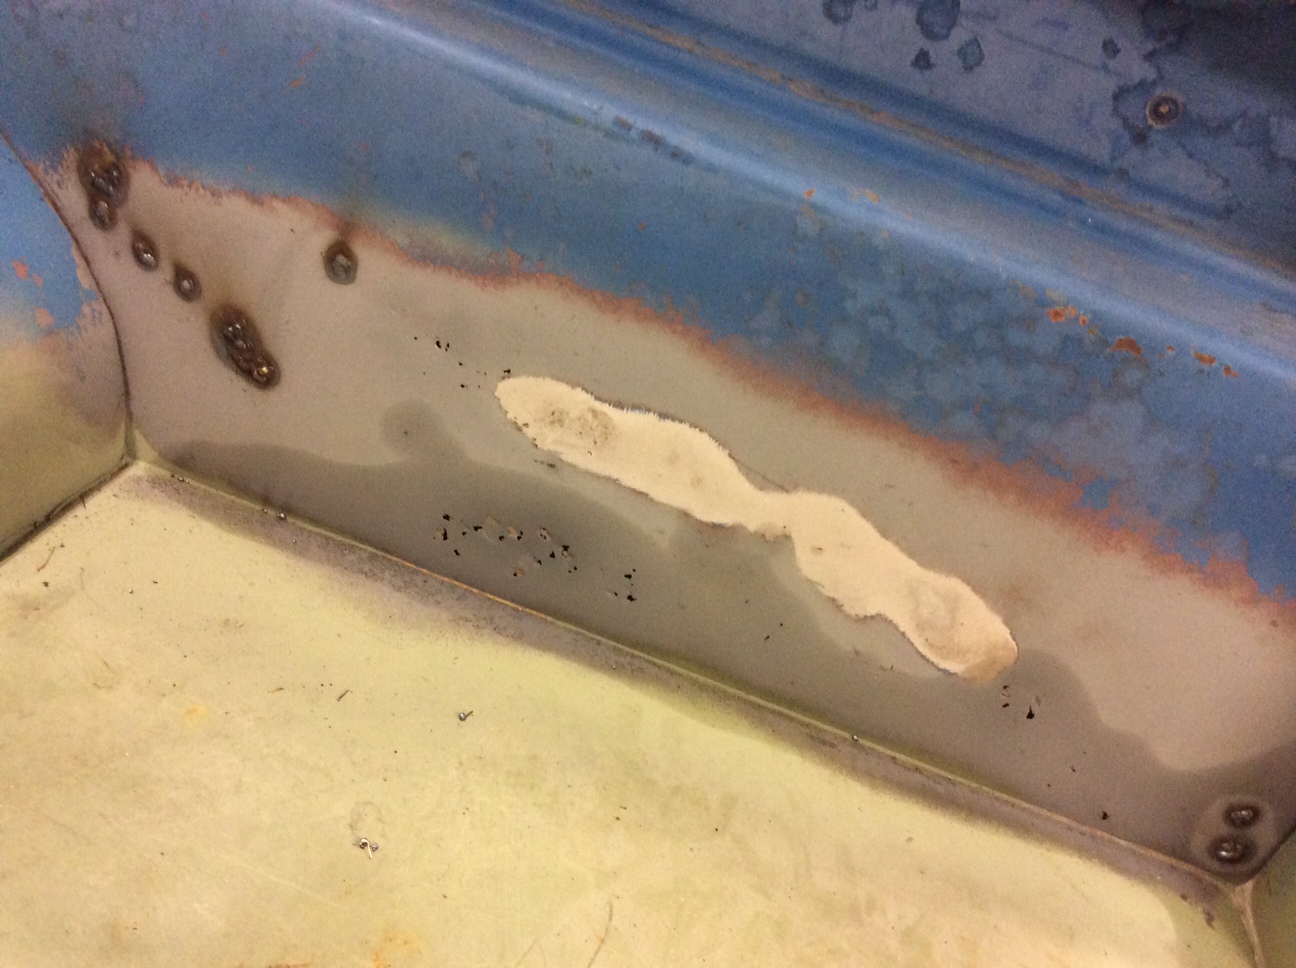
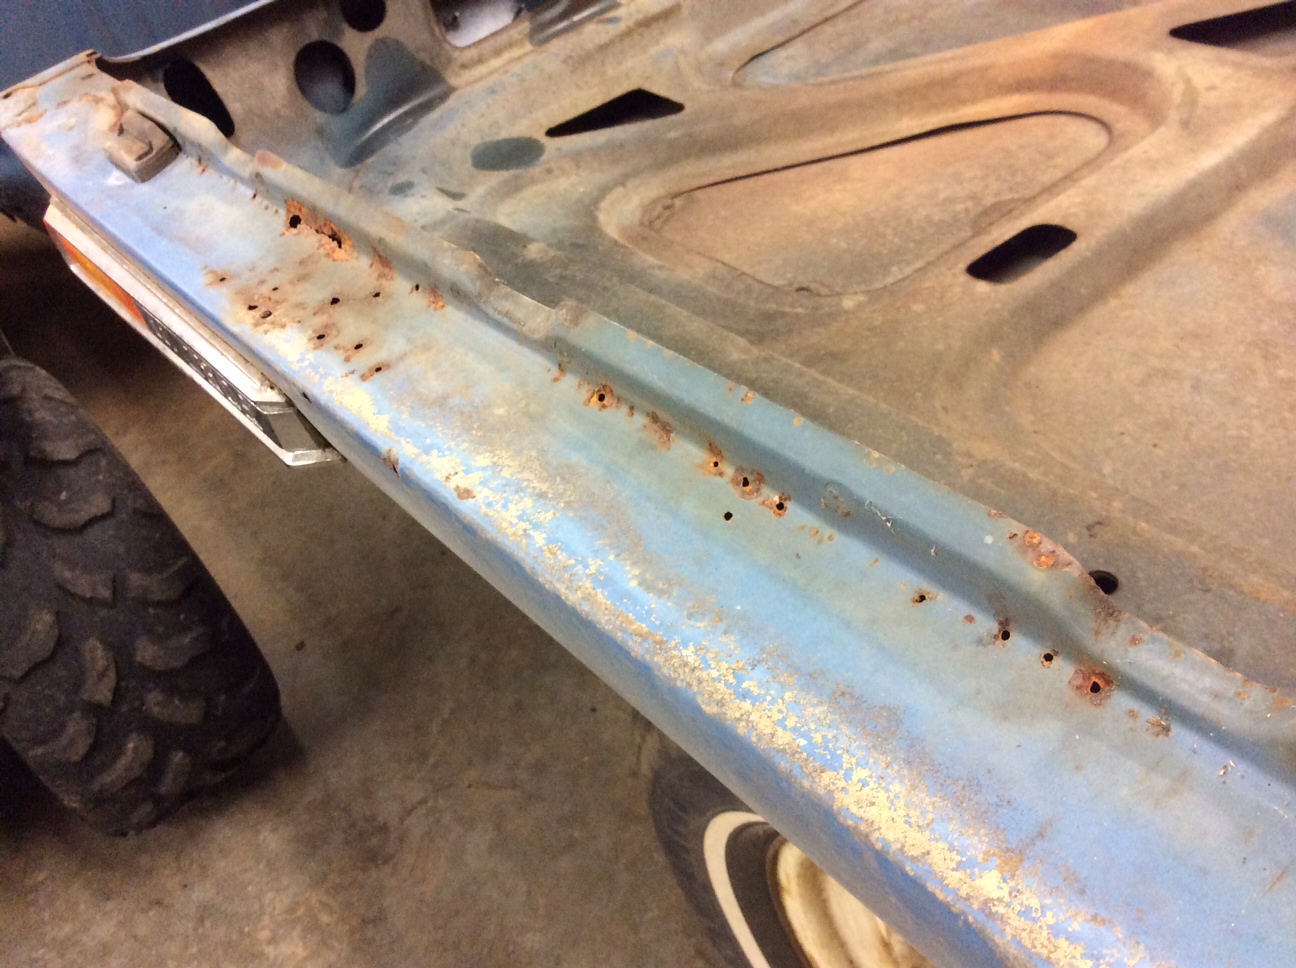
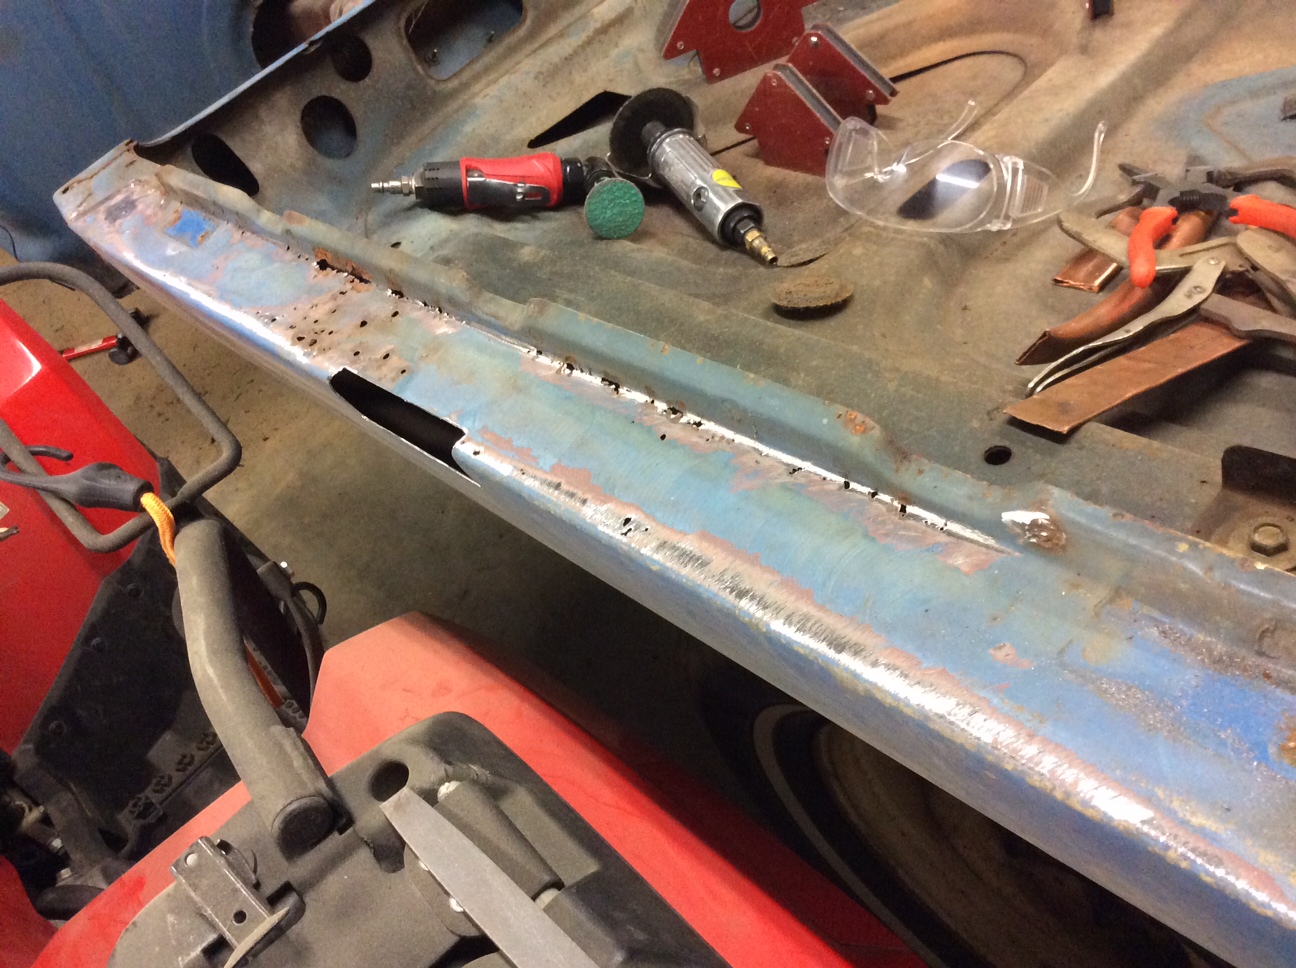
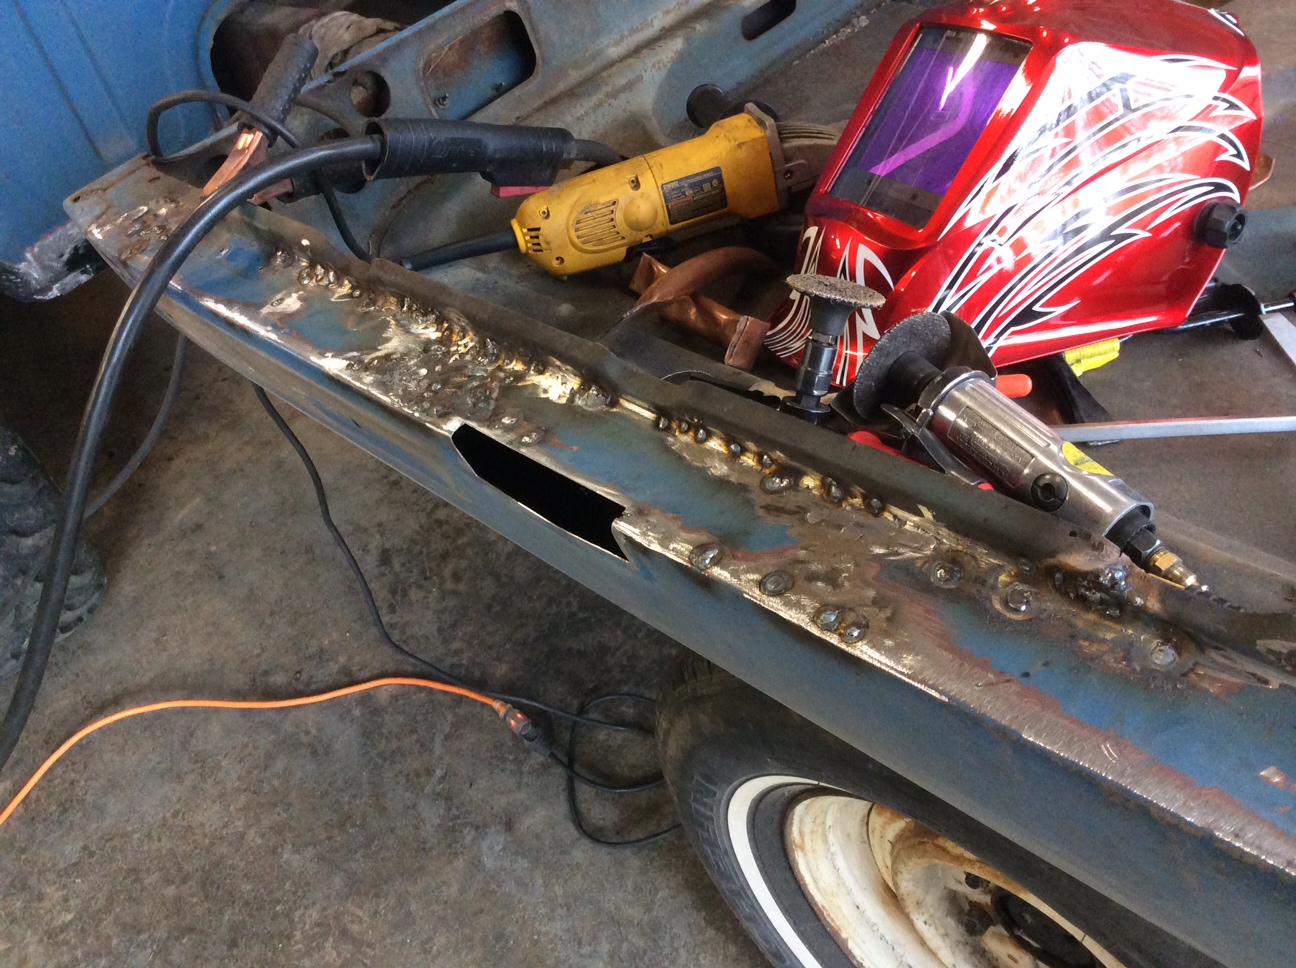
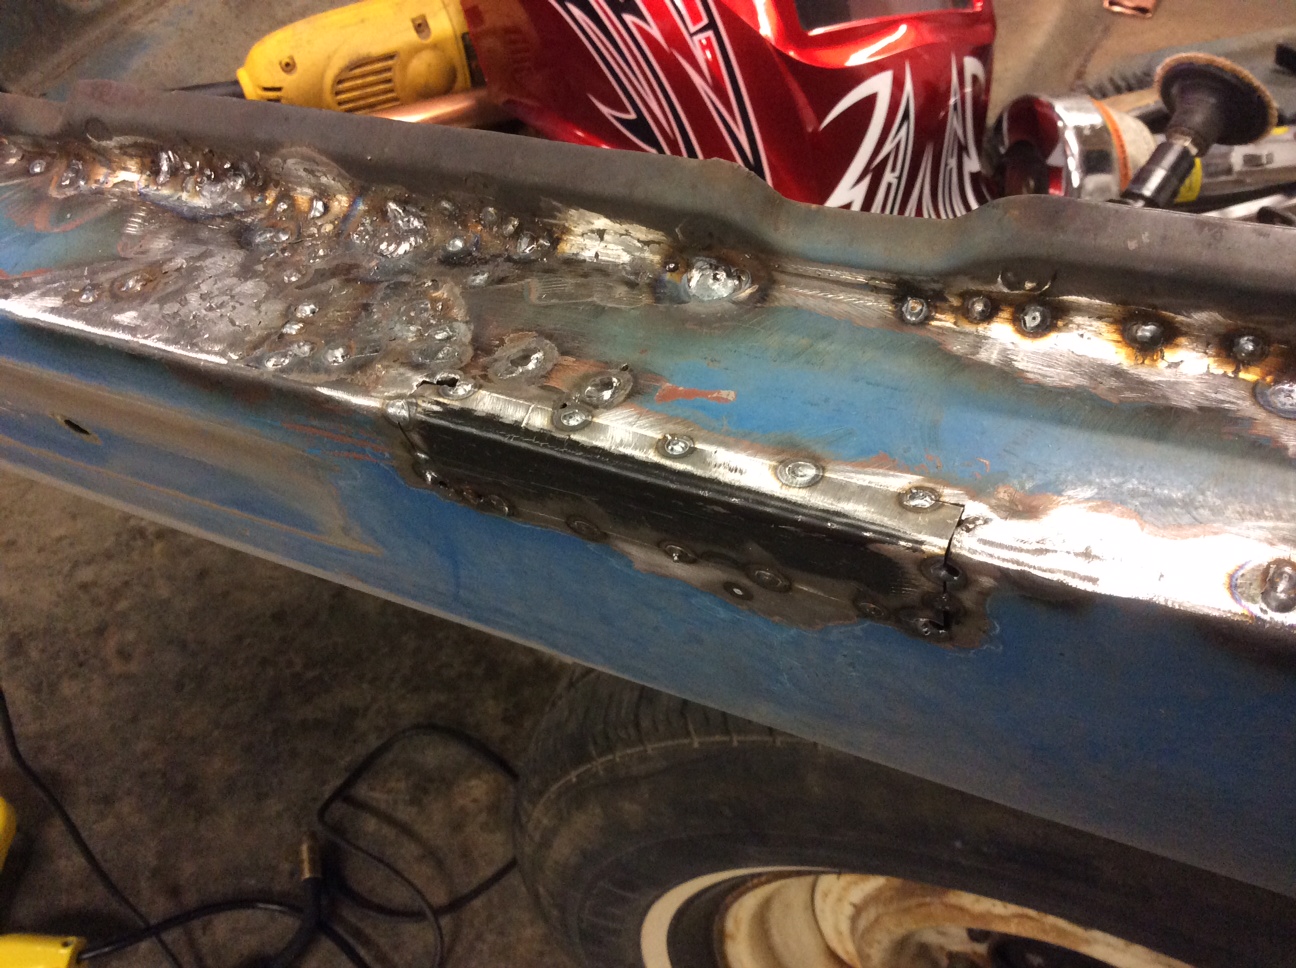
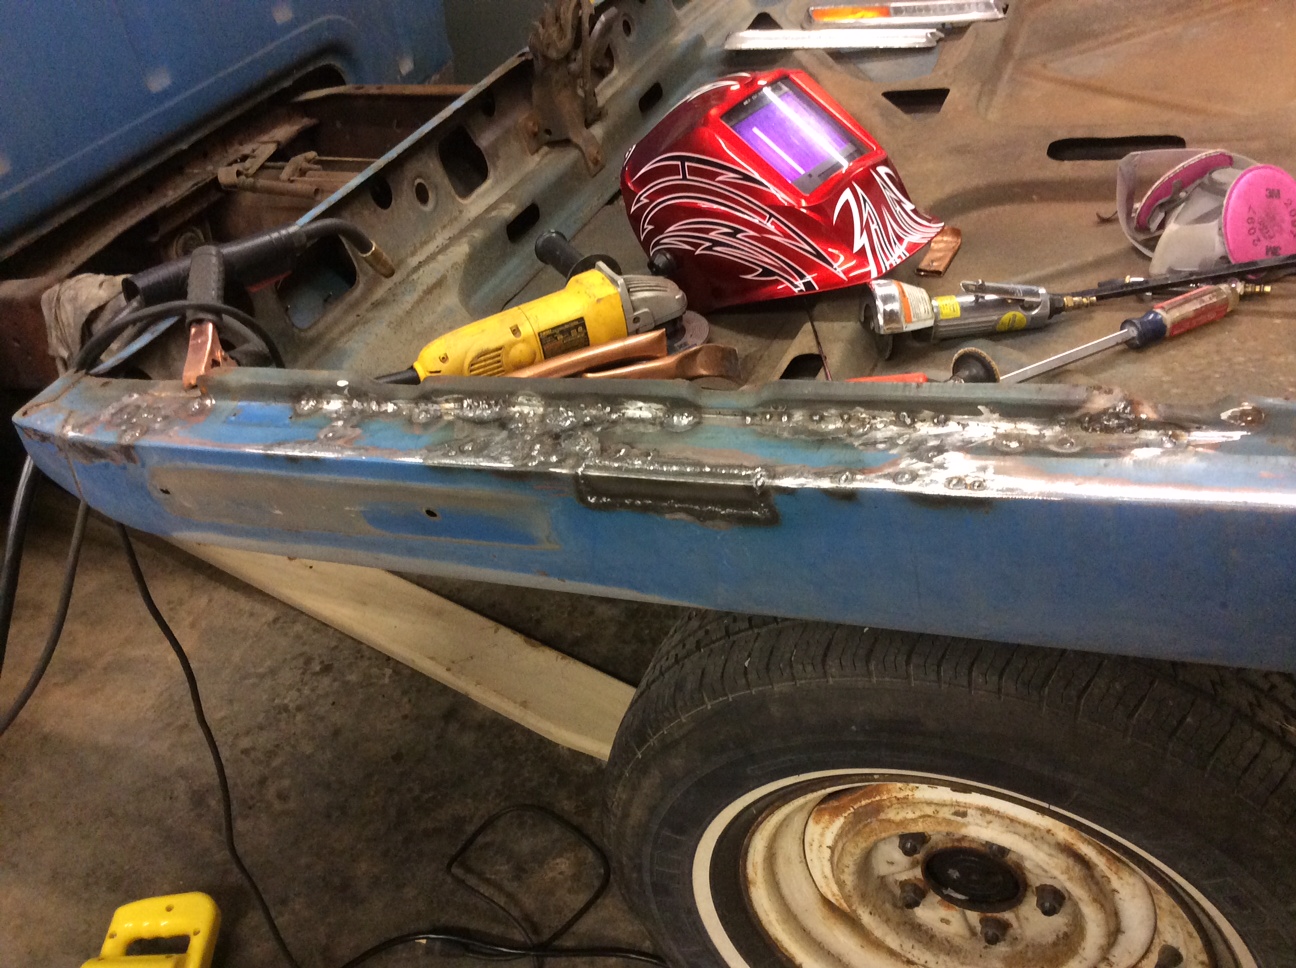
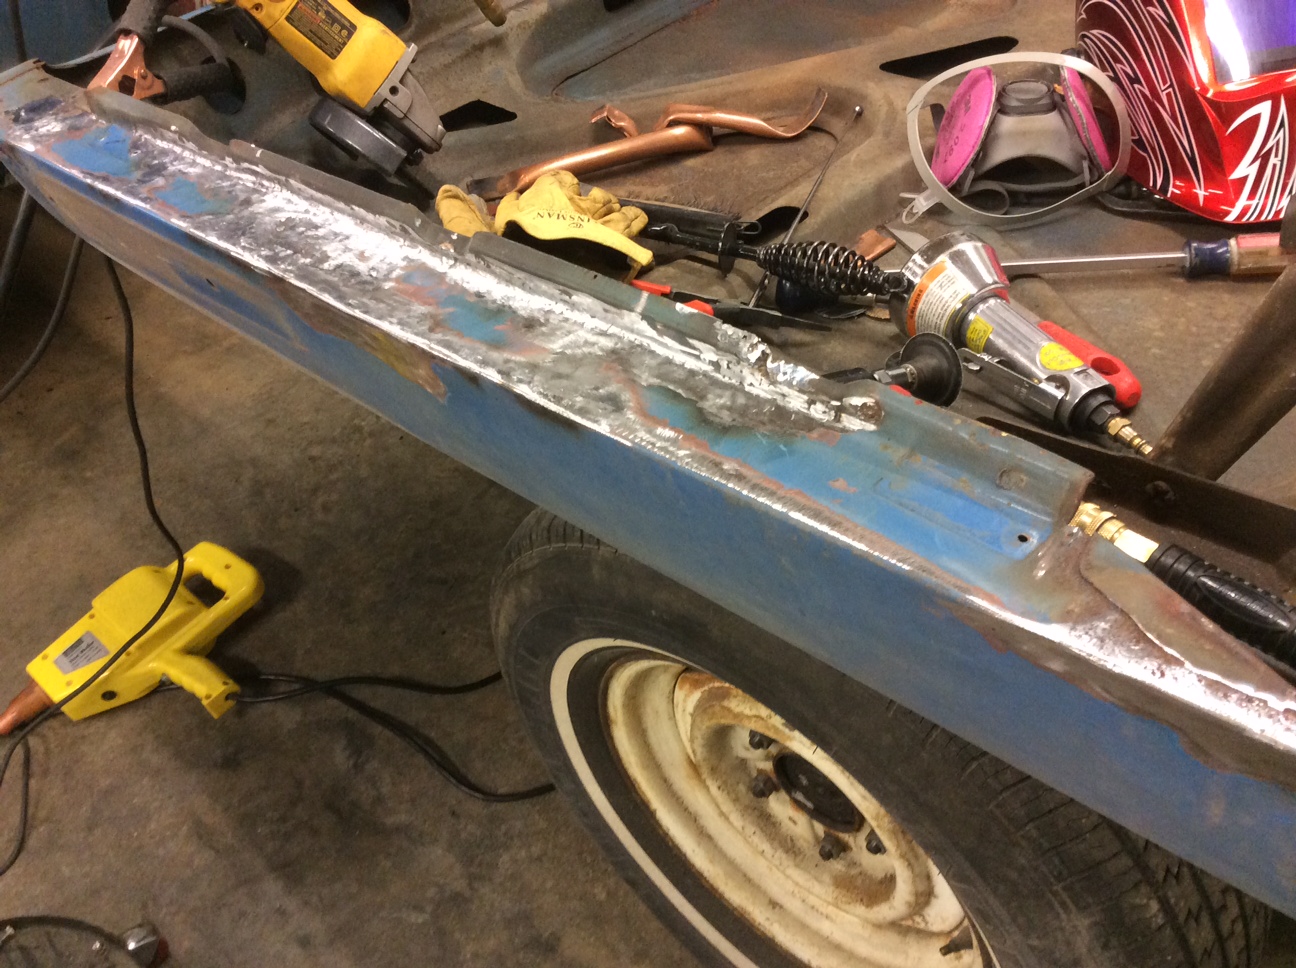
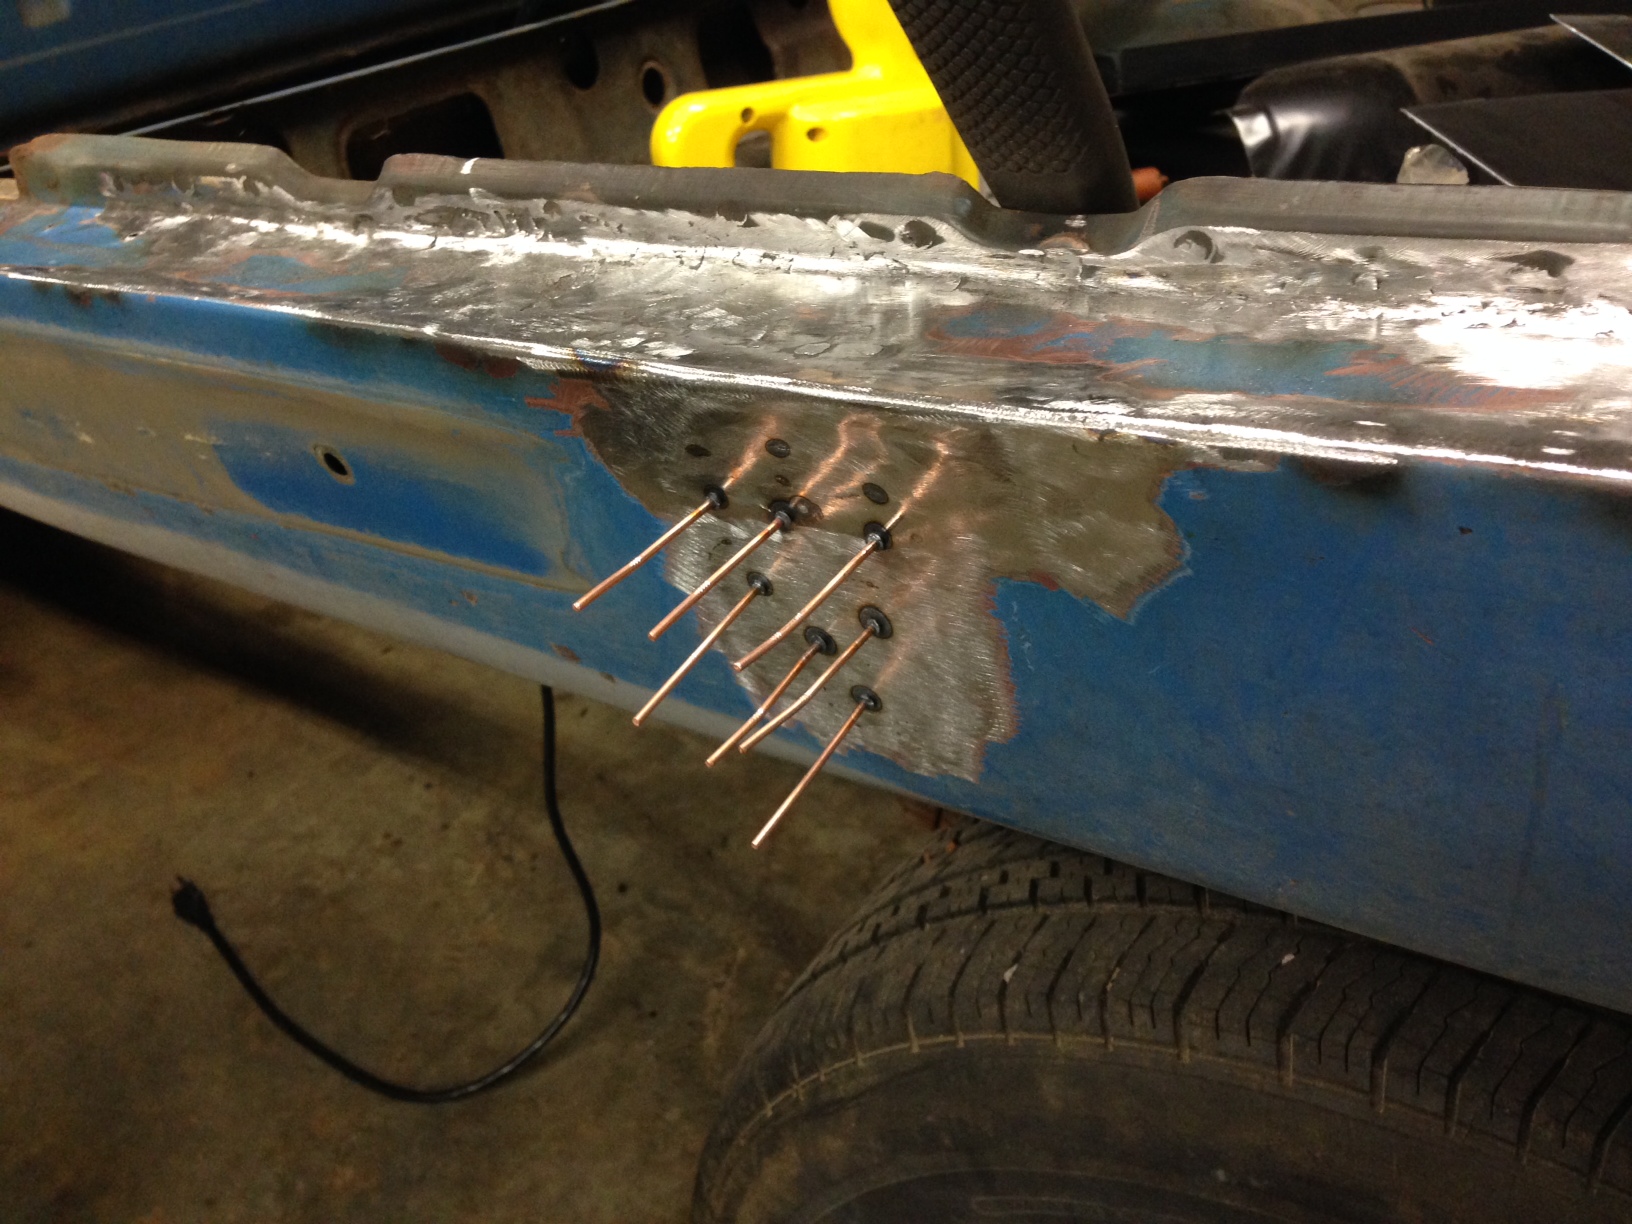
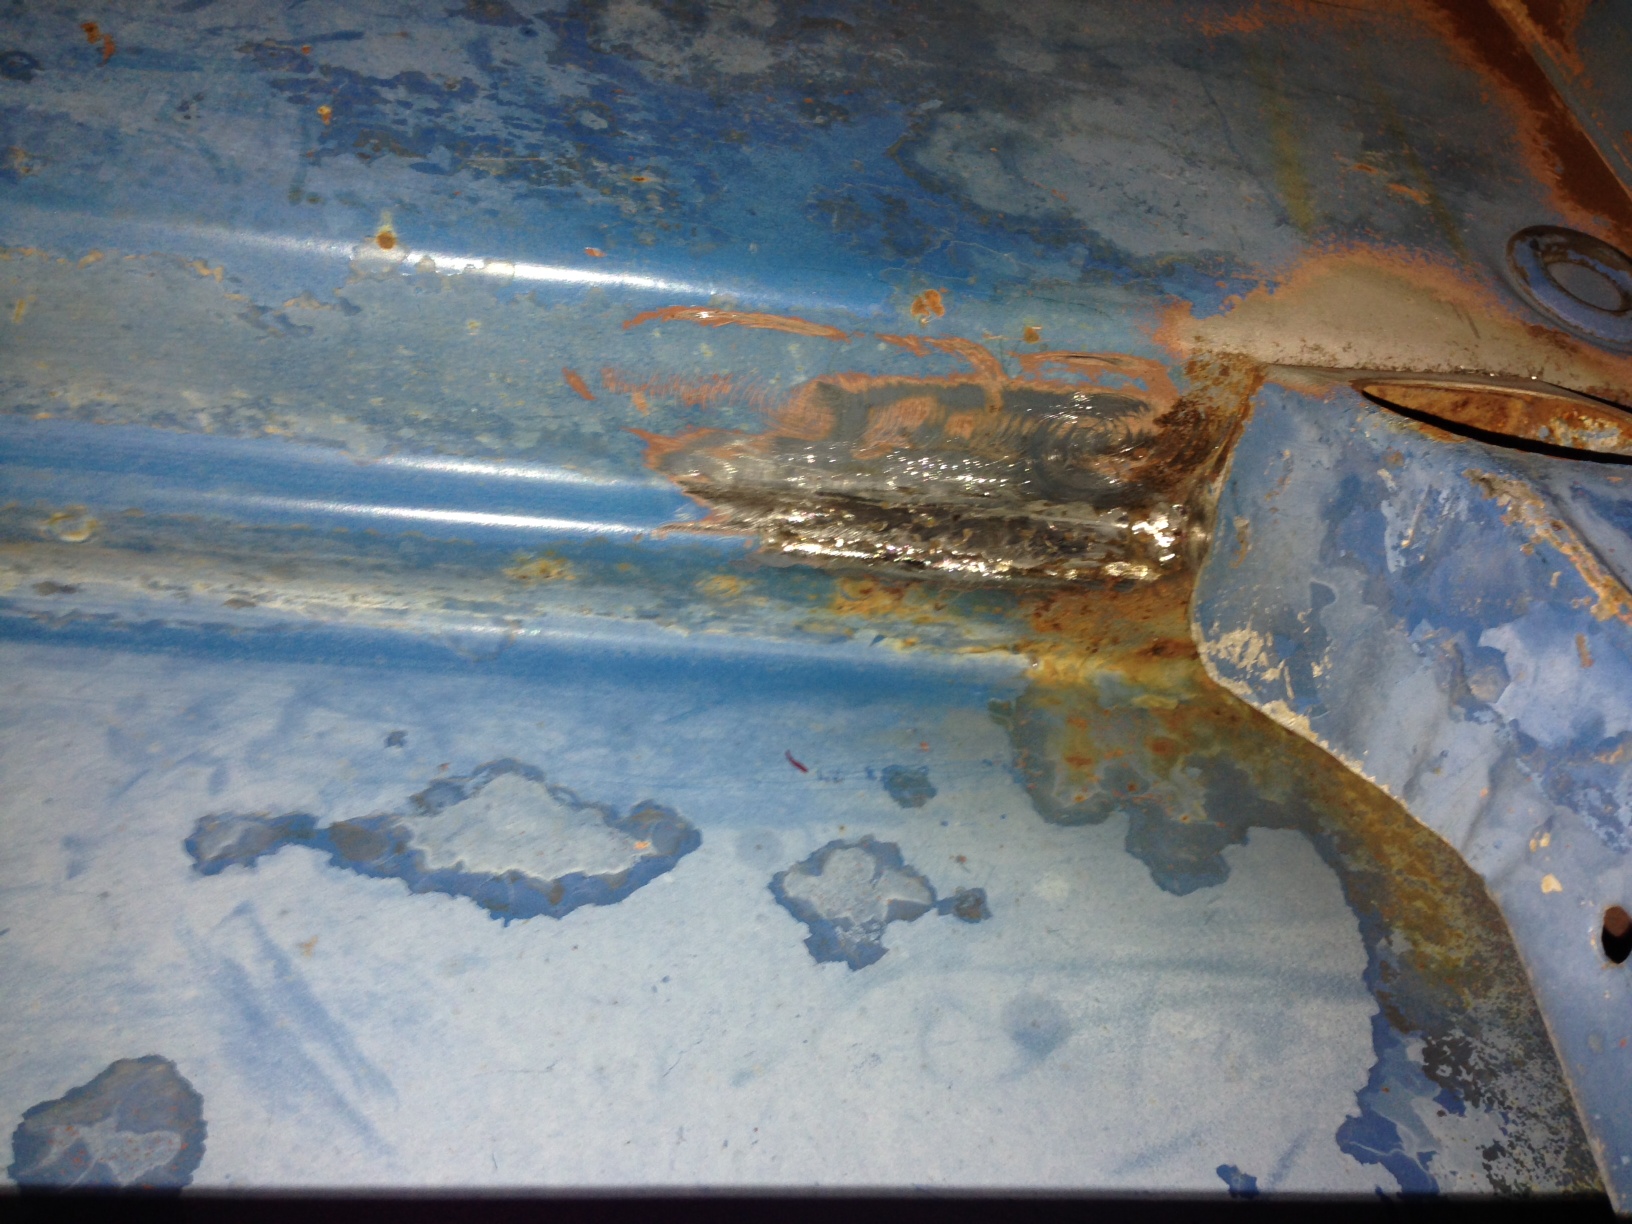
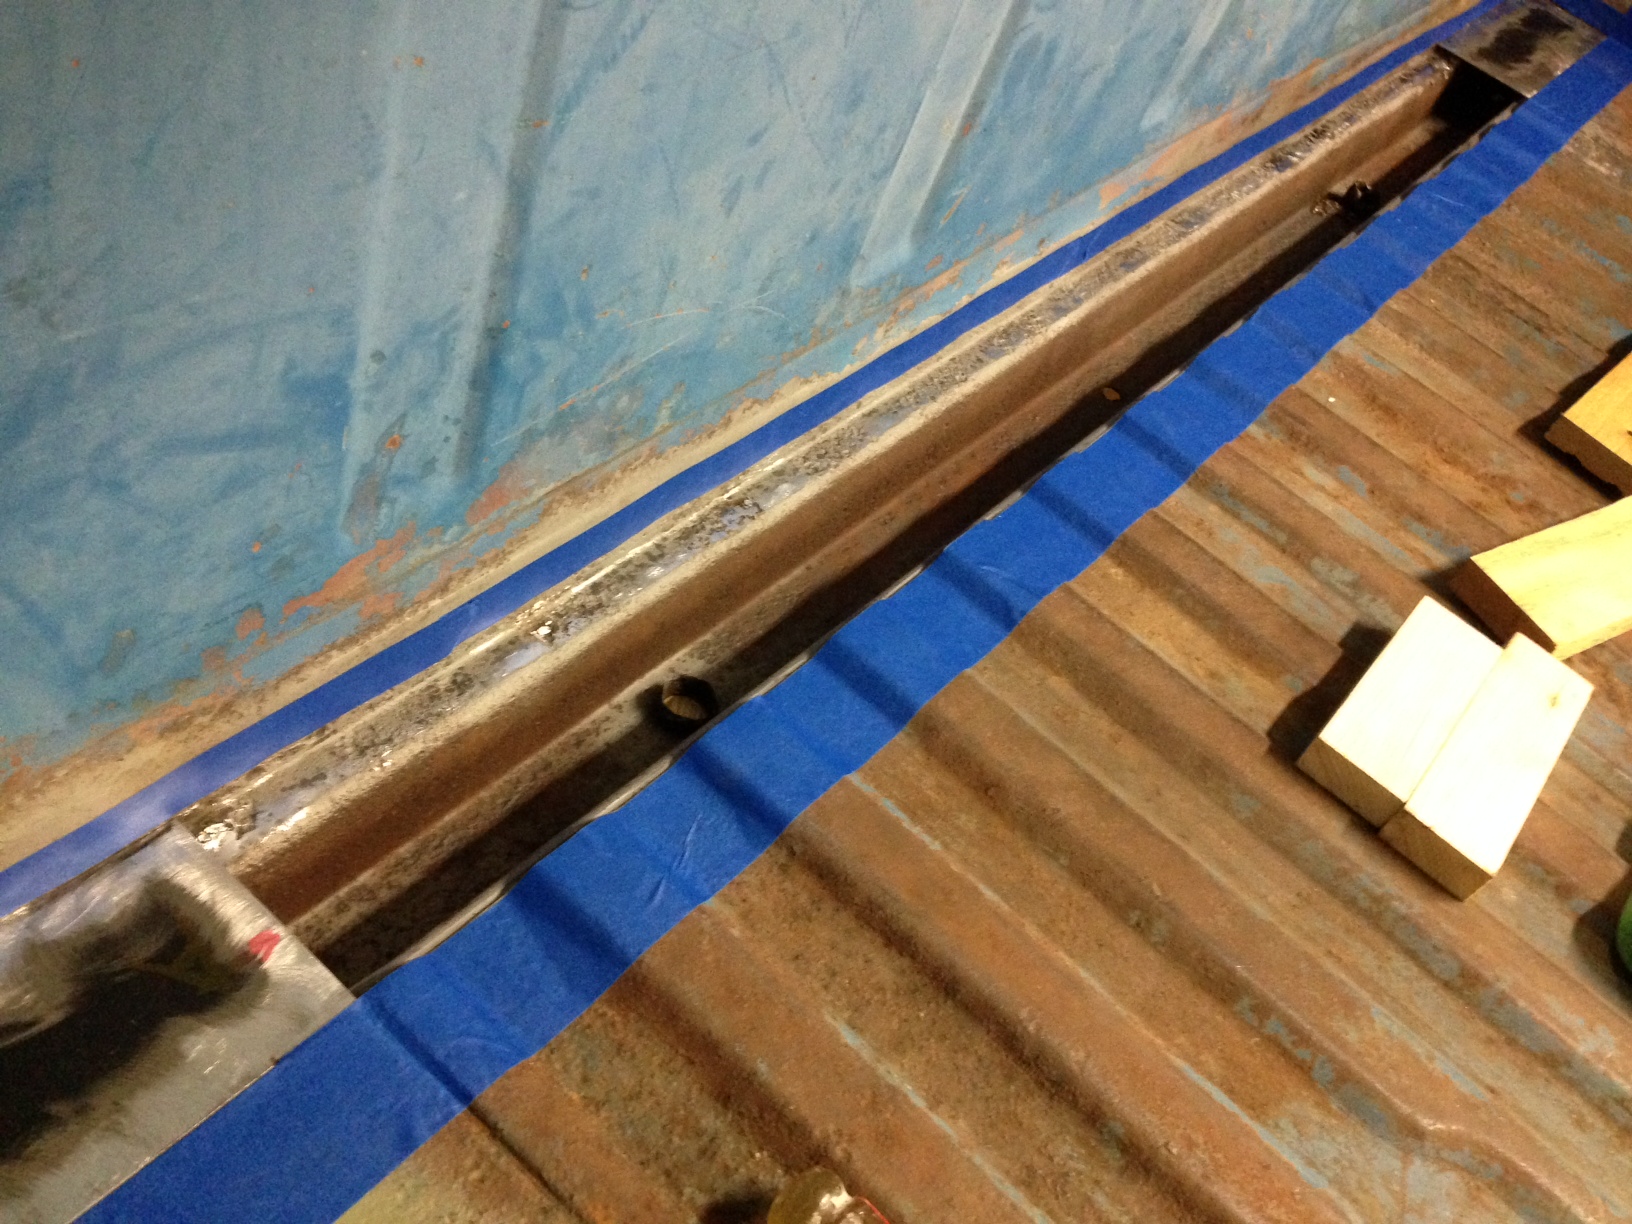
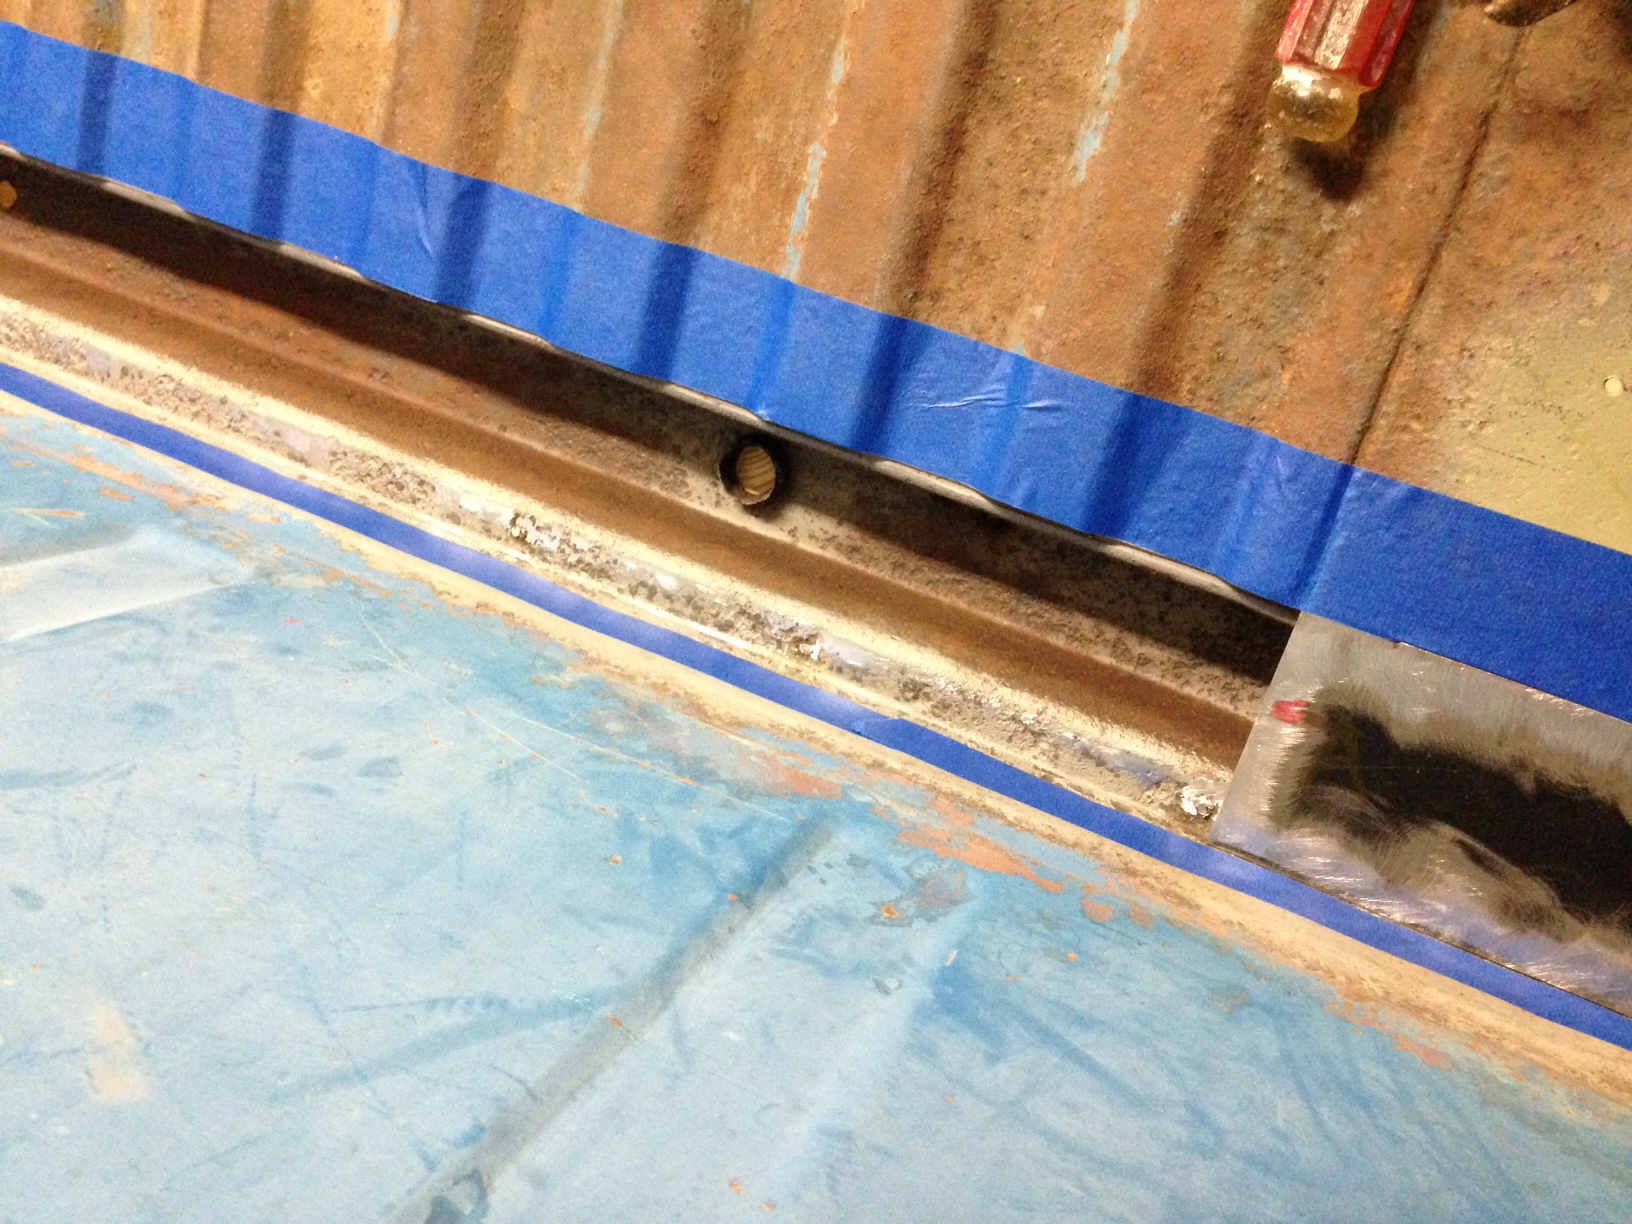
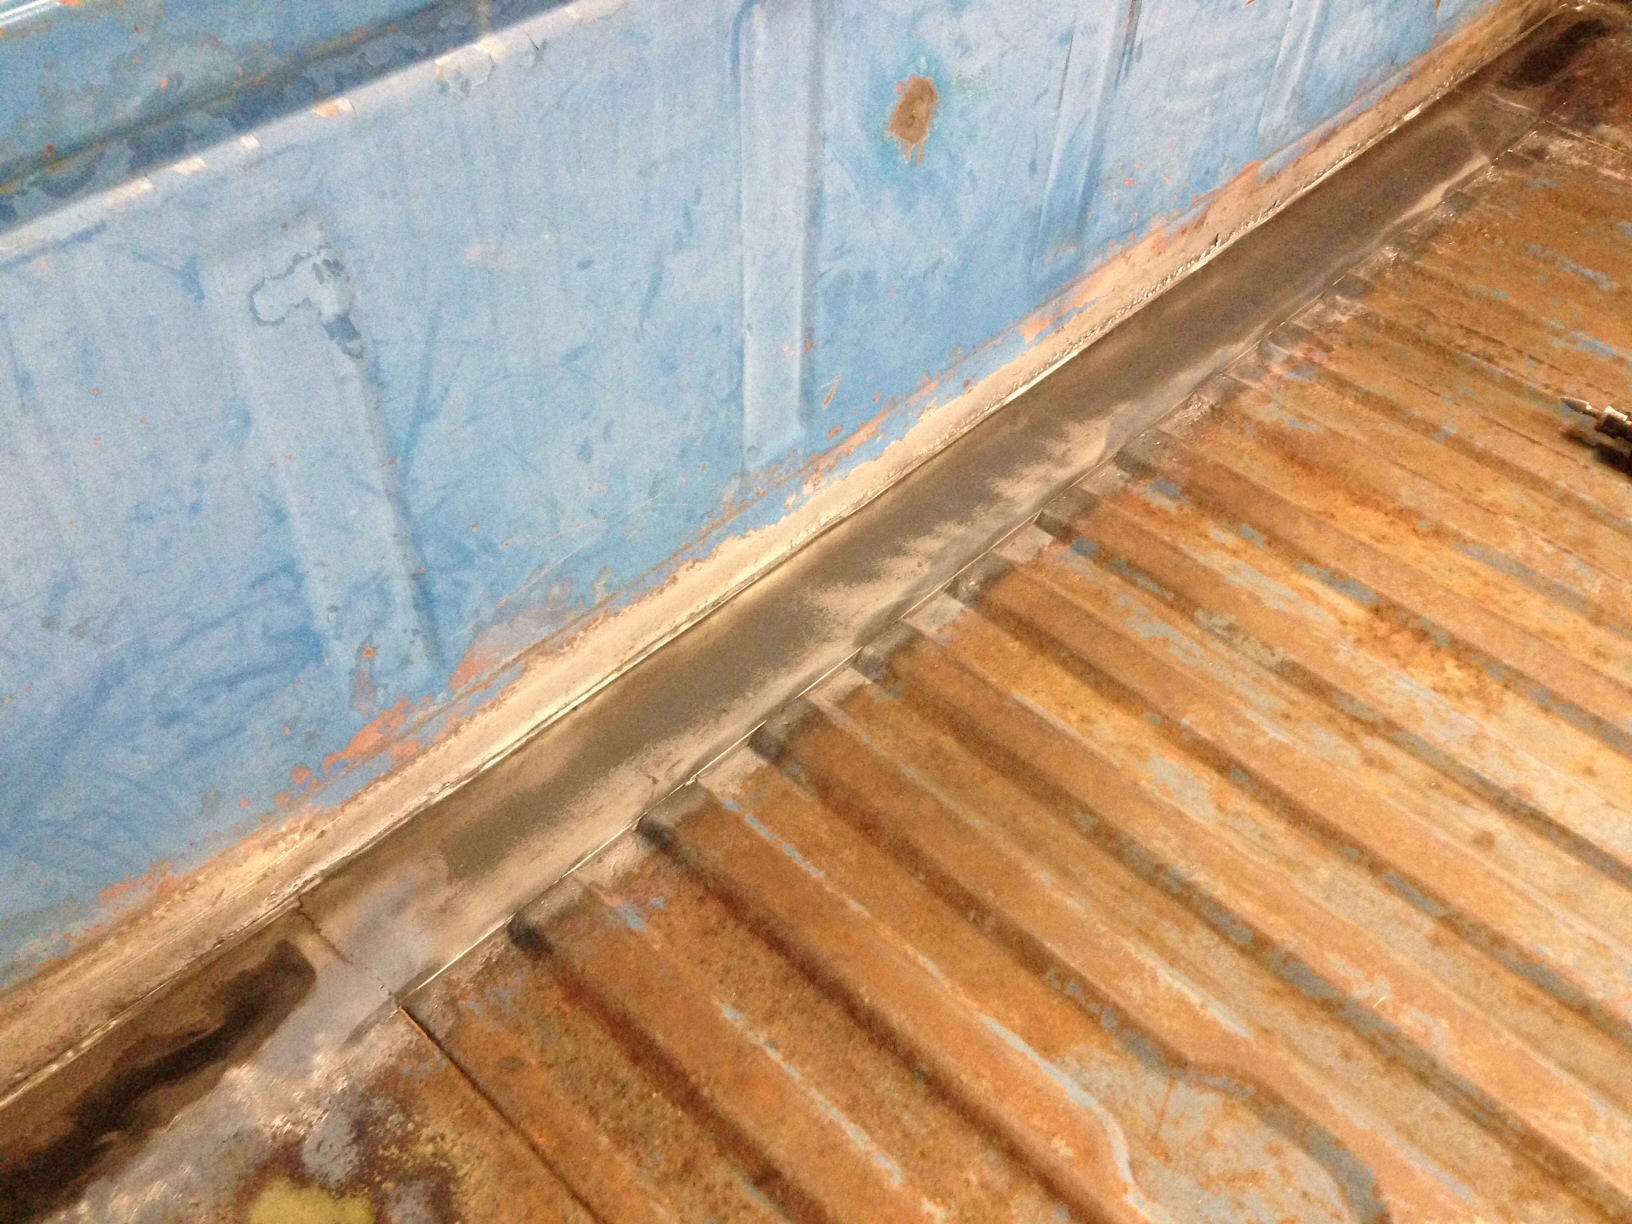
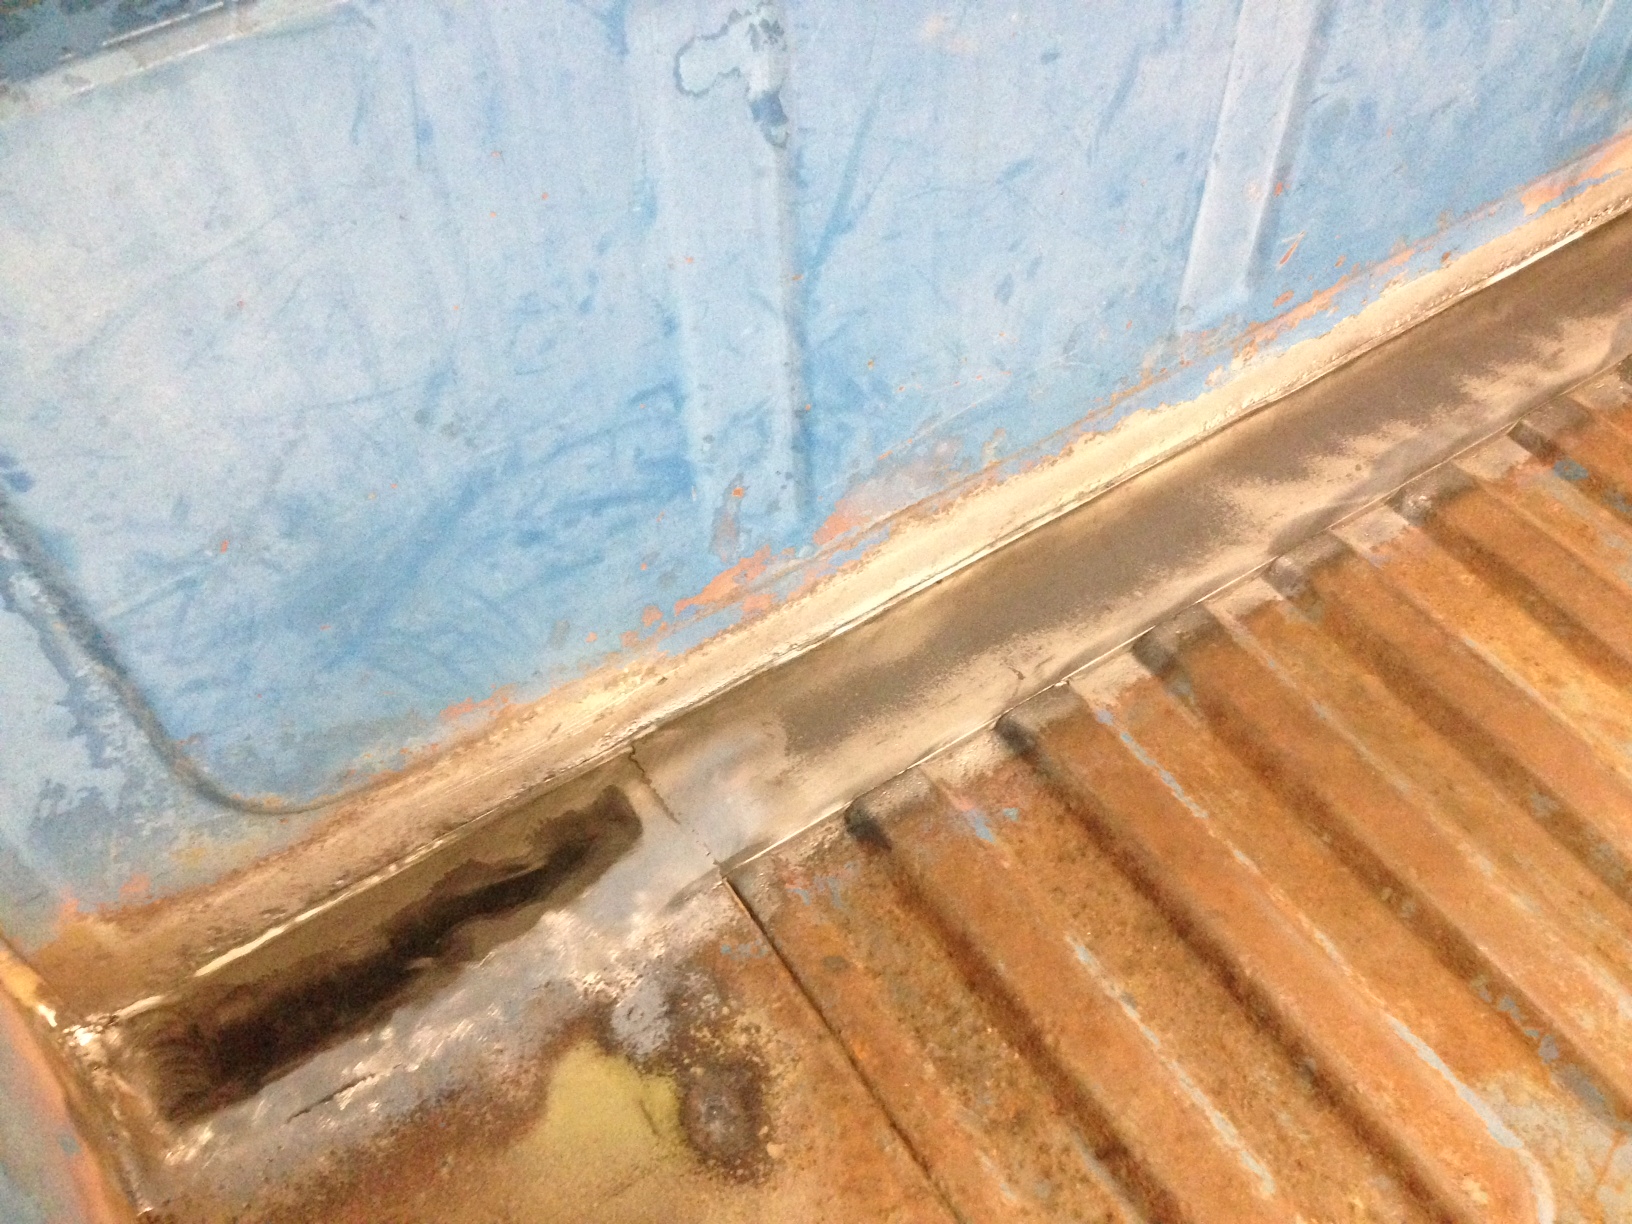
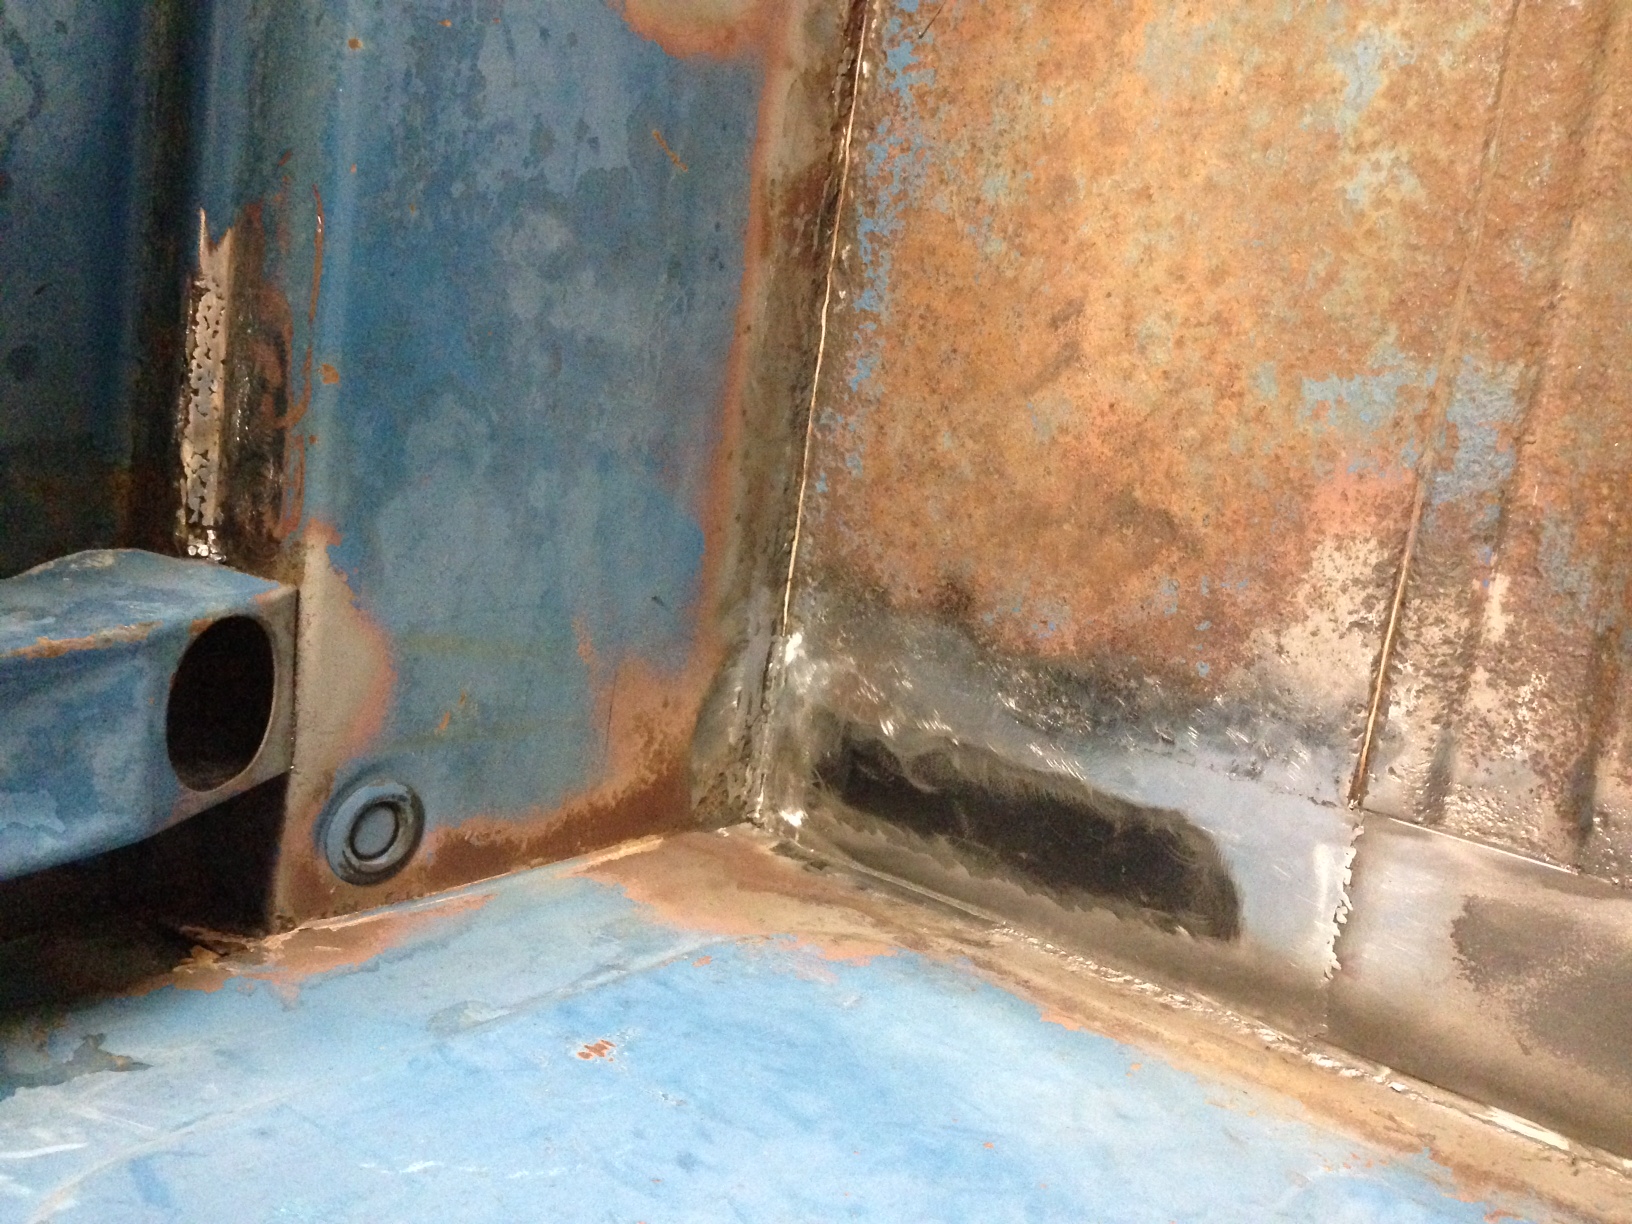
Remaining rusty spots I need to tackle are: A 3-1/2” section along the front of the bed along with a small section of the channel support. A spot of rust-through on the passenger side bed bump about 12” long. A spot along the lower bottom edge of the hood that is showing some pinholes right at the bend.
Tried to remove the front bumper but only got one bolt off. The other 3 apparently rounded off the square hole and now just spin… Not sure how I’m going to get those off yet.
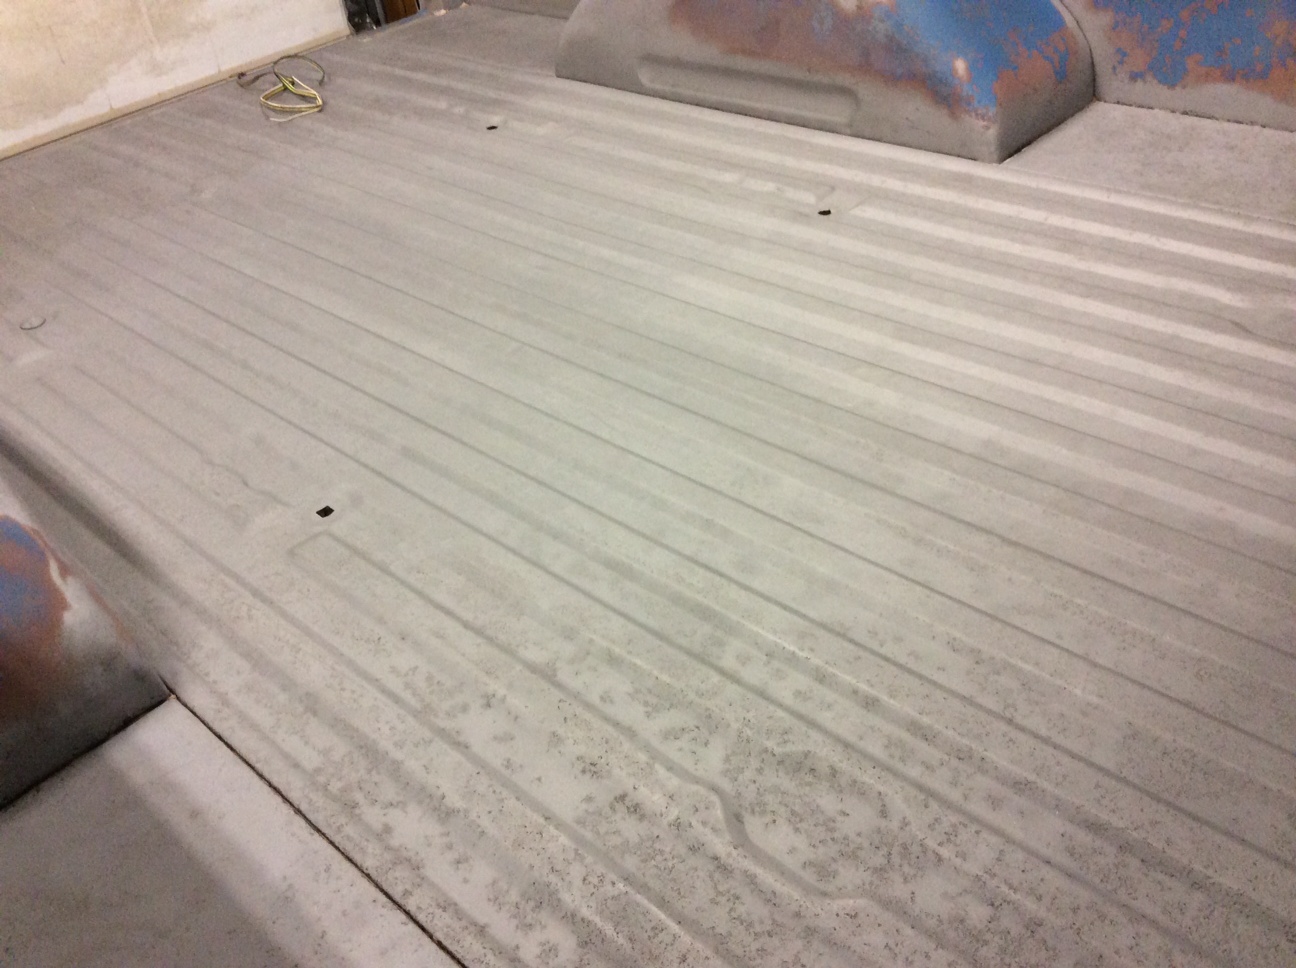
A question for those of you who have cleaned-up the bottom of the bed: It seems to have the strength and rigidity to safely stand on end, but how could it be safely tipped up to that position without bending something? It seems like just tipping it up from laying flat on the floor would bend or deform the bottom portion of the fenders that only have one diagonal brace out to the corners.
I may get after the power steering and column swap this weekend and try to finish prepping the inner fenders and radiator support.
It’s been nice to have this site to browse for all the great work being done by the members to get my motivation back.
Image
Image
Image
Image
Image
Image
Image
Image
Image
Image
Image
Image
Image
Image
Image
Image
Image
Image
Image
Image
Image
Image
User avatar
jimmy828
100% FORDified!
100% FORDified!
Posts: 1611
Joined: Thu Dec 23, 2010 6:47 pm
Location: asheville,NC

Re: Finally back around to my 72 F100

Post by jimmy828 »

Looks like someone getting a lot work done :thup: I'm new at this welding thing but the more i do the better i get. I must say the welder i purchased is paying off.
User avatar
sargentrs
100% FORDified!
100% FORDified!
Posts: 9866
Joined: Fri Jun 22, 2007 9:30 am
Location: Georgia, Jasper

Re: Finally back around to my 72 F100

Post by sargentrs »

Good work! If you want to tip your bed over do it with either the headboard or the top rail of the bed to the ground. Those are the most rigid areas.
Randy
1970 F100 Sport Custom Limited LWB, 302cid, 3 on the tree. NO A/C, NO P/S, NO P/B. Currently in 1000 pcs while rebuilding. Project thread: http://www.fordification.com/forum/view ... 22&t=59995 Plan: 351w, C4, LSD, pwr front disc, p/s, a/c, bucket seats, new interior and paint.
1987 F-150 XLT Lariat, 5.0/C6 auto.
User avatar
MAK
Blue Oval Fan
Blue Oval Fan
Posts: 514
Joined: Tue Dec 21, 2004 9:35 am
Location: Georgia, Blairsville - Florida, Flagler Beach
Contact:

Re: Finally back around to my 72 F100

Post by MAK »

sargentrs wrote:Good work! If you want to tip your bed over do it with either the headboard or the top rail of the bed to the ground. Those are the most rigid areas.
Yeah, I guess I'm having a hard time figuring out how to get the rigid portion of the bed touching the ground first. If it's sitting on the ground right side up and I start to tilt it up then the bottom flimsy part of the fenders has all the fore on them. I would basically have to get it turned upside down first right? I was thinking I could cut a piece of plywood slightly taller than the total bed height and then attach to the bed so all the force was on that as we tip it up.
Anyway, I'm sandblasting and painting the steering column and some components today and hopefully will get my inner fenders and radiator support painted with some ZeroRust this weekend. Hopefully I have all the parts on hand to get the column back together too but with my luck there will be one more part I forgot to order....
User avatar
sargentrs
100% FORDified!
100% FORDified!
Posts: 9866
Joined: Fri Jun 22, 2007 9:30 am
Location: Georgia, Jasper

Re: Finally back around to my 72 F100

Post by sargentrs »

It'll require an extra hand or two or some creative rigging with a hoist but tilt it forward onto the headboard, and flip it totally upside down. That'll put the bed rails down. I had my 3 step sons helping me but that's what we did to finally get it here....
You do not have the required permissions to view the files attached to this post.
Randy
1970 F100 Sport Custom Limited LWB, 302cid, 3 on the tree. NO A/C, NO P/S, NO P/B. Currently in 1000 pcs while rebuilding. Project thread: http://www.fordification.com/forum/view ... 22&t=59995 Plan: 351w, C4, LSD, pwr front disc, p/s, a/c, bucket seats, new interior and paint.
1987 F-150 XLT Lariat, 5.0/C6 auto.
User avatar
MAK
Blue Oval Fan
Blue Oval Fan
Posts: 514
Joined: Tue Dec 21, 2004 9:35 am
Location: Georgia, Blairsville - Florida, Flagler Beach
Contact:

Re: Finally back around to my 72 F100

Post by MAK »

Slowly chipping away and making some progress. Got the power steering column reassembled. I was afraid I was going to forget what went where but it was pretty straight-forward. I did have a lot of trouble getting the shift tube to move after I got the lever installed. Had to pull it all apart a couple times and ended up using a lot more grease than I thought was going to be necessary.
Image
Rough test fit and all looked ok. I still have to get a new rag joint or a whole new steering coupler if I cant get the original disassembled.
Image

Got a 2nd coat of Zero-Rust on the inner fenders an radiator support last weekend. Just need to figure out what finish I'm going to put on all the bolts and fasteners. Soaked in Ospho and are bare metal at the moment.
Image
Image

Rolled the bed out of the garage and spent a few hours blasting various areas with most concentrated on the channel where the full-length patch will go.
Image
Will require welding in some patches on the channel first...
Image
Image
Image
User avatar
MAK
Blue Oval Fan
Blue Oval Fan
Posts: 514
Joined: Tue Dec 21, 2004 9:35 am
Location: Georgia, Blairsville - Florida, Flagler Beach
Contact:

Re: Finally back around to my 72 F100

Post by MAK »

I was disappointed that LMC was slow on my order and I didn’t get the shift arm bushing/insulators so I could finally try to get my shift column back in place. Just spent Saturday bouncing around from one thing to another. Blasted a pile of rusty bolts and fasteners so I could get a fresh coat of paint on them. Played with a cheap Harbor Freight stud welder that I have had forever and never got around to using. It works pretty well (although the first one I had from them was non-functional). Decided to save $35 on a new battery tray and tried to improve my poor welding skills. Before and after sandblasting pics are below. Attempted to plug weld all the little pinholes on the side of the bed bump but finally gave up. Even with a copper backer I still kept blowing holes in it and filling one hole would cause another adjacent to it. Went ahead and cut out a big section of the bump. Fortunately it’s only rusty on this one side and section. I’ve got a front fender that is rusty on the lower support section but I should be able to cut the bump off it and use as the patch. It appears to be the same size and angle, at least toward the back of the fender. Also plugged a few pinholes on the inside of the bed but will need to just go ahead and cut out a section and patch most of it. Does anyone know what gauge metal that part is?
Deer season start this coming weekend so I’m afraid I’m going to get off track and not be working on the truck for a while. If we could just add a couple extra days in to our weekends…
Image
Image
Image
Image
Image
Image
User avatar
MAK
Blue Oval Fan
Blue Oval Fan
Posts: 514
Joined: Tue Dec 21, 2004 9:35 am
Location: Georgia, Blairsville - Florida, Flagler Beach
Contact:

Re: Finally back around to my 72 F100

Post by MAK »

Hunting season and the holidays are over so have finally started getting some quality time with the blue goose. Inner fenders and radiator support are back in place and finally got the steering column finished and reinstalled.
Image

Cut out and finished one small spot on the back edge of the bed behind the bumper.
Image
Image

Cut the bump off an old front fender and when I tried to line up with the already cutout piece on my rear fender I found that with me “measure twice” is still not enough... Oh well, fortunately I had another spare fender to cut a new section from. Went way oversize on this one and was more careful trimming back to fit. The top and bottom edges line up nice and straight. I didn't notice until I finished that the high point of the edge is a tad low. It sits back about 3/32” from the high point of the front and backside of the bump that wasn't cut out. Not sure it's bad enough to start over so will just use more filler than I want.
Image
Image

Tackled the door rust in the lower corners. I've seen much worse. Decided to just cut out the corner sections and patch rather than replacing the whole lower skin and re-wrapping around the edges. Inner door was solid but rusty so it was tough to get nice clean beads. Problem compounded by my piss-poor welding skills.
Image
Image
Image
Image
Image
Image
Image
Image

My cheap Harbor Freight stud welder has come in real handy for helping to pull out and manipulate the patches as they move from the heat and getting stuff lined up. While I was working on one of the door corners I found another section of the cab corner that I thought I had completed but still had another rusty section higher-up. More cuts. More patching.
Image
Image
Image

Door repairs close to complete. Maybe on to a small section on the hood next.
Image
Image
Image
Image
User avatar
SSW
New Member
New Member
Posts: 55
Joined: Sun Jul 06, 2014 9:55 pm
Location: Mesa, AZ

Re: Finally back around to my 72 F100

Post by SSW »

You're Steering column looked like the lower bearing was shot, and it started to wear into the retainer. If there is a gap between the column & the Steering wheel this is why. I replaced the bearing and flipped the retainer over to the side not wore down, barely could get the Allen set screw out.
This pic is after I flipped the retainer.
IMG_20141115_074639847_HDRrev.jpg

I also decided the new battery tray was the way to go.

Good luck.

Steve
http://www.fordification.com/forum/view ... 22&t=76466
You do not have the required permissions to view the files attached to this post.
User avatar
MAK
Blue Oval Fan
Blue Oval Fan
Posts: 514
Joined: Tue Dec 21, 2004 9:35 am
Location: Georgia, Blairsville - Florida, Flagler Beach
Contact:

Re: Finally back around to my 72 F100

Post by MAK »

Getting all the truck front end panels back on for a test fit it going to push me over the edge. Driver side is close but the bump still won't quite line up fender to door. Have it as low as it will go and still not matching to door. Looks like door needs to be pushed in some as it's hanging out a little toward the top. Hopefully that will work. Other side is close to lined up now horizontally but the darn back corner is hanging 3/8" under the cowl right in front of the door edge and it's that far outside the edge of the cowl at the front. If I space it out farther to match in the back, it will be even further out at the front, and the radiator support and front mount points of the fender are as far toward the driver side as they will go. Aaaaagh! :cry:

Image
Image

Hood rust was a lot worse than I originally thought. Looks like just a small section but then as I started to sand off the paint found nothing underneath... Cut out a little piece where the rust had started up the side and the whole side of the hood started to oil-can and want to lose it's shape on that side. Decided not to cut out a bigger piece and just used a copper backer and filled in all the holes until it got to enough metal that they quit blowing out.
Image
Image
Image
Image
Image
Image

Back to rusty spots here and there in the bed. Didn't finish the big panel on the side but got it tacked in place and it appears to be staying nice and flat.
Image
Image
Image
Image
Image
Image
Image

I've got a few spots on the bed support channel that need to get cut out and replaced. Will try to get that done next weekend.
Finally starting to see some light at the end of the tunnel as far as having all the rusty spots patched. At least as far as I know about. May find some more spots that have nothing under the paint... :lol:

One of the top bumper bolts was so rusted that it rounded out the square hole in the bumper. Not sure how the heck I'm going to get that off now. Too tight of a space to get in there with the sawzall.
User avatar
flyboy2610
100% FORDified!
100% FORDified!
Posts: 4901
Joined: Sun Oct 03, 2004 6:42 pm
Location: Nebraska, Lincoln

Re: Finally back around to my 72 F100

Post by flyboy2610 »

You're really making some good progress there! :thup:
Here's an article that might help you get your doors aligned:
http://www.hotrod.com/how-to/additional ... build-off/
Click on the pics to get an explanations of each pic.
"If the women don't find you handsome, they should at least find you handy."
Red Green

If you're going to live like there's no hell...............
you'd better be right.
http://theworldasiseeit-flyboy2610.blog ... ee-it.html
User avatar
MAK
Blue Oval Fan
Blue Oval Fan
Posts: 514
Joined: Tue Dec 21, 2004 9:35 am
Location: Georgia, Blairsville - Florida, Flagler Beach
Contact:

Re: Finally back around to my 72 F100

Post by MAK »

flyboy2610 wrote:You're really making some good progress there! :thup:
Here's an article that might help you get your doors aligned:
http://www.hotrod.com/how-to/additional ... build-off/
Click on the pics to get an explanations of each pic.
That's perfect. Will save me a lot of time trying to figure out how to make each adjustment.
Thanks a lot.
User avatar
ToughOldFord
100% FORDified!
100% FORDified!
Posts: 1907
Joined: Mon Jul 25, 2005 10:47 pm
Location: Communist California, USA

Re: Finally back around to my 72 F100

Post by ToughOldFord »

Nice work, looking good! :thup:
1969 F250 Ranger Camper Special. 390, NP435, 3:73s.
-------------------------------------------------------------------------------------------------
That government is best which governs least, because its people discipline themselves. -Thomas Jefferson
User avatar
MAK
Blue Oval Fan
Blue Oval Fan
Posts: 514
Joined: Tue Dec 21, 2004 9:35 am
Location: Georgia, Blairsville - Florida, Flagler Beach
Contact:

Re: Finally back around to my 72 F100

Post by MAK »

Found a couple more spots that had rust-through just under the paint but pretty close to having all the welding done.
Used the stud welder to straighten the cupping that occurred when I cut out the rusty spot before I even welded in the new piece. The first on I got from Harbor Freight was DOA but this one has come in pretty handy.
Image
Image

I'm going to leave most of the trim and insignia off, so jumped around filling all the holes.
Image
Image
Image
Image

Major task was replacing the strip of floor along the back of the bed. I welded some of it along the sides, and to connect the side flat sections, but used panel adhesive to attach the three pieces to the support channel underneath. I figure that will help seal it good and be less likely to rust. I used a piece of 5/16" thick bar stock which comes to the same height as the top of the bed ribs. I will still have to drill holes for the bed bolts once I get it back on the frame and aligned. I still need to sandblast most of the rest of the bed to thoroughly remove the surface rust and clean out the pits. Not looking forward to that.
Image
Image
Image
Image
Image
Image
Image
User avatar
wndsofchng06
Preferred User
Preferred User
Posts: 402
Joined: Fri Jun 01, 2012 7:41 pm
Location: Durham, NC

Re: Finally back around to my 72 F100

Post by wndsofchng06 »

You're doing great! Giving me motivation to tackle my rust bucket!
Post Reply