|


|

|
Disassembling the '67 SWB Bed |
|
 |
|
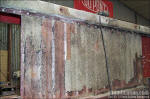
Fig. 1 - Here's a shot taken as I was drilling out the spot
welds.

Fig. 2 - Here's a close-up of a drilled-out spot-weld.

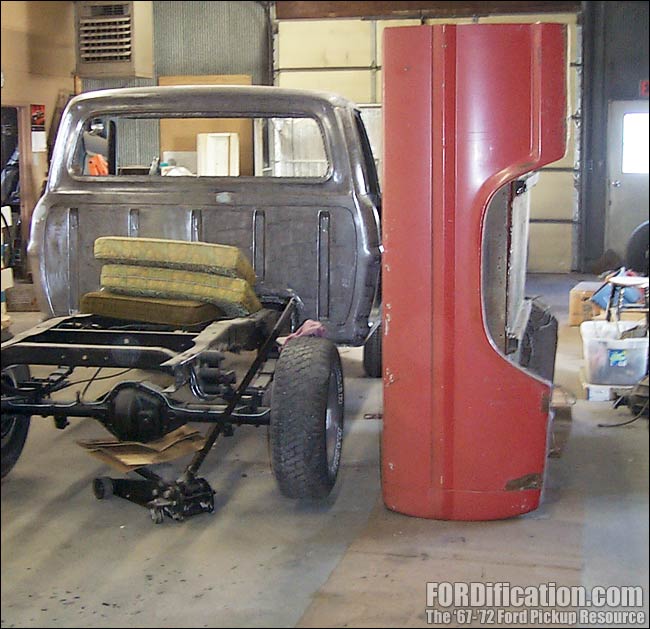
Fig. 3 - Here I am trying to slide the box on end, past
the project truck to the '72 chassis sitting in front of it (out
of view). |
Saturday, December 17, 2005 - I spent the day
today finishing up the bed disassembly on my original box that I
started on last weekend. Basically I just had to finish removing
the bed floor and rear support.
Since I didn't get a chance to get the special spot-weld drill
bits ordered, I decided to just go ahead and use a regular drill
bit. It really didn't matter how deep I drilled these welds,
even if they went all the way through, since the bed floor was
going to be discarded anyway. The holes that remain in the
supports will enable me to weld everything back together anyway.
Fig. 1 shows the drilling process about halfway through for the
front support. Fig. 2 shows a close-up of a drilled-out
spot-weld.
Once
I got all the spot-welds in the front support drilled out, I'd
gotten about as far as I could go with the bed sitting up on end
where it had been sitting for the past two years. I needed to
get started drilling the spot-welds for the rear end of the box,
but first I needed to get the box laying down flat. I decided to
lay it over onto the bed floor that was still sitting on the
'72s rolling chassis, to use as a workbench...but it definitely
took a little work getting it there! I was alone and had to get
the box from one end of the shop to the other. I laid a couple
carpet runners on the shop floor (to keep from damaging the box)
and was able to push/pull the box on it's end over to it's new
home for a while. In Fig. 3 the box is about halfway there (had
to stop and take a break!). Fig. 4 shows the box laying upside
down on the '72 bed floor. This will be convenient, since it'll
hold everything at a comfortable level for the necessary
repairs.
Once
I got the box laid over, I got started drilling out the
spot-welds holding the rear support in place. |

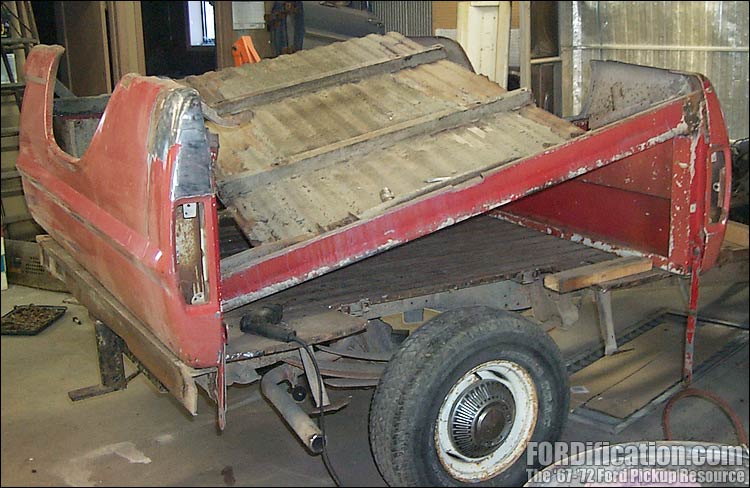
Fig. 4 - Finally got the box laid upside down so I can
finish disassembly and get started on repairs. |

Fig. 5 - Got the passenger side of the rear support
disconnected. |

Fig. 6 - ...and the bed floor is completely out now. It's
time to start on repairs to the bed sides. |
|
With
the floor completely removed, I was able to then get started on
necessary bed repairs. However, I found that the bed sides
weren't in as good a shape as I remembered. I took a bunch of
pictures to show what I have to deal with here. This is going to
take even more work than I'd initially thought! Figs. 7 thru 10
are things I already knew about, and wasn't too worried about
repairing. |

Fig. 7 - Sometime in it's previous life, this box has
already seen a lot of repairs. Just in front of each end cap
panel there was rust which someone had just coated Bondo over
the top of, but which was now failing and needed to be
completely redone. This is a shot of the passenger side... |

Fig. 8 - ...and here's the driver's side from the front...

Fig. 9 - ...and from the back. |

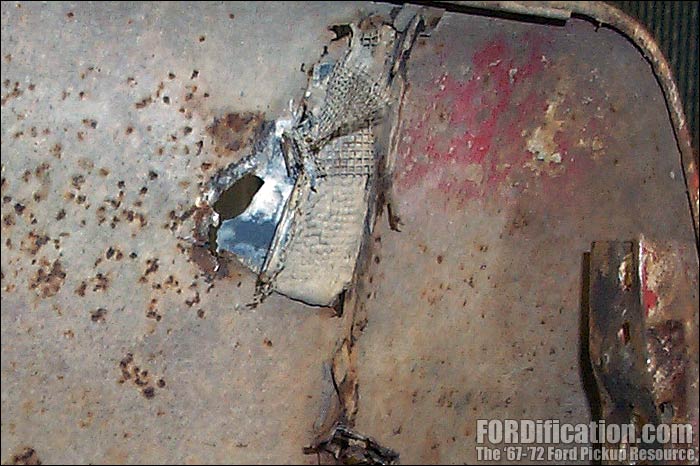
Fig. 10 - The inner lip of one of the fenderwells was rotted
away. The point at which the paint stops is where it meets the
bed floor. I'm not sure whether I'll cut this rusted area out
and replace it with good metal, or just cut it out and leave it
off. If I don't replace it, I can just run a weld bead along the
inside of the bed, where the bed floor meets the fenderwell.
|
|
I
decided that the first repair would be to weld in a patch panel
for the area pictured in Fig. 7, on the passenger side of the
box. I figured I could weld in a patch panel spanning the bed
side and the end cap, covering up the seam between the two, and
then continue with welding up the seam around the remainder of
the end cap perimeter to smooth it out. I cleaned up the area
with the angle grinder and wire wheel to survey the damage, and
then got out the air chisel and cut out the rusted area (Fig.
11). I was planning on cutting a patch panel from the bed sides
of the '72 which I removed last weekend, but they weren't good
enough to use. Therefore, I just decided I could start hacking
up the '68 parts truck sitting out front of the shop, using it
as a donor for all the bed's patch panels. While I was messing
around with the wire wheel in the angle grinder, I hit it to
several blistered areas in the paint along the bed sides and was
more than a little disappointed by what I found. I knew the back
sides of the side panels were pitted to a fair degree, but I
figured I could sandblast them and coat them with POR-15.
However, I discovered that the pitting actually went all the way
through in several spots (Fig. 12). It was at this point that I
just spent almost an hour looking things over, trying to decide
on a course of action. |

Fig. 11 - Using the air chisel I cut out the rusty area and
cleaned it up a little for the patch panel.
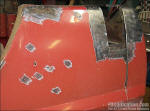
Fig. 12 - Here you can see that rust has completely penetrated
the side walls. |
|
I guess I'm now leaning towards completely replacing the bed
sides, using skins I can remove from the LWB '68 parts truck.
After removing the entire skin I'll have to trim it on each end
to fit the SWB box, but I didn't want to get started doing that
this evening, since by this time it was dark outside and I
really wasn't 100% certain of the condition of the '68 box's bed
sides. I decided I'd better wait till tomorrow when I can check
them out in the daylight, just to prevent any more surprises.
I'd really hate to remove the bed sides only to find that they
too were unusable!
So
tomorrow I'm going to head back to the shop and take inventory
of the condition of the '68 parts truck's bed sides, and go from
there. However, I have to admit....at this point, I'm almost
thinking that this is going to be more work than I really want
to tackle. Although I'll still keep my eyes open for a better
box to use, in the meantime I guess I have to continue as if I
absolutely have to use what I already have. With my luck,
it'll be just like the cab I spent about 3 months sandblasting
completely clean (Oct.-Jan. '03), only to find another rust-free
cab to use instead. Oh well....at least I'll get a crash course
on aligning body panels and getting used to welding sheetmetal
with the MIG.
So
anyway....stay tuned! |
|
 |

Want to link to
this site? Please save this banner to your hard drive to place on your
webpage.
The correct link to use is
http://www.fordification.com
|