|
Friday, June
9, 2006 - Since it was another slow Friday
afternoon at work, I decided to take the afternoon off and head
to the shop. I had no idea what I was going to get done today,
although I was sure it had something to do with the new box.
After stopping
at the local farm supply store to get some more 3M composite
stripping wheels for the angle grinder, I went to work on the
front of the box, getting it stripped to bare metal (Fig. 1).
I then decided
to get started on welding up the bed seams (Fig. 2). It took a
few tries before finding the proper setup on the MIG, and then
it took a while for me to learn the proper technique to filling
in a gap without blowing holes in the thin sheetmetal. I only
went through one time, but was able to fill that in. |

Fig. 1

Fig. 2 |
|
And now for something
COMPLETELY different! A $50 paint job???
A couple days ago, a
FORDification.com forum user posted
a
message in the Body/Paint section, calling attention to a
thread on a Mopar messageboard, where there was a very
lively discussion going on about a cheap alternative to
expensive paint jobs. This alternative was the use of Rustoleum
Professional roll-on enamel. Yes, that's right....an enamel
paint applied with a roller! At first I rolled my eyes, but
decided to keep reading...and reading....and reading some more.
As of today, the thread is a whopping 47 PAGES LONG! It
took me three nights worth of reading to make it all the way
through, and by the time I was about half done, I was already
seriously considering this as a viable alternative to expensive
BC/CC paint jobs, which can easily run $3,000 to $5,000. And the
total cost of the Rustoleum method? About $50-$75. The paint is
only $25-$30 per gallon, with the rest covering the foam
rollers, mineral spirits for thinning and clean-up, and
sandpaper for wet-sanding. The Mopar messageboard thread has
been linked to from dozens of other automotive forums, and by
end (so far) of the thread, a majority of the people
participating aren't even Mopar owners, but owners of Hondas,
Camaros, Volkswagens, etc. who were giving this method a try and
reporting back their results. After the proper surface prep,
paint thinning and application, and wet-sanding, a lot of folks
are posting pictures of their cars/trucks with some very
respectable-looking paint jobs. |
|
So
anyway....over the past couple of days I've been giving some
serious thought to picking up the supplies needed and satisfying
my own personal curiosity, and trying this out on a fender. My
father-in-law called me last night from the local Menards,
asking me if there was anything I needed. At first I said no,
but then on the spur-of-the-moment, I decided to have him check
to see if the Rustoleum was available there. He checked and said
it was, so I decided to have him get the paint supplies for me.
The only problem was that I still hadn't fully decided on a
color yet. The stock colors didn't really do anything for me,
but after discussing it with him for a few minutes, I made
another snap decision and told him to get me a gallon of 'After
Midnight' blue, which is the darkest blue they could custom-mix
for me. He also picked up a gallon of white primer, although the
general consensus among the participants of the Mopar
messageboard thread was that it wasn't needed. However, after
reading the entire thread and seeing some of the cases of laying
down inconsistent layer thicknesses, I decided I wanted a
light-colored base coat to permit me to get the hang of the
paint application. This Rustoleum enamel is applied in multiple
very-thin (almost transparent) layers, so the white primer will
enable me to see how thick each of the first layers are applied,
until I get the knack for applying it uniformly. He also picked
up the necessary foam rollers, sandpaper for wet-sanding (in
600, 800, 1000, 1200 and 1500 grit) and some tack cloths.
I'm not sure
when I'll get started on this, but it'll be fairly soon.
Although the cab and box aren't ready yet, much of the front
sheetmetal for my project is already down to bare metal. So
sometime in the near future I'm going to get started on a fender
and give this a try. After a fender is done and I see how it
goes, I'll make a decision at that time on whether or not to
proceed with this. If I do, I'll be constructing a special
tutorial page showing all the details and progress, so that
others who consider this in the future won't have to wade
through many personal project update pages to find information
on it here...it'll be all in one area. Stay tuned! |
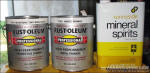
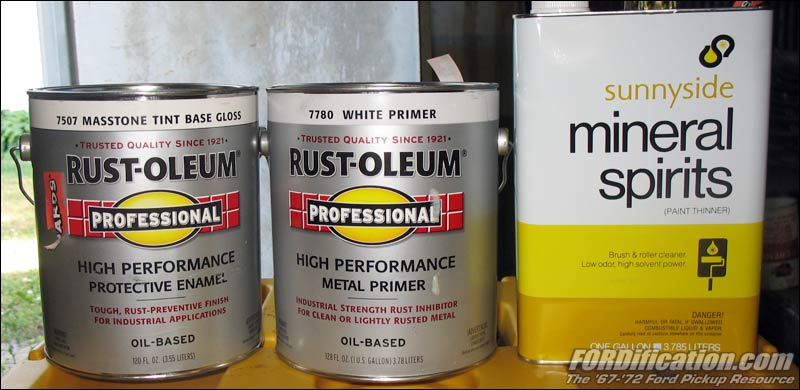
Fig. 2 - Here's a
shot of the paint, primer and mineral spirits. The Masstone Tint
Base was used to custom-mix a gallon of 'After Midnight' Blue,
the darkest blue that could be tinted.

Fig. 3 - Here are the foam rollers and
brushes. The white rollers are perfect, but I'm not sure the
black ones will work, due to the larger pore size. |
|

Fig. 3 - Yeah yeah, I know...this is one ugly bead!
It took me a while to get the hang of welding with the MIG
without burning through.

Fig. 4 - You can see in this shot how I was jumping
back and forth to different areas of the seam, to avoid heat
build-up which would distort/warp the sheetmetal. However, I did
still end up with some warpage that will need fixed.

Fig. 5 - Here's a shot of the completed right side, ready to
be ground down.

Fig. 6 - The first rough pass with the grinder. Man, this
bead is some hard steel! |
Saturday,
June 10, 2006 - I kinda got a late start this
morning, kept getting sidetracked playing on the computer. Made
it to the shop about 11AM, knowing that I only had until about
6PM to work, because I had to come home and play Mr. Mom while
Mrs. Mom went to work. Since I got started on the seam welding
yesterday, getting some more work done on this was today's
agenda.
Since the
subject of welding seams has come up many times on the
FORDification.com forums, the general consensus has been to not
weld a seam in a single continuous weld, to prevent (or at least
minimize) sheetmetal warpage. Therefore, I started out by
welding 2"-long beads at a time, (Fig. 4) and then moving to
another section of the bed seam, to avoid transferring too much
heat into one area, and to give the first one time to cool down
a bit. However, after I was completely done on one side and
everything had cooled down completely, I found I did have a bit
of warpage on the top side of the horizontal bump. It's not bad,
definitely repairable, but it's obvious now to me that I have to
go in much-shorter spurts. When I get started on the opposite
side, I'll try making small 1/2"-long beads at a time, and will
see if that will make a difference.
Welding up the
right side of the box actually went pretty quickly. I think it
took me about 60-90 minutes to completely fill in the seam.
However, it took me a LOT longer to grind it down. The weld bead
is considerably harder than the sheetmetal, and it took several
hours just to rough it in. Another mistake I made doing this
too, was that instead of just making a tiny minimal bead, I
really filled it in, figuring that it was better to have too
much than not enough. Unfortunately, not only did this probably
contribute to the little bit of warpage I experienced, but it
also dramatically increased my grinding time. Plus, the large
bead made it almost impossible to accurately figure out where
the top corner of the bump was supposed to be. Therefore, I had
to guess-timate, and while I got close, it's still going to need
a little more work. I'm going to have to tape a piece of string
to each end of the box right over the top of the bead area,
where the center of the top curve is supposed to be, and then
mark it. Then I'll be able to finish up the grinding, using the
mark to more-accurately shape the curve. I was going to do that
this afternoon, but by the time I'd roughed it in, I was needing
a break from it, so I moved onto something else...and that was:
...welding up
some trim holes, as outlined below. |

|
Well, that's it
for this installment. I'm slowly getting better with the MIG, so
future welds should be a little better. Not that they're bad,
per se....but they could use a little improvement. I have at
least another full day's work ahead of me finishing up the
right-side bed seam, and then it'll be on to the opposite side,
where hopefully the lessons I learned will make it go much
smoother...no pun intended. Once the right-side seams are
filled, I'll be flipping the box over and getting started
getting the bottom side cleaned up and coated with POR-15. And
sometime in near future I'll be taking the plunge and trying out
the roll-on Rustoleum as outlined above.
So much to
do...and so little time. Oh well....stay tuned! |
|