|
After reading the articles "How
to Install Power Steering in a ’65-’72 2WD Twin I-beam
Pickup" and "How
to Shorten Your Manual-Steering Column" on the
FORDification.com website, we decided that we might be able
to convert the ‘72 F100 three-speed on the column from
manual steering to power steering. Without the pictures and
information in those articles, it would have been very
difficult and we probably wouldn’t even have attempted the
project.
The two shift levers on the foot of the steering column
required by the manual transmission posed a serious space
problem. After much studying of a 3-speed column from a junk
truck, we decided that by modifying the work described in
the automatic-shift column tutorial, we could probably
accomplish the task.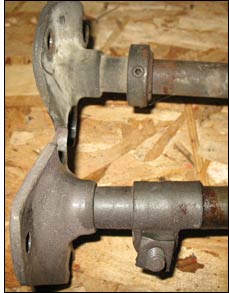
We also had an automatic shift column out of a factory
power-steering truck to use for parts. It had the late-style
lower bushing retainer collar (with an Allen set screw) on
the foot of the steering shaft as opposed to the early-style
clamp type. There was not enough space for the early-type
clamp. If we hadn’t had the late style, we would have had to
make a retainer. We slid the retainer collar down against
the steering shaft rag connector flange and tightened it
there. That accounted for 1-3/16 inch of the 2-3/8 inches
difference in length between the manual and automatic column
assemblies. That left 1-3/16 inches that we needed to
shorten the column. That left just barely sufficient space
for the dual manual shift lever assembly to clear the
firewall. We temporarily clamped the column into the truck
before we cut it and it appeared that it would work, so we
proceeded to shorten the column and shift tubes by the
required 1-3/16 inch.
We had intended to turn the 2-3 lever on the column around
so that the offset was toward the front of the truck and use
the automatic lever that had an inch and a half or so of
offset for the R-1 lever. We were going to have to modify it
slightly and when we started to cut one of the manual
levers, we discovered that they are made of much harder
metal (no saw blade we had would touch it), suggesting that
an offset lever might not work due to the amount of force
required to put the transmission into gear (an automatic
transmission has essentially no internal resistance to gear
changes with the stops being set in the column). When we
tried the configuration using the offset lever in the truck,
we were not comfortable with the movement and felt that it
would not be reliable, and might actually bend.
 We took the column out of the truck and reassembled it in
the normal manual shift configuration and put it back into
the truck. The 2/3 linkage rod seriously interfered with the
firewall when in the second gear (up) position. We decided
that bending it at the center bend would allow it to clear
the firewall. We also had to bend the R-1 linkage rod so
that the two rods would clear each other in the various
positions depending on which gear the transmission was in at
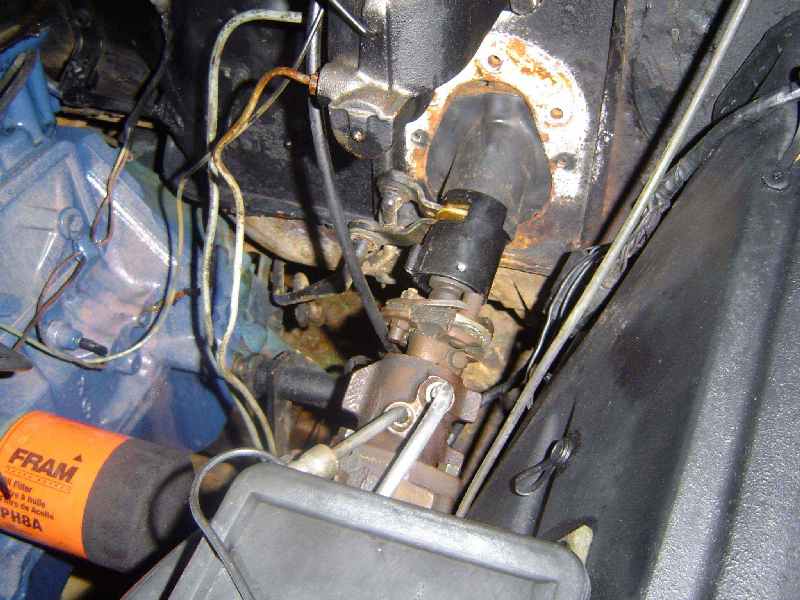
the time. We bent the linkages so that there was 1/4"
more clearance (see yellow marker in picture) at their
center bends. When we reinstalled them, the shifting worked
normally. We took the column out of the truck and reassembled it in
the normal manual shift configuration and put it back into
the truck. The 2/3 linkage rod seriously interfered with the
firewall when in the second gear (up) position. We decided
that bending it at the center bend would allow it to clear
the firewall. We also had to bend the R-1 linkage rod so
that the two rods would clear each other in the various
positions depending on which gear the transmission was in at
the time. We bent the linkages so that there was 1/4"
more clearance (see yellow marker in picture) at their
center bends. When we reinstalled them, the shifting worked
normally.
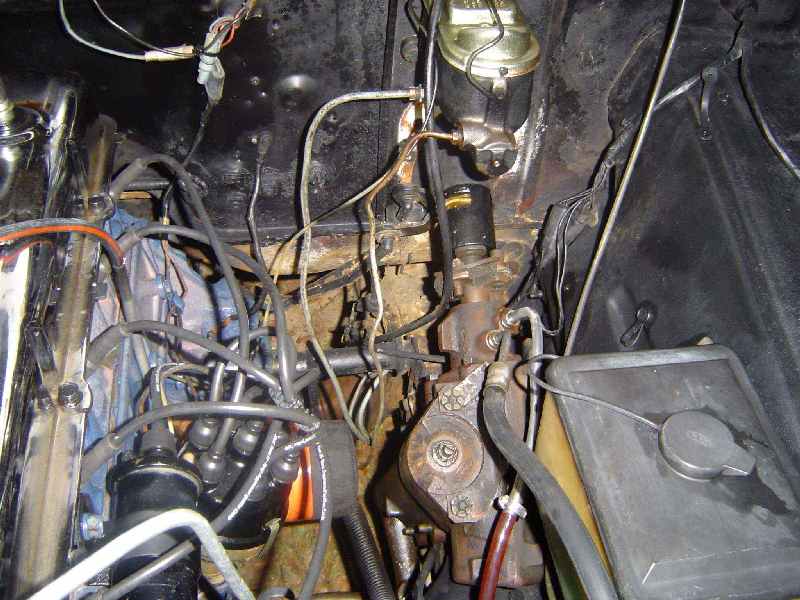
We then discovered another problem. The heavy locater pins
on the steering gear rag joint were rubbing on the foot of
the steering column because of it being shifted down.
 That
obviously would not work. It appeared that by cutting off
about 1/8 inch of the lower end of the column that we could
gain enough clearance to allow the rag joint to operate
correctly. When cutting the end off, be careful not to cut
the spot welds that hold the lower bearing assembly in the
column completely out; we left about half the area of each
one (you could hit the end of the column with a welder if
you are concerned about the spot welds being weakened). We
then reassembled the column and reinstalled it. That
obviously would not work. It appeared that by cutting off
about 1/8 inch of the lower end of the column that we could
gain enough clearance to allow the rag joint to operate
correctly. When cutting the end off, be careful not to cut
the spot welds that hold the lower bearing assembly in the
column completely out; we left about half the area of each
one (you could hit the end of the column with a welder if
you are concerned about the spot welds being weakened). We
then reassembled the column and reinstalled it.
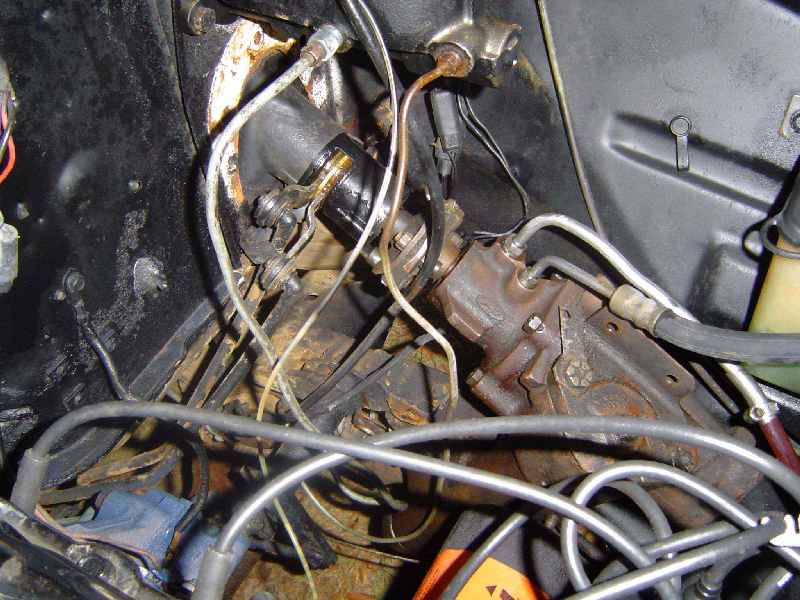
We started the truck and found that the linkages would have
to be adjusted out (R-1 ended up out to the end of the
adjustment at the tranny) to allow the transmission to go
into gear properly and reliably.
We then installed the steering wheel and it was almost
perfect except that the distance between the back side of
the wheel and the turn signal switch housing was about 1/8
inch too wide. We removed the column from the truck once
more and slid the collar with the Allen set screw up on the
steering shaft so that it was about 1/8 inch away from the
flange, which effectively moved the steering shaft toward
the front of the truck. This also gave us more clearance
between the locater pins and the steering column. Everything
lined up and worked except that we still had some
interference between the 2-3 linkage and the firewall. We
put another ¼ inch (for a total of ½ inch) into the 2-3
linkage center bend and straightened the 2-3 lower bend
about ¼ inch. This solved the clearance problems and the
shift mechanism worked properly!! Note that these distances
are for our truck and “bend it and try it” may be required
to get the clearances where they need to be.
One should use the firewall bracket from a power steering column, as the change in angle
of the manual column will cause conflict with the manual
brackets and holes pre-drilled in the firewall. Pictured at
right are the manual-steering bracket (left) and the
power-steering bracket (right). (Click to enlarge.) |