I purchased a "perfect fit" a/c system for my '67 crew and have been running into some issues. They say that they have sold a few systems for 67 trucks already and no one has had an issue yet but me.
The kit is mainly designed for a '68-72 v8 truck, though it isn't advertised as such and the sales/tech reps assured they had components to adapt to 1967 push/pull controls.
One issue is the angle of the dash and the depth of the associated bezels. The cable portion of the kit is designed for a Bronco, which has a flat dash and thin, flat a/c bezels for the fan switch and push/pull cables. Because the truck bezels are angled, the threads of their cables and switch are too short to reach through.
The second issue so far is that the condensor and brackets(and hard lines probably) are designed for a v8 truck. The condensor does not fit behind my 6 cylinder radiator and will not mount to the radiator support like it would on a v8 support. Since the radiator opening is smaller and offset, it will not mount to the factory holes intended, even though they are still there and in the same place on my truck. With slightly different brackets, it looks like it may fit fine. I am reusing their two bottom brackets and custom making two top ones for the compressor to mount to the backside of the radiator, instead of the radiator support. I am going to have to space the radiator 1" to 1-1/4" away from the support to make this work though, so the lines can route around the stock radiator mounting bracket/ear. I though of notching the radiator mounting bracket, but I didn't like that idea just yet. My fan may have to be shortened, or I may use electrics.
My lines did not come pre-crimped as others have. It is not a big deal(yet), as I knew this upon buying the kit and I have plenty of shops locally that make custom a/c hoses. It would have been nice to have, like others have posted, but it is another reason to believe they have not dealt with a 6cyl truck yet.
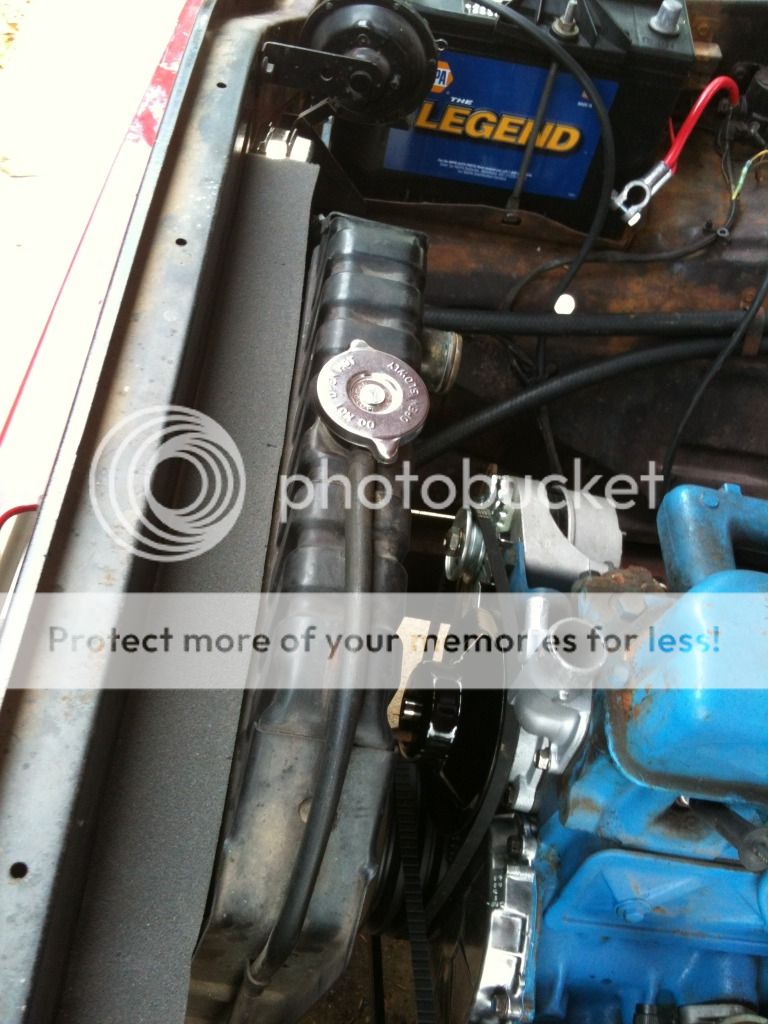
The compressor bracket bolted perfectly to my non power steering 240, I simply had to purchase a new balancer with more than one groove. I opted to buy a three groove 300 balancer from LMC(made in China). Classic Auto Air wanted me to modify the bracket and run the alt off the compressor, or something similar, but this was much easier and much more reliable. It works great. I did paint their mild steel bracket spacers so they quit rusting, but the bracket came pre painted.
So far this is what I have. I have a couple pics I can post, but nothing spectacular yet. Classic Auto Air's tech guys have been VERY nice on the phone and have been as helpful as they can be, though a little slow to return phone calls sometimes. Right now they are just hand tied with a lack of parts to offer that would work. I give them an A+ for their attitude and effort so far. They have been great to work with.
Classic Auto Air install issues, comments and pictures.
Moderator: FORDification
-
guhfluh

- Blue Oval Fan

- Posts: 650
- Joined: Tue Mar 15, 2011 3:31 pm
- Location: Houma, LA
Classic Auto Air install issues, comments and pictures.
Last edited by guhfluh on Thu Jun 06, 2013 10:38 pm, edited 2 times in total.
'67 F-250 Crew 2wd 300ci, T-170/RTS/TOD 4-speed overdrive
'96 Dodge Ram ECLB CTD
'99 Dodge Neon ACR 2dr - 10.64@130 (Sold)
'05 Infinity G35 Sedan
'96 Dodge Ram ECLB CTD
'99 Dodge Neon ACR 2dr - 10.64@130 (Sold)
'05 Infinity G35 Sedan
-
Calfdemon

- 100% FORDified!

- Posts: 2672
- Joined: Tue May 25, 2010 11:31 pm
- Location: California, Santa Clarita
Re: Classic Auto Air install issues and comments.
Thanks for the post as I have purchased the Classic Auto Air perfect fit system for my truck as well. Unfortunately, my truck is still in the body shop and the AC system sits in my garage in multiple boxes, but glad to read that their customer service is top notch so far with trying to help you through this. I am sorry to hear about the problems you are having, but with your truck being a 67 bump with a 6 banger, I am hopeful I will not have any issues with mine (69 with a 460) since mine is the more common year design and a V8.
Any photos you can post showing your problems and progress would be helpful to others that end up getting this system. I know that there are others that have recently purchased it as well.
Any photos you can post showing your problems and progress would be helpful to others that end up getting this system. I know that there are others that have recently purchased it as well.
-Rich
Current toys -
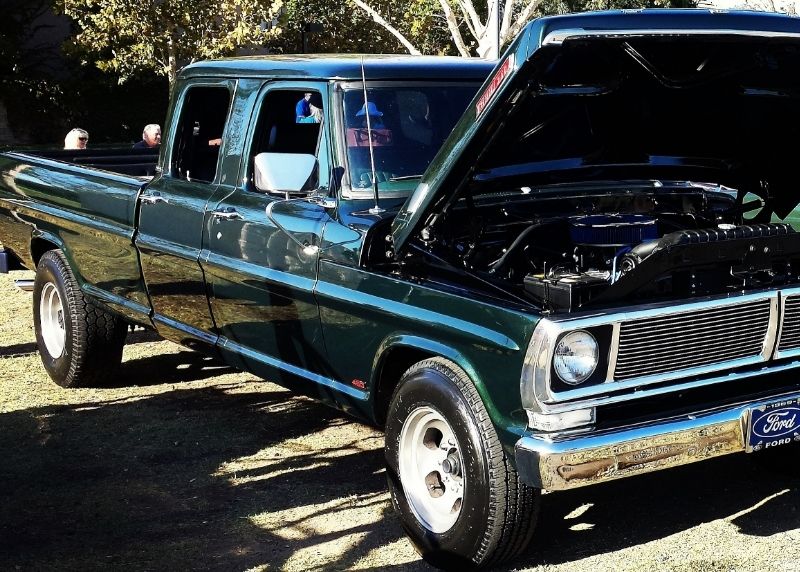
69 Ford F350 Crew Cab - 460 / C6 - http://i253.photobucket.com/albums/hh67 ... lqgskp.jpg
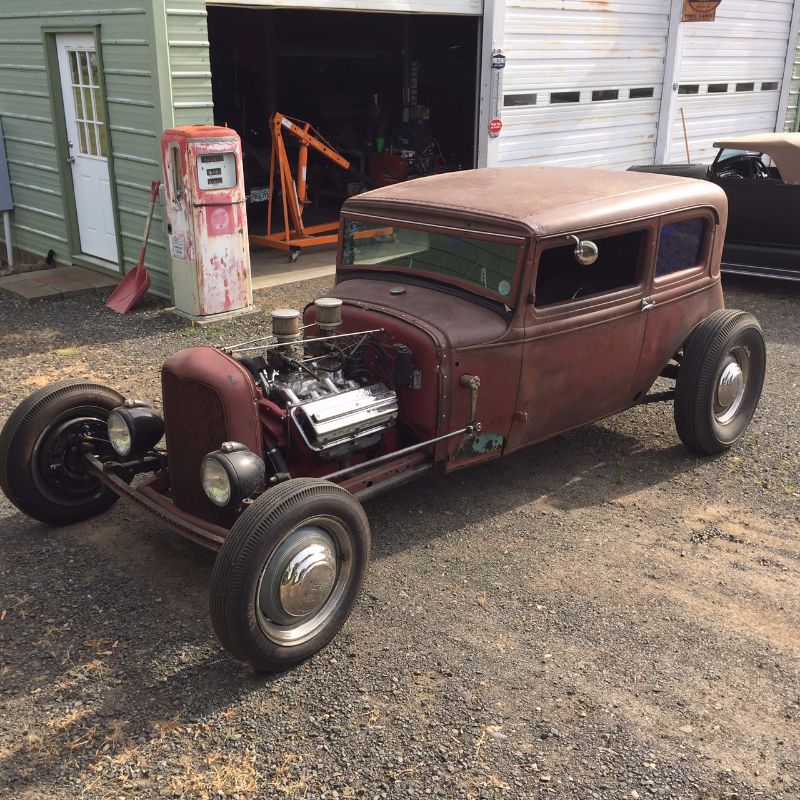
31 Ford Vicky - 1955 270 Red Ram Hemi / 4 speed - http://i253.photobucket.com/albums/hh67 ... bsibvn.jpg
Former toys -
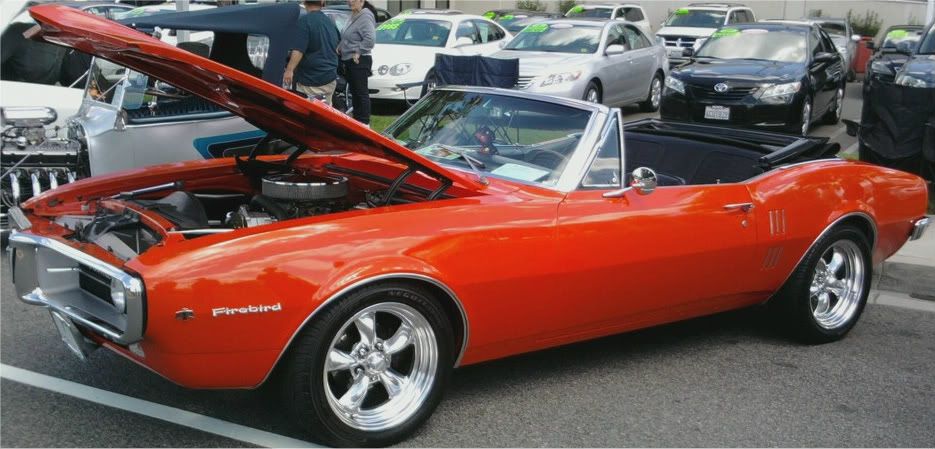
67 Pontiac Firebird 400 convertible (sold 9/13) - http://i253.photobucket.com/albums/hh67 ... bird-1.jpg
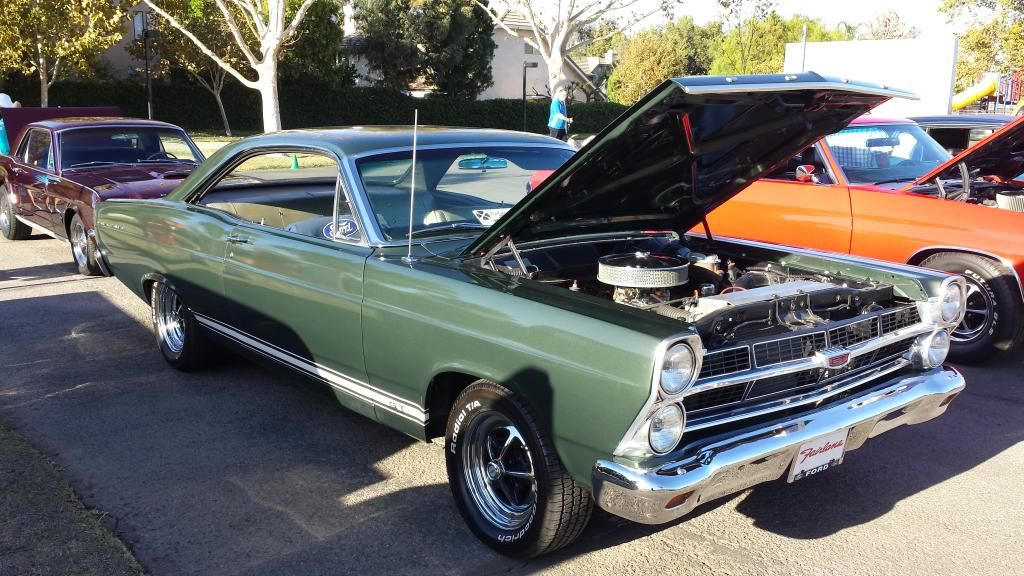
67 Ford Fairlane GT - 390 / 4 speed (sold 7/15) - http://i253.photobucket.com/albums/hh67 ... c5hu8z.jpg
Current toys -
69 Ford F350 Crew Cab - 460 / C6 - http://i253.photobucket.com/albums/hh67 ... lqgskp.jpg
31 Ford Vicky - 1955 270 Red Ram Hemi / 4 speed - http://i253.photobucket.com/albums/hh67 ... bsibvn.jpg
Former toys -
67 Pontiac Firebird 400 convertible (sold 9/13) - http://i253.photobucket.com/albums/hh67 ... bird-1.jpg
67 Ford Fairlane GT - 390 / 4 speed (sold 7/15) - http://i253.photobucket.com/albums/hh67 ... c5hu8z.jpg
-
guhfluh
- Blue Oval Fan
- Posts: 650
- Joined: Tue Mar 15, 2011 3:31 pm
- Location: Houma, LA
Re: Classic Auto Air install issues and comments.
I have taken a few pictures that show the issues with the dash controls and have forwarded them onto Gary at Classic Auto Air. I will post those and a few more as I progress. Gary is currently working with the engineers there to see if they can come up with a fix or already have one they can find. The switch is going to be the biggest hurdle for a stock style installation. There simply isn't a switch made that I can find or that Classic offers that has a long enough thread and shaft to be a direct replacement. The cables SHOULD be an easy fix, as they already supply a custom machined aluminum adapter for the end of their cables to fit the 7/16" dash bezel opening. Their adapter would simply need to be made with longer threads and the cable sheath could be trimmed to length if needed for adjustment. Without the stock angle iron swith and cable adapter behind the dash, the switch that they supply works, but isn't a great fit, as the switch doesn't sit flush against the back of the angled dash without the factory angle iron piece. I reused the factory angle iron piece to keep the switch from rotating, but flattened it out to sit flush against the back of the dash. With this piece being flush against the back of the dash now, their cable adapters only need to be roughly 1/4"-1/2" longer than they currently are.
From what I have seen so far, other than a 460 not being a factory offering that I know of, or at least a common one, it looks like you shouldn't have much trouble with your install. If the compressor mount is on the driver side top of the engine, like the 360-390 seems to be, your hoses will probably be a direct fit if they're already pre cut and crimped.
From what I have seen so far, other than a 460 not being a factory offering that I know of, or at least a common one, it looks like you shouldn't have much trouble with your install. If the compressor mount is on the driver side top of the engine, like the 360-390 seems to be, your hoses will probably be a direct fit if they're already pre cut and crimped.
'67 F-250 Crew 2wd 300ci, T-170/RTS/TOD 4-speed overdrive
'96 Dodge Ram ECLB CTD
'99 Dodge Neon ACR 2dr - 10.64@130 (Sold)
'05 Infinity G35 Sedan
'96 Dodge Ram ECLB CTD
'99 Dodge Neon ACR 2dr - 10.64@130 (Sold)
'05 Infinity G35 Sedan
-
Calfdemon
- 100% FORDified!
- Posts: 2672
- Joined: Tue May 25, 2010 11:31 pm
- Location: California, Santa Clarita
Re: Classic Auto Air install issues and comments.
When I ordered mine, they included the 460 mount which they have for the dent systems. It still mounts on the drivers side, so the whole system should install as designed.
-Rich
Current toys -
69 Ford F350 Crew Cab - 460 / C6 - http://i253.photobucket.com/albums/hh67 ... lqgskp.jpg
31 Ford Vicky - 1955 270 Red Ram Hemi / 4 speed - http://i253.photobucket.com/albums/hh67 ... bsibvn.jpg
Former toys -
67 Pontiac Firebird 400 convertible (sold 9/13) - http://i253.photobucket.com/albums/hh67 ... bird-1.jpg
67 Ford Fairlane GT - 390 / 4 speed (sold 7/15) - http://i253.photobucket.com/albums/hh67 ... c5hu8z.jpg
-
guhfluh
- Blue Oval Fan
- Posts: 650
- Joined: Tue Mar 15, 2011 3:31 pm
- Location: Houma, LA
Re: Classic Auto Air install issues and comments.


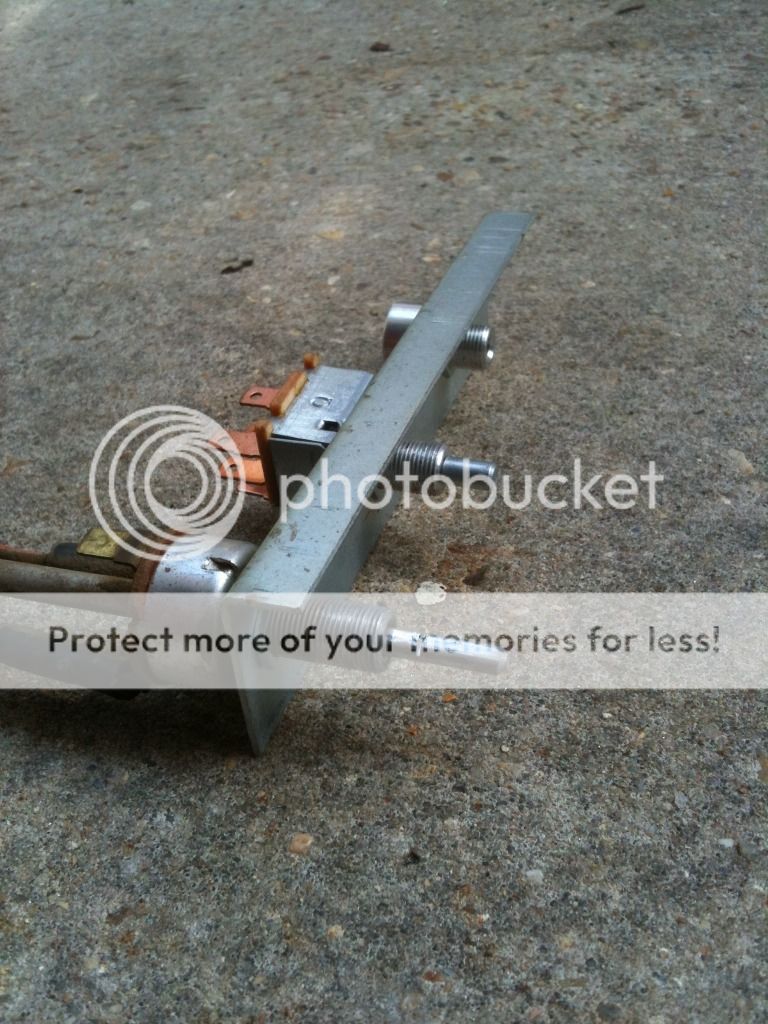

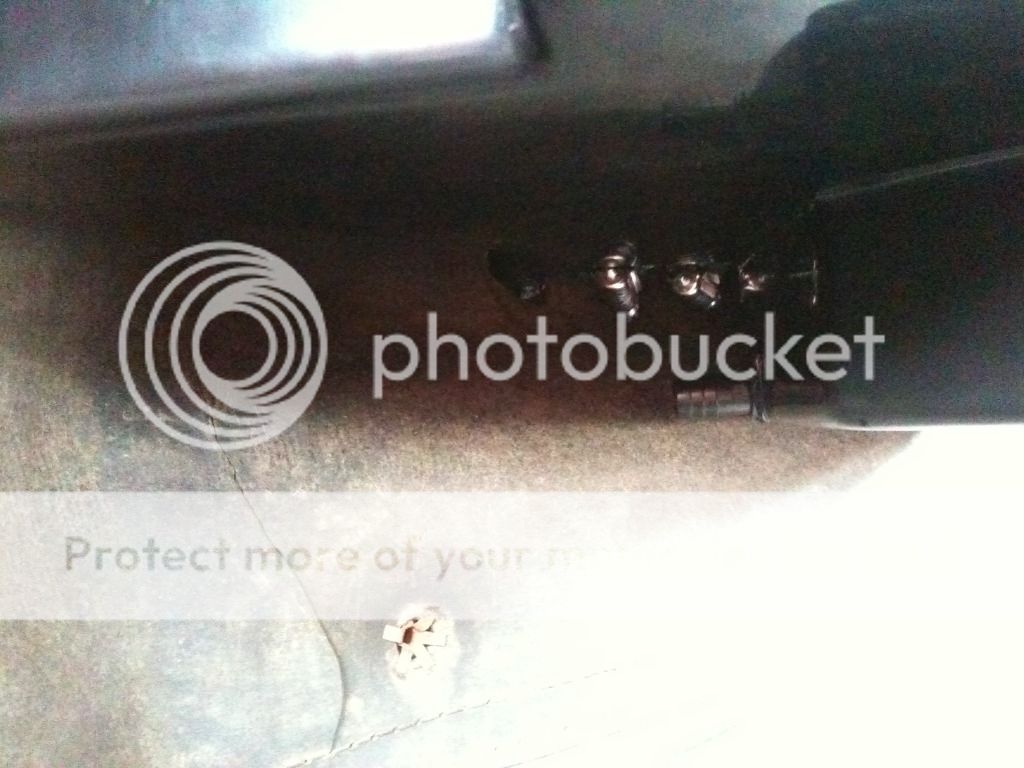
These photos show the factory 1967 angle iron piece that goes behind the dash to give the switch and cables a parallel surface to snug against. It also shows the factory switch with its extra long threads, the Custom Auto Air switch and the Custom Auto Air cable end adapter. Notice how short the cable end adapter is.
The latest update from Classic Auto Air is they have nothing that will work to use the factory bezels. The adapter piece you see is all they have. Either cables and switch bezel from a Bronco will have to be used, or you will have to get custom cables made. Either route looks like it will cost me around $80 to do. The Bronco parts can be purchased new from Jeffs Bronco Graveyard or maybe Dennis Carpenter. I am not too happy about that.
I tried grinding the shoulder of their adapter back far enough to get the threads to protrude far enough through the bezel to work, but there isn't enough material on their adapter to work. The adapter ended up splitting in two before there was enough thread length.
I haven't cut apart my temp control cable yet to get the bezel off, and it seems to me like it should still work with their heater valve, instead of using their cable. That may at least leave me with only needing to buy one custom cable instead of two.
Also, it may be much easier to get control cables with a 3/8" bulkhead end fitting, instead of the 7/16" size of the factory thread and size of Custom Auto Air's adapter piece, and when you drill out your stock bezel, only drill 3/8" instead of 7/16". Or, I may see if using a 3/8" cable with a bushing of 3/8" ID and 7/16" OD might be able to work.
'67 F-250 Crew 2wd 300ci, T-170/RTS/TOD 4-speed overdrive
'96 Dodge Ram ECLB CTD
'99 Dodge Neon ACR 2dr - 10.64@130 (Sold)
'05 Infinity G35 Sedan
'96 Dodge Ram ECLB CTD
'99 Dodge Neon ACR 2dr - 10.64@130 (Sold)
'05 Infinity G35 Sedan
-
guhfluh
- Blue Oval Fan
- Posts: 650
- Joined: Tue Mar 15, 2011 3:31 pm
- Location: Houma, LA
Re: Classic Auto Air install issues and comments.

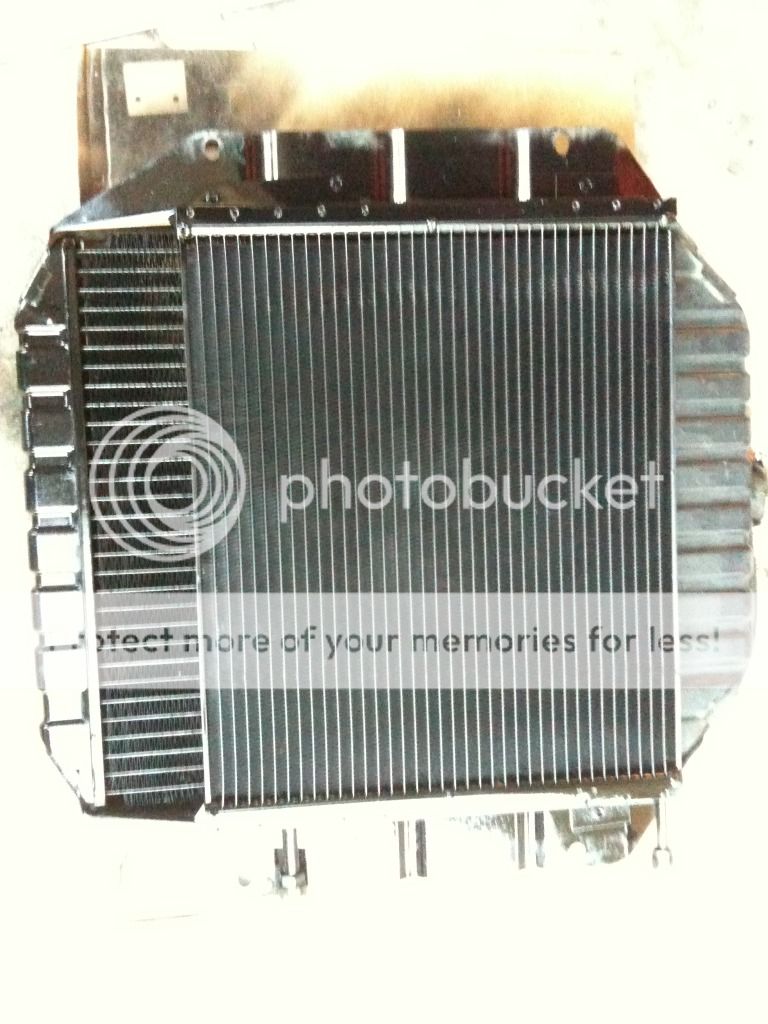
These two pictures show how I attached the Custom Auto Air lower brackets to the bottom of the condensor and made my own two for the top. I then screwed the condensor to my stock 6 cyl radiator's brackets.
I just got back from Lowes and picked up some 3/8"x2" longer bolts for the radiator to radiator support and a 3' stick of galvanized, pre drilled 1-1/4" square tube to space the radiator from the radiator support. The holes were perfectly aligned with the pass side radiator mounting holes, just undersized, so I drilled them out. I will use two deprecate pieces for the driver side. Pics in the morning.
'67 F-250 Crew 2wd 300ci, T-170/RTS/TOD 4-speed overdrive
'96 Dodge Ram ECLB CTD
'99 Dodge Neon ACR 2dr - 10.64@130 (Sold)
'05 Infinity G35 Sedan
'96 Dodge Ram ECLB CTD
'99 Dodge Neon ACR 2dr - 10.64@130 (Sold)
'05 Infinity G35 Sedan
-
guhfluh
- Blue Oval Fan
- Posts: 650
- Joined: Tue Mar 15, 2011 3:31 pm
- Location: Houma, LA
Re: Classic Auto Air install issues and comments.
Here's a picture of their compressor bracket and compressor, along with the three groove 300 pulley.

I'm getting a custom control cable made now to try and fit my dash bezel...
I'm getting a custom control cable made now to try and fit my dash bezel...
'67 F-250 Crew 2wd 300ci, T-170/RTS/TOD 4-speed overdrive
'96 Dodge Ram ECLB CTD
'99 Dodge Neon ACR 2dr - 10.64@130 (Sold)
'05 Infinity G35 Sedan
'96 Dodge Ram ECLB CTD
'99 Dodge Neon ACR 2dr - 10.64@130 (Sold)
'05 Infinity G35 Sedan
-
guhfluh
- Blue Oval Fan
- Posts: 650
- Joined: Tue Mar 15, 2011 3:31 pm
- Location: Houma, LA
Re: Classic Auto Air install issues, comments and pictures.
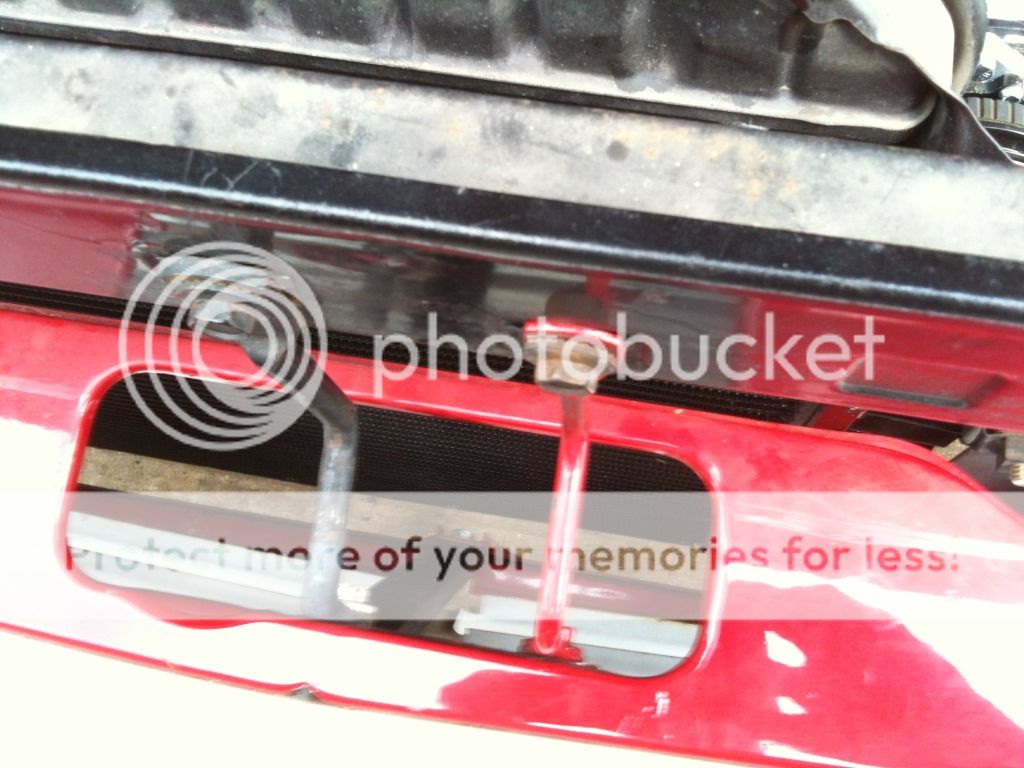
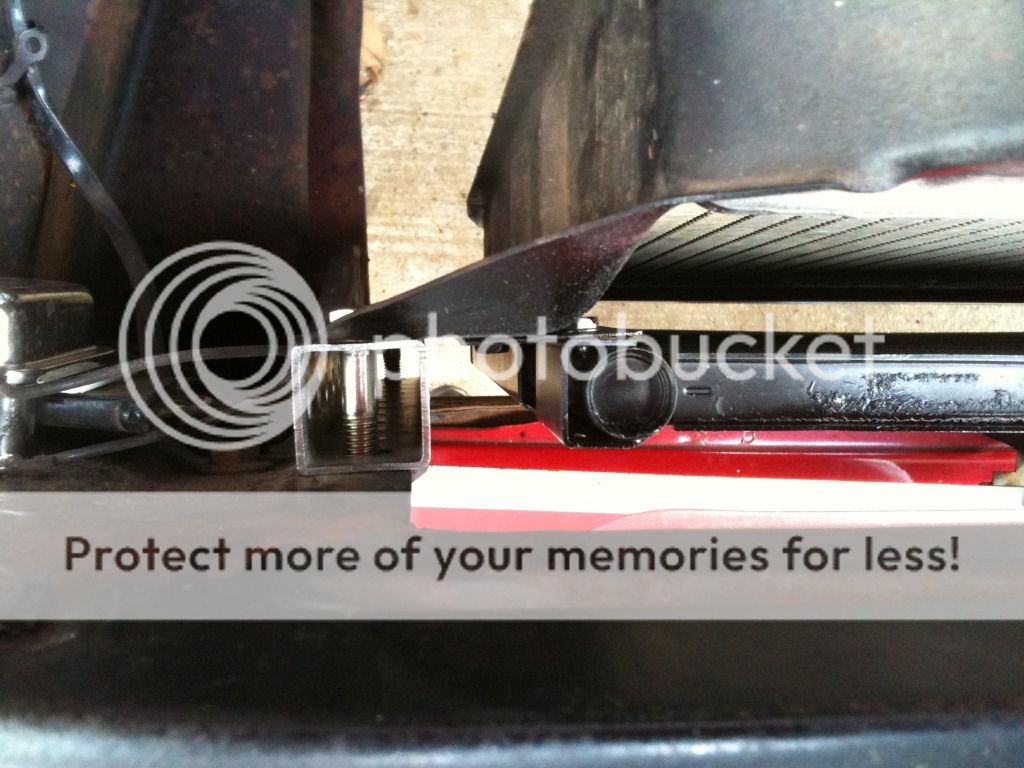
Oops. I had the condenser upside down in those pics I believe. I had to remove it and flip it over. I have it installed and the radiator spaced from the support, with the fan hub spacer turned down shorter so the fan clears. They want me to wait before I go any further to see if the engineers might think of a better way or are okay with the way I have it.
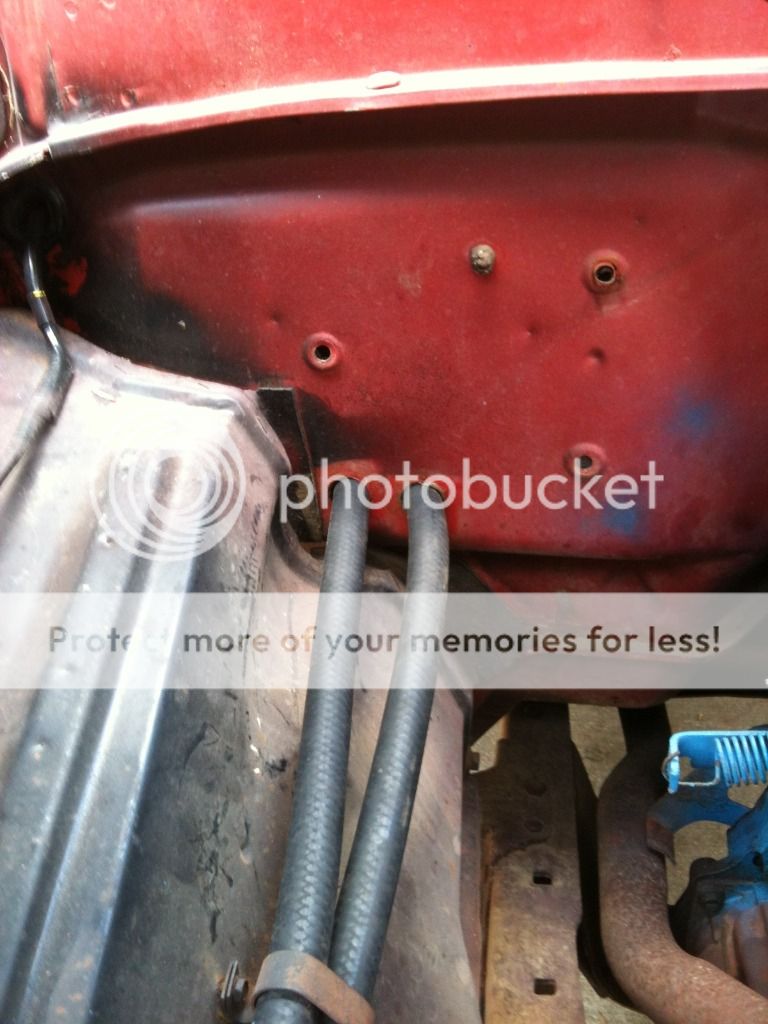
I also don't care for the way they route the heater hoses and drill holes in the cowl drain and fender liner. They hang too low in the wheel well for my liking. I have done a trial fit using 90 degree brass fittings from their heater core lines and run the heater hoses through the firewall in the factory dash holes. It fits so well, I'm not sure why their engineers don't run them that way... I'm trying to decide how I want to seal the hoses through the firewall though. I believe I'm going to enlarge the factory holes to 1-3/8"(I think that's their size) to use the nice rubber grommets supplied in the kit to run the heater lines through the fender. They are better designed for chafing than the plugs supplied in the kit for the factory eater holes, and I'm not too confident with leaving them without a grommet long term.
Some more pics of progress:
'67 F-250 Crew 2wd 300ci, T-170/RTS/TOD 4-speed overdrive
'96 Dodge Ram ECLB CTD
'99 Dodge Neon ACR 2dr - 10.64@130 (Sold)
'05 Infinity G35 Sedan
'96 Dodge Ram ECLB CTD
'99 Dodge Neon ACR 2dr - 10.64@130 (Sold)
'05 Infinity G35 Sedan
-
Calfdemon
- 100% FORDified!
- Posts: 2672
- Joined: Tue May 25, 2010 11:31 pm
- Location: California, Santa Clarita
Re: Classic Auto Air install issues, comments and pictures.
I am very interested to see what you do with the 90's and the firewall as I also wondered about the wheelwell route they have in their design. If your method works with the factory firewall holes, I would really like to see how you do it so I can do the same! 
-Rich
Current toys -
69 Ford F350 Crew Cab - 460 / C6 - http://i253.photobucket.com/albums/hh67 ... lqgskp.jpg
31 Ford Vicky - 1955 270 Red Ram Hemi / 4 speed - http://i253.photobucket.com/albums/hh67 ... bsibvn.jpg
Former toys -
67 Pontiac Firebird 400 convertible (sold 9/13) - http://i253.photobucket.com/albums/hh67 ... bird-1.jpg
67 Ford Fairlane GT - 390 / 4 speed (sold 7/15) - http://i253.photobucket.com/albums/hh67 ... c5hu8z.jpg
Current toys -
69 Ford F350 Crew Cab - 460 / C6 - http://i253.photobucket.com/albums/hh67 ... lqgskp.jpg
31 Ford Vicky - 1955 270 Red Ram Hemi / 4 speed - http://i253.photobucket.com/albums/hh67 ... bsibvn.jpg
Former toys -
67 Pontiac Firebird 400 convertible (sold 9/13) - http://i253.photobucket.com/albums/hh67 ... bird-1.jpg
67 Ford Fairlane GT - 390 / 4 speed (sold 7/15) - http://i253.photobucket.com/albums/hh67 ... c5hu8z.jpg
-
1972hiboy

- 100% FORDified!
- Posts: 2421
- Joined: Thu Sep 09, 2010 5:44 pm
- Location: California, Santa Cruz
Re: Classic Auto Air install issues, comments and pictures.
Is there any way to get that condenser closer to the radiator? If not be sure to make some flashing or something to cover the gaps all the way around. Having the condenser spaced that way in front of the radiator can cause overheating issues. Air will not pull from the front of the condenser and through the radiator. Air will try to come in from the sides ( path of least resistance) to go through the radiator. thus making the condenser inaffective and effectively blocking the radiator.
Rich
1973 f350 super c/s 460/c6 22k orig miles
1972 f350 srw crewcab special 390
1972 f250 4x4 sport custom 390fe Red
1972 f250 4x4 custom 360 FE " Ranger Ric"
1972 f250 4x4 custom 84k og miles 390
1971 f250 4x4 sport custom 56k og miles. 360
1970 f250 4x4 428 fe hp60 205 d60
Dont eat yellow snow.....
1973 f350 super c/s 460/c6 22k orig miles
1972 f350 srw crewcab special 390
1972 f250 4x4 sport custom 390fe Red
1972 f250 4x4 custom 360 FE " Ranger Ric"
1972 f250 4x4 custom 84k og miles 390
1971 f250 4x4 sport custom 56k og miles. 360
1970 f250 4x4 428 fe hp60 205 d60
Dont eat yellow snow.....
-
guhfluh
- Blue Oval Fan
- Posts: 650
- Joined: Tue Mar 15, 2011 3:31 pm
- Location: Houma, LA
Re: Classic Auto Air install issues, comments and pictures.
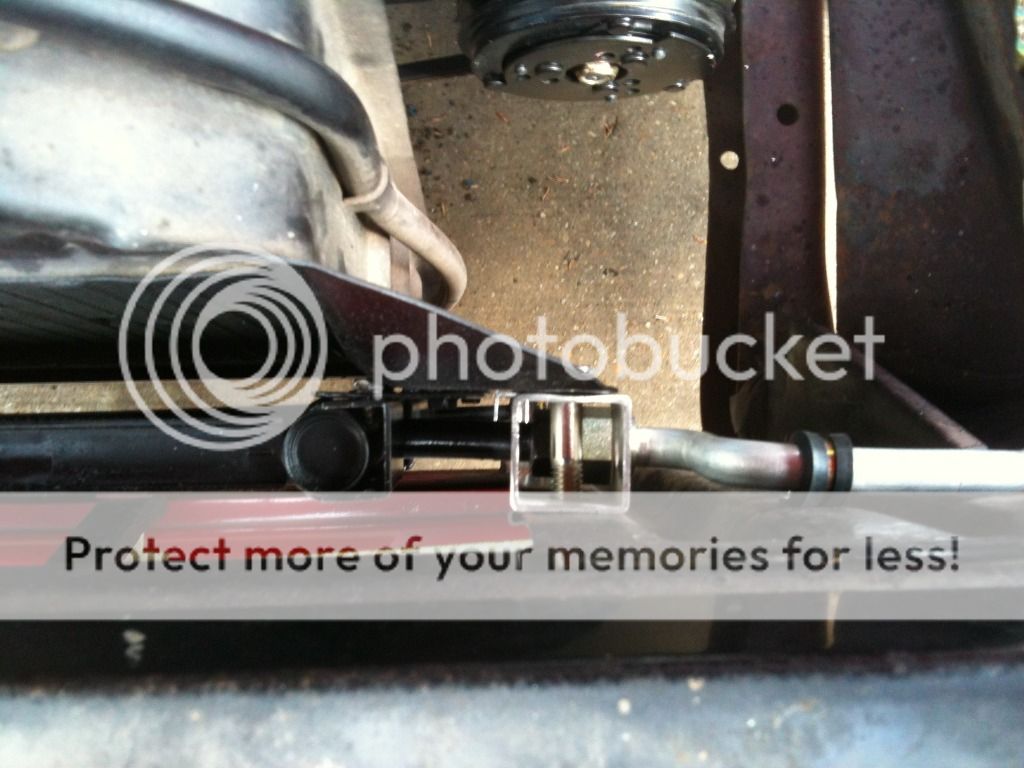
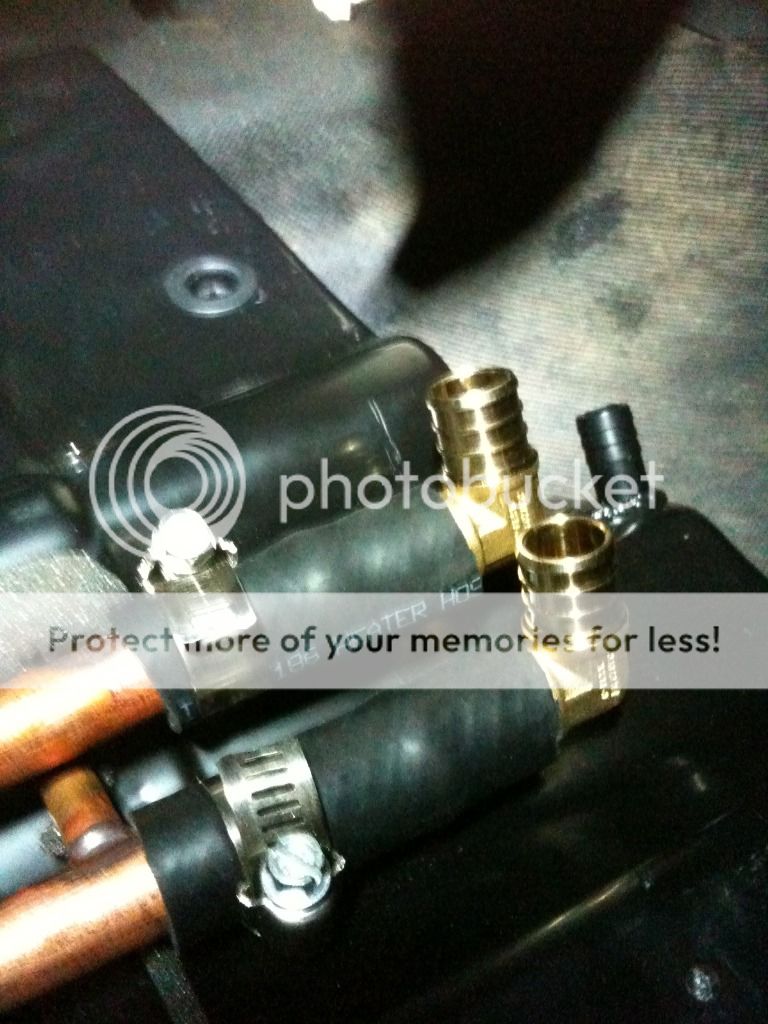
The last pic shows the back of the HVAC unit where I cut the heater hoses that came preinstalled and added the brass 90 fittings. I only allowed enough hose length to add the fittings, and nothing more, as the 90 needs to be as high as possible. I used PEX 3/4"x3/4" 90's because that's all that Lowes had, but the PEX 3/4" fitting is the same OD as 5/8" hose barb with the added benefit of being shorter in length. If I had to, I was going to cut and shorten the heater core tubes, and even go as far as soldering on copper 90's to the ends. It doesn't look like I need to make any changes and I have the fittings installed at the slight angle towards the driver side as shown in the pics.
I have some 2-1/4" x 2-1/4" x 42" grey foam to fill the gaps between the condenser, radiator and radiator support. I may also add some 90* rubber flashing material to the radiator support above the foam, since having to rotate the condenser upside down has dropped it an inch or two lower, to keep the fittings and lines from running into the radiator mounting bolts on the driver side:( It would have sealed better up where I had it, right about where it goes in a v8 truck. The condenser cannot go any closer to the radiator core because the condenser is too wide, and hits the radiator mounting brackets. It is as close as possible, being bolted to the brackets right in the center. The radiator could go closer to the support, but the condenser lines run into the radiator support. If it goes back far enough for the lines to go in front of the support, the condenser core hits the center support brace for the grill and hood latch, as well as hitting the upper panel between the radiator support and grille.
I hurt my back bad somehow last night while working on the truck, or lifting some wheels earlier in the morning. I couldn't turn over or get out of bed this morning. So, I may not make much progress today:(
'67 F-250 Crew 2wd 300ci, T-170/RTS/TOD 4-speed overdrive
'96 Dodge Ram ECLB CTD
'99 Dodge Neon ACR 2dr - 10.64@130 (Sold)
'05 Infinity G35 Sedan
'96 Dodge Ram ECLB CTD
'99 Dodge Neon ACR 2dr - 10.64@130 (Sold)
'05 Infinity G35 Sedan
-
Calfdemon
- 100% FORDified!
- Posts: 2672
- Joined: Tue May 25, 2010 11:31 pm
- Location: California, Santa Clarita
Re: Classic Auto Air install issues, comments and pictures.
Well, get your back better sir! The AC system does you no good if you can't get out of bed to drive the truck.
As for the 90's, I am not as knowledgeable on HVAC systems as I would like to be, but doesn't the system need to be completely sealed and pressurized? I was under the impression that rubber hoses and hose clamps were a no-no in an HVAC system. I know you mentioned something about possibly soldering the 90's into the lines, so is the rubber just a temporary measure for fitting purposes? How much of the hoses did you cut away for the placement of the 90's? I guess I would be able to tell better if I had the system in front of me with a truck to mock it up on, but with a truck in the shop and the AC system still in the boxes, I am just living vicariously through your thread!
EDIT: I just re-read your posts and realized that the rubber hoses you have on those 90's would be for the heater hoses which makes perfect sense. What is your solution for the 2 AC lines which they design to run the same way as their heater hoses? Are you going to keep the AC lines through the wheelwell route or were you going to modify that route as well? And if you are going to modify that route, then what is your plan?
Again, thank you for documenting your progress on this install! While it may not interest the masses as it is something they might never do, there are several of us on this forum that will be doing this exact same install and your posts and photos are going to be extremely helpful!
As for the 90's, I am not as knowledgeable on HVAC systems as I would like to be, but doesn't the system need to be completely sealed and pressurized? I was under the impression that rubber hoses and hose clamps were a no-no in an HVAC system. I know you mentioned something about possibly soldering the 90's into the lines, so is the rubber just a temporary measure for fitting purposes? How much of the hoses did you cut away for the placement of the 90's? I guess I would be able to tell better if I had the system in front of me with a truck to mock it up on, but with a truck in the shop and the AC system still in the boxes, I am just living vicariously through your thread!
EDIT:
Again, thank you for documenting your progress on this install! While it may not interest the masses as it is something they might never do, there are several of us on this forum that will be doing this exact same install and your posts and photos are going to be extremely helpful!
-Rich
Current toys -
69 Ford F350 Crew Cab - 460 / C6 - http://i253.photobucket.com/albums/hh67 ... lqgskp.jpg
31 Ford Vicky - 1955 270 Red Ram Hemi / 4 speed - http://i253.photobucket.com/albums/hh67 ... bsibvn.jpg
Former toys -
67 Pontiac Firebird 400 convertible (sold 9/13) - http://i253.photobucket.com/albums/hh67 ... bird-1.jpg
67 Ford Fairlane GT - 390 / 4 speed (sold 7/15) - http://i253.photobucket.com/albums/hh67 ... c5hu8z.jpg
Current toys -
69 Ford F350 Crew Cab - 460 / C6 - http://i253.photobucket.com/albums/hh67 ... lqgskp.jpg
31 Ford Vicky - 1955 270 Red Ram Hemi / 4 speed - http://i253.photobucket.com/albums/hh67 ... bsibvn.jpg
Former toys -
67 Pontiac Firebird 400 convertible (sold 9/13) - http://i253.photobucket.com/albums/hh67 ... bird-1.jpg
67 Ford Fairlane GT - 390 / 4 speed (sold 7/15) - http://i253.photobucket.com/albums/hh67 ... c5hu8z.jpg
-
guhfluh
- Blue Oval Fan
- Posts: 650
- Joined: Tue Mar 15, 2011 3:31 pm
- Location: Houma, LA
Re: Classic Auto Air install issues, comments and pictures.
Hehe, yep, the rubber hoses and clamps are for the heater lines, which should be fine. But I did opt for brass vs plastic for longevity. In this pic you can see where I made the cut on the hoses. What is left on the heater core was installed by Classic already. I only made one cut in each line to insert the 90. The HVAC box is laying with the back facing up in the pic.
With a preformed hose, you wouldn't need the 90, but without them, the hoses wanted to kink when trying to make the turn.
I am going to keep the routing of the A/C lines as they have it. I would have to bend what they have too much and/or get more custom lines made up to change their routing. I feel okay about them routing through the grommet in the cowl drain/vent and they stay higher and fit closer to the body than the zip tied heater hoses would have. I'd like it better if they went straight through the firewall, but I'm okay with their routing. Their tubes will need some tweaking to align correctly coming out of the evaporator and into the grommet in the cowl/vent.
What I have envisioned is getting another driver side factory vent and installing it upside down on the pass side, but notching out where the a/c lines will go, or drilling holes in it depending on how it looks. I plan on using some foam or weather strip or rubber to seal against the lines better. I don't care for their block off plate that they supply, and think it looks a little cheaply made. If anyone has an extra driver vent in red, I'd love to have it;)
I have also used a bolt, lock but and washers to hold the HVAC unit to the firewall instead of their self drilling TEK screws. Sometimes those are okay, but in this situation I didn't like them and one kept pulling out.
'67 F-250 Crew 2wd 300ci, T-170/RTS/TOD 4-speed overdrive
'96 Dodge Ram ECLB CTD
'99 Dodge Neon ACR 2dr - 10.64@130 (Sold)
'05 Infinity G35 Sedan
'96 Dodge Ram ECLB CTD
'99 Dodge Neon ACR 2dr - 10.64@130 (Sold)
'05 Infinity G35 Sedan
-
Calfdemon
- 100% FORDified!
- Posts: 2672
- Joined: Tue May 25, 2010 11:31 pm
- Location: California, Santa Clarita
Re: Classic Auto Air install issues, comments and pictures.
Ah, I like the idea of running the driver vent upside down. And wouldn't you know it, I recently had an extra drivers side vent that I could have used... Of course, in my typical fashion, I recently got rid of it because I thought it was "extra" and it went to a new home. Oh well... I can always get another one from the pick-a-part. I just hate fighting with the E-brake in order to get the vent out... 
-Rich
Current toys -
69 Ford F350 Crew Cab - 460 / C6 - http://i253.photobucket.com/albums/hh67 ... lqgskp.jpg
31 Ford Vicky - 1955 270 Red Ram Hemi / 4 speed - http://i253.photobucket.com/albums/hh67 ... bsibvn.jpg
Former toys -
67 Pontiac Firebird 400 convertible (sold 9/13) - http://i253.photobucket.com/albums/hh67 ... bird-1.jpg
67 Ford Fairlane GT - 390 / 4 speed (sold 7/15) - http://i253.photobucket.com/albums/hh67 ... c5hu8z.jpg
Current toys -
69 Ford F350 Crew Cab - 460 / C6 - http://i253.photobucket.com/albums/hh67 ... lqgskp.jpg
31 Ford Vicky - 1955 270 Red Ram Hemi / 4 speed - http://i253.photobucket.com/albums/hh67 ... bsibvn.jpg
Former toys -
67 Pontiac Firebird 400 convertible (sold 9/13) - http://i253.photobucket.com/albums/hh67 ... bird-1.jpg
67 Ford Fairlane GT - 390 / 4 speed (sold 7/15) - http://i253.photobucket.com/albums/hh67 ... c5hu8z.jpg
-
guhfluh
- Blue Oval Fan
- Posts: 650
- Joined: Tue Mar 15, 2011 3:31 pm
- Location: Houma, LA
Re: Classic Auto Air install issues, comments and pictures.
Yeah, I broke both firewall studs and had to drill the dash bolt to get my ebrake out, to get to the vent, to vacuum out the years of built up rats nests 6+" deep. I think I have enough studs left for another nut though.
I took a couple more pics to try and illustrate what the foam will look like around the condensor and radiator, and how the heater hoses route through the firewall from the back of the box. I think I also took a pic of one bolt and just a pic illustrating how I have it fitting in the vent hole right now. Sorry for the blurriness, I'm doing my best with my phone.


I believe when I enlarge the factory holes, I will offset them towards the passenger side slightly just to ease the misalignment just a little more, even though it will be just fine where they are with the added grommets. The offset between the HVAC box heater core outlets and dash holes are very minor.
I took a couple more pics to try and illustrate what the foam will look like around the condensor and radiator, and how the heater hoses route through the firewall from the back of the box. I think I also took a pic of one bolt and just a pic illustrating how I have it fitting in the vent hole right now. Sorry for the blurriness, I'm doing my best with my phone.
I believe when I enlarge the factory holes, I will offset them towards the passenger side slightly just to ease the misalignment just a little more, even though it will be just fine where they are with the added grommets. The offset between the HVAC box heater core outlets and dash holes are very minor.
'67 F-250 Crew 2wd 300ci, T-170/RTS/TOD 4-speed overdrive
'96 Dodge Ram ECLB CTD
'99 Dodge Neon ACR 2dr - 10.64@130 (Sold)
'05 Infinity G35 Sedan
'96 Dodge Ram ECLB CTD
'99 Dodge Neon ACR 2dr - 10.64@130 (Sold)
'05 Infinity G35 Sedan